使用 D3D11on12 的 D2D
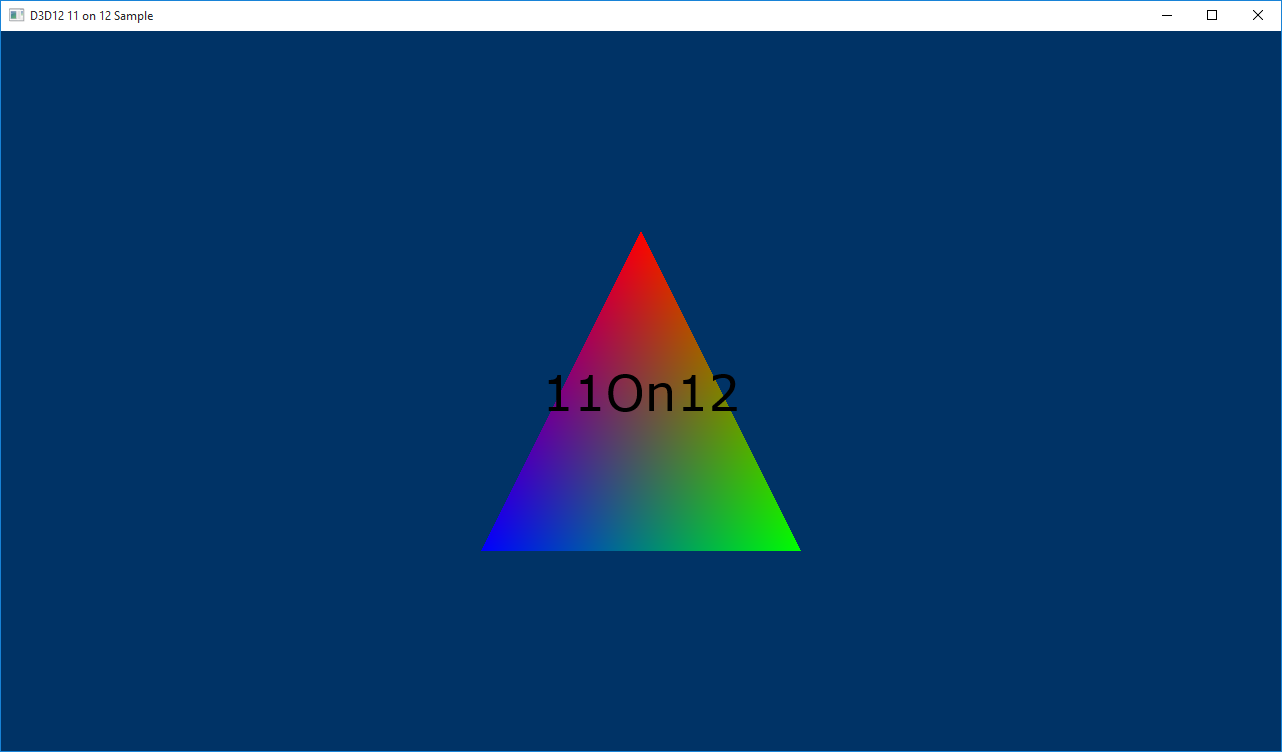
D3D1211on12 示例演示了如何通过在基于 11 的设备与基于 12 的设备之间共享资源来呈现 D2D 内容。
创建 ID3D11On12Device
首先是在创建 ID3D12Device 之后创建一个 ID3D11On12Device,这包括创建一个通过 API D3D11On12CreateDevice 包装在 ID3D12Device 上的 ID3D11Device。 该 API 还采用 ID3D12CommandQueue 等参数,以便 11On12 设备能够提交其命令。 创建 ID3D11Device 之后,可从中查询 ID3D11On12Device 接口。 这是用于设置 D2D 的主要设备对象。
在 LoadPipeline 方法中设置设备。
 // Create an 11 device wrapped around the 12 device and share
    // 12's command queue.
    ComPtr<ID3D11Device> d3d11Device;
    ThrowIfFailed(D3D11On12CreateDevice(
        m_d3d12Device.Get(),
        d3d11DeviceFlags,
        nullptr,
        0,
        reinterpret_cast<IUnknown**>(m_commandQueue.GetAddressOf()),
        1,
        0,
        &d3d11Device,
        &m_d3d11DeviceContext,
        nullptr
        ));

    // Query the 11On12 device from the 11 device.
    ThrowIfFailed(d3d11Device.As(&m_d3d11On12Device));
| 调用流程 | 参数 |
|---|---|
| ID3D11Device | |
| D3D11On12CreateDevice |
创建 D2D 工厂
现在我们有了 11On12 设备,我们用它来创建 D2D 工厂和设备,就像使用 D3D11 时的通常做法一样。
添加到 LoadAssets 方法。
 // Create D2D/DWrite components.
    {
        D2D1_DEVICE_CONTEXT_OPTIONS deviceOptions = D2D1_DEVICE_CONTEXT_OPTIONS_NONE;
        ThrowIfFailed(D2D1CreateFactory(D2D1_FACTORY_TYPE_SINGLE_THREADED, __uuidof(ID2D1Factory3), &d2dFactoryOptions, &m_d2dFactory));
        ComPtr<IDXGIDevice> dxgiDevice;
        ThrowIfFailed(m_d3d11On12Device.As(&dxgiDevice));
        ThrowIfFailed(m_d2dFactory->CreateDevice(dxgiDevice.Get(), &m_d2dDevice));
        ThrowIfFailed(m_d2dDevice->CreateDeviceContext(deviceOptions, &m_d2dDeviceContext));
        ThrowIfFailed(DWriteCreateFactory(DWRITE_FACTORY_TYPE_SHARED, __uuidof(IDWriteFactory), &m_dWriteFactory));
    }
| 调用流程 | 参数 |
|---|---|
| D2D1_DEVICE_CONTEXT_OPTIONS | |
| D2D1CreateFactory | D2D1_FACTORY_TYPE |
| IDXGIDevice | |
| ID2D1Factory3::CreateDevice | |
| ID2D1Device::CreateDeviceContext | |
| DWriteCreateFactory | DWRITE_FACTORY_TYPE |
为 D2D 创建呈现器目标
D3D12 拥有交换链,因此如果我们想使用 11On12 设备(D2D 内容)呈现到后台缓冲区,则需要基于 ID3D12Resource 类型的后台缓冲区创建 ID3D11Resource 类型的包装资源。 这会将 ID3D12Resource 与基于 D3D11 的接口相关联,使它能够与 11On12 设备配合使用。 在拥有包装资源后,然后就可为 D2D 创建一个要呈现到的呈现器目标,这也是在 LoadAssets 方法中创建的。
// Initialize *hwnd* with the handle of the window displaying the rendered content.
HWND hwnd;

// Query the window's dpi settings, which will be used to create
// D2D's render targets.
float dpi = GetDpiForWindow(hwnd);
D2D1_BITMAP_PROPERTIES1 bitmapProperties = D2D1::BitmapProperties1(
    D2D1_BITMAP_OPTIONS_TARGET | D2D1_BITMAP_OPTIONS_CANNOT_DRAW,
    D2D1::PixelFormat(DXGI_FORMAT_UNKNOWN, D2D1_ALPHA_MODE_PREMULTIPLIED),
    dpi,
    dpi);

// Create frame resources.
{
    CD3DX12_CPU_DESCRIPTOR_HANDLE rtvHandle(m_rtvHeap->GetCPUDescriptorHandleForHeapStart());

    // Create a RTV, D2D render target, and a command allocator for each frame.
    for (UINT n = 0; n < FrameCount; n++)
    {
        ThrowIfFailed(m_swapChain->GetBuffer(n, IID_PPV_ARGS(&m_renderTargets[n])));
        m_d3d12Device->CreateRenderTargetView(m_renderTargets[n].Get(), nullptr, rtvHandle);

        // Create a wrapped 11On12 resource of this back buffer. Since we are
        // rendering all D3D12 content first and then all D2D content, we specify
        // the In resource state as RENDER_TARGET - because D3D12 will have last
        // used it in this state - and the Out resource state as PRESENT. When
        // ReleaseWrappedResources() is called on the 11On12 device, the resource
        // will be transitioned to the PRESENT state.
        D3D11_RESOURCE_FLAGS d3d11Flags = { D3D11_BIND_RENDER_TARGET };
        ThrowIfFailed(m_d3d11On12Device->CreateWrappedResource(
            m_renderTargets[n].Get(),
            &d3d11Flags,
            D3D12_RESOURCE_STATE_RENDER_TARGET,
            D3D12_RESOURCE_STATE_PRESENT,
            IID_PPV_ARGS(&m_wrappedBackBuffers[n])
            ));

        // Create a render target for D2D to draw directly to this back buffer.
        ComPtr<IDXGISurface> surface;
        ThrowIfFailed(m_wrappedBackBuffers[n].As(&surface));
        ThrowIfFailed(m_d2dDeviceContext->CreateBitmapFromDxgiSurface(
            surface.Get(),
            &bitmapProperties,
            &m_d2dRenderTargets[n]
            ));

        rtvHandle.Offset(1, m_rtvDescriptorSize);

        ThrowIfFailed(m_d3d12Device->CreateCommandAllocator(
            D3D12_COMMAND_LIST_TYPE_DIRECT,
            IID_PPV_ARGS(&m_commandAllocators[n])));
    }
}
| 调用流程 | 参数 |
|---|---|
| GetDpiForWindow | 窗口句柄 |
| D2D1_BITMAP_PROPERTIES1 |
[D2D1_BITMAP_OPTIONS] (/windows/desktop/api/d2d1_1/ne-d2d1_1-d2d1_bitmap_options) [PixelFormat] (/windows/desktop/api/d2d1helper/nf-d2d1helper-pixelformat) [DXGI_FORMAT] (/windows/desktop/api/dxgiformat/ne-dxgiformat-dxgi_format) [D2D1_ALPHA_MODE] (/windows/desktop/api/dcommon/ne-dcommon-d2d1_alpha_mode) |
| CD3DX12_CPU_DESCRIPTOR_HANDLE | GetCPUDescriptorHandleForHeapStart |
| IDXGISwapChain::GetBuffer | |
| CreateRenderTargetView | |
| D3D11_RESOURCE_FLAGS | D3D11_BIND_FLAG |
| CreateWrappedResource | D3D12_RESOURCE_STATES |
| IDXGISurface | |
| ID2D1DeviceContext::CreateBitmapFromDxgiSurface | |
| CreateCommandAllocator | D3D12_COMMAND_LIST_TYPE |
创建基本 D2D 文本对象
现在我们有一个 ID3D12Device 用于呈现 3D 内容,一个 ID2D1Device 通过可用于呈现 2D 内容的 ID3D11On12Device 与 12 设备共享内容,而且这两个都配置为呈现到同一交换链。 此示例仅使用 D2D 设备在 3D 场景上呈现文本,类似于游戏呈现其 UI 的方式。 为此,我们需要仍然使用 LoadAssets 方法创建一些基本的 D2D 对象。
 // Create D2D/DWrite objects for rendering text.
    {
        ThrowIfFailed(m_d2dDeviceContext->CreateSolidColorBrush(D2D1::ColorF(D2D1::ColorF::Black), &m_textBrush));
        ThrowIfFailed(m_dWriteFactory->CreateTextFormat(
            L"Verdana",
            NULL,
            DWRITE_FONT_WEIGHT_NORMAL,
            DWRITE_FONT_STYLE_NORMAL,
            DWRITE_FONT_STRETCH_NORMAL,
            50,
            L"en-us",
            &m_textFormat
            ));
        ThrowIfFailed(m_textFormat->SetTextAlignment(DWRITE_TEXT_ALIGNMENT_CENTER));
        ThrowIfFailed(m_textFormat->SetParagraphAlignment(DWRITE_PARAGRAPH_ALIGNMENT_CENTER));
    }
更新主呈现循环
现已完成示例的初始化,可执行主呈现循环了。
// Render the scene.
void D3D1211on12::OnRender()
{
    // Record all the commands we need to render the scene into the command list.
    PopulateCommandList();

    // Execute the command list.
    ID3D12CommandList* ppCommandLists[] = { m_commandList.Get() };
    m_commandQueue->ExecuteCommandLists(_countof(ppCommandLists), ppCommandLists);

    RenderUI();

    // Present the frame.
    ThrowIfFailed(m_swapChain->Present(0, 0));

    MoveToNextFrame();
}
| 调用流程 | 参数 |
|---|---|
| ID3D12CommandList | |
| ExecuteCommandLists | |
| IDXGISwapChain1::Present1 |
呈现循环中唯一新功能是 RenderUI 调用,它将使用 D2D 来呈现 UI。 请注意,我们首先执行所有 D3D12 命令列表以呈现 3D 场景,然后在此基础上呈现 UI。 在深入研究 RenderUI 之前,必须查看对 PopulateCommandLists 的更改。 在其他示例中,我们通常在关闭命令列表之前在列表上放置一个资源屏障,以便将后台缓冲区从呈现目标状态转换为当前状态。 但是,在此示例中,我们移除了该资源屏障,因为我们仍然需要使用 D2D 呈现到后台缓冲区。 注意,当我们创建后台缓冲区的包装资源时,我们将呈现目标状态指定为“IN”状态,将当前状态指定为“OUT”状态。
RenderUI 在 D2D 使用方面非常简单。 我们设置呈现器目标并呈现文本。 但是,在 11On12 设备上使用任何包装资源(例如后台缓冲区呈现目标)之前,必须在 11On12 设备上调用 AcquireWrappedResources API。 呈现后,我们在 11On12 设备上调用 ReleaseWrappedResources API。 通过调用 ReleaseWrappedResources,将在后台生成一个资源屏障,它将把指定的资源转换为创建时指定的“OUT”状态。 在本例中,就是指当前状态。 最后,为了将在 11On12 设备上执行的所有命令提交到共享的 ID3D12CommandQueue,必须在 ID3D11DeviceContext 上调用刷新。
// Render text over D3D12 using D2D via the 11On12 device.
void D3D1211on12::RenderUI()
{
    D2D1_SIZE_F rtSize = m_d2dRenderTargets[m_frameIndex]->GetSize();
    D2D1_RECT_F textRect = D2D1::RectF(0, 0, rtSize.width, rtSize.height);
    static const WCHAR text[] = L"11On12";

    // Acquire our wrapped render target resource for the current back buffer.
    m_d3d11On12Device->AcquireWrappedResources(m_wrappedBackBuffers[m_frameIndex].GetAddressOf(), 1);

    // Render text directly to the back buffer.
    m_d2dDeviceContext->SetTarget(m_d2dRenderTargets[m_frameIndex].Get());
    m_d2dDeviceContext->BeginDraw();
    m_d2dDeviceContext->SetTransform(D2D1::Matrix3x2F::Identity());
    m_d2dDeviceContext->DrawTextW(
        text,
        _countof(text) - 1,
        m_textFormat.Get(),
        &textRect,
        m_textBrush.Get()
        );
    ThrowIfFailed(m_d2dDeviceContext->EndDraw());

    // Release our wrapped render target resource. Releasing
    // transitions the back buffer resource to the state specified
    // as the OutState when the wrapped resource was created.
    m_d3d11On12Device->ReleaseWrappedResources(m_wrappedBackBuffers[m_frameIndex].GetAddressOf(), 1);

    // Flush to submit the 11 command list to the shared command queue.
    m_d3d11DeviceContext->Flush();
}
运行示例

相关主题