从 UserCustomAction 迁移到SharePoint 框架扩展
许多基于 Microsoft 365 和 SharePoint Online 构建的企业解决方案利用 SharePoint 功能框架的网站 CustomAction 功能来扩展页面的 UI。 在 SharePoint Server 2019 和 SharePoint Online 的当前“新式”UI 中,大多数自定义项不再可用。 幸运的是,借助SharePoint 框架扩展,可以在“新式”UI 中提供类似的功能。
本教程介绍了如何将旧式“经典”自定义迁移到基于 SharePoint 框架扩展的新模型。
首先,介绍一下 SharePoint 框架扩展的开发选项:
- 应用程序自定义工具:通过将自定义 HTML 元素和客户端代码添加到“新式”页面的预定义占位符来扩展 SharePoint 的本地“新式”UI。 有关应用程序自定义工具的详细信息,请参阅生成第一个 SharePoint 框架扩展(Hello World第 1 部分)。
- 命令集:将自定义编辑控制块 (ECB) 菜单项或自定义按钮添加到列表或库的列表视图的命令栏。 可以将任何客户端操作关联到这些命令。 有关命令集的详细信息,请参阅生成第一个 ListView 命令集扩展。
- 字段自定义工具:使用自定义 HTML 元素和客户端代码自定义列表视图中字段的呈现。 有关字段自定义工具的详细信息,请参阅生成第一个字段自定义工具扩展。
此上下文中最有用的选项是应用程序自定义工具扩展。
假设你在 SharePoint Online 中有一个 CustomAction ,可以在网站的所有页面中都有一个自定义页脚。
下面的代码片段展示了使用 SharePoint 功能框架定义 CustomAction 的 XML 代码。
<?xml version="1.0" encoding="utf-8"?>
<Elements xmlns="http://schemas.microsoft.com/sharepoint/">
  <CustomAction Id="jQueryCDN"
                Title="jQueryCDN"
                Description="Loads jQuery from the public CDN"
                ScriptSrc="https://code.jquery.com/jquery-3.2.1.slim.min.js"
                Location="ScriptLink"
                Sequence="100" />
  <CustomAction Id="spoCustomBar"
                Title="spoCustomBar"
                Description="Loads a script to rendere a custom footer"
                Location="ScriptLink"
                ScriptSrc="SiteAssets/SPOCustomUI.js"
                Sequence="200" />
</Elements>
可以看到,功能元素文件定义了几个要在目标网站页面中添加的 CustomAction 类型元素,即通过公用 CDN 加载的 jQuery,以及呈现自定义页脚的自定义 JavaScript 文件。
出于完整性考虑,可以看到呈现自定义页脚的 JavaScript 代码(其中菜单项已在代码中进行预定义,这样做是出于简便考虑)。
var SPOCustomUI = SPOCustomUI || {};
SPOCustomUI.setUpCustomFooter = function () {
if ($("#SPOCustomFooter").length)
return;
var footerContainer = $("<div>");
footerContainer.attr("id", "SPOCustomFooter");
footerContainer.append("<ul>");
$("#s4-workspace").append(footerContainer);
}
SPOCustomUI.addCustomFooterText = function (id, text) {
if ($("#" + id).length)
return;
var customElement = $("<div>");
customElement.attr("id", id);
customElement.html(text);
$("#SPOCustomFooter > ul").before(customElement);
return customElement;
}
SPOCustomUI.addCustomFooterLink = function (id, text, url) {
if ($("#" + id).length)
return;
var customElement = $("<a>");
customElement.attr("id", id);
customElement.attr("href", url);
customElement.html(text);
$("#SPOCustomFooter > ul").append($("<li>").append(customElement));
return customElement;
}
SPOCustomUI.loadCSS = function (url) {
var head = document.getElementsByTagName('head')[0];
var style = document.createElement('link');
style.type = 'text/css';
style.rel = 'stylesheet';
style.href = url;
head.appendChild(style);
}
SPOCustomUI.init = function (whenReadyDoFunc) {
// avoid executing inside iframes (used by SharePoint for dialogs)
if (self !== top) return;
if (!window.jQuery) {
// jQuery is needed for Custom Bar to run
setTimeout(function () { SPOCustomUI.init(whenReadyDoFunc); }, 50);
} else {
$(function () {
SPOCustomUI.setUpCustomFooter();
whenReadyDoFunc();
});
}
}
// The following initializes the custom footer with some fake links
SPOCustomUI.init(function () {
var currentScriptUrl;
var currentScript = document.querySelectorAll("script[src*='SPOCustomUI']");
if (currentScript.length > 0) {
currentScriptUrl = currentScript[0].src;
}
if (currentScriptUrl != undefined) {
var currentScriptBaseUrl = currentScriptUrl.substring(0, currentScriptUrl.lastIndexOf('/') + 1);
SPOCustomUI.loadCSS(currentScriptBaseUrl + 'SPOCustomUI.css');
}
SPOCustomUI.addCustomFooterText('SPOFooterCopyright', '© 2017, Contoso Inc.');
SPOCustomUI.addCustomFooterLink('SPOFooterCRMLink', 'CRM', 'CRM.aspx');
SPOCustomUI.addCustomFooterLink('SPOFooterSearchLink', 'Search Center', 'SearchCenter.aspx');
SPOCustomUI.addCustomFooterLink('SPOFooterPrivacyLink', 'Privacy Policy', 'Privacy.aspx');
});
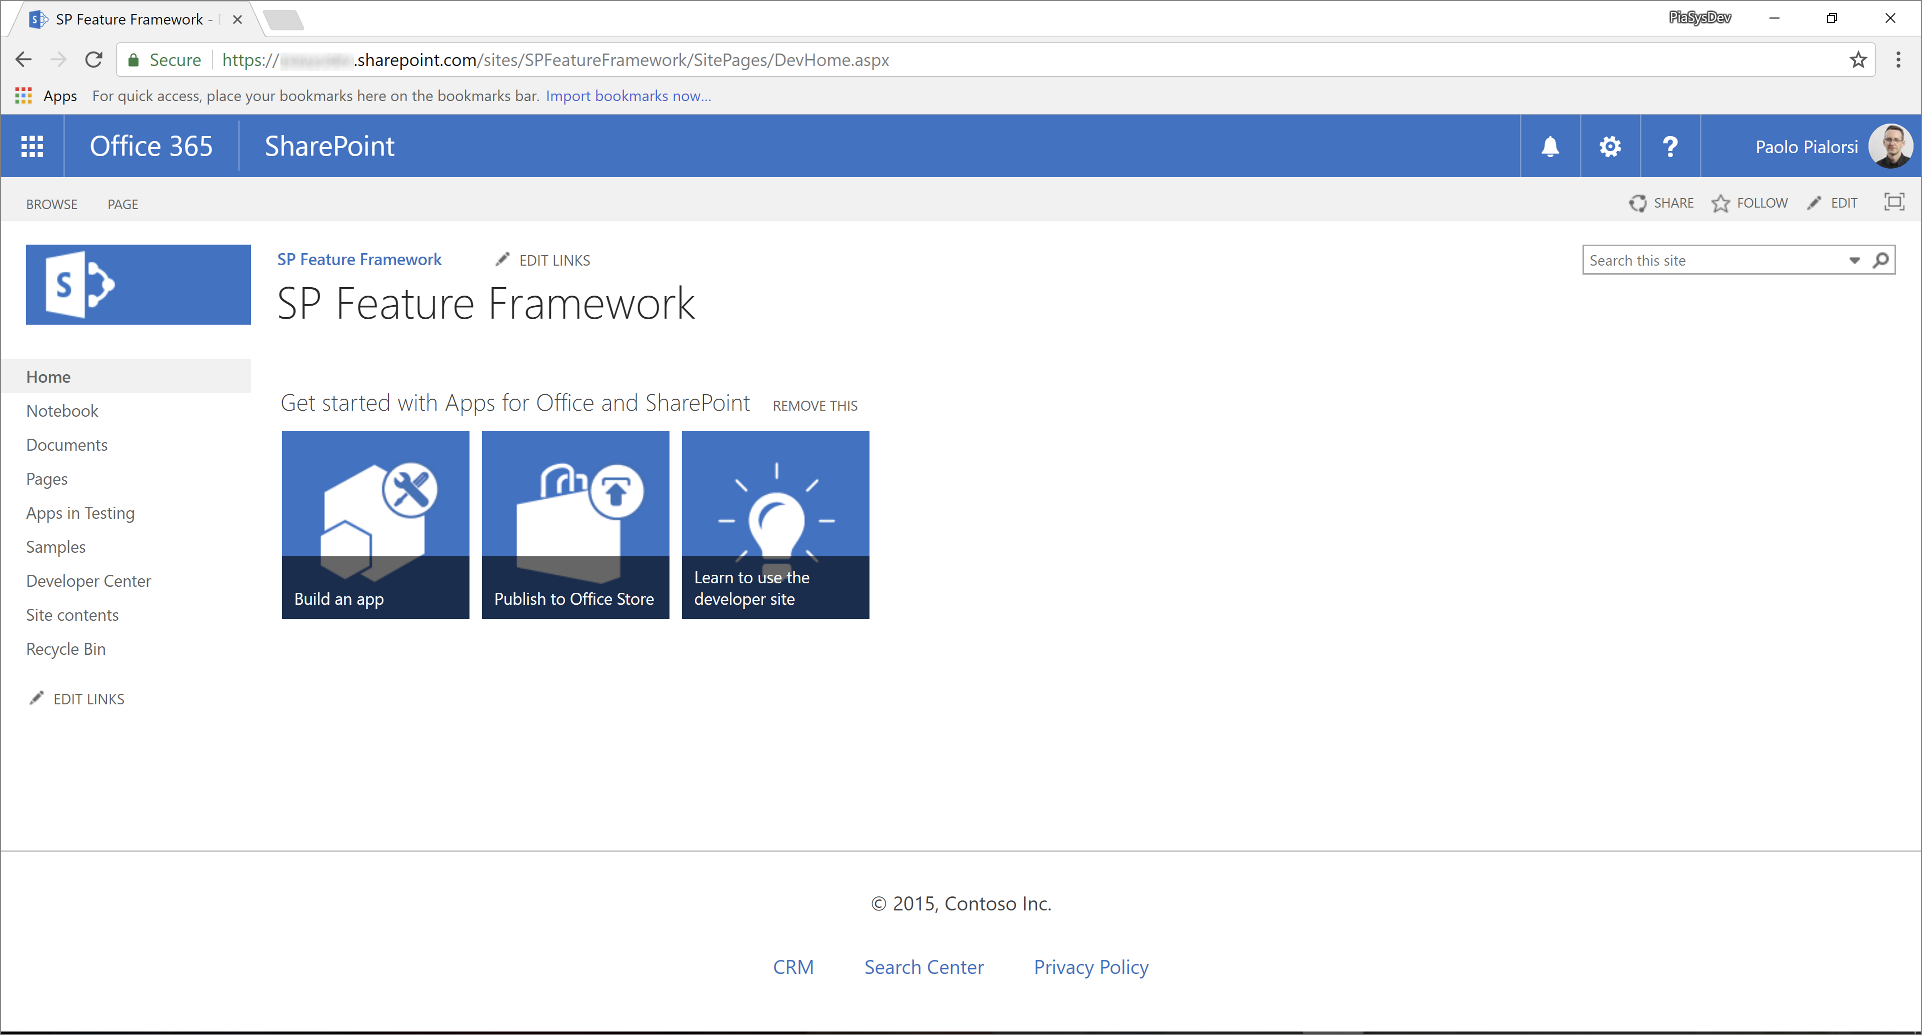
在下图中,可以看到上一自定义操作在经典网站主页中的输出。

若要将上一解决方案迁移到“新式”UI,请参阅以下步骤。
新建 SharePoint 框架解决方案
在控制台中,为项目新建文件夹:
md spfx-react-custom-footer转到项目文件夹:
cd spfx-react-custom-footer在项目文件夹中,运行 SharePoint Framework Yeoman 生成器,以搭建新的 SharePoint Framework 项目:
yo @microsoft/sharepoint出现提示时,请输入以下值(为下面省略的所有提示选择默认选项):
- 解决方案名称是什么?: spfx-react-custom-footer
- 你想要为你的组件设定哪些基准包?:仅需要 SharePoint Online(最新)
- 要创建哪种类型的客户端组件?:扩展
- 要创建哪种类型的客户端扩展? 应用程序定制器
- 字段自定义工具的名称是什么? CustomFooter
此时,Yeoman 安装必需的依赖项,并为解决方案文件和文件夹以及“CustomFooter”扩展搭建基架。 这可能需要几分钟的时间才能完成。
启动 Visual Studio Code(或选定代码编辑器),并开始开发解决方案。 若要启动 Visual Studio Code,可以执行下面的语句。
code .
定义新 UI 元素
自定义页脚的 UI 元素使用 React 和自定义 React 组件进行呈现。 可以使用喜欢的任何技术创建示例页脚的 UI 元素。 本教程使用 React 来利用 Office UI Fabric React 组件。
打开文件 ./src/extensions/customFooter/CustomFooterApplicationCustomizer.manifest.json 文件夹。 复制
id属性的值,并将它存储到安全位置上,因为稍后将需要用到它。打开文件 ./src/extensions/customFooter/CustomFooterApplicationCustomizer.ts,并从包 @microsoft/sp-application-base 导入类型和
PlaceholderContentPlaceholderName。在文件的开头,添加
importReact 的指令。下面的代码片段展示了 CustomFooterApplicationCustomizer.ts 文件的 import 部分。
import * as React from 'react';
import * as ReactDom from 'react-dom';

import { override } from '@microsoft/decorators';
import { Log } from '@microsoft/sp-core-library';
import {
  BaseApplicationCustomizer,
  PlaceholderContent,
  PlaceholderName
} from '@microsoft/sp-application-base';
import { Dialog } from '@microsoft/sp-dialog';

import * as strings from 'CustomFooterApplicationCustomizerStrings';
import CustomFooter from './components/CustomFooter';
找到类
CustomFooterApplicationCustomizer的定义,再声明新的私有成员,即类型为PlaceholderContent | undefined的bottomPlaceholder。在
onInit()方法重写内,调用自定义函数renderPlaceHolders,再定义此函数。在以下代码摘录中,可以看到自定义页脚应用程序定制器类的实现。
/** A Custom Action which can be run during execution of a Client Side Application */ export default class CustomFooterApplicationCustomizer extends BaseApplicationCustomizer<ICustomFooterApplicationCustomizerProperties> { // This private member holds a reference to the page's footer private _bottomPlaceholder: PlaceholderContent | undefined; @override public onInit(): Promise<void> { Log.info(LOG_SOURCE, `Initialized ${strings.Title}`); let message: string = this.properties.testMessage; if (!message) { message = '(No properties were provided.)'; } // Call render method for rendering the needed html elements this._renderPlaceHolders(); return Promise.resolve(); } private _renderPlaceHolders(): void { // Handling the bottom placeholder if (!this._bottomPlaceholder) { this._bottomPlaceholder = this.context.placeholderProvider.tryCreateContent(PlaceholderName.Bottom); // The extension should not assume that the expected placeholder is available. if (!this._bottomPlaceholder) { console.error('The expected placeholder (Bottom) was not found.'); return; } const element: React.ReactElement<{}> = React.createElement(CustomFooter); ReactDom.render(element, this._bottomPlaceholder.domElement); } } }renderPlaceHolders()方法搜索类型Bottom的占位符;若有,此方法会呈现它的内容。 事实上,在 方法的renderPlaceHolders()末尾,代码会创建 React 组件的新实例CustomFooter,并将其呈现在页面底部 (的占位符内,即页脚应呈现) 的位置。注意
在“新式”UI 中,React 组件替代了“经典”模型中的 JavaScript 文件。 当然,可以使用纯 JavaScript 代码,并重用大部分现有代码,从而呈现整个页脚。 不过,无论是从技术角度来看,还是从代码角度来看,最好还是考虑升级实现。
在 src/extensions/customFooter 文件夹中添加名为 components 的新文件夹。
在新文件夹中,新建文件,并将它命名为“CustomFooter.tsx”。
将以下代码添加到此文件:
import * as React from 'react'; import { CommandButton } from 'office-ui-fabric-react/lib/Button'; export default class CustomFooter extends React.Component<{}, {}> { public render(): React.ReactElement<{}> { return ( <div className={`ms-bgColor-neutralLighter ms-fontColor-white`}> <div className={`ms-bgColor-neutralLighter ms-fontColor-white`}> <div className={`ms-Grid`}> <div className="ms-Grid-row"> <div className="ms-Grid-col ms-sm2 ms-md2 ms-lg2"> <CommandButton data-automation="CopyRight" href={`CRM.aspx`}>© 2017, Contoso Inc.</CommandButton> </div> <div className="ms-Grid-col ms-sm2 ms-md2 ms-lg2"> <CommandButton data-automation="CRM" iconProps={ { iconName: 'People' } } href={`CRM.aspx`}>CRM</CommandButton> </div> <div className="ms-Grid-col ms-sm2 ms-md2 ms-lg2"> <CommandButton data-automation="SearchCenter" iconProps={ { iconName: 'Search' } } href={`SearchCenter.aspx`}>Search Center</CommandButton> </div> <div className="ms-Grid-col ms-sm2 ms-md2 ms-lg2"> <CommandButton data-automation="Privacy" iconProps={ { iconName: 'Lock' } } href={`Privacy.aspx`}>Privacy Policy</CommandButton> </div> <div className="ms-Grid-col ms-sm4 ms-md4 ms-lg4"></div> </div> </div> </div> </div> ); } }介绍如何编写 React 组件并不在本文档的范围之内。 请注意开头的
import语句,其中组件导入React,以及CommandButtonOffice UI Fabric 组件库中的 React 组件。在组件的
render()方法中,它通过页脚链接的几个CommandButton组件实例定义了CustomFooter输出。 所有 HTML 输出都包装在 Office UI Fabric 的网格布局内。注意
若要详细了解 Office UI Fabric 的网格布局,请参阅响应式布局。
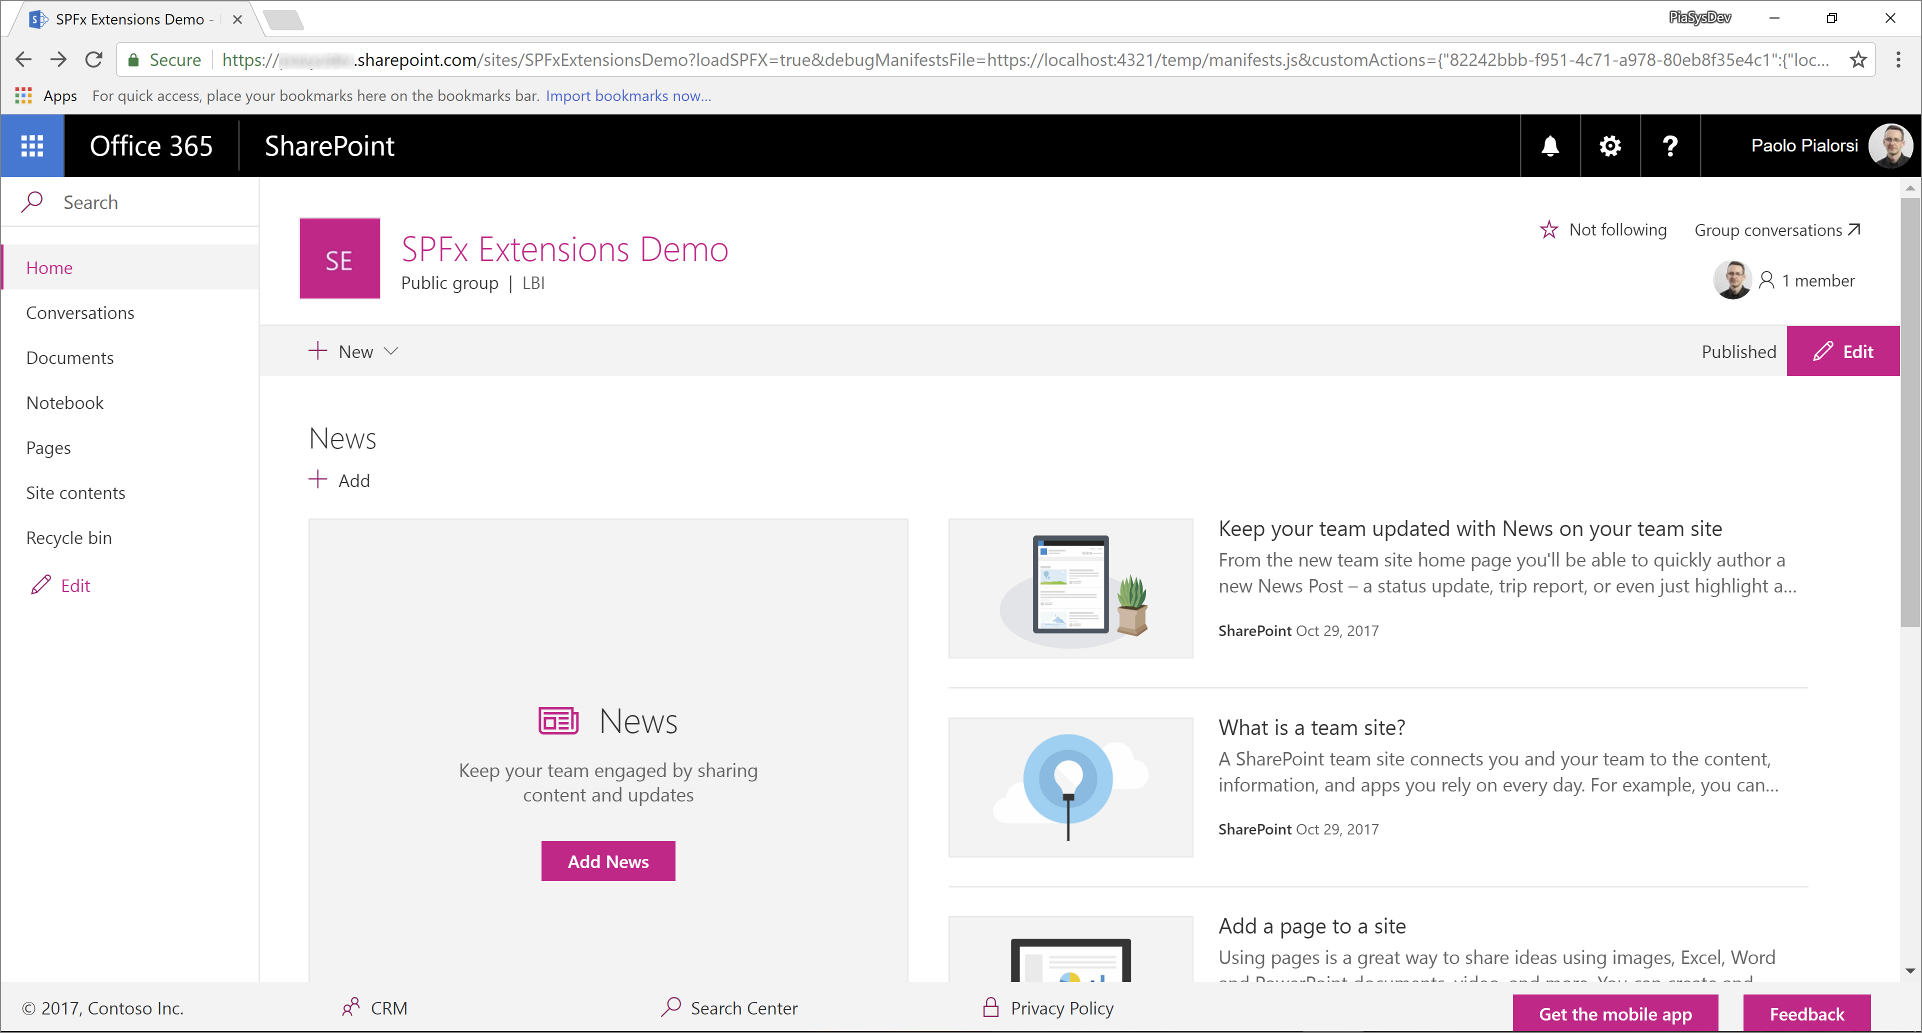
下图展示了所生成的输出。

在调试模式下测试解决方案
返回到控制台窗口,并运行下面的命令,以生成解决方案,并运行本地 Node.js 服务器来托管它。
gulp serve --nobrowser此时,打开常用浏览器,并转到任意“新式”团队网站的“新式”页面。 现在,将以下查询字符串参数追加到页面 URL 中。
?loadSPFX=true&debugManifestsFile=https://localhost:4321/temp/manifests.js&customActions={"82242bbb-f951-4c71-a978-80eb8f35e4c1":{"location":"ClientSideExtension.ApplicationCustomizer"}}在此查询字符串中,将 GUID 替换为从 CustomFooterApplicationCustomizer.manifest.json 文件保存的
id值。请注意,出于安全考虑,在执行页面请求时,可能会看到警告消息框(标题为“允许调试脚本?”),提示是否同意通过 localhost 运行代码。 若要在本地调试和测试解决方案,必须通过选择“加载调试脚本”同意这样做。
注意
或者,你可以在项目的
config/serve.json文件中创建服务配置条目,以自动创建调试查询字符串参数,如以下文档中所述:在新式 SharePoint 页面上调试 SharePoint 框架解决方案
打包和托管解决方案
如果对结果感到满意,就可以准备打包解决方案,并将它托管在实际宿主基础结构中。
生成捆绑包和程序包前,需要声明 XML 功能框架文件来预配扩展。
查看功能框架元素
在代码编辑器中,打开 /sharepoint/assets/elements.xml 文件。 应按照下面的代码片段编辑此文件。
<?xml version="1.0" encoding="utf-8"?>
<Elements xmlns="http://schemas.microsoft.com/sharepoint/">
  <CustomAction
      Title="CustomFooter"
      Location="ClientSideExtension.ApplicationCustomizer"
      ClientSideComponentId="82242bbb-f951-4c71-a978-80eb8f35e4c1">
  </CustomAction>
</Elements>
可以看到,它类似于“经典”模型中的 SharePoint 功能框架文件,不同之处在于它使用
ClientSideComponentId属性引用自定义扩展的id。 如果需要向扩展提供自定义设置,还可以添加ClientSideComponentProperties属性,本教程中的情况并非如此。打开解决方案的文件 ./config/package-solution.json 文件夹。 在 文件中,可以看到节中有
assets对 elements.xml 文件的引用。{ "$schema": "https://developer.microsoft.com/json-schemas/spfx-build/package-solution.schema.json", "solution": { "name": "spfx-react-custom-footer-client-side-solution", "id": "911728a5-7bde-4453-97b2-2eba59277ed3", "version": "1.0.0.0", "features": [ { "title": "Application Extension - Deployment of custom action.", "description": "Deploys a custom action with ClientSideComponentId association", "id": "f16a2612-3163-46ad-9664-3d3daac68cff", "version": "1.0.0.0", "assets": { "elementManifests": [ "elements.xml" ] } }] }, "paths": { "zippedPackage": "solution/spfx-react-custom-footer.sppkg" } }
捆绑、打包和部署解决方案
接下来,需要将解决方案包捆绑和打包到应用程序目录中。 若要完成此任务,请执行以下步骤。
为 SharePoint Online 租户准备和部署解决方案:
执行下列任务,以捆绑解决方案。 这将创建项目的发布版本:
gulp bundle --ship执行下列任务来打包解决方案。 此命令在 sharepoint/solution 文件夹中创建 *.sppkg 包。
gulp package-solution --ship将新建的客户端解决方案包上传或拖放到租户上的应用程序目录中,再选择“部署”按钮。
安装并运行解决方案
打开浏览器,并转到任意目标“新式”网站。
转到“网站内容”页,并选择添加新“应用”。
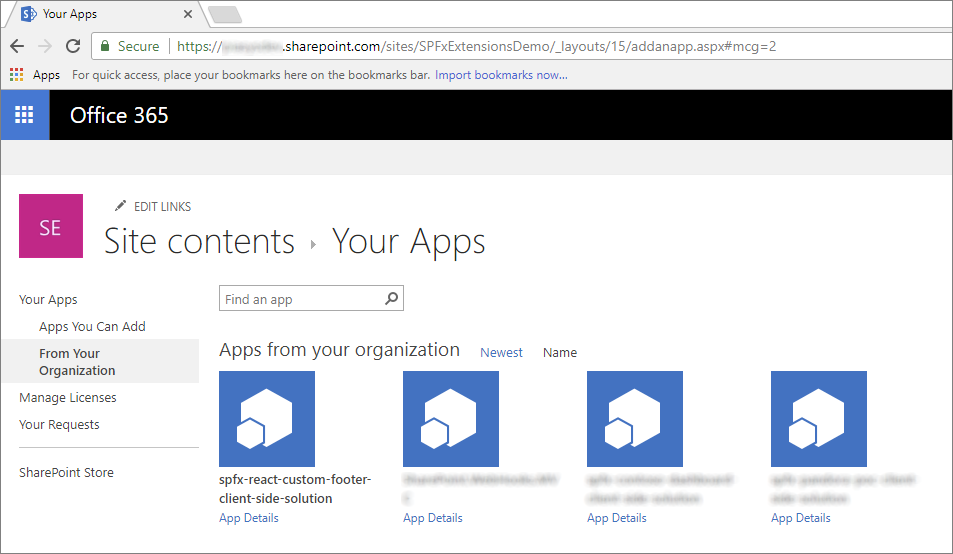
在“来自组织的应用”中,选择安装新应用,以浏览应用程序目录中的解决方案。
选择“spfx-react-custom-footer-client-side-solution”解决方案,并在目标网站上安装它。

完成应用安装后,刷新页面或转到网站主页。 应会看到自定义页脚的运行情况。
享受使用 SharePoint 框架 扩展构建的新自定义页脚!