Real-Time インテリジェンス チュートリアル パート 5: Real-Time ダッシュボードを作成する
手記
このチュートリアルはシリーズの一部です。 前のセクションについては、「チュートリアル パート 4: ストリーミング データのクエリを実行する」を参照してください。
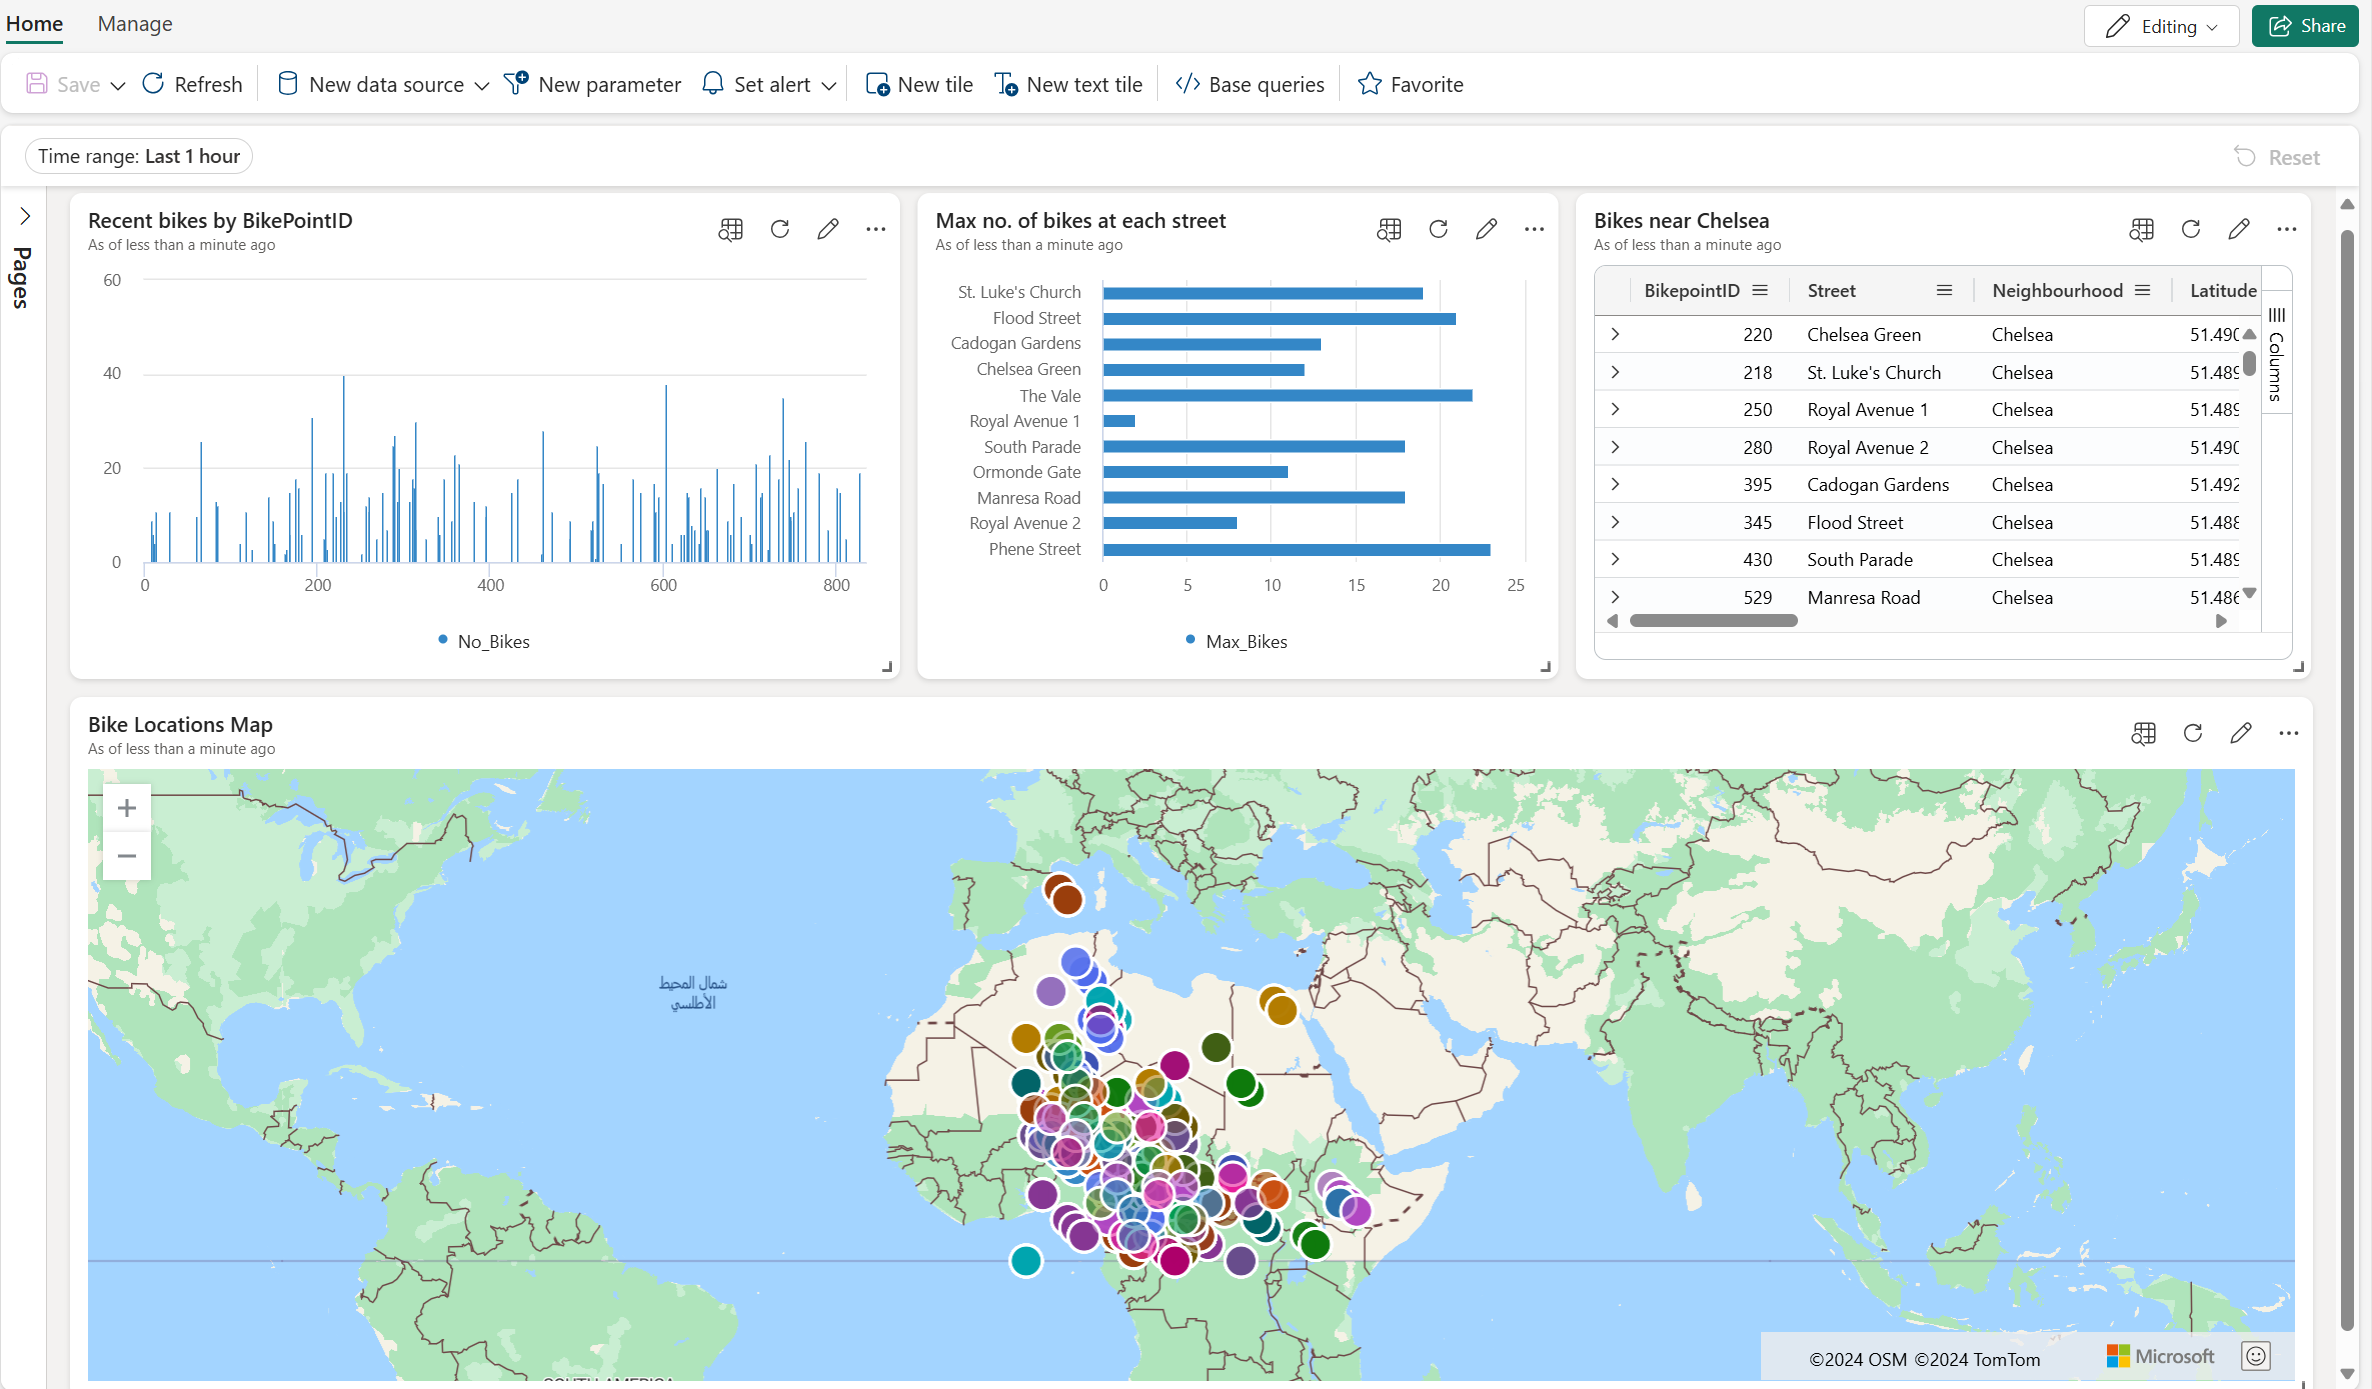
チュートリアルのこの部分では、Real-Time Intelligence で Real-Time ダッシュボードを作成する方法について説明します。 Kusto クエリ言語 (KQL) クエリを作成し、Real-Time ダッシュボードを作成し、ダッシュボードに新しいタイルを追加し、集計を追加してデータを視覚的に探索します。
Real-Time ダッシュボードを作成する
KQL クエリセットで、コピー/貼り付け、次のクエリを実行します。 このクエリは、このチュートリアルの前のセクションから既に実行されている可能性があります。 このクエリは、BikepointID ごとの自転車の最近の台数を示す縦棒グラフを返します。
AggregatedData
| sort by BikepointID
| render columnchart with (ycolumns=No_Bikes,xcolumn=BikepointID)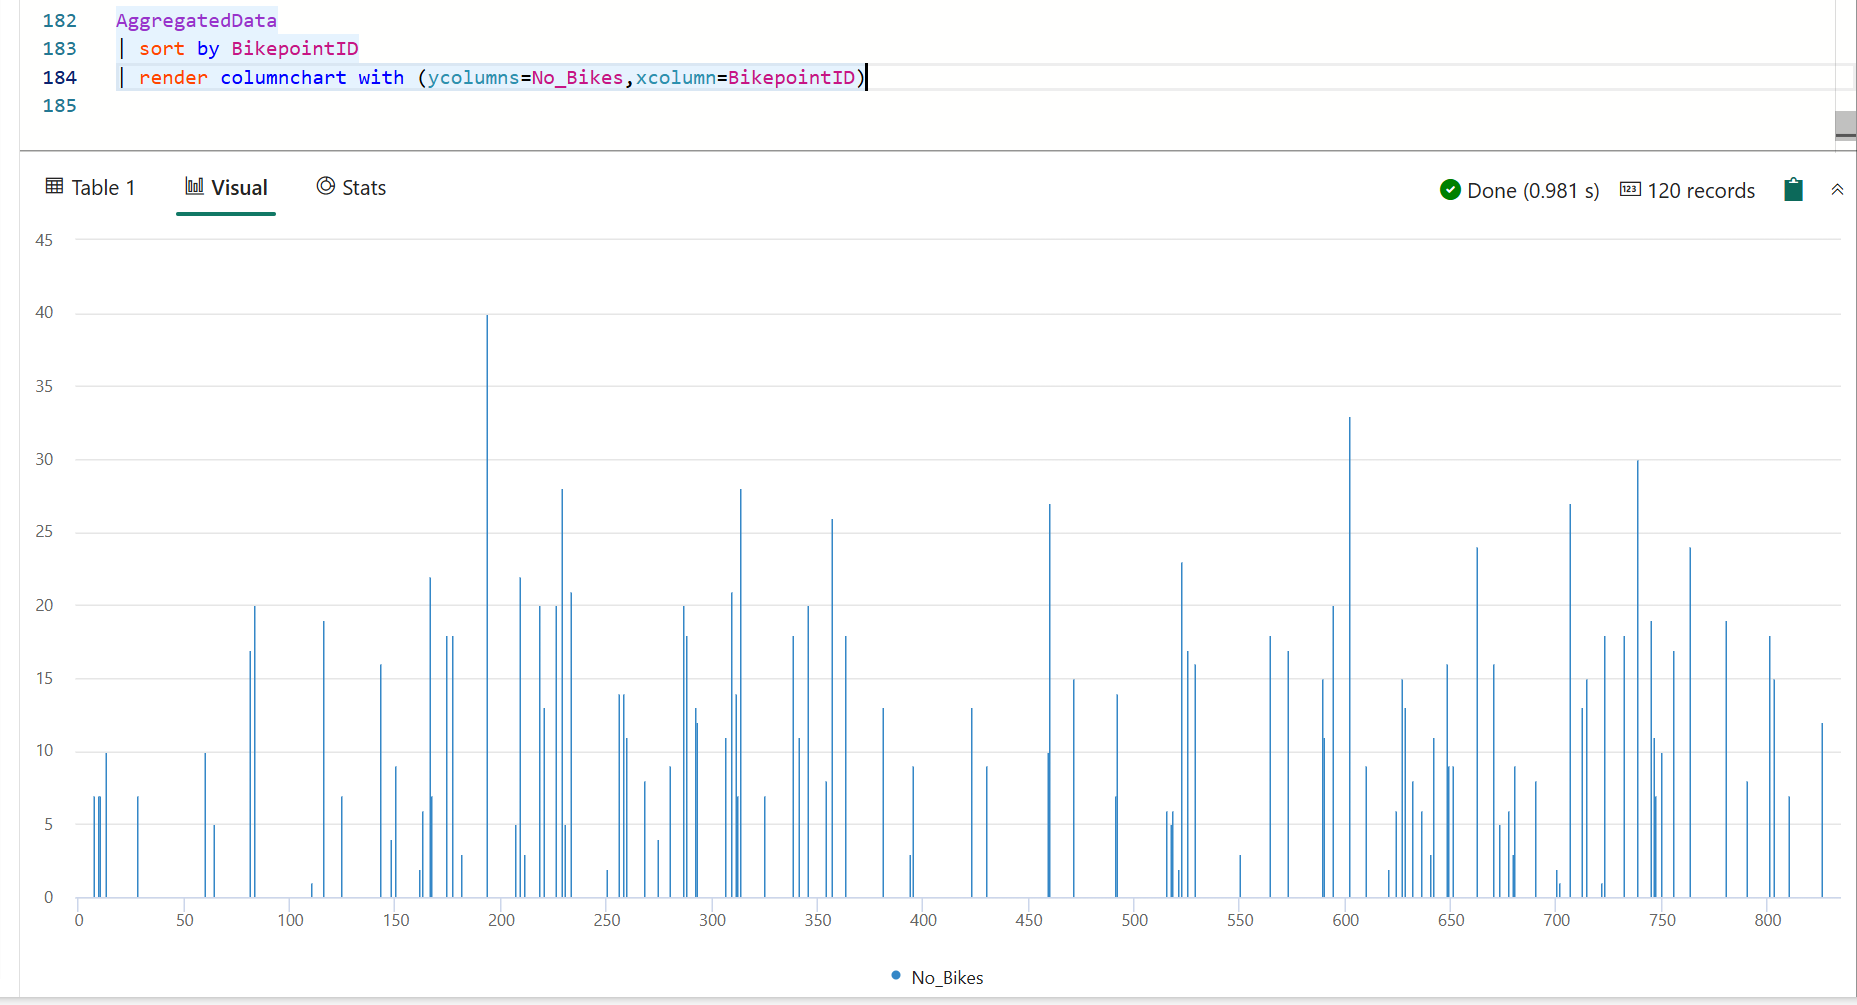
[ダッシュボードにピン留めする] をオンにします。
次の情報を入力します。
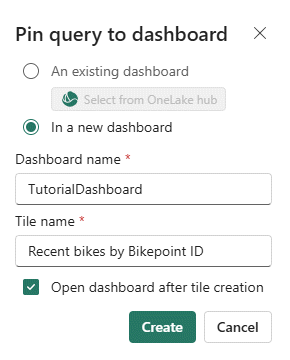
フィールド 価値 新しいタイル を作成する In a new dashboard ダッシュボード名 TutorialDashboard タイル名 Recent bikes by Timepoint 作成後にダッシュボードを開く 選択済み [作成] を選択します。
[作成後にダッシュボードを開く] を選択したので、新しいリアルタイム ダッシュボード TutorialDashboard が開いて Recent bikes by Bikepoint タイルが表示されます。 ワークスペースを参照して目的の項目を選択することで、Real-Time ダッシュボードにアクセスすることもできます。
ダッシュボードに新しいタイルを追加する
上部のメニューバーで、表示 モードから 編集 モードに切り替えます。
新しいタイル を選択する
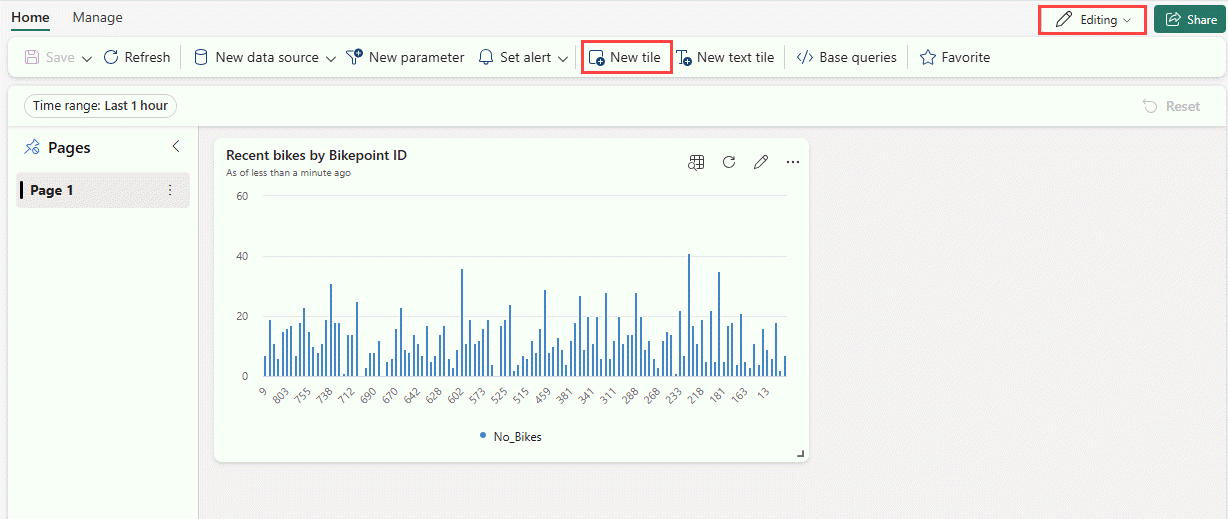
クエリ エディターで、次のクエリを入力します。
RawData
| where Neighbourhood == "Chelsea"
メニュー リボンから [変更の適用] を選択します。 新しいタイルが作成されます。
タイルの右上隅にある [その他] メニュー [...] を選択して、タイルの名前を変更 >タイルの名前を変更。
Chelsea bikes を入力してタイルの名前を変更します。
集計を追加してデータを視覚的に調べる
新しい Chelsea bikes タイルで、探索アイコンを選択します。

[+ 追加]>[集計] を選択します。
[演算子]>[最大] および [列]>[No_Bikes] を選択します。
表示名に「Max_Bikes」と入力します。
を選択し、グループ化を追加します。
[>ストリートでグループ化] を選択します。
[適用] を選択します。
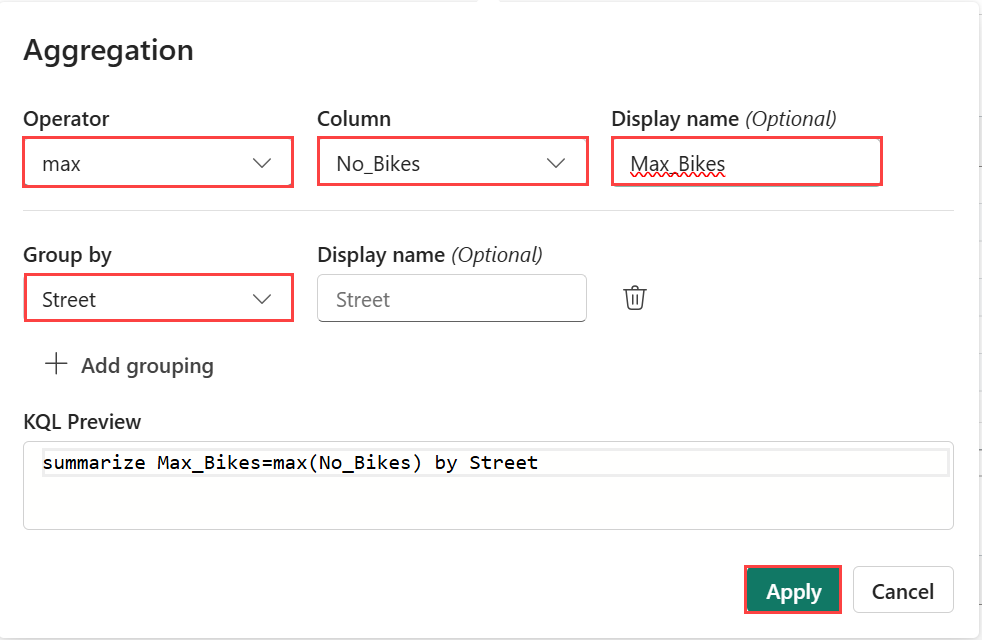
Street 集計の結果として
max(No_Bikes) を含むようにクエリ要素が更新されていることに注意してください。 結果のテーブルは、道路ごとの自転車の場所の合計数を示すために変更されました。 Visual の種類を から 棒グラフに変更します。
[ダッシュボードにピン留めする]>[このダッシュボード] を選択します。
マップ タイルを追加する
新しいタイル を選択する。
クエリ エディターで、次のクエリを入力して実行します。
RawData
| where Timestamp > ago(1h)
結果ウィンドウの上にある [+ ビジュアルの追加] を選択します。
[ビジュアルの書式設定] ウィンドウで、次の情報を入力します。
フィールド 価値 タイル名 自転車の場所マップ 視覚化の種類 マップ で場所を定義する 緯度と経度 緯度列 緯度 経度列 Longitude ラベル列 BikepointID [変更の適用] を選択します。 タイルのサイズを変更し、必要に応じてマップ上で拡大することができます。
ダッシュボードの左上隅にある [ 保存] アイコン
選択して、ダッシュボードを保存します。
関連コンテンツ
このチュートリアルで実行されるタスクの詳細については、以下を参照してください。
