iOS SDK でマップにバブル レイヤーを追加する (プレビュー)
この記事では、データ ソースからのポイント データをマップ上のバブル レイヤーにレンダリングする方法について説明します。 バブル レイヤーでは、固定ポイント半径を持つ円としてポイントをマップ上にレンダリングします。
Note
Azure Maps iOS SDK の廃止
iOS 用 Azure Maps Native SDK は非推奨となり、2025 年 3 月 31 日に廃止されます。 サービスの中断を回避するには、2025 年 3 月 31 日までに Azure Maps Web SDK に移行してください。 詳細については、「Azure Maps iOS SDK 移行ガイド」を参照してください。
ヒント
バブル レイヤーの既定では、データ ソース内のすべてのジオメトリの座標がレンダリングされます。 ポイント ジオメトリ フィーチャーのみがレンダリングされるようにレイヤーを制限するには、レイヤーの filter オプションを NSPredicate(format: "%@ == \"Point\"", NSExpression.geometryTypeAZMVariable) に設定します。 MultiPoint 地物も含める場合は、NSCompoundPredicate を使います。
前提条件
必ず、iOS アプリの作成のクイック スタートに関するドキュメントの手順を完了してください。 この記事のコード ブロックは、ViewController の viewDidLoad 関数に挿入できます。
バブル レイヤーを追加する
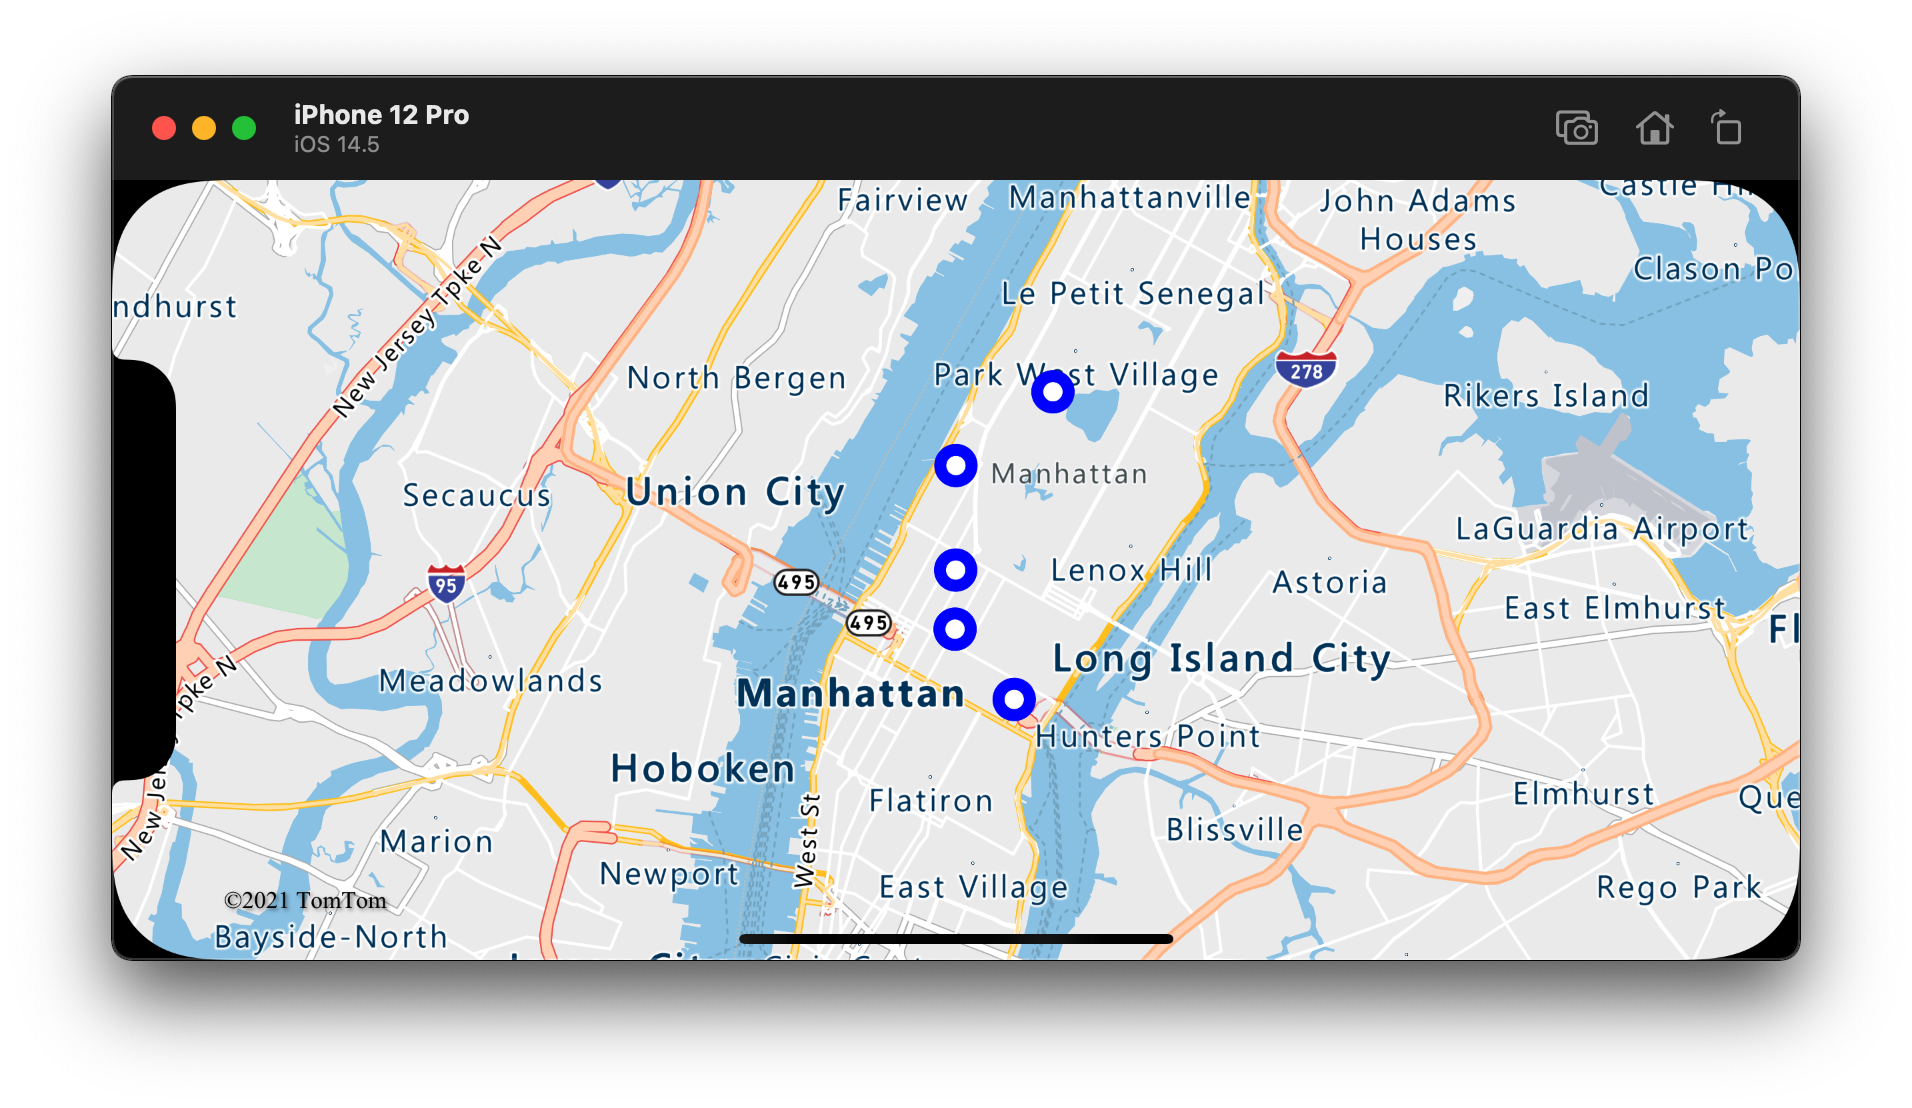
次のコードでは、ポイントの配列がデータ ソースに読み込まれます。 次に、データ ポイントがバブル レイヤーに接続されます。 バブル レイヤーでは、各バブルが 5 ポイントの半径、白の塗りつぶしの色でレンダリングされます。 また、青のストロークの色、6 ポイントのストロークの幅になります。
// Create a data source and add it to the map.
let source = DataSource()
map.sources.add(source)

// Create point locations.
let points = [
    Point(CLLocationCoordinate2D(latitude: 40.75773, longitude: -73.985708)),
    Point(CLLocationCoordinate2D(latitude: 40.76542, longitude: -73.985600)),
    Point(CLLocationCoordinate2D(latitude: 40.77900, longitude: -73.985550)),
    Point(CLLocationCoordinate2D(latitude: 40.74859, longitude: -73.975550)),
    Point(CLLocationCoordinate2D(latitude: 40.78859, longitude: -73.968900))
]

// Add multiple points to the data source.
source.add(geometries: points)

// Create a bubble layer to render the filled in area of the circle, and add it to the map.
let layer = BubbleLayer(source: source, options: [
    .bubbleRadius(5),
    .bubbleColor(.white),
    .bubbleStrokeColor(.blue),
    .bubbleStrokeWidth(6)
])
map.layers.addLayer(layer)
次のスクリーンショットは、上記のコードによって、バブル レイヤーにポイントがレンダリングされている状態を示しています。

バブル レイヤーでラベルを表示する
このコードは、バブル レイヤーを使用してマップ上にポイントをレンダリングする方法を示しています。 また、シンボル レイヤーを使用して、ラベルをレンダリングする方法を示しています。 シンボル レイヤーのアイコンを非表示にするには、iconImage オプションを nil に設定します。
// Create a data source and add it to the map.
let source = DataSource()
map.sources.add(source)

// Add a data point to the map.
source.add(geometry: Point(CLLocationCoordinate2D(latitude: 47.627631, longitude: -122.336641)))

// Add a bubble layer.
map.layers.addLayer(
    BubbleLayer(source: source, options: [
        .bubbleRadius(5),
        .bubbleColor(.white),
        .bubbleStrokeColor(.blue),
        .bubbleStrokeWidth(6)
    ])
)

// Add a symbol layer to display text, hide the icon image.
map.layers.addLayer(
    SymbolLayer(source: source, options: [
        .iconImage(nil),
        .textField("Museum of History & Industry (MOHAI)"),
        .textColor(.blue),
        .textOffset(CGVector(dx: 0, dy: -2.2))
    ])
)
次のスクリーンショットは、上記のコードにより、バブル レイヤーにポイントがレンダリングされ、シンボル レイヤーを使ってポイントのテキスト ラベルがレンダリングされている状態を示しています。

関連情報
マップに追加できる他のコード サンプルについては、次の記事をご覧ください。