Step 3 - Purchase and subscribe to the private offer
This article explains how to purchase and subscribe to private offers after you accepted a private offer from your Microsoft partner. Private offers align to your billing account. During purchase, you need your organization's billing account ID.
Important
You must complete the purchasing steps in this article to start billing. Purchasing a private offer requires different roles and permissions as compared with accepting a private offer.
Purchase the private offer
After accepting the private offer, follow these steps to begin the purchase.
Check that you're signed into the directory (or Azure tenant) that includes the billing account of the private offer. If you just accepted the private offer, you should already be signed into the correct directory. If not, see Switch directories.
Find and select the private offer, then check the private offer dates and status. The private offer start date must be on or before the current date, and the private offer end date must be on or after the current date. The private offer status must be Accepted or Term Ending to purchase.
Check that you're assigned an Azure subscription owner or contributor role for a subscription under the billing account of the private offer. See Roles and permissions to check your role. You can also use the Check eligibility tool to validate if a subscription is available under this billing account and that you have the required subscription role.
Confirm that the private offer product status is Ready and select the Purchase button. It can take 15-60 minutes after acceptance for the Purchase button to enable. For private offers with multiple products, you can accept all products at once, but you must complete the purchase for each product individually.
Note
If the Purchase button is inactive (or grayed out), hover over the button to get a tip on why purchase is disabled and follow this troubleshooting guidance.

Subscribe to the private offer products
Subscribing requires you to specify other purchasing details, assign the purchase to an Azure subscription and resource group, and optionally tag the purchase with details that are viewable in Cost Management.
The steps for subscribing vary depending on the product type. See instructions in this article for Software-as-a-service (SaaS), professional services, Virtual machine (VM) products, Virtual machine software reservations (VMSR), and Azure apps and managed apps.
Activate the software-as-a-service product to complete the purchase
If your private offer purchase includes a software-as-a-service (SaaS) product, you must activate the SaaS product's subscription after subscribing to complete the purchase.
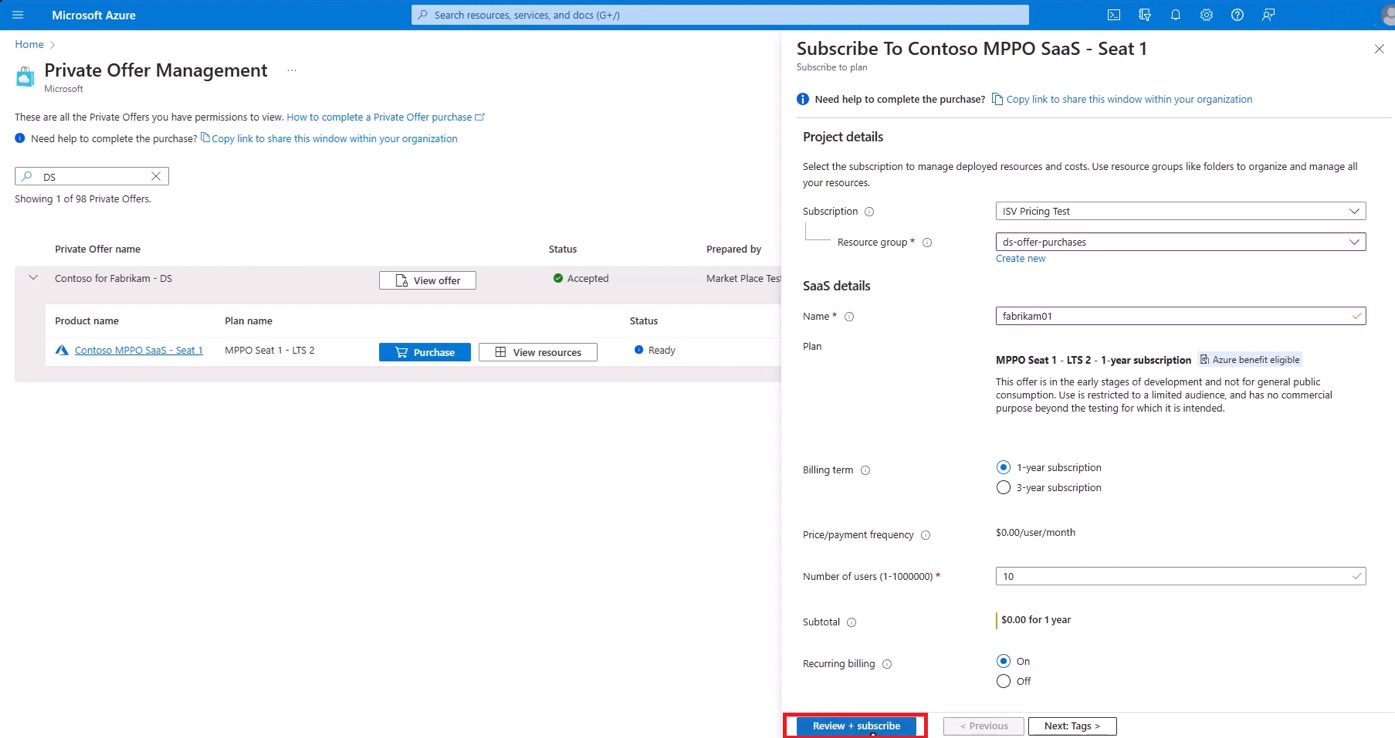
After you purchase the private offer, fill in all required fields under Project Details, select an eligible Azure subscription, and then either select or create a new resource group.
Complete the SaaS details. Specify the name of the SaaS subscription. Select a billing term and number of users (if applicable) and then set recurring billing to on or off.

Note
Check with the vendor that provided you with the private offer to understand your private offer's pricing at renewal and to determine the appropriate recurring billing setting.
On: The SaaS subscription autorenews at the end of the billing term and billing continues.
- If your private offer ends after the end of the billing term, your subscription renews at the private offer price.
- If your private offer ends before the end of the billing term, and no other private offer is started, your subscription renews at the public offer price.
- If your private offer ends before the end of the billing term, and a new private offer started, check with your vendor to confirm the price at which your subscription renews.
Off: The SaaS subscription terminates on the end date. There's no other billing on that SaaS subscription, even if your private offer ends after the end of the billing term.
Select Review + subscribe.
Review the details of the offer and select Subscribe.

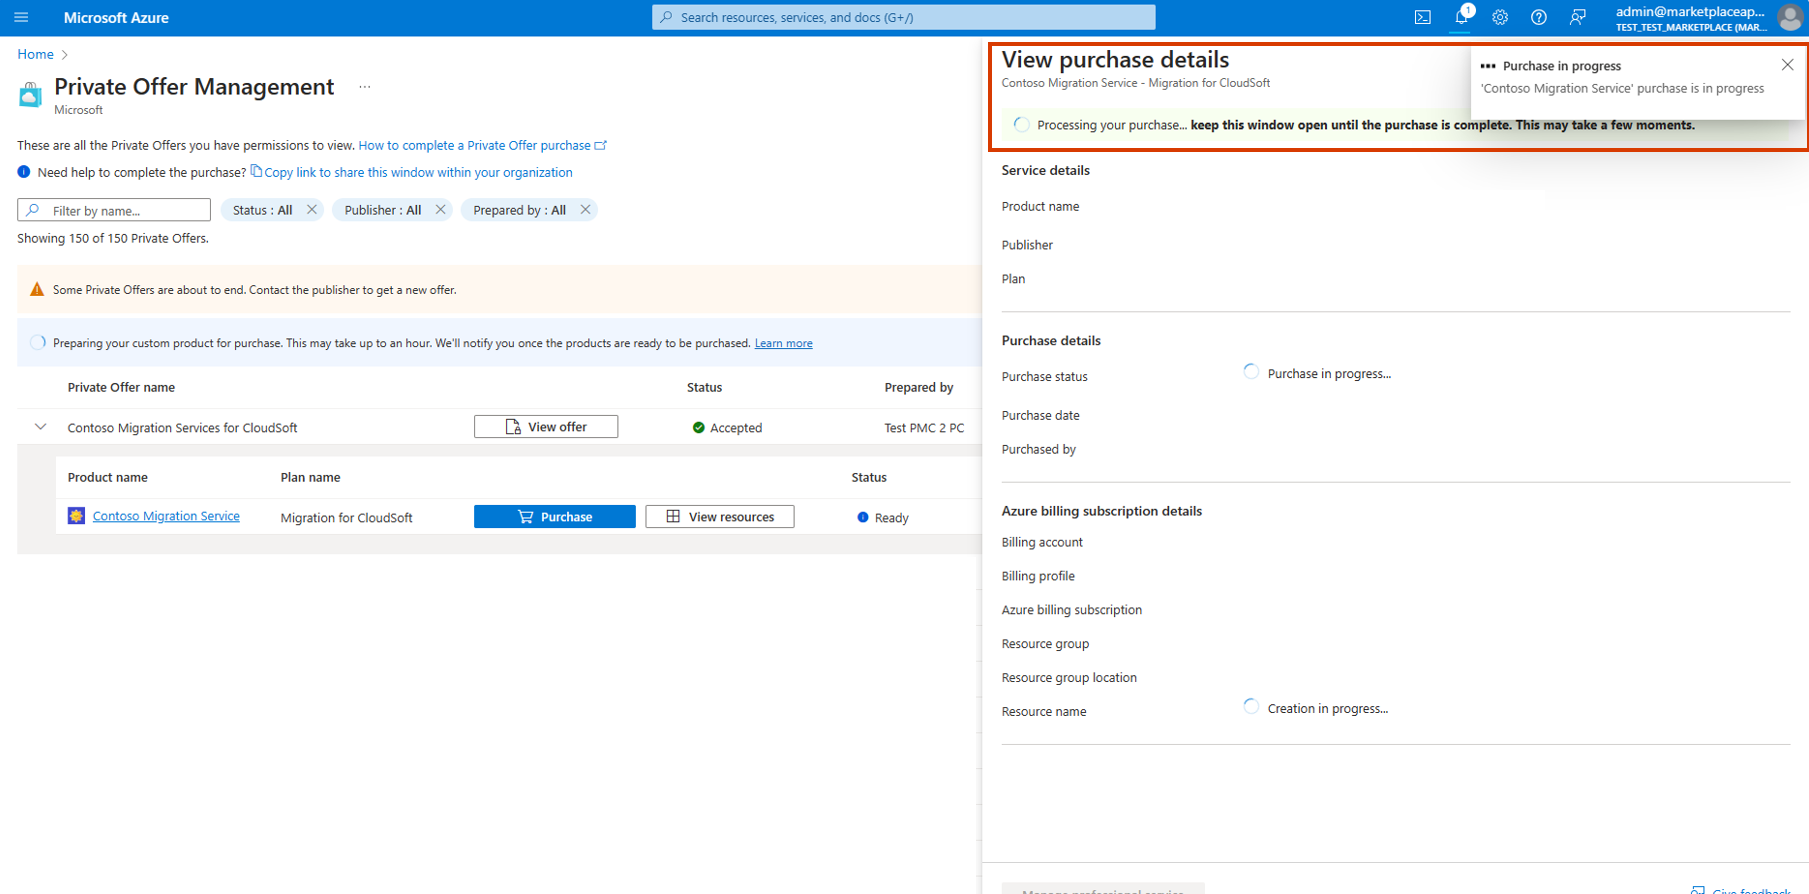
After subscribing to the offer, you see: Your SaaS subscription is in progress.
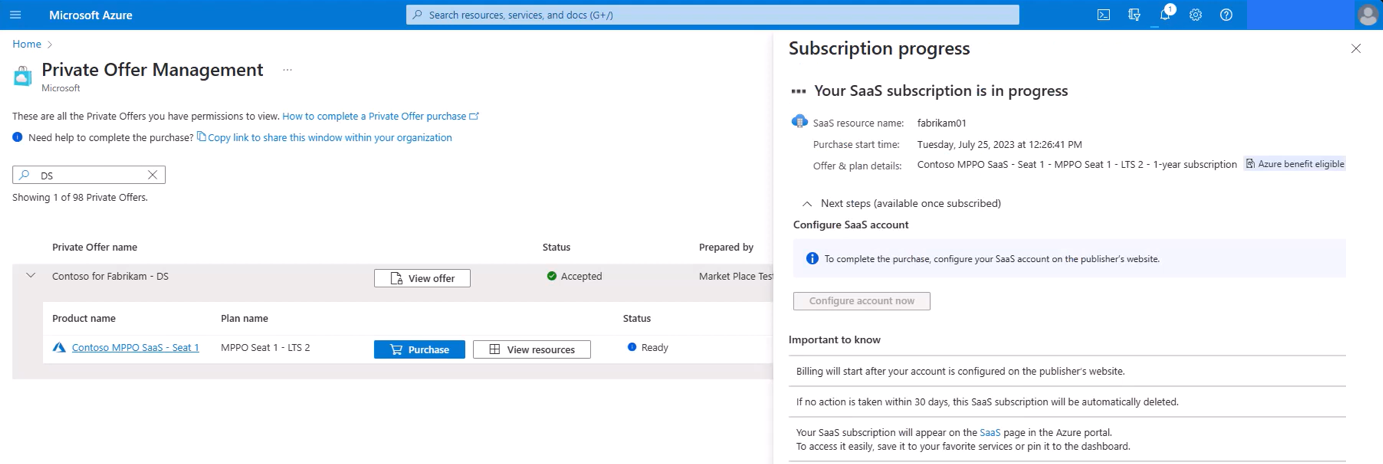
Once the SaaS offer deployment completes, configure the account on the partner website. Select Configure account now.


Important
Your purchase isn't complete until you activate your SaaS subscription. This step ensures that you have access to your SaaS subscription before billing starts. Select Configure account now to be redirected to your vendor's SaaS landing page to complete the process. This step requires access to the partner's landing page domain, and user consent for Microsoft Entra apps. For more information, see SaaS subscription and configuration.
To complete this step:
- Disable pop-up blockers.
- Ensure access to your vendor's landing page domain from your network. Your networking administrator might need to add the domain to the allowlist. Contact your vendor for details.
- Verify that your Microsoft Entra policy supports user consent for apps. If not, your Microsoft Entra Global Admin needs to enable this setting.
- Complete this step and ensure that the partner activates your SaaS subscription within 30 days after purchase.
To manage a SaaS subscription that you purchased previously, follow these steps.
- Locate your private offer on the Private offers management dashboard.
- Select the product you want to purchase.
- Select View resources.
- Find and manage your SaaS subscription.
Complete a professional services purchase
If your private offer includes a professional service, you have two options to complete the purchase:
Create a new Azure subscription.
The option is ideal for users who might not have access to an existing Azure subscription, but who have the EA Admin or MCA billing owner or contributor role and want to create a new Azure subscription under the private offer billing account.
Use an existing Azure subscription.
This option is ideal for users who already have the subscription owner or contributor role for an existing Azure subscription under the private offer billing account. It's the typical subscription experience when purchasing other private offer products, like SaaS.
Note
The following screenshots are for customers using MCA accounts. If you're using an EA account, the experience is similar but you need to choose an Enrollment account instead of a Billing profile during checkout.
Option 1: Create a new Azure subscription
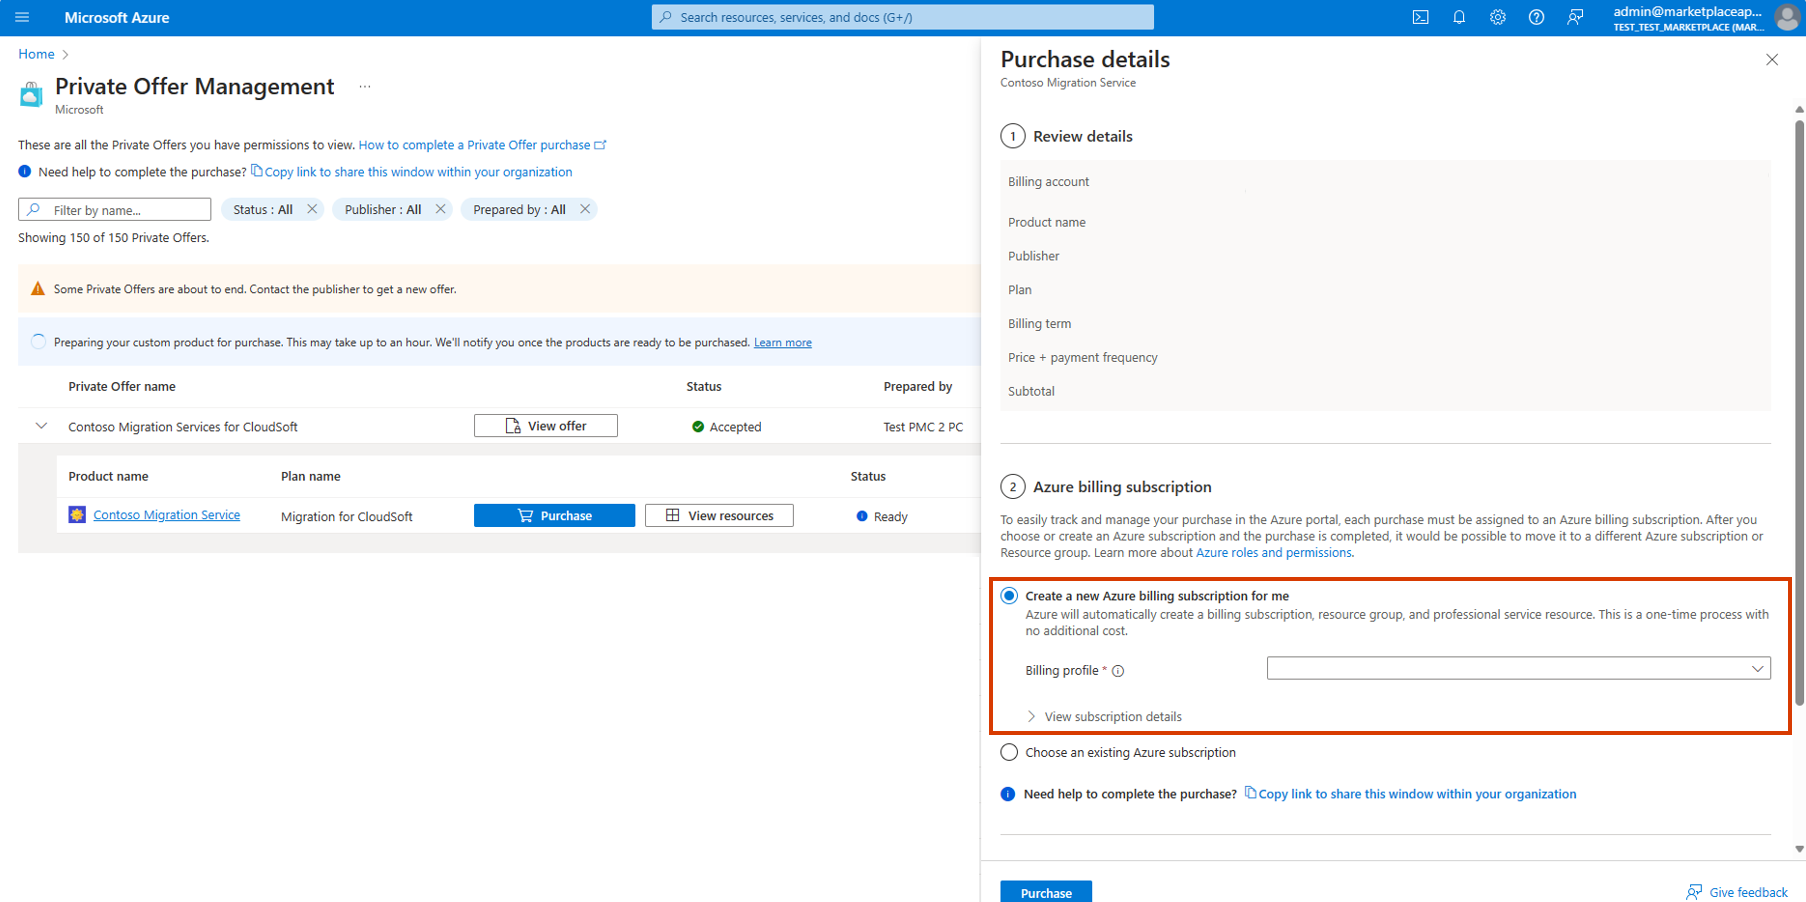
On the Purchase details page, review the details of your purchase in the Review details section. Then, select Create a new Azure billing subscription for me in the Azure billing subscription section.
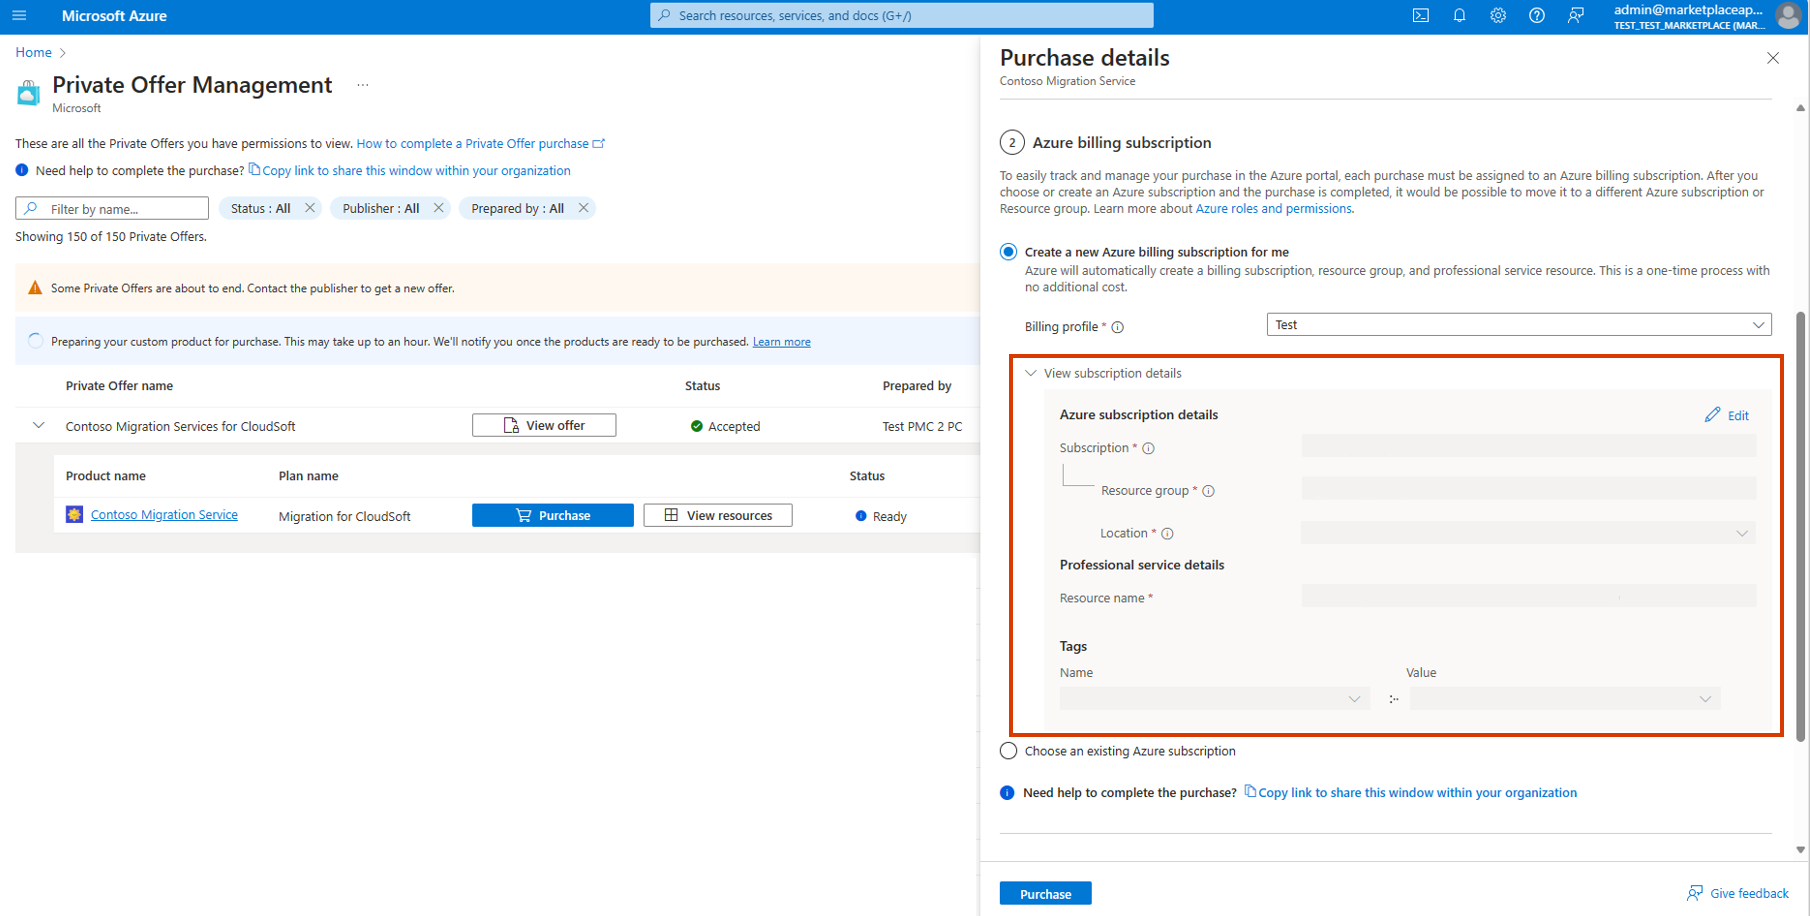
Your new subscription is assigned a default subscription name, resource group, location, and resource name. If you would like to edit these fields, expand the View subscription details dropdown and select Edit on the upper right corner.
Select Purchase. It might take a few moments to create your new Azure subscription and complete the purchase.
After the purchase completes, billing starts, and the service provider receives a notification. Ensure that you connect with the service provider to begin launch of the service.


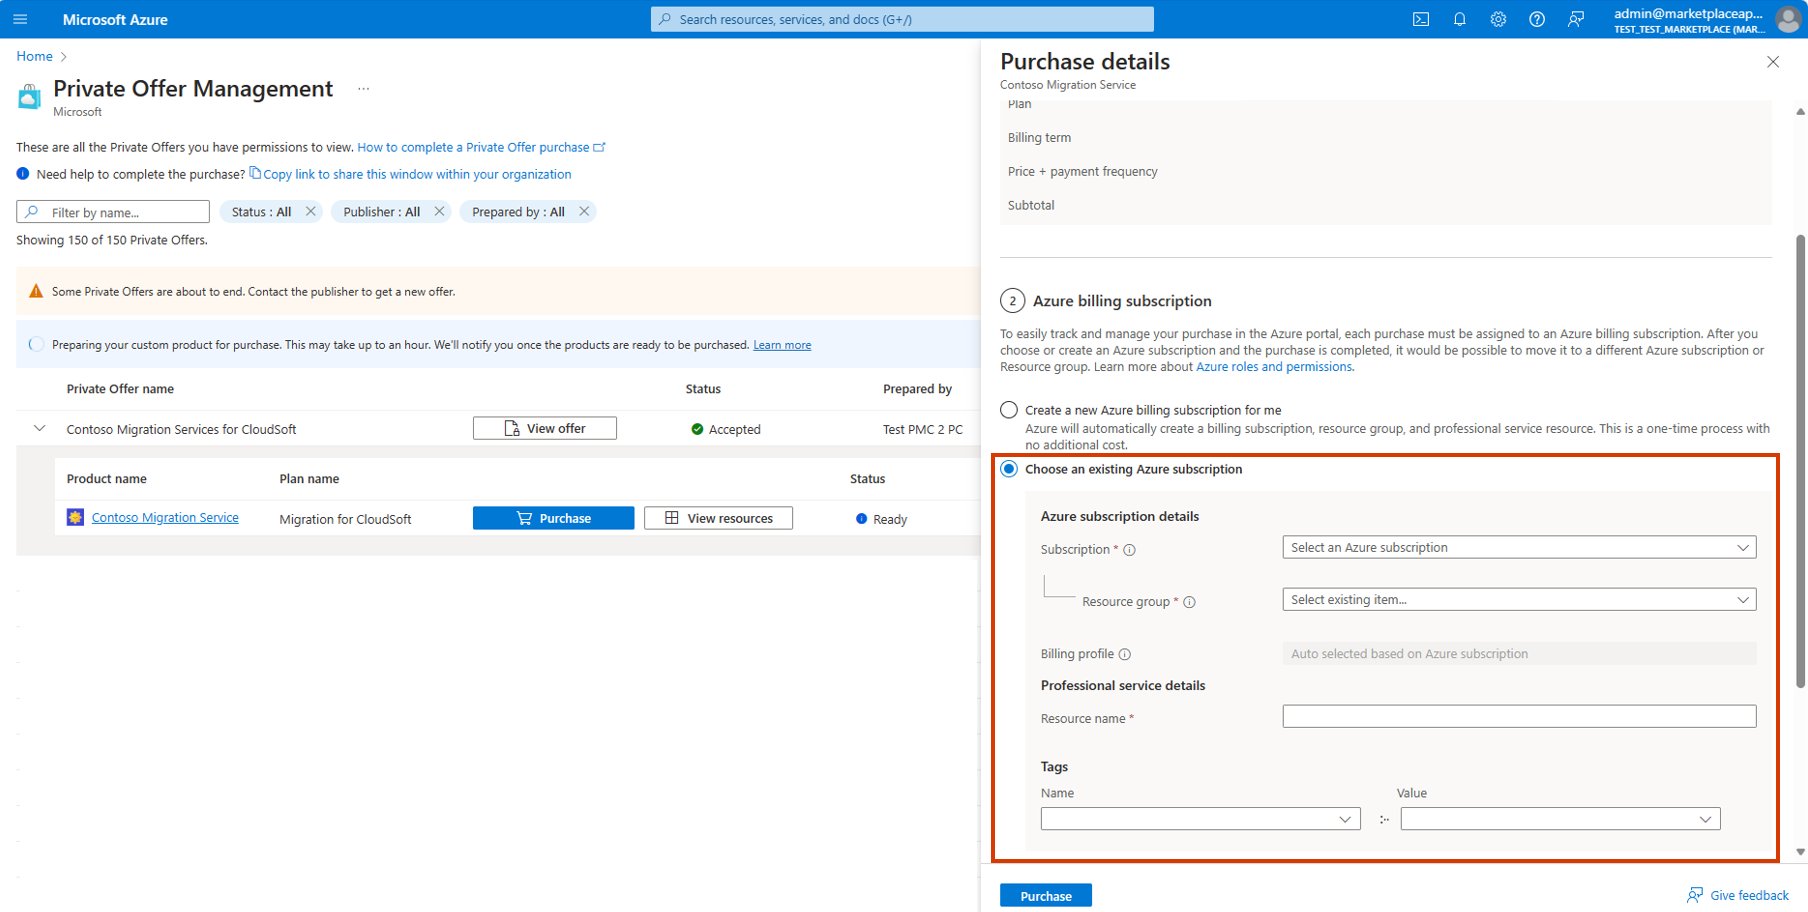
Option 2: Use an existing Azure subscription during checkout
On the Purchase details page, review the details of your purchase in the Review details section. Then, select Choose an existing Azure subscription in the Azure billing subscription section.
Select your Azure subscription and resource group from the dropdowns.
Assign your Resource name for the professional service subscription.
Select Purchase. It might take a few moments to complete the purchase.
After the purchase completes, billing starts, and the service provider receives a notification. Ensure that you connect with the service provider to begin launch of the service.
Purchase a virtual machine (VM) product private offer
If your private offer has VMs that are already deployed or are expected to deploy later, with or without automation scripts, no further action is required.
For deployment of VMs on your own through the Azure portal, follow these steps to purchase the private offer.
Select Purchase on the VM product listing on the Private Offers Management screen.
Follow the VM create wizard.
If you plan to buy VM reservations, continue to the Reservations menu and find the right product to purchase.
Note
This option isn't applicable to private offers that include virtual machine software reservation (VMSR) bundles with a set quantity of VM reservations. For more information, see Virtual machine software reservations (VMSR).
If you're deploying these VM images within an Azure app or managed app: go to the marketplace within Azure portal and deploy the app.
Purchase a virtual machine software reservations (VMSR) private offer
If your private offer includes VMSR, follow these steps to purchase the private offer.
Go to the Private Offers Management dashboard.
Find the private offer with the VMSR you want to buy, then select Purchase.
Make sure the reservation details are correct, select the billing subscription, and select Purchase all reservations.
Note
Either the subscription owner or reservation purchaser role is required to complete the purchase.
Purchase an Azure apps and managed apps private offer
If you're using Azure apps or managed apps, follow these steps to purchase the private offer.
- Find the accepted private offer under Private Offer Management and select Purchase.
- In the next panel, select your plan, and select Purchase.
- Proceed through the typical steps for resource creation.