Tutorial: Spielen des 3D-Klaviers
Im vorhergehenden Tutorial haben wir erfolgreich ein Modell eines Klaviers mit einer vollständigen 88-Tasten-Klaviatur erstellt. Machen wir es jetzt im XR-Raum spielbar.
In diesem Tutorial lernen Sie Folgendes:
- Hinzufügen von interaktiven Klavierfeatures mithilfe von Zeigerereignissen
- Skalieren von Gittermodellen auf eine andere Größe
- Aktivieren von Teleportierungs- und Multizeigerunterstützung in XR
Vorbereitung
Vergewissern Sie sich, dass Sie das vorhergehende Tutorial in der Reihe durchgegangen und bereit sind, mit dem Hinzufügen von Code fortzufahren.
index.html
<html>
    <head>
        <title>Piano in BabylonJS</title>
        <script src="https://cdn.babylonjs.com/babylon.js"></script>
        <script src="scene.js"></script>
        <style>
            body,#renderCanvas { width: 100%; height: 100%;}
        </style>
    </head>
    <body>
        <canvas id="renderCanvas"></canvas>
        <script type="text/javascript">
            const canvas = document.getElementById("renderCanvas");
            const engine = new BABYLON.Engine(canvas, true);

            createScene(engine).then(sceneToRender => {
                engine.runRenderLoop(() => sceneToRender.render());
            });

            // Watch for browser/canvas resize events
            window.addEventListener("resize", function () {
                engine.resize();
            });
        </script>
    </body>
</html>
scene.js
const buildKey = function (scene, parent, props) {
    if (props.type === "white") {
        /*
        Props for building a white key should contain:
        note, topWidth, bottomWidth, topPositionX, wholePositionX, register, referencePositionX

        As an example, the props for building the middle C white key would be
        {type: "white", note: "C", topWidth: 1.4, bottomWidth: 2.3, topPositionX: -0.45, wholePositionX: -14.4, register: 4, referencePositionX: 0}
        */

        // Create bottom part
        const bottom = BABYLON.MeshBuilder.CreateBox("whiteKeyBottom", {width: props.bottomWidth, height: 1.5, depth: 4.5}, scene);

        // Create top part
        const top = BABYLON.MeshBuilder.CreateBox("whiteKeyTop", {width: props.topWidth, height: 1.5, depth: 5}, scene);
        top.position.z =  4.75;
        top.position.x += props.topPositionX;

        // Merge bottom and top parts
        // Parameters of BABYLON.Mesh.MergeMeshes: (arrayOfMeshes, disposeSource, allow32BitsIndices, meshSubclass, subdivideWithSubMeshes, multiMultiMaterials)
        const key = BABYLON.Mesh.MergeMeshes([bottom, top], true, false, null, false, false);
        key.position.x = props.referencePositionX + props.wholePositionX;
        key.name = props.note + props.register;
        key.parent = parent;

        return key;
    }
    else if (props.type === "black") {
        /*
        Props for building a black key should contain:
        note, wholePositionX, register, referencePositionX

        As an example, the props for building the C#4 black key would be
        {type: "black", note: "C#", wholePositionX: -13.45, register: 4, referencePositionX: 0}
        */

        // Create black color material
        const blackMat = new BABYLON.StandardMaterial("black");
        blackMat.diffuseColor = new BABYLON.Color3(0, 0, 0);

        // Create black key
        const key = BABYLON.MeshBuilder.CreateBox(props.note + props.register, {width: 1.4, height: 2, depth: 5}, scene);
        key.position.z += 4.75;
        key.position.y += 0.25;
        key.position.x = props.referencePositionX + props.wholePositionX;
        key.material = blackMat;
        key.parent = parent;

        return key;
    }
}

const createScene = async function(engine) {
    const scene = new BABYLON.Scene(engine);

    const alpha =  3*Math.PI/2;
    const beta = Math.PI/50;
    const radius = 220;
    const target = new BABYLON.Vector3(0, 0, 0);

    const camera = new BABYLON.ArcRotateCamera("Camera", alpha, beta, radius, target, scene);
    camera.attachControl(canvas, true);

    const light = new BABYLON.HemisphericLight("light", new BABYLON.Vector3(0, 1, 0), scene);
    light.intensity = 0.6;

    const keyParams = [
        {type: "white", note: "C", topWidth: 1.4, bottomWidth: 2.3, topPositionX: -0.45, wholePositionX: -14.4},
        {type: "black", note: "C#", wholePositionX: -13.45},
        {type: "white", note: "D", topWidth: 1.4, bottomWidth: 2.4, topPositionX: 0, wholePositionX: -12},
        {type: "black", note: "D#", wholePositionX: -10.6},
        {type: "white", note: "E", topWidth: 1.4, bottomWidth: 2.3, topPositionX: 0.45, wholePositionX: -9.6},
        {type: "white", note: "F", topWidth: 1.3, bottomWidth: 2.4, topPositionX: -0.55, wholePositionX: -7.2},
        {type: "black", note: "F#", wholePositionX: -6.35},
        {type: "white", note: "G", topWidth: 1.3, bottomWidth: 2.3, topPositionX: -0.2, wholePositionX: -4.8},
        {type: "black", note: "G#", wholePositionX: -3.6},
        {type: "white", note: "A", topWidth: 1.3, bottomWidth: 2.3, topPositionX: 0.2, wholePositionX: -2.4},
        {type: "black", note: "A#", wholePositionX: -0.85},
        {type: "white", note: "B", topWidth: 1.3, bottomWidth: 2.4, topPositionX: 0.55, wholePositionX: 0},
    ]

    // Transform Node that acts as the parent of all piano keys
    const keyboard = new BABYLON.TransformNode("keyboard");

    // Register 1 through 7
    var referencePositionX = -2.4*14;
    for (let register = 1; register <= 7; register++) {
        keyParams.forEach(key => {
            buildKey(scene, keyboard, Object.assign({register: register, referencePositionX: referencePositionX}, key));
        })
        referencePositionX += 2.4*7;
    }

    // Register 0
    buildKey(scene, keyboard, {type: "white", note: "A", topWidth: 1.9, bottomWidth: 2.3, topPositionX: -0.20, wholePositionX: -2.4, register: 0, referencePositionX: -2.4*21});
    keyParams.slice(10, 12).forEach(key => {
        buildKey(scene, keyboard, Object.assign({register: 0, referencePositionX: -2.4*21}, key));
    })

    // Register 8
    buildKey(scene, keyboard, {type: "white", note: "C", topWidth: 2.3, bottomWidth: 2.3, topPositionX: 0, wholePositionX: -2.4*6, register: 8, referencePositionX: 84});

    // Transform node that acts as the parent of all piano components
    const piano = new BABYLON.TransformNode("piano");
    keyboard.parent = piano;

    // Import and scale piano frame
    BABYLON.SceneLoader.ImportMesh("frame", "https://raw.githubusercontent.com/MicrosoftDocs/mixed-reality/docs/mixed-reality-docs/mr-dev-docs/develop/javascript/tutorials/babylonjs-webxr-piano/files/", "pianoFrame.babylon", scene, function(meshes) {
        const frame = meshes[0];
        frame.parent = piano;
    });

    // Lift the piano keyboard
    keyboard.position.y += 80;

    const xrHelper = await scene.createDefaultXRExperienceAsync();

    return scene;
}
Spielbar Machen der Klaviatur
Im Moment handelt es sich bei der Klaviatur, die wir erstellt haben, um ein statisches Modell, das nicht auf Benutzerinteraktionen reagiert. In diesem Abschnitt programmieren wir die Tasten so, dass sie sich nach unten bewegen und einen Ton wiedergeben, wenn jemand sie drückt.
Babylon.js stellt verschiedene Arten von Ereignissen oder observables (wahrnehmbaren Elementen) zur Verfügung, mit denen wir interagieren können. In unserem Fall werden wir uns mit dem
onPointerObservablebefassen, da wir die Tasten dafür programmieren möchten, mithilfe eines Zeigers eine Aktion auszuführen, wenn jemand sie drückt, was durch einen Mausklick, Berührung, den Klick mit einer Taste des XR-Controllers usw. erfolgen kann.Dies ist die grundlegende Struktur, wie wir einem
onPointerObservablejedes beliebige Verhalten hinzufügen können:scene.onPointerObservable.add((pointerInfo) => { // do something });Zwar bietet Babylon.js viele verschiedene Typen von Zeigerereignissen, wir werden jedoch nur die Ereignisse
POINTERDOWNundPOINTERUPverwenden, um das Verhalten der Klaviertasten zu programmieren, und verwenden dazu die Struktur unten:scene.onPointerObservable.add((pointerInfo) => { switch (pointerInfo.type) { case BABYLON.PointerEventTypes.POINTERDOWN: // When the pointer is down on a piano key, // move the piano key downward (to show that it is pressed) // and play the sound of the note break; case BABYLON.PointerEventTypes.POINTERUP: // When the pointer is released, // move the piano key upward to its original position // and stop the sound of the note of the key that is released break; } });Arbeiten wir zunächst an der Bewegung der Klaviertaste nach unten und oben, wenn wir die Taste drücken und loslassen.
Beim Zeiger-abwärts-Ereignis müssen wir das Gittermodell erkennen, auf das geklickt wird, uns vergewissern, dass es eine Klaviertaste ist, und die Y-Koordinate des Gittermodells um einen kleinen Betrag ins Negative ändern, um es aussehen zu lassen, als wäre die Taste nach unten gedrückt worden.
Für das Zeiger-aufwärts-Ereignis ist das etwas komplizierter, da der Zeiger, der die Taste gedrückt hat, möglicherweise nicht auf der gleichen Taste freigegeben wird. Beispielsweise könnte jemand auf die Taste „C4“ klicken, seine Maus auf „E4“ ziehen und dann die Maustaste loslassen. In diesem Fall möchten wir trotzdem die gedrückte Taste (C4) anstelle des Orts freigeben, an dem das
pointerUp-Ereignis eintritt (E4).Sehen wir uns an, wie das mit dem folgenden Code erreicht wird:
const pointerToKey = new Map();
scene.onPointerObservable.add((pointerInfo) => {
    switch (pointerInfo.type) {
        case BABYLON.PointerEventTypes.POINTERDOWN:
            if(pointerInfo.pickInfo.hit) {
                const pickedMesh = pointerInfo.pickInfo.pickedMesh;
                const pointerId = pointerInfo.event.pointerId;
                if (pickedMesh.parent === keyboard) {
                    pickedMesh.position.y -= 0.5;
                    // play the sound of the note
                    pointerToKey.set(pointerId, {
                        mesh: pickedMesh
                    });
                }
            }
            break;
        case BABYLON.PointerEventTypes.POINTERUP:
            const pointerId = pointerInfo.event.pointerId;
            if (pointerToKey.has(pointerId)) {
                pointerToKey.get(pointerId).mesh.position.y += 0.5;
                // stop the sound of the note of the key that is released
                pointerToKey.delete(pointerId);
            }
            break;
    }
});
Die
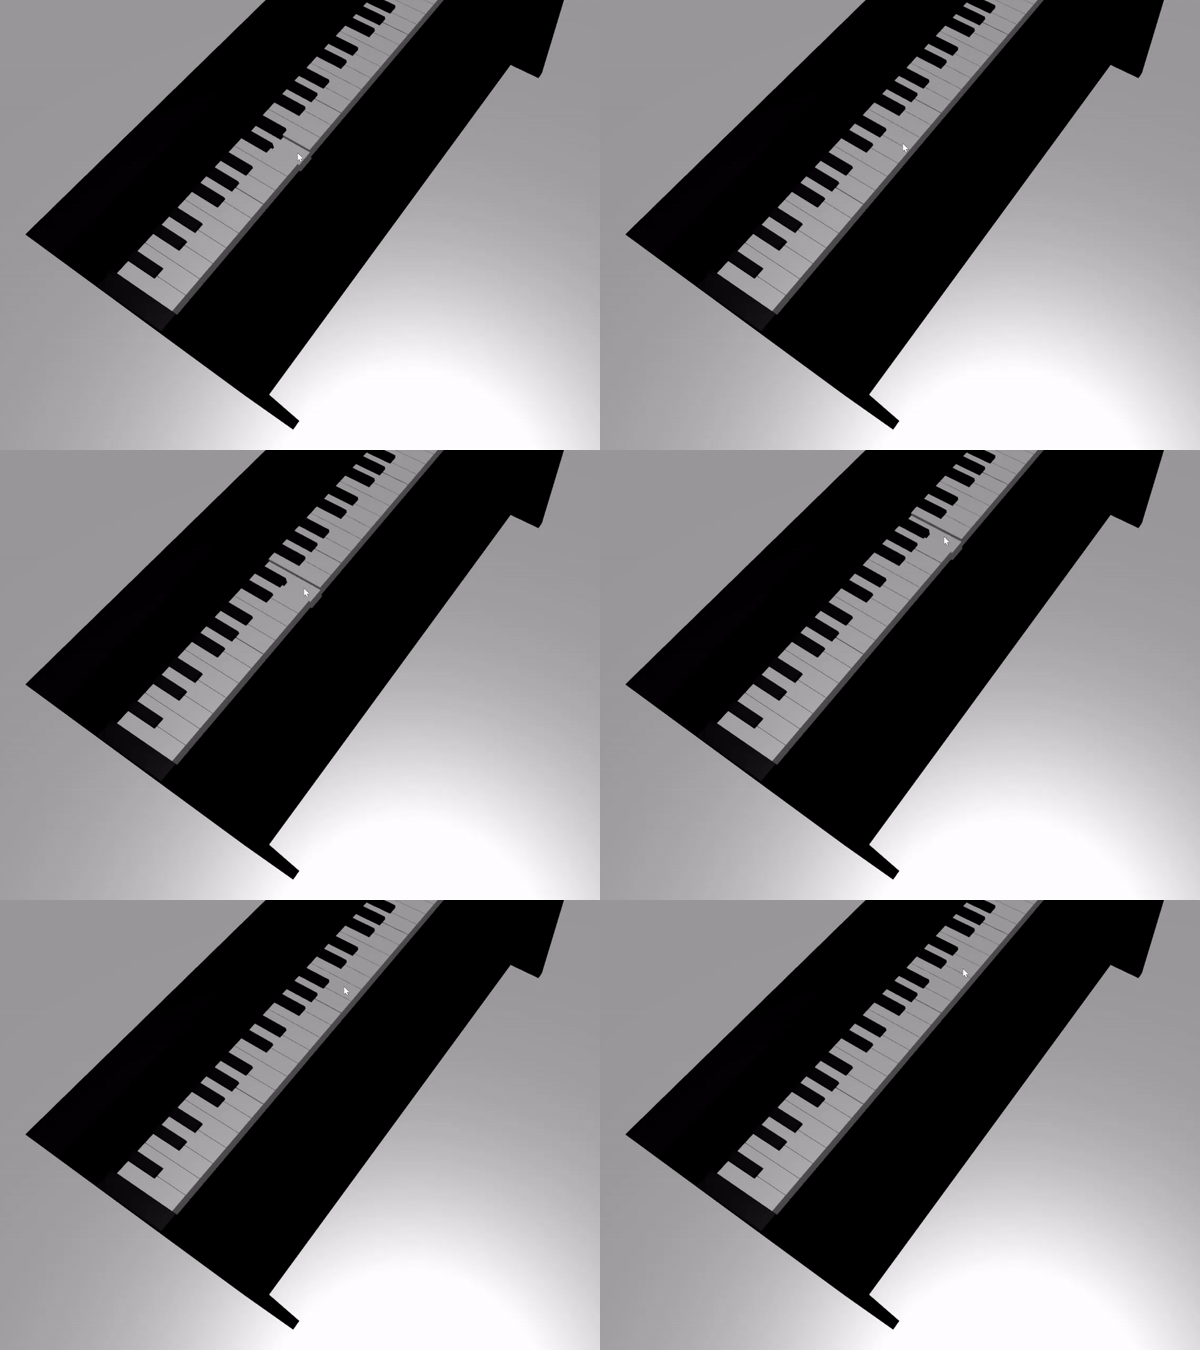
pointerIdist für jeden Zeiger eindeutig und kann uns helfen, einen Zeiger zu identifizieren, wenn wir mehrere Controller benutzen oder einen Touchbildschirm verwenden. Hier haben wir einMap-Objekt mit dem NamenpointerToKeyinitialisiert, um die Beziehung zu speichern, welcher Zeiger welche Taste gedrückt hat, damit wir wissen, welche Taste losgelassen werden soll, wenn der Zeiger freigegeben wird, unabhängig davon, wo die Freigabe erfolgt.So sieht die Interaktion mit dem Code oben aus:

Arbeiten wir jetzt daran, einen Ton zu spielen und zu beenden, wenn eine Taste gedrückt und losgelassen wird. Dies möchten wir mithilfe einer Javascript-Bibliothek mit dem Namen soundfont-player erreichen, die es uns ermöglicht, auf einfache Weise MIDI-Klänge auf einem Instrument unserer Wahl zu spielen.
Laden Sie den verkleinerten Code der Bibliothek herunter, speichern Sie ihn im gleichen Ordner wie index.html, und schließen Sie ihn in das
<header>-Tag in index.html ein:<head> <title>Babylon Template</title> <script src="https://cdn.babylonjs.com/babylon.js"></script> <script src="scene.js"></script> <script src="soundfont-player.min.js"></script> <style> body,#renderCanvas { width: 100%; height: 100%;} </style> </head>Nachdem die Bibliothek importiert wurde, können wir mithilfe der Bibliothek ein Instrument initialisieren und MIDI-Klänge wiedergeben bzw. beenden:
const pianoSound = await Soundfont.instrument(new AudioContext(), 'acoustic_grand_piano'); const C4 = piano.play("C4"); // Play note C4 C4.stop(); // Stop note C4Lassen Sie uns dies in die Zeigerereignisse integrieren und den Code für diesen Abschnitt abschließen:
const pointerToKey = new Map() const piano = await Soundfont.instrument(new AudioContext(), 'acoustic_grand_piano'); scene.onPointerObservable.add((pointerInfo) => { switch (pointerInfo.type) { case BABYLON.PointerEventTypes.POINTERDOWN: if(pointerInfo.pickInfo.hit) { let pickedMesh = pointerInfo.pickInfo.pickedMesh; let pointerId = pointerInfo.event.pointerId; if (keys.has(pickedMesh)) { pickedMesh.position.y -= 0.5; // Move the key downward pointerToKey.set(pointerId, { mesh: pickedMesh, note: pianoSound.play(pointerInfo.pickInfo.pickedMesh.name) // Play the sound of the note }); } } break; case BABYLON.PointerEventTypes.POINTERUP: let pointerId = pointerInfo.event.pointerId; if (pointerToKey.has(pointerId)) { pointerToKey.get(pointerId).mesh.position.y += 0.5; // Move the key upward pointerToKey.get(pointerId).note.stop(); // Stop the sound of the note pointerToKey.delete(pointerId); } break; } });Da wir das Gittermodell jeder Taste mit der Note benannt haben, die es darstellt, können wir einfach angeben, welche Note gespielt werden soll, indem wir den Namen des Gittermodells an die Funktion
pianoSound.play()übergeben. Beachten Sie auch, dass wir den Ton in derpointerToKey-Karte speichern, damit wir wissen, welcher Ton zu beenden ist, wenn eine Taste losgelassen wird.
Skalieren des Klaviers für den immersiven VR-Modus
Mittlerweile haben Sie wahrscheinlich bereits mit der Maus (oder sogar mit einem Touchscreen) auf dem Klavier gespielt, als Sie die interaktiven Funktionen hinzugefügt hatten. In diesem Abschnitt ziehen wir in den immersiven VR-Raum um.
Zum Öffnen der Seite in Ihrem immersiven VR-Headset müssen Sie das Headset zunächst mit Ihrem Entwicklercomputer verbinden und sich vergewissern, dass es für die Verwendung in der Windows Mixed Reality-App eingerichtet ist. Wenn Sie den Windows Mixed Reality-Simulator verwenden, vergewissern Sie sich, dass er aktiviert ist.
Unten rechts auf der Webseite wird nun eine Schaltfläche „Immersive VR“ angezeigt. Klicken Sie darauf, dann können Sie das Klavier in dem angeschlossenen XR-Gerät sehen.

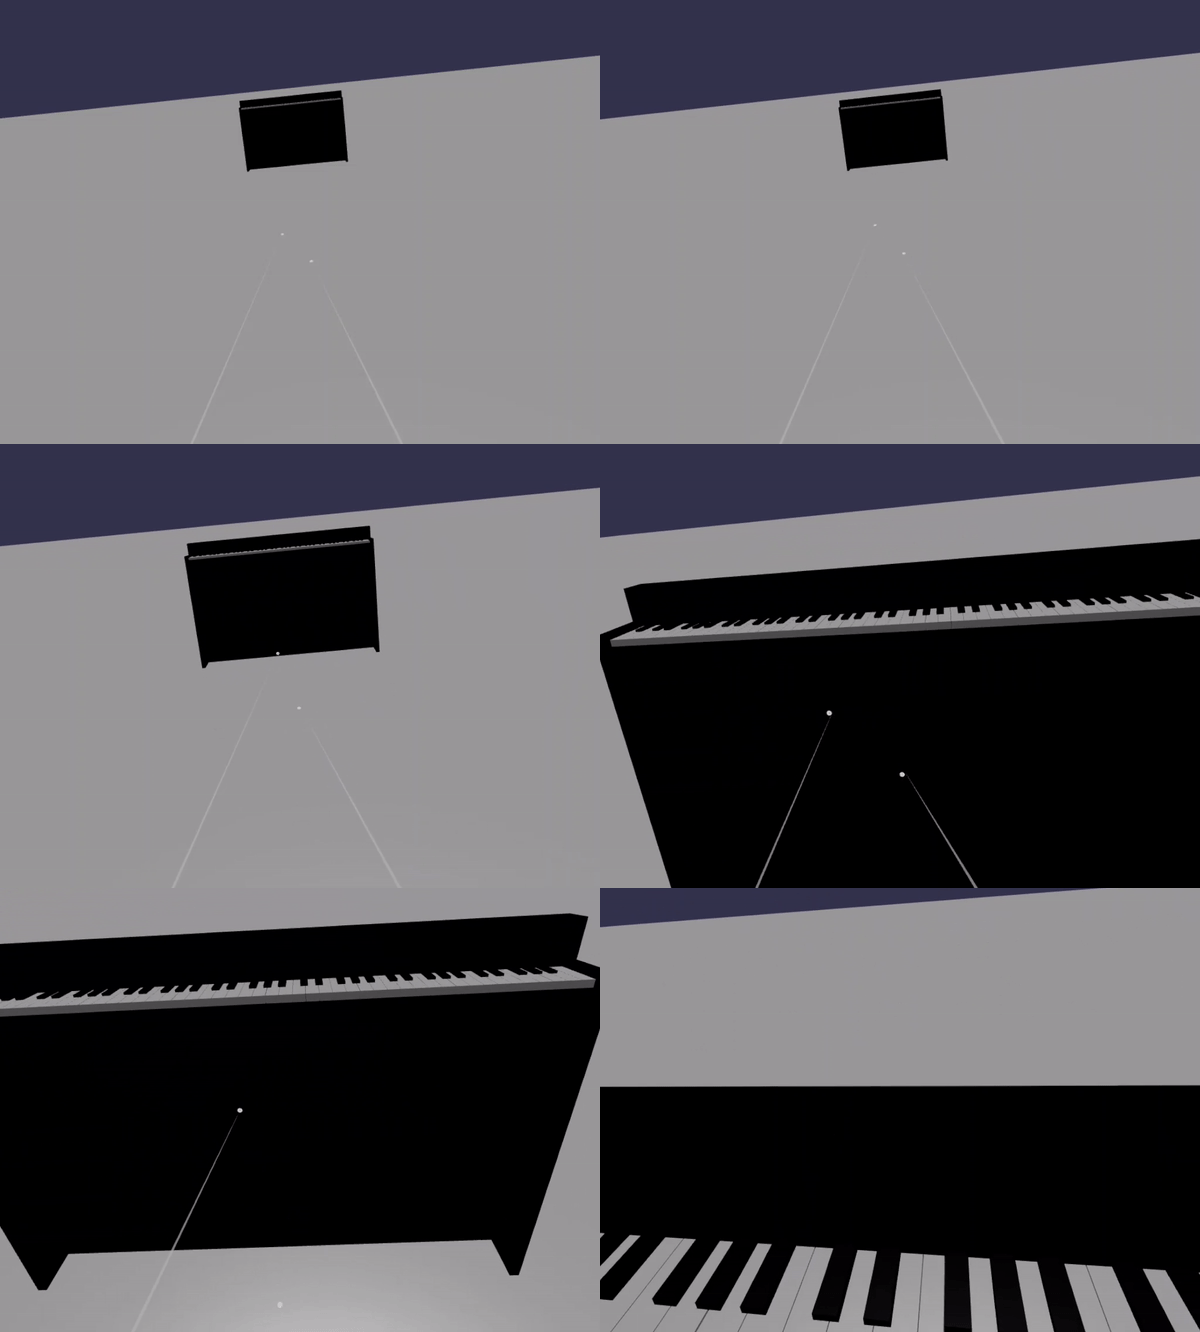
Sobald Sie sich im virtuellen Raum befinden, stellen Sie möglicherweise fest, dass das Klavier, das wir gebaut haben, extrem groß ist. In der VR-Welt können wir nur an seiner Unterkante stehen und es spielen, indem wir mit dem Mauszeiger auf die weit entfernten Tasten zeigen.

Lassen Sie uns das Klavier herunterskalieren, damit seine Größe eher einem normalen stehenden Klavier in der Realität entspricht. Dazu müssen wir eine Hilfsfunktion verwenden, mit der wir ein Gitternetz relativ zu einem Punkt im Raum skalieren können. Fügen Sie diese Funktion zu scene.js (außerhalb von
createScene()) hinzu:const scaleFromPivot = function(transformNode, pivotPoint, scale) { const _sx = scale / transformNode.scaling.x; const _sy = scale / transformNode.scaling.y; const _sz = scale / transformNode.scaling.z; transformNode.scaling = new BABYLON.Vector3(_sx, _sy, _sz); transformNode.position = new BABYLON.Vector3(pivotPoint.x + _sx * (transformNode.position.x - pivotPoint.x), pivotPoint.y + _sy * (transformNode.position.y - pivotPoint.y), pivotPoint.z + _sz * (transformNode.position.z - pivotPoint.z)); }Diese Funktion nimmt drei Parameter an:
-
transformNode: der zu skalierende
TransformNode -
pivotPoint: ein
Vector3-Objekt, das den Punkt angibt, relativ zu dem die Skalierung erfolgt - scale: der Skalierungsfaktor
-
transformNode: der zu skalierende
Wir verwenden diese Funktion, um den Klavierrahmen und die Tasten um den Faktor 0,015 zu skalieren, mit einem Pivotpunkt im Ursprung. Fügen Sie den Funktionsaufruf an die
createScene()-Funktion an, indem Sie ihn hinterkeyboard.position.y += 80;platzieren:// Put this line at the beginning of createScene() const scale = 0.015;// Put this function call after keyboard.position.y += 80; // Scale the entire piano scaleFromPivot(piano, new BABYLON.Vector3(0, 0, 0), scale);Vergessen wir nicht, auch die Kameraposition zu skalieren:
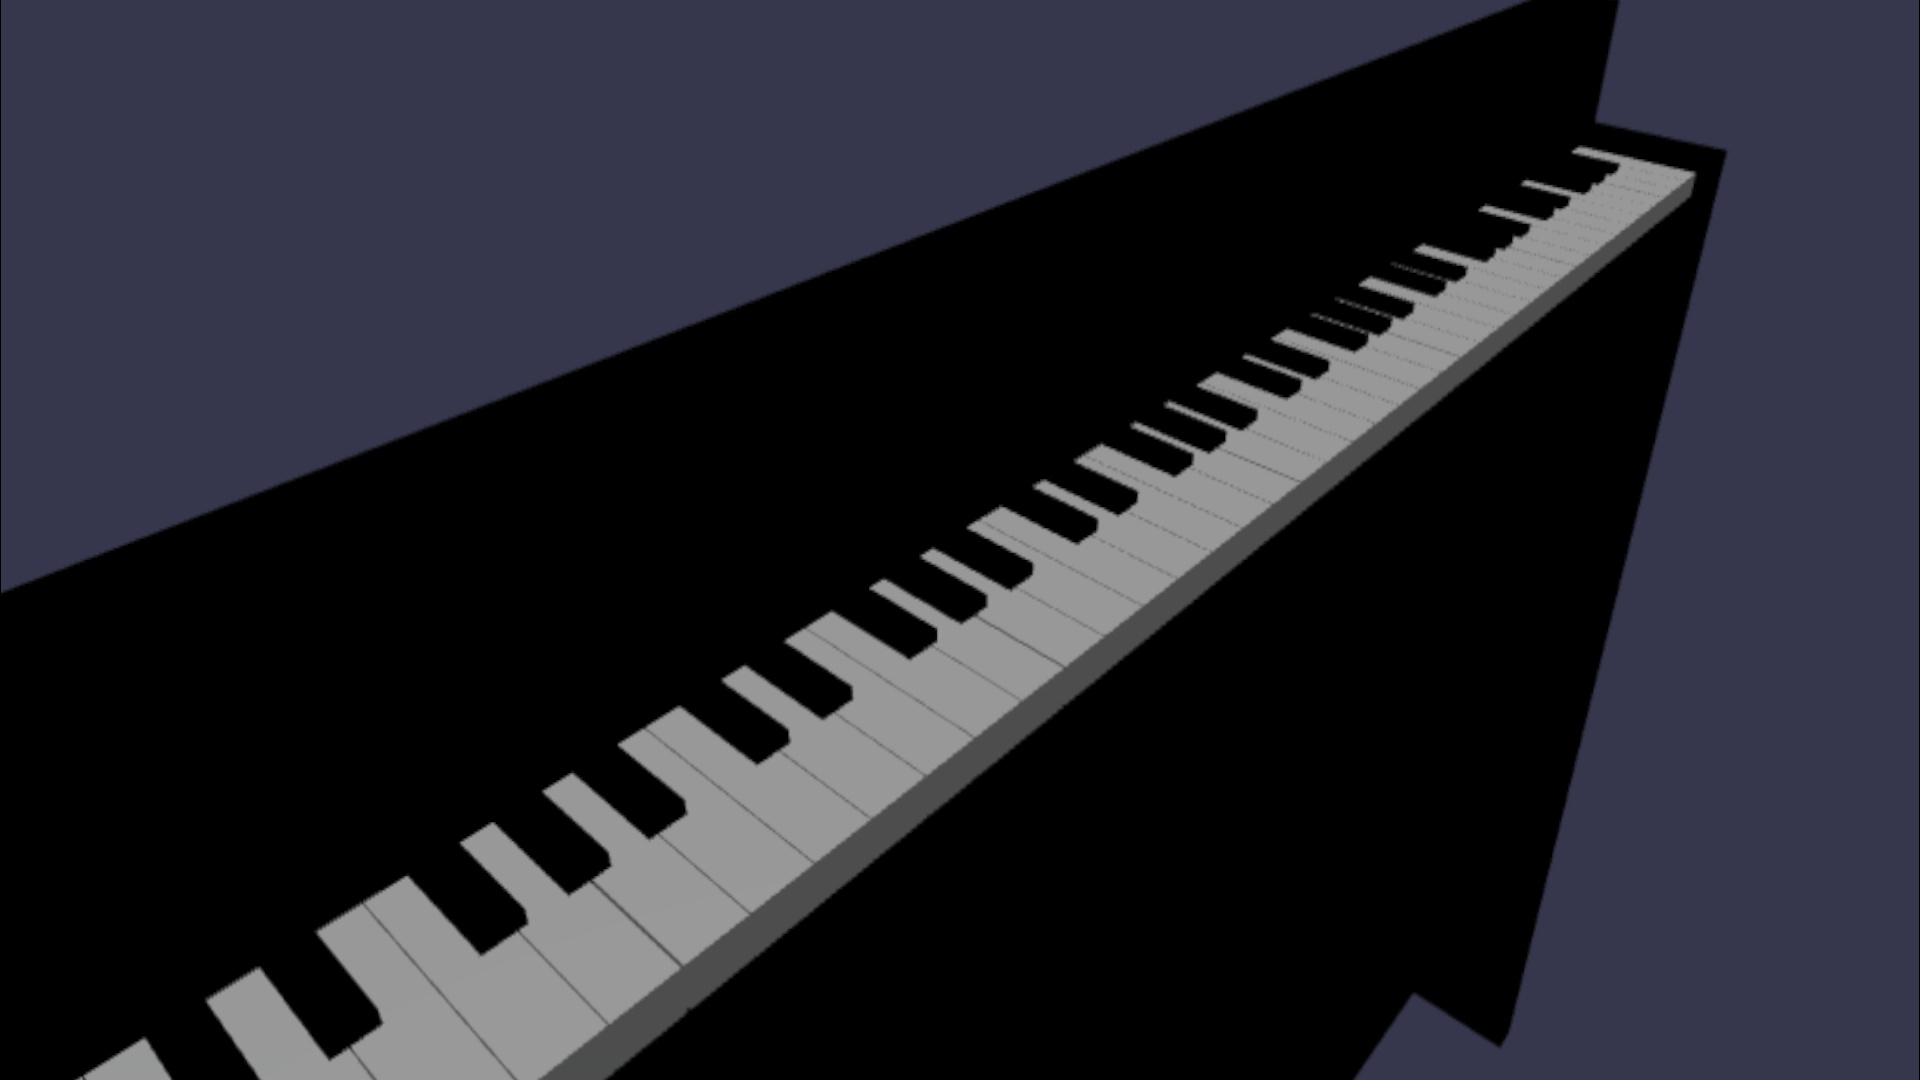
const alpha = 3*Math.PI/2; const beta = Math.PI/50; const radius = 220*scale; // scale the radius const target = new BABYLON.Vector3(0, 0, 0); const camera = new BABYLON.ArcRotateCamera("Camera", alpha, beta, radius, target, scene); camera.attachControl(canvas, true);Wenn wir den VR-Raum jetzt wieder betreten, hat das Klavier die Größe eines normalen aufrecht stehenden Klaviers.

Aktivieren von WebXR-Features
Nachdem wir das Klavier nun auf die richtige Größe im VR-Raum skaliert haben, aktivieren wir ein paar coole WebXR-Features, um unser Klavierspielerlebnis im Raum zu verbessern.
Wenn Sie das Klavier mithilfe der immersiven VR-Controller gespielt haben, ist Ihnen möglicherweise aufgefallen, dass Sie immer nur je einen Controller verwenden können. Aktivieren wir die Multizeigerunterstützung im XR-Raum mithilfe des WebXR-Features-Managers von Babylon.js.
Fügen Sie der
createScene()-Funktion den folgenden Code hinzu, nach der InitialisierungszeilexrHelper:const featuresManager = xrHelper.baseExperience.featuresManager; const pointerSelection = featuresManager.enableFeature(BABYLON.WebXRFeatureName.POINTER_SELECTION, "stable", { xrInput: xrHelper.input, enablePointerSelectionOnAllControllers: true });Außerdem finden Sie es, abhängig vom Ausgangspunkt, möglicherweise etwas schwierig, sich selbst vor dem Klavier zu positionieren. Wenn Sie mit der immersiven VR-Umgebung vertraut sind, ist Ihnen Teleportierung möglicherweise schon ein Begriff. Dies ist ein Feature, das es Ihnen erlaubt, sich sofort an einen anderen Punkt im Raum zu bewegen, indem Sie auf ihn zeigen.
Damit wir das Teleportierungsfeature von Babylon.js verwenden können, benötigen wir zuerst ein Bodengitternetz im VR-Raum, auf dem wir „stehen“ können. Fügen Sie der Funktion
createScene()den folgenden Code hinzu, um einen Boden zu erstellen:const ground = BABYLON.MeshBuilder.CreateGround("ground", {width: 400, height: 400});Die Teleportierungsunterstützung bringt außerdem ein sehr nützliches Feature mit dem Namen snap-to positions (Einrastpositionen) mit. Kurz gesagt sind Einrastpositionen bestimmte Positionen, an denen wir Benutzer landen lassen möchten.
Beispielsweise können wir eine Einrastposition vor dem Klavier einrichten, sodass sich Benutzer komfortabel an diesen Ort teleportieren können, wenn sie mit ihren Zeigern in die Nähe des Klaviers zeigen.
Fügen Sie den Code unten an, um das Teleportierungsfeature zu aktivieren und einen Einrastpunkt anzugeben:
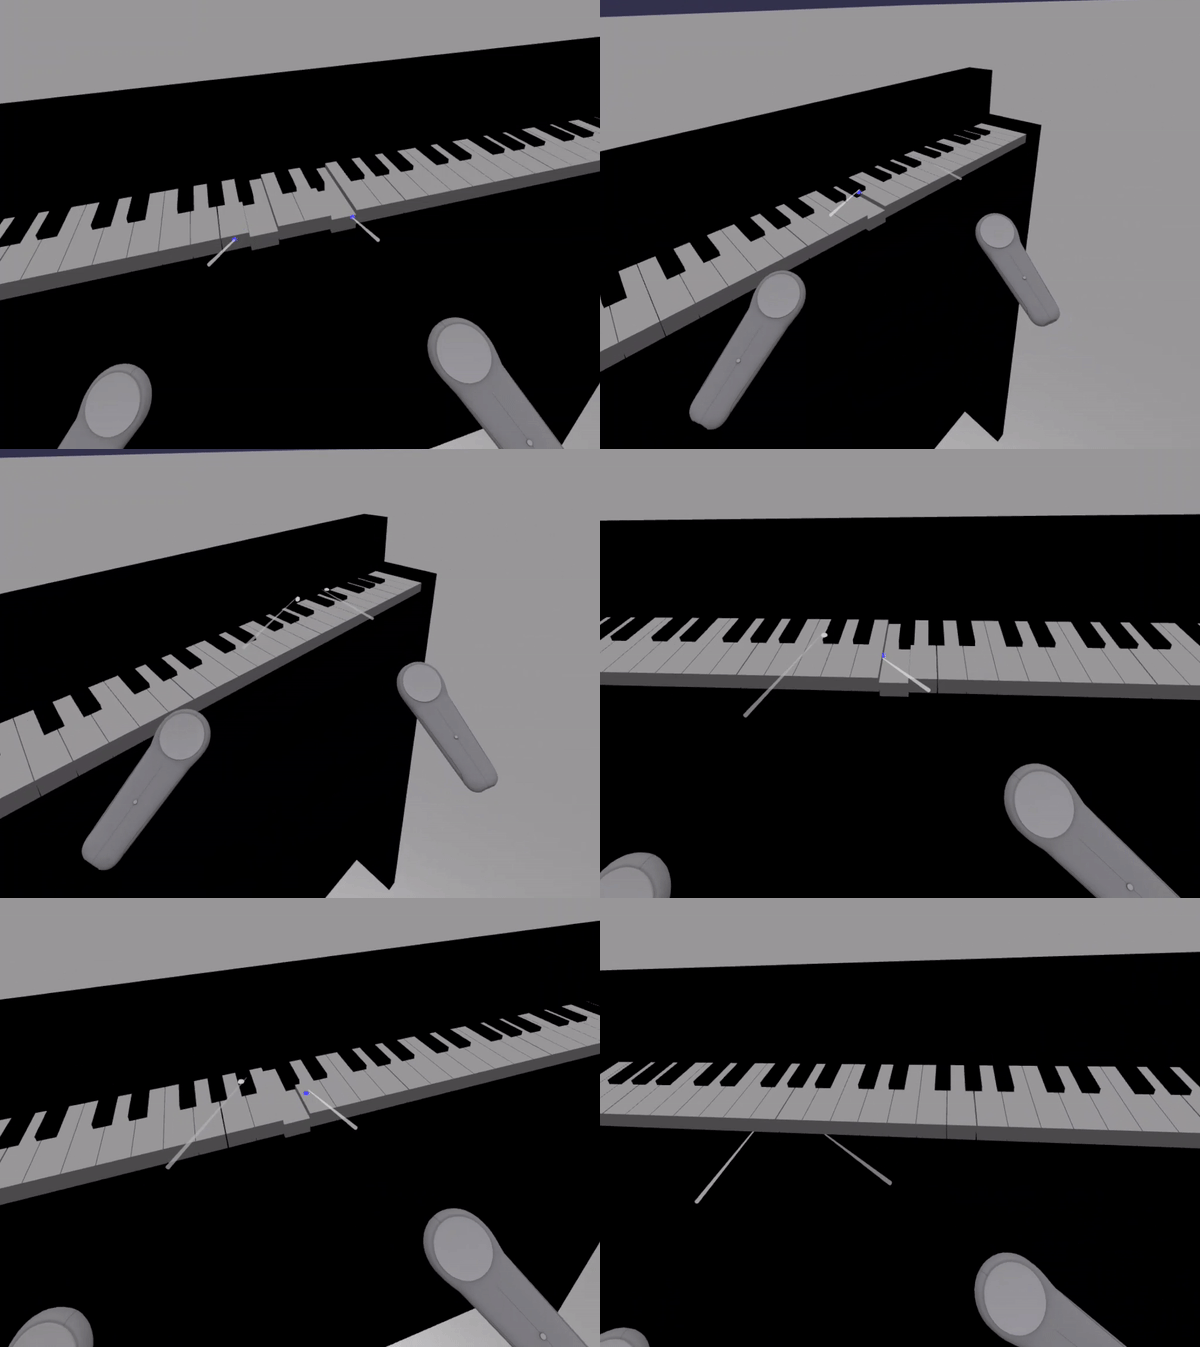
const teleportation = featuresManager.enableFeature(BABYLON.WebXRFeatureName.TELEPORTATION, "stable", { xrInput: xrHelper.input, floorMeshes: [ground], snapPositions: [new BABYLON.Vector3(2.4*3.5*scale, 0, -10*scale)], });Jetzt sollten Sie in der Lage sein, sich komfortabel mithilfe von Teleportierung zum Einrastpunkt vor dem Klavier zu positionieren, und Sie sollten zwei Töne gleichzeitig spielen können, indem Sie beide Controller verwenden.


Zusammenfassung
Herzlichen Glückwunsch! Sie haben unsere Reihe mit Babylon.js-Tutorials zur Erstellung eines Klaviers abgeschlossen und dabei Folgendes gelernt:
- Erstellen, Positionieren und Zusammenführen von Gittermodellen zum Erstellen eines Modells einer Klaviatur
- Importieren eines Babylon.js-Modells eines Klavierrahmens
- Hinzufügen von Zeigerinteraktionen zu jeder Klaviertaste
- Skalieren der Größe von Gitternetzen auf der Grundlage eines Pivotpunkts
- Aktivieren wichtiger WebXR-Features wie Teleportierung und Multizeigerunterstützung
Hier sehen Sie den endgültigen Code für scene.js und index.html:
scene.js
const buildKey = function (scene, parent, props) {
if (props.type === "white") {
/*
Props for building a white key should contain:
note, topWidth, bottomWidth, topPositionX, wholePositionX, register, referencePositionX
As an example, the props for building the middle C white key would be
{type: "white", note: "C", topWidth: 1.4, bottomWidth: 2.3, topPositionX: -0.45, wholePositionX: -14.4, register: 4, referencePositionX: 0}
*/
// Create bottom part
const bottom = BABYLON.MeshBuilder.CreateBox("whiteKeyBottom", {width: props.bottomWidth, height: 1.5, depth: 4.5}, scene);
// Create top part
const top = BABYLON.MeshBuilder.CreateBox("whiteKeyTop", {width: props.topWidth, height: 1.5, depth: 5}, scene);
top.position.z = 4.75;
top.position.x += props.topPositionX;
// Merge bottom and top parts
// Parameters of BABYLON.Mesh.MergeMeshes: (arrayOfMeshes, disposeSource, allow32BitsIndices, meshSubclass, subdivideWithSubMeshes, multiMultiMaterials)
const key = BABYLON.Mesh.MergeMeshes([bottom, top], true, false, null, false, false);
key.position.x = props.referencePositionX + props.wholePositionX;
key.name = props.note + props.register;
key.parent = parent;
return key;
}
else if (props.type === "black") {
/*
Props for building a black key should contain:
note, wholePositionX, register, referencePositionX
As an example, the props for building the C#4 black key would be
{type: "black", note: "C#", wholePositionX: -13.45, register: 4, referencePositionX: 0}
*/
// Create black color material
const blackMat = new BABYLON.StandardMaterial("black");
blackMat.diffuseColor = new BABYLON.Color3(0, 0, 0);
// Create black key
const key = BABYLON.MeshBuilder.CreateBox(props.note + props.register, {width: 1.4, height: 2, depth: 5}, scene);
key.position.z += 4.75;
key.position.y += 0.25;
key.position.x = props.referencePositionX + props.wholePositionX;
key.material = blackMat;
key.parent = parent;
return key;
}
}
const scaleFromPivot = function(transformNode, pivotPoint, scale) {
const _sx = scale / transformNode.scaling.x;
const _sy = scale / transformNode.scaling.y;
const _sz = scale / transformNode.scaling.z;
transformNode.scaling = new BABYLON.Vector3(_sx, _sy, _sz);
transformNode.position = new BABYLON.Vector3(pivotPoint.x + _sx * (transformNode.position.x - pivotPoint.x), pivotPoint.y + _sy * (transformNode.position.y - pivotPoint.y), pivotPoint.z + _sz * (transformNode.position.z - pivotPoint.z));
}
const createScene = async function(engine) {
const scale = 0.015;
const scene = new BABYLON.Scene(engine);
const alpha = 3*Math.PI/2;
const beta = Math.PI/50;
const radius = 220*scale;
const target = new BABYLON.Vector3(0, 0, 0);
const camera = new BABYLON.ArcRotateCamera("Camera", alpha, beta, radius, target, scene);
camera.attachControl(canvas, true);
const light = new BABYLON.HemisphericLight("light", new BABYLON.Vector3(0, 1, 0), scene);
light.intensity = 0.6;
const keyParams = [
{type: "white", note: "C", topWidth: 1.4, bottomWidth: 2.3, topPositionX: -0.45, wholePositionX: -14.4},
{type: "black", note: "C#", wholePositionX: -13.45},
{type: "white", note: "D", topWidth: 1.4, bottomWidth: 2.4, topPositionX: 0, wholePositionX: -12},
{type: "black", note: "D#", wholePositionX: -10.6},
{type: "white", note: "E", topWidth: 1.4, bottomWidth: 2.3, topPositionX: 0.45, wholePositionX: -9.6},
{type: "white", note: "F", topWidth: 1.3, bottomWidth: 2.4, topPositionX: -0.55, wholePositionX: -7.2},
{type: "black", note: "F#", wholePositionX: -6.35},
{type: "white", note: "G", topWidth: 1.3, bottomWidth: 2.3, topPositionX: -0.2, wholePositionX: -4.8},
{type: "black", note: "G#", wholePositionX: -3.6},
{type: "white", note: "A", topWidth: 1.3, bottomWidth: 2.3, topPositionX: 0.2, wholePositionX: -2.4},
{type: "black", note: "A#", wholePositionX: -0.85},
{type: "white", note: "B", topWidth: 1.3, bottomWidth: 2.4, topPositionX: 0.55, wholePositionX: 0},
]
// Transform Node that acts as the parent of all piano keys
const keyboard = new BABYLON.TransformNode("keyboard");
// Register 1 through 7
var referencePositionX = -2.4*14;
for (let register = 1; register <= 7; register++) {
keyParams.forEach(key => {
buildKey(scene, keyboard, Object.assign({register: register, referencePositionX: referencePositionX}, key));
})
referencePositionX += 2.4*7;
}
// Register 0
buildKey(scene, keyboard, {type: "white", note: "A", topWidth: 1.9, bottomWidth: 2.3, topPositionX: -0.20, wholePositionX: -2.4, register: 0, referencePositionX: -2.4*21});
keyParams.slice(10, 12).forEach(key => {
buildKey(scene, keyboard, Object.assign({register: 0, referencePositionX: -2.4*21}, key));
})
// Register 8
buildKey(scene, keyboard, {type: "white", note: "C", topWidth: 2.3, bottomWidth: 2.3, topPositionX: 0, wholePositionX: -2.4*6, register: 8, referencePositionX: 84});
// Transform node that acts as the parent of all piano components
const piano = new BABYLON.TransformNode("piano");
keyboard.parent = piano;
// Import and scale piano frame
BABYLON.SceneLoader.ImportMesh("frame", "https://raw.githubusercontent.com/MicrosoftDocs/mixed-reality/docs/mixed-reality-docs/mr-dev-docs/develop/javascript/tutorials/babylonjs-webxr-piano/files/", "pianoFrame.babylon", scene, function(meshes) {
const frame = meshes[0];
frame.parent = piano;
});
// Lift the piano keyboard
keyboard.position.y += 80;
// Scale the entire piano
scaleFromPivot(piano, new BABYLON.Vector3(0, 0, 0), scale);
const pointerToKey = new Map()
const pianoSound = await Soundfont.instrument(new AudioContext(), 'acoustic_grand_piano');
scene.onPointerObservable.add((pointerInfo) => {
switch (pointerInfo.type) {
case BABYLON.PointerEventTypes.POINTERDOWN:
// Only take action if the pointer is down on a mesh
if(pointerInfo.pickInfo.hit) {
let pickedMesh = pointerInfo.pickInfo.pickedMesh;
let pointerId = pointerInfo.event.pointerId;
if (pickedMesh.parent === keyboard) {
pickedMesh.position.y -= 0.5; // Move the key downward
pointerToKey.set(pointerId, {
mesh: pickedMesh,
note: pianoSound.play(pointerInfo.pickInfo.pickedMesh.name) // Play the sound of the note
});
}
}
break;
case BABYLON.PointerEventTypes.POINTERUP:
let pointerId = pointerInfo.event.pointerId;
// Only take action if the released pointer was recorded in pointerToKey
if (pointerToKey.has(pointerId)) {
pointerToKey.get(pointerId).mesh.position.y += 0.5; // Move the key upward
pointerToKey.get(pointerId).note.stop(); // Stop the sound of the note
pointerToKey.delete(pointerId);
}
break;
}
});
const xrHelper = await scene.createDefaultXRExperienceAsync();
const featuresManager = xrHelper.baseExperience.featuresManager;
featuresManager.enableFeature(BABYLON.WebXRFeatureName.POINTER_SELECTION, "stable", {
xrInput: xrHelper.input,
enablePointerSelectionOnAllControllers: true
});
const ground = BABYLON.MeshBuilder.CreateGround("ground", {width: 400, height: 400});
featuresManager.enableFeature(BABYLON.WebXRFeatureName.TELEPORTATION, "stable", {
xrInput: xrHelper.input,
floorMeshes: [ground],
snapPositions: [new BABYLON.Vector3(2.4*3.5*scale, 0, -10*scale)],
});
return scene;
}
index.html
<html>
<head>
    <title>Babylon Template</title>
    <script src="https://cdn.babylonjs.com/babylon.js"></script>
    <script src="scene.js"></script>
    <script src="soundfont-player.min.js"></script>
    <style>
            body,#renderCanvas { width: 100%; height: 100%;}
    </style>
</head>
<body>
<canvas id="renderCanvas"></canvas>
<script>
const canvas = document.getElementById("renderCanvas"); // Get the canvas element
const engine = new BABYLON.Engine(canvas, true); // Generate the BABYLON 3D engine
// Register a render loop to repeatedly render the scene
createScene(engine).then(sceneToRender => {
engine.runRenderLoop(() => sceneToRender.render());
});
// Watch for browser/canvas resize events
window.addEventListener("resize", function () {
engine.resize();
});
</script>
</body>
</html>
Nächste Schritte
Weitere Informationen zur Mixed Reality-Entwicklung mit JavaScript finden Sie unter Übersicht über die JavaScript-Entwicklung.