你当前正在访问 Microsoft Azure Global Edition 技术文档网站。 如果需要访问由世纪互联运营的 Microsoft Azure 中国技术文档网站,请访问 https://docs.azure.cn。
在 iOS SDK 中显示功能信息(预览版)
注意
Azure Maps iOS SDK 停用
适用于 iOS 的 Azure Maps 本机 SDK 现已弃用,将于 2025 年 3 月 31 日停用。 为了避免服务中断,请在 2025 年 3 月 31 日之前迁移到 Azure Maps Web SDK。 有关详细信息,请参阅 Azure Maps iOS SDK 迁移指南。
空间数据通常使用点、线条和多边形来表示。 这种数据通常具有与之关联的元数据信息。 例如,点可能代表餐馆的位置,而有关该餐馆的元数据可能是餐馆的名称、地址和提供的美食种类。 可作为 GeoJSON 的属性 Feature 添加这一元数据。 下面的代码使用值为 "Hello World!" 的 title 属性创建一个简单的点功能。
// Create a data source and add it to the map.
let source = DataSource()
map.sources.add(source)

// Create a point feature.
let feature = Feature(Point(CLLocationCoordinate2D(latitude: -122.33, longitude: 47.64)))

// Add a property to the feature.
feature.addProperty("title", value: "Hello World!")

// Create a point feature, pass in the metadata properties, and add it to the data source.
source.add(feature: feature)
有关如何创建数据并将其添加到地图的详细信息,请参阅创建数据源。
当用户与地图上的功能交互时,可以使用事件来回应这些操作。 常见的情况是显示一条消息,其中包含用户与之交互的功能的元数据属性。 azureMap(_:didTapOn:) 事件是用于检测用户在地图上点击功能时所使用的主要事件。 还有一个是 azureMap(_:didLongPressOn:) 事件。 向地图中添加委托时,可以将该事件限制为单个层,方法是通过要限制到其中的层的 ID 传入。 如果未传入任何层 ID,则在地图上点击任意功能都将触发此事件,无论功能位于哪个层。 下面的代码会创建一个符号层,用于在地图上呈现点数据,然后添加一个限制为此符号层的委托,它会处理 azureMap(_:didTapOn:) 事件。
// Create a symbol and add it to the map.
let layer = SymbolLayer(source: source)
map.layers.addLayer(layer)

// Add the delegate to the map to handle feature tap events on the layer only.
map.events.addDelegate(self, for: [layer.id])
func azureMap(_ map: AzureMap, didTapOn features: [Feature]) {
    // Retrieve the title property of the feature as a string.
    let title = features.first?.properties["title"] as? String

    // Do something with the title.
}
显示警报
警报是向用户显示信息的最简单方法之一,在所有通常支持的 iOS 版本中都提供。 如果你想要快速让用户了解他们点击的内容,警报可能是一个不错的选择。 下面的代码展示了如何在 azureMap(_:didTapOn:) 事件中使用警报。
func azureMap(_ map: AzureMap, didTapOn features: [Feature]) {
    // Retrieve the title property of the feature as a string.
    let title = features.first?.properties["title"] as? String

    // Display an alert with the title information.
    let alert = UIAlertController(title: title, message: nil, preferredStyle: .alert)
    alert.addAction(UIAlertAction(title: "OK", style: .cancel))
    present(alert, animated: true)
}
除了警报以外,还有很多其他方法可以呈现功能的元数据属性,例如:
- 在地图上添加自定义视图
- 在地图上添加子视图控制器
- 在当前视图控制器上以模式方式呈现另一个视图控制器。
- 导航到另一个视图控制器。
显示弹出窗口
Azure Maps iOS SDK 提供了一个 Popup 类,使用户可以轻松创建定位到地图上某个位置的 UI 注释元素。 对于弹出窗口,必须将自调整大小视图传入弹出窗口的 content 选项。 下面是一个简单的视图示例,可以在白色背景上显示深色文本。
class PopupTextView: UIView {
    private let textLabel: UILabel = {
        let label = UILabel()
        label.translatesAutoresizingMaskIntoConstraints = false
        label.numberOfLines = 0
        label.textColor = UIColor(red: 34 / 255, green: 34 / 255, blue: 34 / 255, alpha: 1)
        label.font = .systemFont(ofSize: 18)
        return label
    }()

    override init(frame: CGRect) {
        super.init(frame: frame)
        setup()
    }

    required init?(coder: NSCoder) {
        super.init(coder: coder)
    }

    override func awakeFromNib() {
        super.awakeFromNib()
        setup()
    }

    private func setup() {
        backgroundColor = .white
        addSubview(textLabel)

        NSLayoutConstraint.activate([
            textLabel.topAnchor.constraint(equalTo: topAnchor, constant: 10),
            textLabel.bottomAnchor.constraint(equalTo: bottomAnchor, constant: -10),
            textLabel.leadingAnchor.constraint(equalTo: leadingAnchor, constant: 10),
            textLabel.trailingAnchor.constraint(equalTo: trailingAnchor, constant: -25)
        ])
    }

    func setText(_ text: String) {
        textLabel.text = text
    }
}
以下代码创建一个弹出窗口,将其添加到地图中。 点击某个功能时,将使用 PopupTextView 类显示 title 属性,并且布局的底部中心定位在地图上的指定位置。
// Create a popup and add it to the map.
let popup = Popup()
map.popups.add(popup)

// Set popup to the class property to use in events handling later.
self.popup = popup
func azureMap(_ map: AzureMap, didTapOn features: [Feature]) {
    guard let popup = popup, let feature = features.first else {
        // Popup has been released or no features provided
        return
    }

    // Create the custom view for the popup.
    let customView = PopupTextView()

    // Set the text to the custom view.
    let text = feature.properties["title"] as! String
    customView.setText(text)

    // Get the position of the tapped feature.
    let position = Math.positions(from: feature).first!

    // Set the options on the popup.
    popup.setOptions([
        // Set the popups position.
        .position(position),

        // Set the anchor point of the popup content.
        .anchor(.bottom),

        // Set the content of the popup.
        .content(customView)

        // Optionally, hide the close button of the popup.
        // .closeButton(false)

        // Optionally offset the popup by a specified number of points.
        // .pointOffset(CGPoint(x: 10, y: 10))
    ])

    // Open the popup.
    popup.open()
}
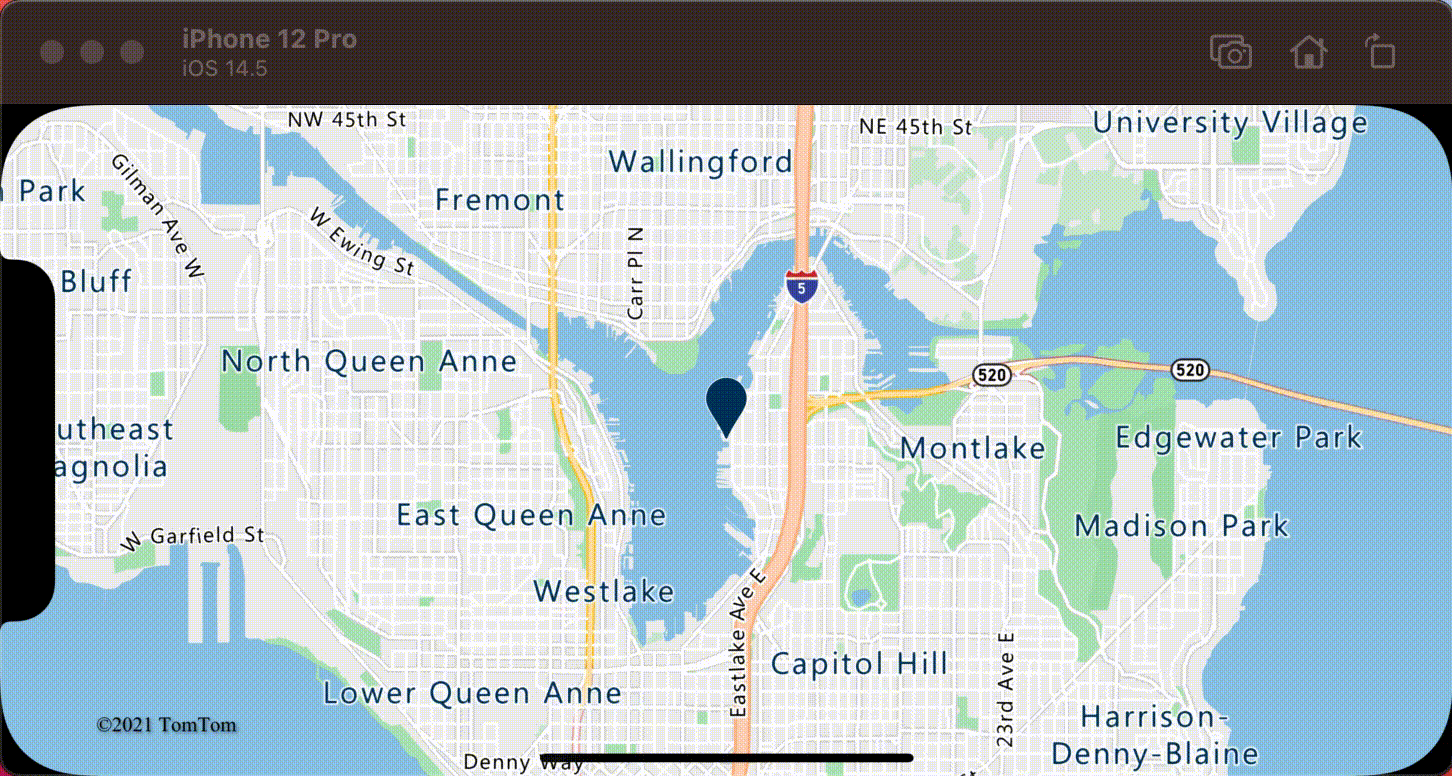
以下屏幕截图显示了点击功能时出现的弹出窗口,并在地图移动时固定在其在地图上的指定位置。
其他信息
要将更多数据添加到地图,请执行以下操作: