Restrict the ability to access OneDrive files in Dynamics 365 Remote Assist
Tip
Dynamics 365 Remote Assist customers now have access to Remote Assist in Microsoft Teams mobile. Learn more: Collaborate with other users and Use spatial annotations on Teams.
If you have a scenario where you need to protect your company information, you can restrict the ability for Microsoft Dynamics 365 Remote Assist users from accessing OneDrive files. Restricting the ability to access OneDrive files is also helpful in a situation where a service account is shared between users and you want to prevent users from accessing each other's files.
When you restrict the ability to access OneDrive files:
- HoloLens users will see the Files tab, but no files will be visible and they'll see this message: "We can't connect to OneDrive."
- Users of the mobile app will not be able to access OneDrive files.
Restrict access to OneDrive files
Sign in to the Microsoft 365 admin center as an admin.
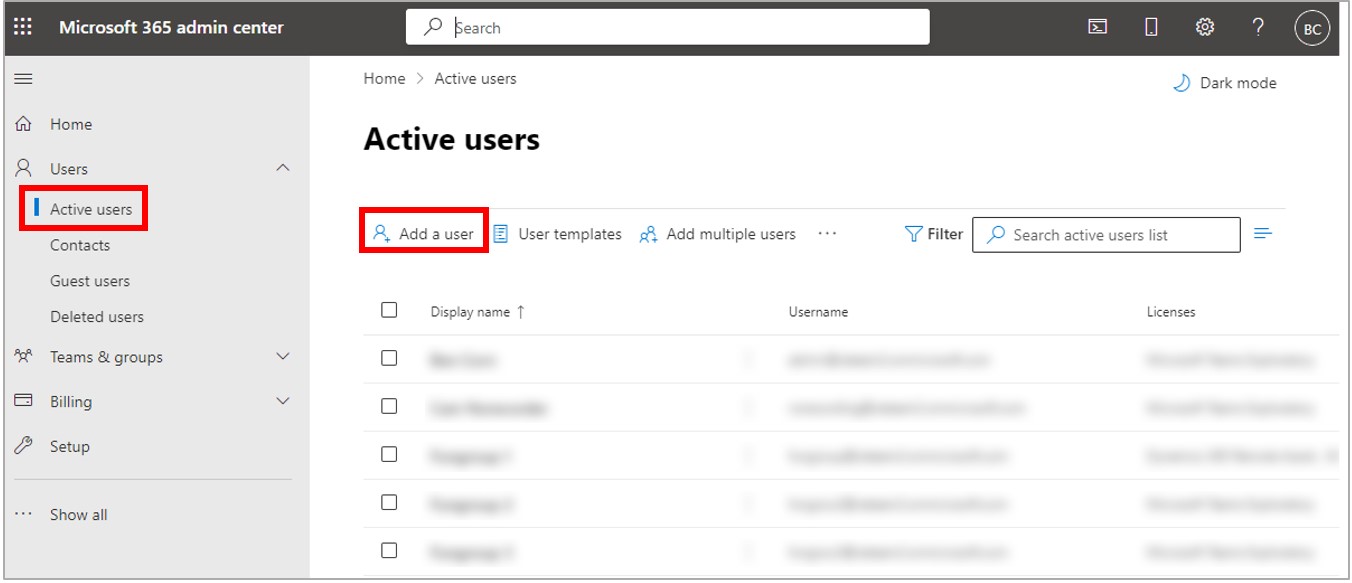
In the left pane, select Users > Active users, and then select Add a user.
Important
It's critical to create a NEW ACCOUNT to make sure that the user will not have access to the licenses required to access OneDrive files.
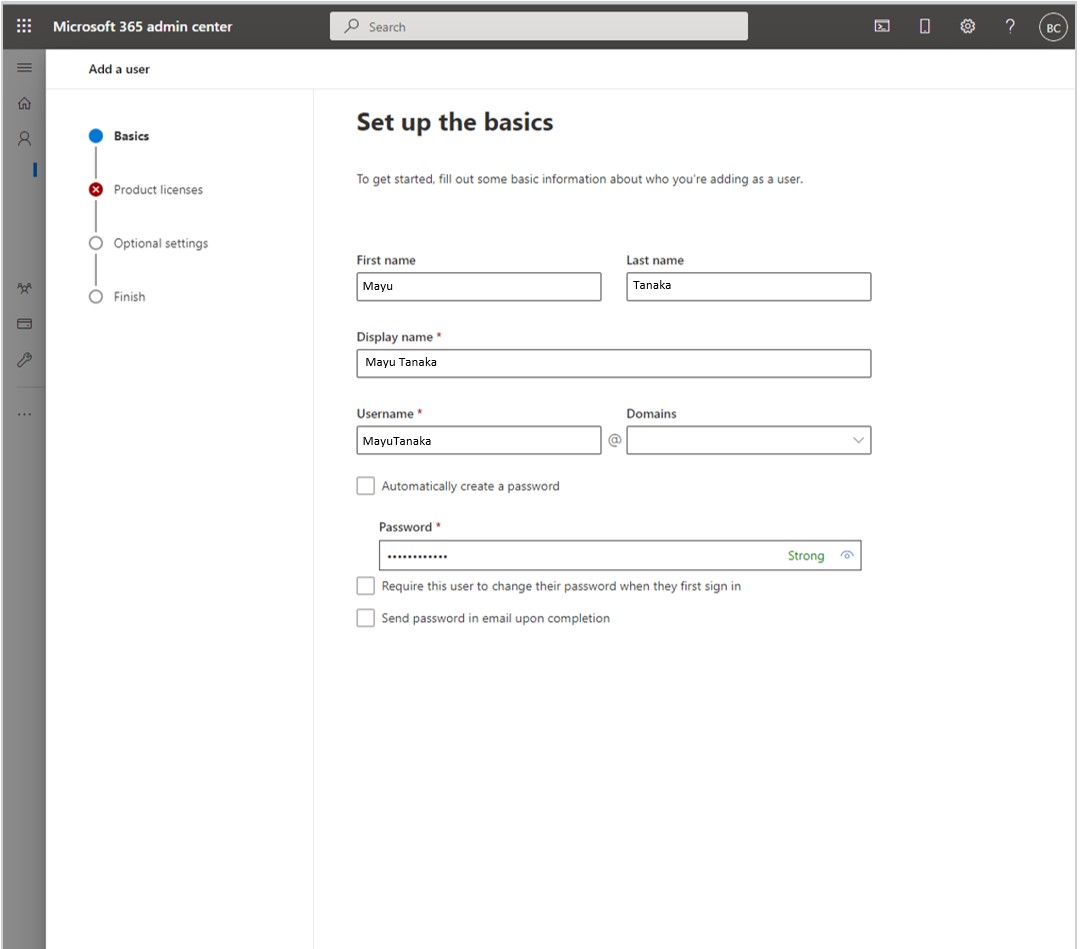
Fill out the user information, and then select Next.
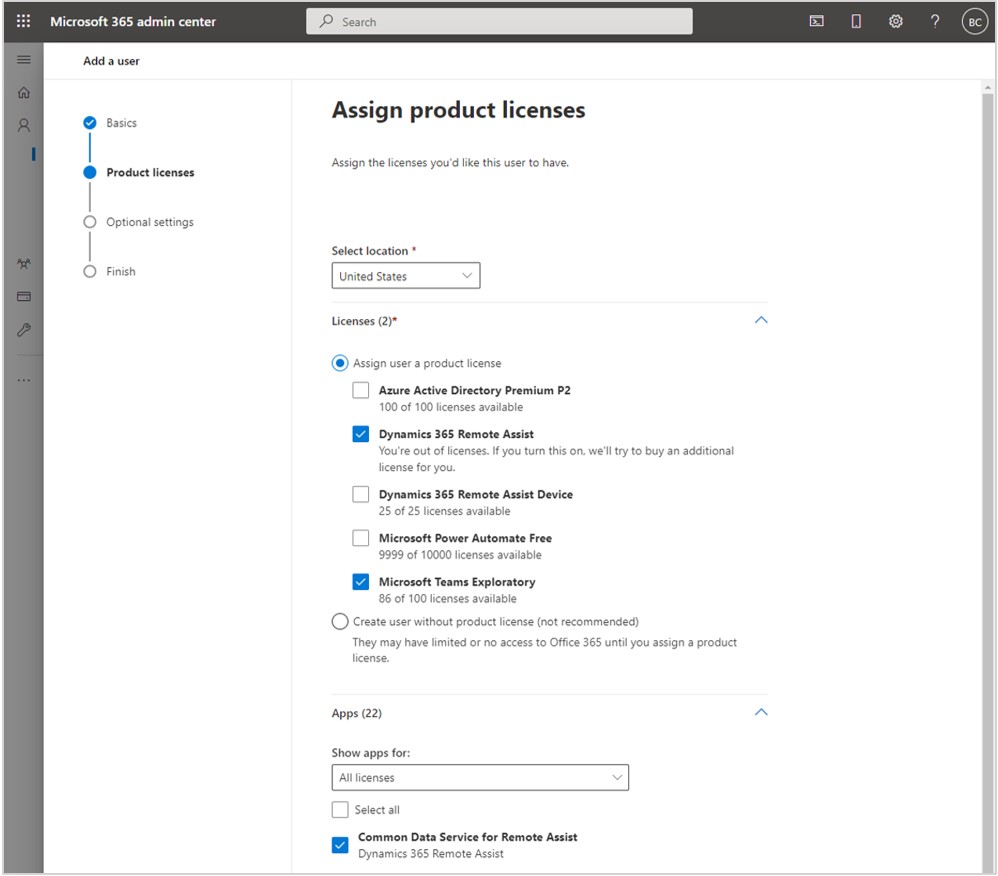
Select the Dynamics 365 Remote Assist and Microsoft Teams license check boxes.
Note
The name of the Teams license may vary based on the products you have installed.
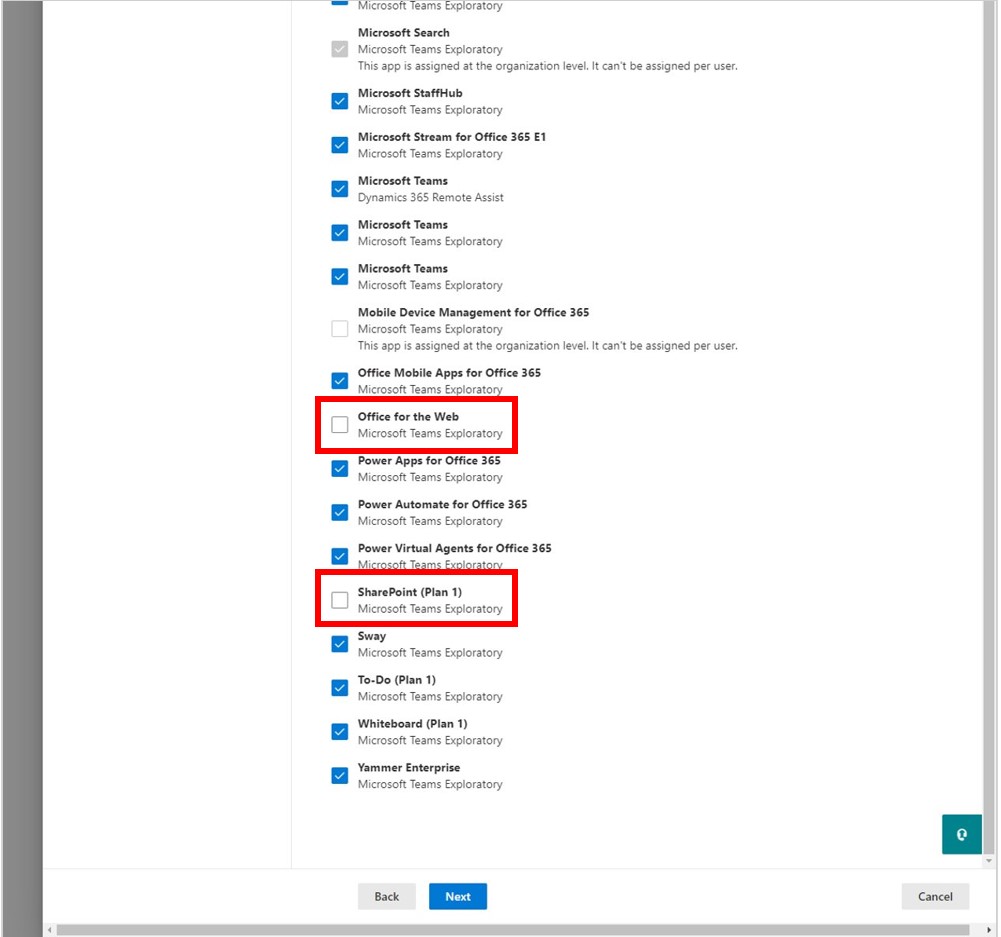
Clear the Office for the Web and SharePoint license check boxes, and then select Next.
In the Optional settings section, leave the default value (no administration access), and then select Next.
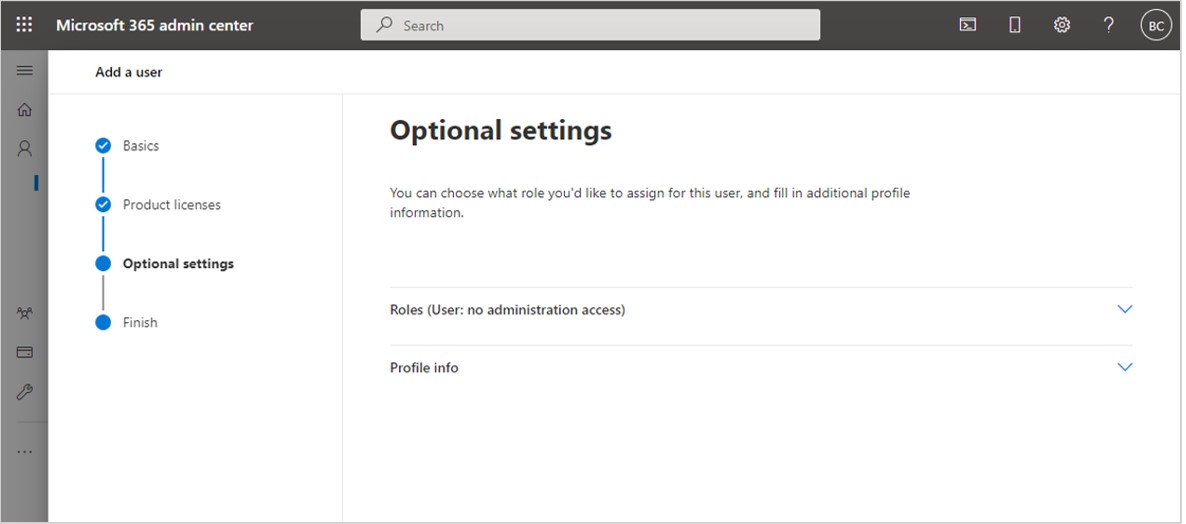
In the Review and finish section, make sure the information is correct, and then select Finish adding when you're ready.
The system confirms if the user was added correctly. Select Close.