Forecast with signals (preview)
[This article is prerelease documentation and is subject to change.]
One way to improve the accuracy of a forecast is to include input signal data beyond just historical sales. You can add signals in your forecast models by including a Signal step. This type of step lets you include any signal as input data. You can then use the new Forecast with signals step to combine the signal input and main input to create the forecast.
This article explains how to set up a forecast model that includes both a primary input (such as historical sales) and a signal input (such as inflation or weather data).
Important
- This is a preview feature.
- Preview features aren’t meant for production use and might have restricted functionality. These features are subject to supplemental terms of use, and are available before an official release so that customers can get early access and provide feedback.
Set up a forecast model that includes both input and a signal
Follow these steps to set up a forecast that includes both input and a signal.
Create a new forecast profile as described in Create and manage forecast profiles.
On the Select a forecasting model preset page, select None.
After you create and save the profile, on the Forecast model tab, set up your model in the following way. (Learn more in Design forecast models.)
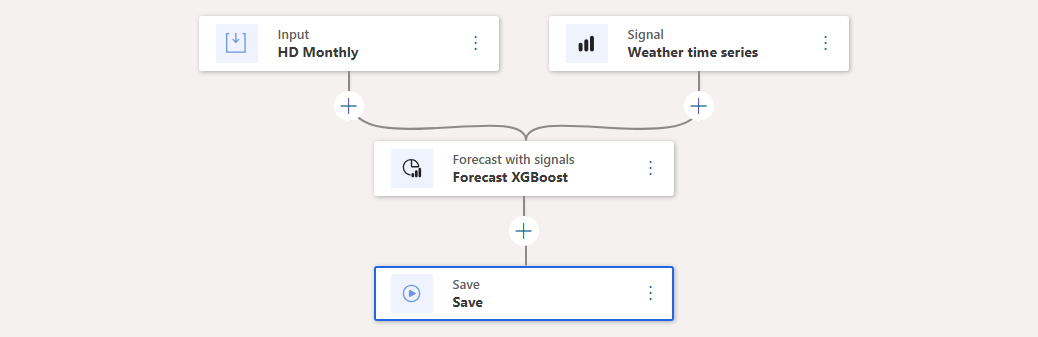
- Use an Input step to set up your primary time series.
- Add a Signal step to set up your signal time series in a parallel branch.
- Add other steps as required to condition the data in each branch.
- Add a Forecast with signals step to combine the two branches.
- Complete the model by adding a Save step.
On the Action Pane, select Save.
