Add condition steps to sequences
Use adaptive sequences in sales accelerator to define conditions steps that determines the path of a sequence.
Configure adaptive sequence steps
Use adaptive sequences to define conditions for the steps in a sequence. These conditions determine the course of action the sequence will take after the condition is either met or not. After the result of a condition is determined—for example, whether a user opened an email (Yes) or didn't (No)—the sequence proceeds as you designed it. Conditions are available for the following activities:
Prerequisite
Conditions in the adaptive sequences work as defined only when Sales Insights Adaptive sequence timeout flow process is enabled. To enable the process, follow these steps:
Go to Power Automate and change the environment to your organization.
Select Solutions and then select Default Solution.

On the Default Solution page, select the view as All and search for Sales Insights Adaptive sequence timeout flow process.

On the Sales Insights Adaptive sequence timeout flow page, select Turn on.

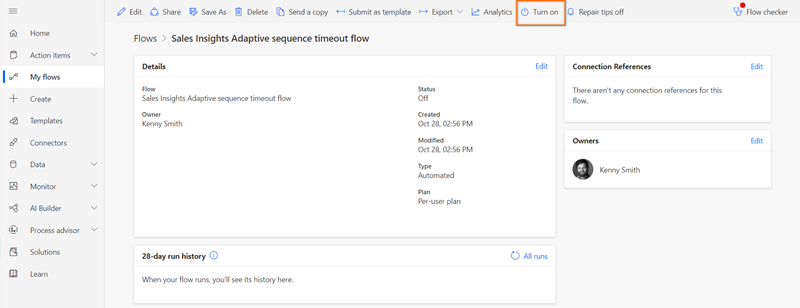
The process is enabled.
Define conditions for an email activity
When you add an email activity to a sequence and select Add (+), the Add an action or other element dialog box displays. Select the Conditions tab, where you determine the next course of action in the sequence.
When the seller skips an email activity that includes a condition, the flow follows the No path.
Important
- You need to configure the email engagement feature in your organization before you start using conditions for the email activity. The interactions that customers have with emails are displayed in the condition list.
- Enable sequence activities to create conditions for email activities.
The following table lists the interactions that are available in email conditions.
| Interaction | Description |
|---|---|
| Email open | If a customer opens the email, the flow follows the Yes path. If not, the No path is followed. |
| Recipient reply | If a customer replies to the email, the flow follows the Yes path. If not, the No path is followed. |
| Link opened | If a customer opens a link that's included in the email, the flow follows the Yes path. If not, the No path is followed. |
| Attachment downloaded | If a customer downloads an attachment that's linked to your email, the flow follows the Yes path. If not, the No path is followed. |
| Advanced email conditions | Define condition to choose whether only one email result must occur or all email results must occur in order to advance to the next step. More information: Advanced email conditions |
Let's define a flow so that if a customer opens your email, the next step is to schedule a phone call, and if the customer doesn't open your email, the next step is to send a reminder email.
Select Add (+) after the email activity.
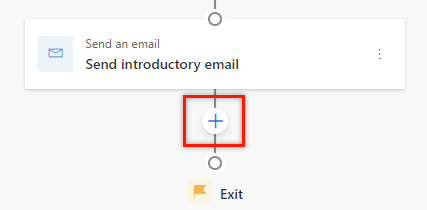
In the Add an action or other element dialog box, select the Conditions tab. A list of interactions that are defined in the email engagement feature is displayed.
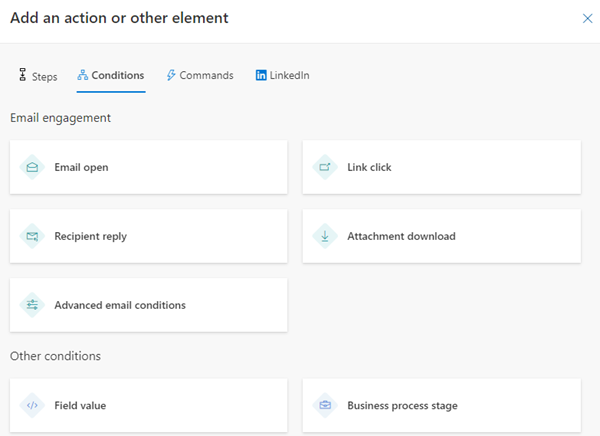
Select Email open.
On the Email open pane, configure the time limit for satisfying the condition before proceeding to the next step.
In the following example, we configure the wait time as one day. This establishes the following:- If the customer opens the email within the day, the Yes path is initiated and the sequence moves to the next step after a day has passed.
If you don't want to wait a day to move to the next step in the Yes path, select the If the action is completed within the time limit, the sequence will move to the yes path checkbox. - If the customer doesn't open the email within the time limit, the No path is executed.
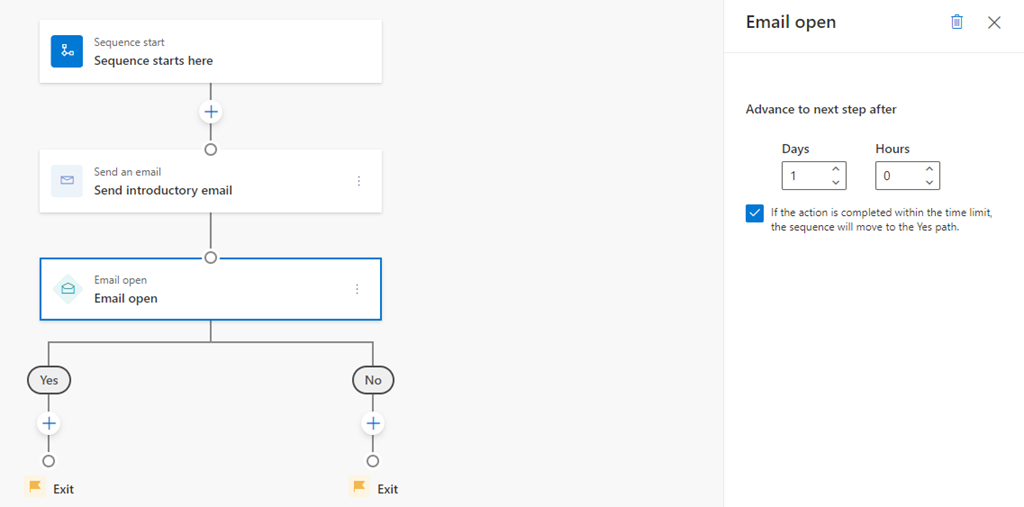
- If the customer opens the email within the day, the Yes path is initiated and the sequence moves to the next step after a day has passed.
Close the email open pane.
The condition is created.To schedule a phone call activity in the Yes path to talk with the customer, do the following:
Select Add (+), and then under the Steps tab, select Make a phone call.
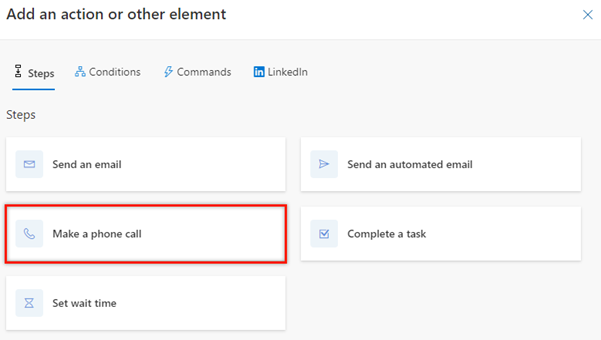
Configure the phone call activity, and then close the pane.
The phone call activity is created.
To send a follow-up email in the No path when the customer doesn't respond within the time limit of one day, do the following:
Select Add (+), and then under the Steps tab, select Send an email.
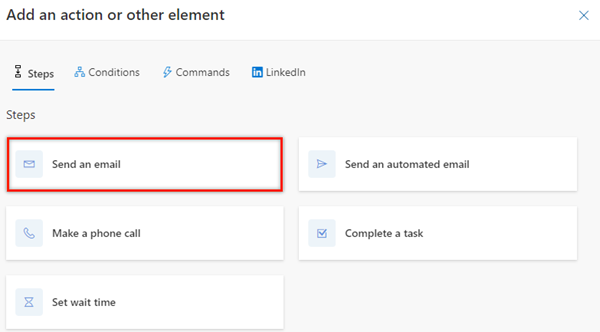
Configure the email activity, and then close the pane.
The email activity is created.
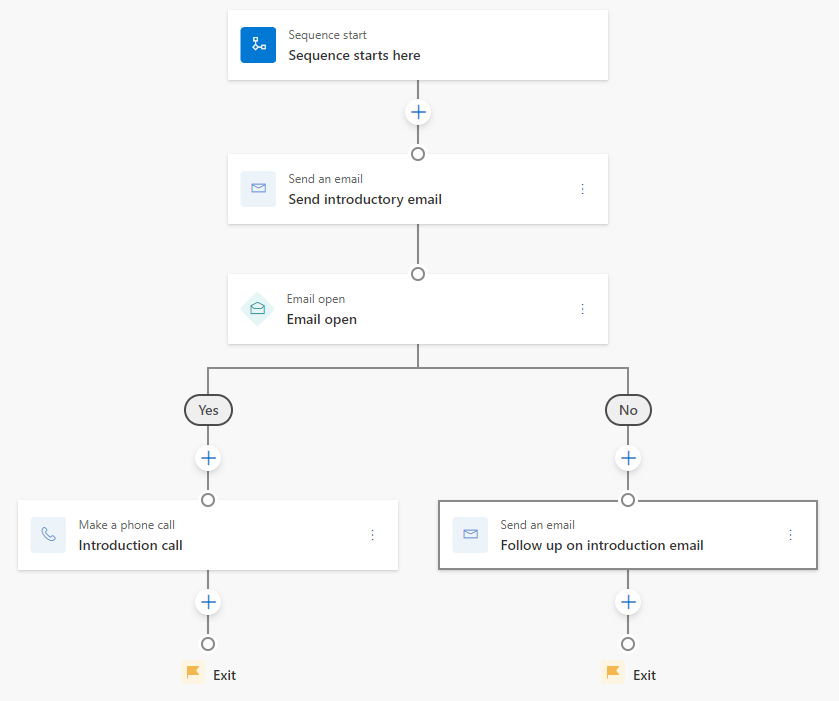
Note
You can't delete a step that's followed by a condition. To delete such a step, remove the condition and then delete the step.
Advanced email conditions
The Advanced email conditions step lets you define next course of action when a set of actions—or any of the selected actions—is performed by the customer on the email step.
Important
- You need to configure the email engagement feature in your organization before you start using conditions for the email activity. The interactions that customers have with emails are displayed in the condition list.
- Enable sequence activities to create conditions for email activities.
Let's define a flow where you want to trigger the next step when a customer opens the email and downloads the attachment.
After adding the Email activity, select + (Add).
On the Add an action or other element dialog box, go to the Conditions tab and select Advanced email conditions.
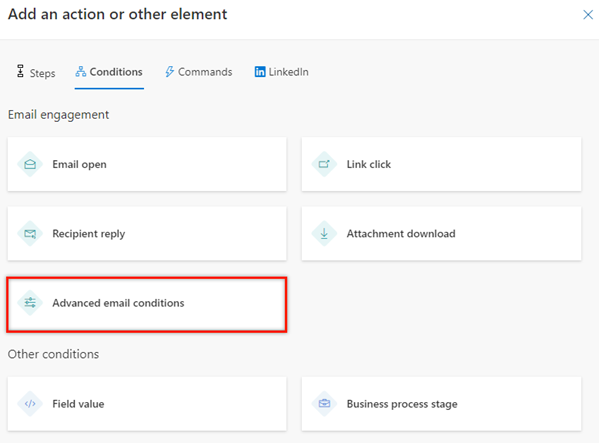
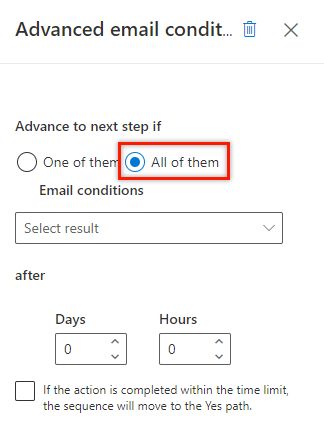
In the Advanced email conditions pane, select the All of them option. In this example, we're defining the condition to go to Yes path when a customer opens the email and downloads the attachment.
Note
Select the One of them option if you want to trigger the Yes path when only one of the selected actions is performed.
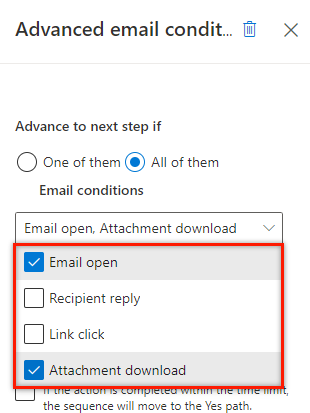
From the Select results dropdown list, select the Email open and Attachment downloaded checkboxes.
When a customer performs both of these actions on the email, the Yes path is initiated.
Note
If you've selected the One of them option, the Yes path will be initiated when the email is opened or the attachment is downloaded.
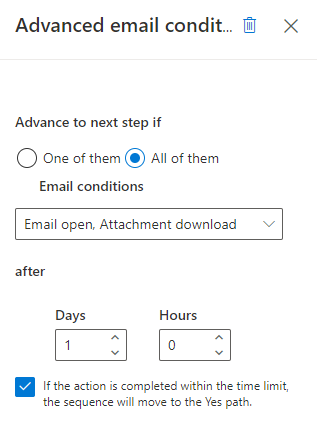
Select the duration in days and hours after which you want to initiate the Yes path when a customer performs the selected actions. If the customer doesn't perform these actions within the time limit, the No path is initiated.
If you don't want to wait and move to the next step in the Yes path after a customer performs the selected actions, select the If the action is completed within the time limit, the sequence will move to the Yes path. checkbox.
Close the Advanced email conditions pane.
The advanced email conditions step is created.
You can continue to create the steps in the Yes and No paths, according to your requirements.
Define conditions for a phone call activity
When you add phone call activity to the sequence and select Add (+), the Add an action or other element dialog box displays. Select the Conditions tab, where you determine the next course of action in the sequence. The actions that can be performed on a phone call activity are displayed in the Advanced call conditions step. However, these actions vary from organization to organization depending on their requirements, and are added by the administrator.
The Advanced call conditions step lets you select multiple results, when only one result must occur to advance to the Yes path.
When the seller skips a phone call activity that includes a condition, the flow follows the No path.
Note
To learn about adding custom status for your organization, see Define status reason transitions for the Case or custom tables.
Let's define a flow where you want to initiate the Yes path when the customer makes or receives a call.
Select Add (+) after the phone call activity.
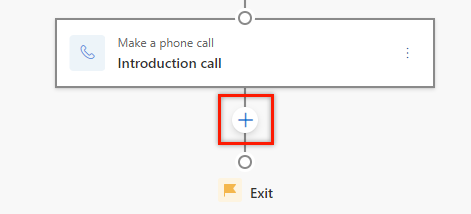
In the Add an action or other element dialog box, go to the Conditions tab and then select Advanced phone conditions.
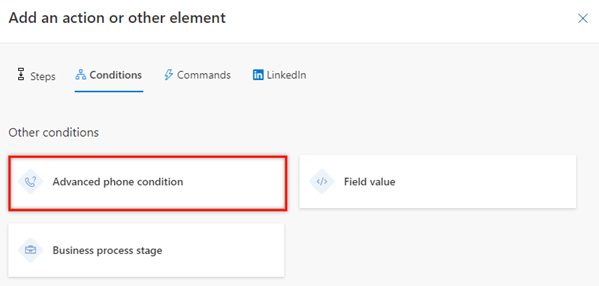
In the Advanced phone conditions pane, from the Select results dropdown list, select the Made and Received options.
When any of the selected activities is completed, the Yes path will be initiated.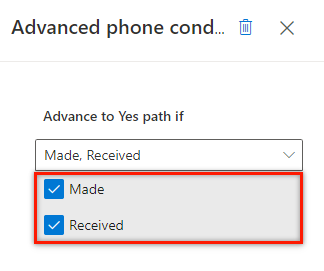
Close the Advanced phone conditions pane.
The advanced call conditions step is created.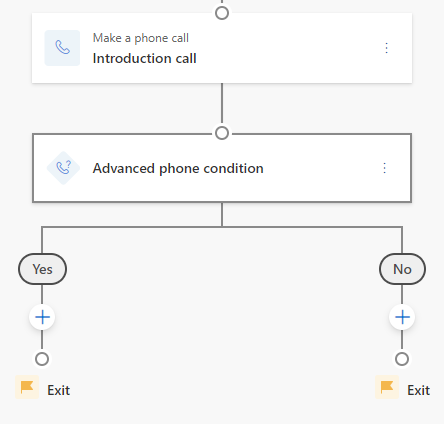
You can continue to create the steps in the Yes and No paths, according to your requirements.
Define conditions based on a field value
When you add a condition based on a field value, you determine the next course of action for the sequence according to the value given in the field. The available field values—including related entities—are based on the type of record you've selected for the sequence.
In the the Add an action or other element dialog box, go to the Conditions tab, choose a field, and create a condition. The sequence follows the Yes path when the condition is true and the No path when the condition is false.
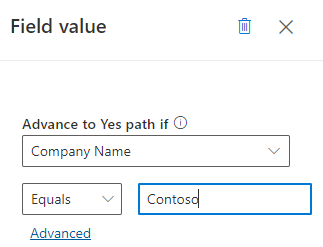
In the following example, let's set the sequence to follow the Yes path when a lead's company name is Contoso.
Select Add (+) after an activity.
In the Add an action or other element dialog box, go to the Conditions tab and then select Field value.
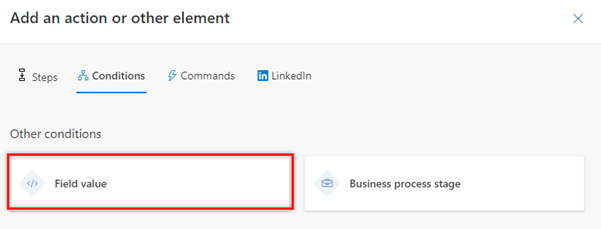
In the Field value pane, under the Advance to Yes path if section, select Company Name, and then set the condition as Equals to Contoso.
Note
- When you select Advanced, the Field values pane opens on the right to define more conditions for the step. You can define conditions based on row, group, and related entities.
- Lookup type fields such as Created by and Owner are only displayed when you select Advanced.
- If the connected record doesn't include the configured field, an error is displayed in the Up next widget. The following image shows an example of the error:

Close the Field value pane.
The field value condition step is created.You can continue to create the steps in the Yes and No paths, according to your requirements.
Define conditions based on a business process stage
When you add a condition based on the stage of a business process, you determine the path of a sequence based on which stage the business process is in. The business process flows are listed based on the type of record you've selected for the sequence.
In the the Add an action or other element dialog box, go to the Conditions tab, choose a Business process stage, and create a condition. The sequence follows the Yes path when the condition is true and the No path when the condition is false.
Note
Verify that business process flows are defined for the record type you've selected in the sequence.
In the following example, let's set the sequence to the Yes path when the Lead to Opportunity Sales Process flow is in either the Propose or Develop stage.
Select Add (+) after an activity.
In the Add an action or other element dialog box, go to the Conditions tab and then select Business process stage.
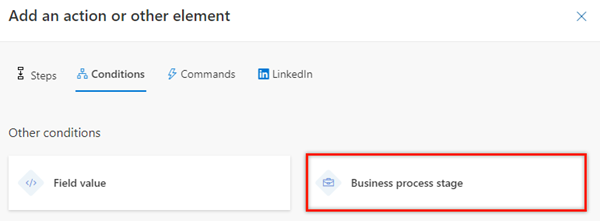
In the Business process stage pane, under the Advance to Yes path if BPF is section, select Lead to Opportunity Sales Process. In the and stage is box, select Propose and Develop.
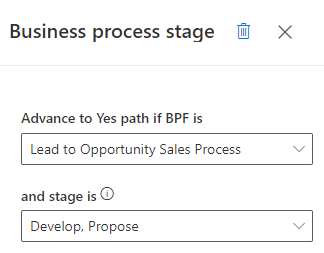
Close the Business process stage pane.
The business process flow condition step is created.
You can continue to create the steps in the Yes and No paths, according to your requirements.
Can't find the feature in your app?
There are a few possibilities:
- You don't have the necessary license to use this feature. Check out the comparison table and the licensing guide to see which features are available with your license.
- You don't have the necessary security role to use this feature.
- To configure or setup a feature, you need to have the Administration and customization roles
- To use sales-related features, you need to have the Primary sales roles
- Some tasks require specific Functional roles.
- Your administrator hasn't turned on the feature.
- Your organization is using a custom app. Check with your administrator for exact steps. The steps described in this article are specific to the out-of-the-box Sales Hub and Sales Professional apps.
Related information
Create and activate a sequence
Add steps to sequence
Add command steps to sequences
Add LinkedIn activities to sequence