Map a business process to a Standard logic app workflow (Preview)
Note
This capability is in preview and is subject to the Supplemental Terms of Use for Microsoft Azure Previews.
After you finish creating your business process, you can map each stage, transaction ID, and business properties to actual operations and outputs in a Standard logic app workflow that you created using Azure Logic Apps.
Prerequisites
Access to the Azure account and subscription associated with the Business process resource that you want to map.
Note
If you're using an Azure integration environment and application groups to organize your Azure resources, and you want to map your business process to Azure resources in your integration environment, all your Azure resources must use the same subscription, including your business processes and integration environment. If you're not using an Azure integration environment, you can map your business process to Azure resources where you have access.
A Business process resource with the stages and business property values that you want to map to the corresponding operations and output values in Standard logic app workflows.
All the Standard logic app workflows that you want to map your business process stages. For more information, see What is Azure Logic Apps?
Map a business process stage
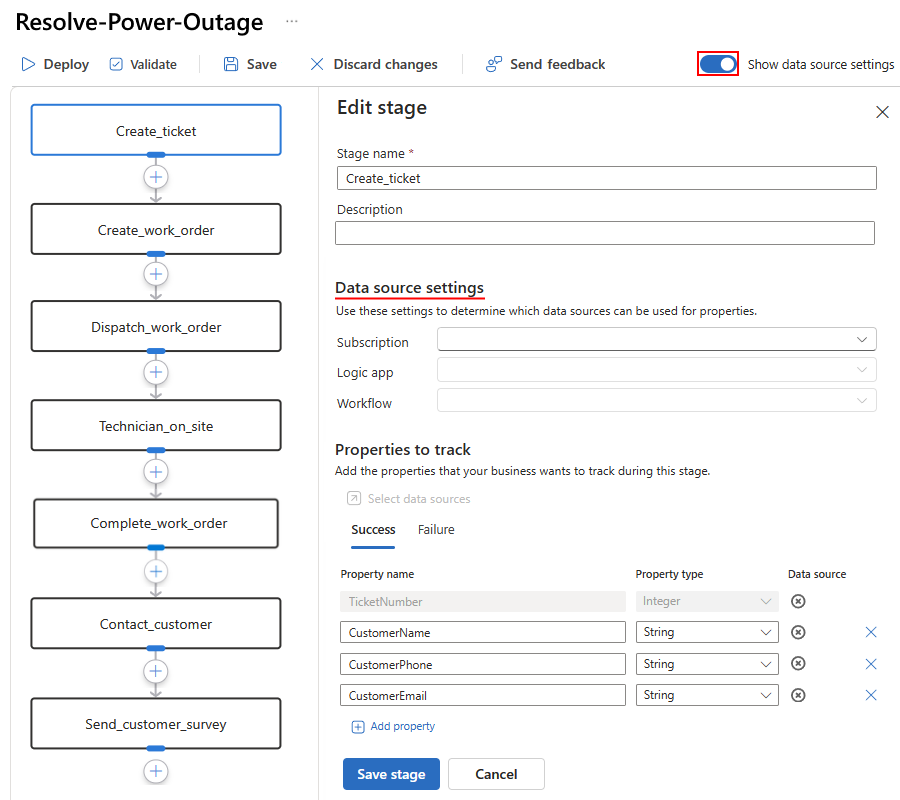
On the process editor toolbar, turn on Show data source settings.
After the Data source settings section appears with the following options, select the values for the Standard logic app workflow that you want to map to your stage:
Setting Description Subscription The Azure subscription for your Standard logic app resource. Logic app The Standard logic app resource with the workflow that you want to map. Workflow The workflow that you want to map. For example, the following Edit stage pane shows the Data source settings section:
After you select your workflow, under Properties to track, select the now-active link named Select data sources.
The Standard logic app workflow designer in Azure Logic Apps opens in read-only mode. To the designer's right side, the Select data sources pane appears with the previously defined key business properties.
On the read-only workflow designer, select the operation that you want to map.
This example selects the Send message operation.
In the Select data sources pane, under Point-in-time action, the selected operation appears.
To continue by mapping your transaction ID and business properties to operation outputs, select Next.
Map transaction ID and business properties to operation outputs
In the Properties section, follow these steps to map each property's value to the output from an operation in the workflow. You must completely map all properties before you can deploy your business process.
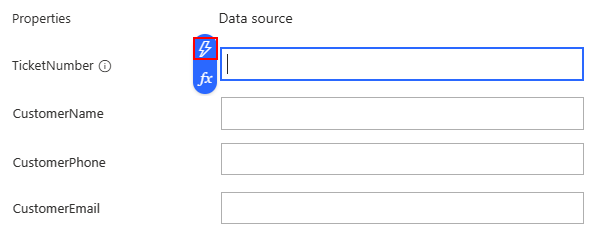
For the transaction ID and each business property, select inside the property value box, and then select the dynamic content option (lightning icon):
The dynamic content list opens and shows the available operations and their outputs. This list shows only those operations and the outputs that precede the currently selected operation.
Choose one of the following options:
If you can use the output as provided, select that output.
Note
Make sure to select a value that exists in each business process stage, which means in each workflow that you map to each business stage.
For TicketNumber, this example selects the Body int23_ticketnumber output from the Parse JSON - Canonical Message operation:
If you have to convert the output into another format or value, you can build an expression that uses the provided functions to produce the necessary result.
To close the dynamic content list, select inside the property value box.
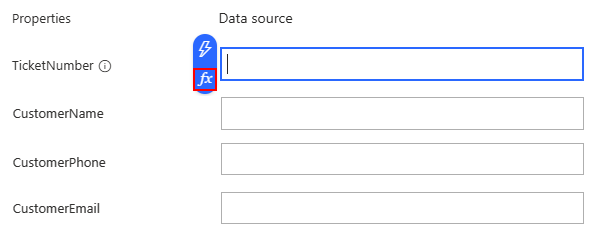
Now select the expression editor option (formula icon):
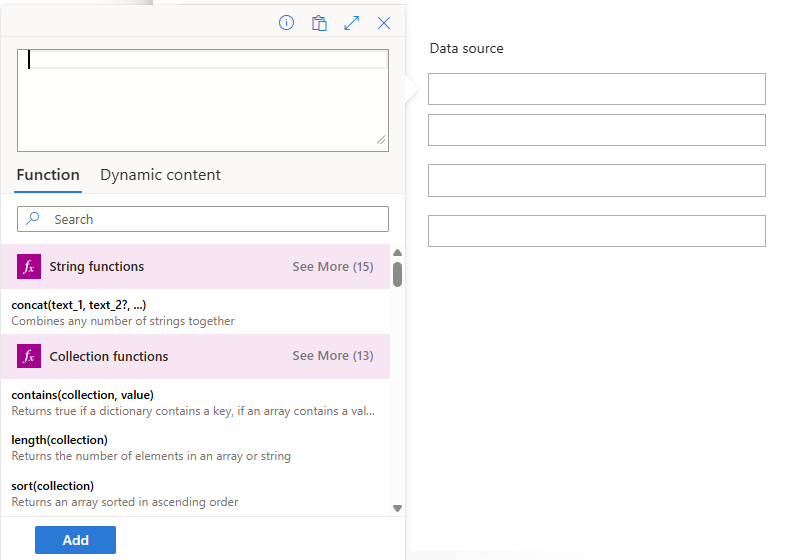
The expression editor opens and shows the functions that you can use to build an expression:
From the Function list, select the function to start your expression.
To include the operation's output in your expression, next the Function list label, select Dynamic content, and select the output that you want.
When you're done with your expression, select Add.
Your expression resolves to a token and appears in the property value box.
Continue mapping each business property to an operation output by repeating the preceding steps.
The following example shows complete mappings between business properties and operation outputs:
When you're done, select Next.
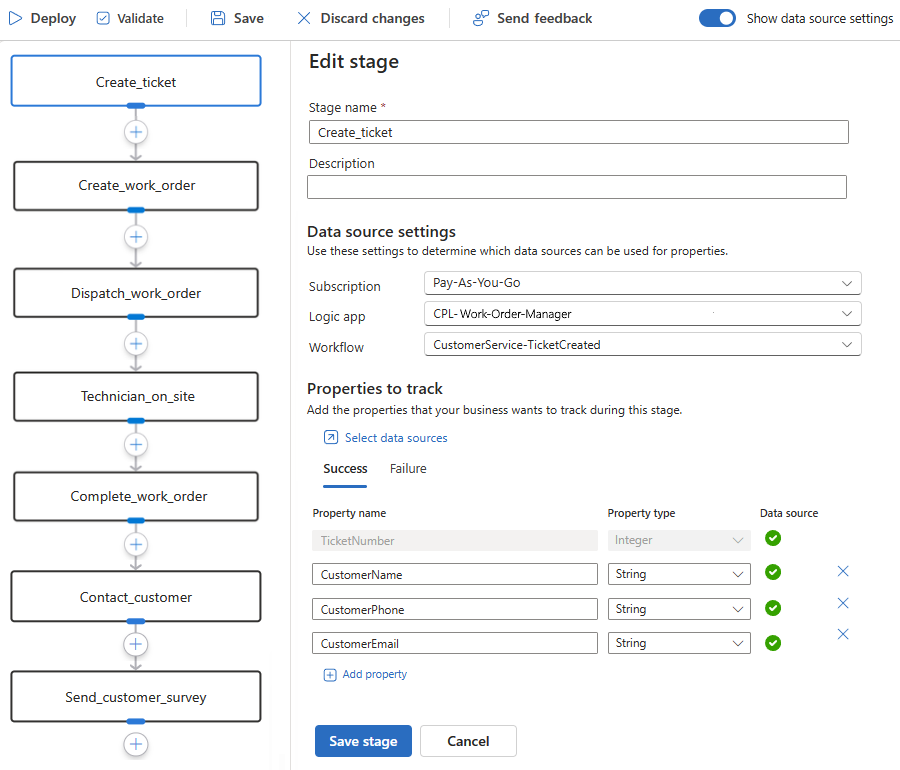
The platform returns you to the process editor and the Edit stage pane. The following example shows a complete mapped business process stage:
On the Edit stage pane, select Save stage.
Validate your mappings, or continue mapping any other stages that you might have.
Validate mappings
As you build your business process, you can check your mappings before you deploy. That way, you can find errors or problems earlier when your process is less complex and is easier to troubleshoot.
If you wait until you finish or deploy, and your process is long or complex, you might find that your process has more errors than expected, which might take longer to resolve or prove difficult to troubleshoot.
Before you validate your mappings, make sure to completely map all existing stages. Otherwise, unmapped stages generate errors.
When you're ready, on the editor toolbar, select Validate.
The Azure portal shows notifications for any errors or problems that exist.
Finish mapping your business process
Repeat the preceding steps to map each business process stage as necessary.
Save the changes to your business process often. On the process designer toolbar, select Save.
When you finish, save your business process one more time.
Now, continue on to deploy your business process and tracking profile.
