Configure backup for Azure Database for PostgreSQL - Flexible Server using Azure portal
This article describes how to configure backup for Azure Database for PostgreSQL - Flexible Server using Azure portal.
Prerequisites
Before you configure backup for Azure Database for PostgreSQL - Flexible Server, ensure the following prerequisites are met:
- Review the supported scenarios and known limitations of Azure Database for PostgreSQL Flexible server backup.
- Identify or create a Backup vault in the same region where you want to back up the Azure Database for PostgreSQL Server instance.
- Check that Azure Database for PostgreSQL Server is named in accordance with naming guidelines for Azure Backup. Learn about the naming conventions.
- Allow access permissions for PostgreSQL - Flexible Server. Learn about the access permissions.
- Create a back up policy.
Configure backup for the database
To configure backup for Azure PostgreSQL – Flexible Server using Azure Backup, you can use one of the following methods:
- Azure PostgreSQL – Flexible Server: Database manage pane
- Backup vault
- Azure Business Continuity Center
To configure backup on the Azure Database for PostgreSQL - Flexible Server via Azure Business Continuity Center, follow these steps:
Go to Business Continuity Center, and then select Overview > + Configure protection.

Alternatively, for configuring backup from the Backup vault pane, go to the Backup vault > Overview, and then select + Backup.
To configure backup from the Database manage pane, go to the PostgreSQL - flexible server pane, and then select Settings > LTR (Vaulted Backups).
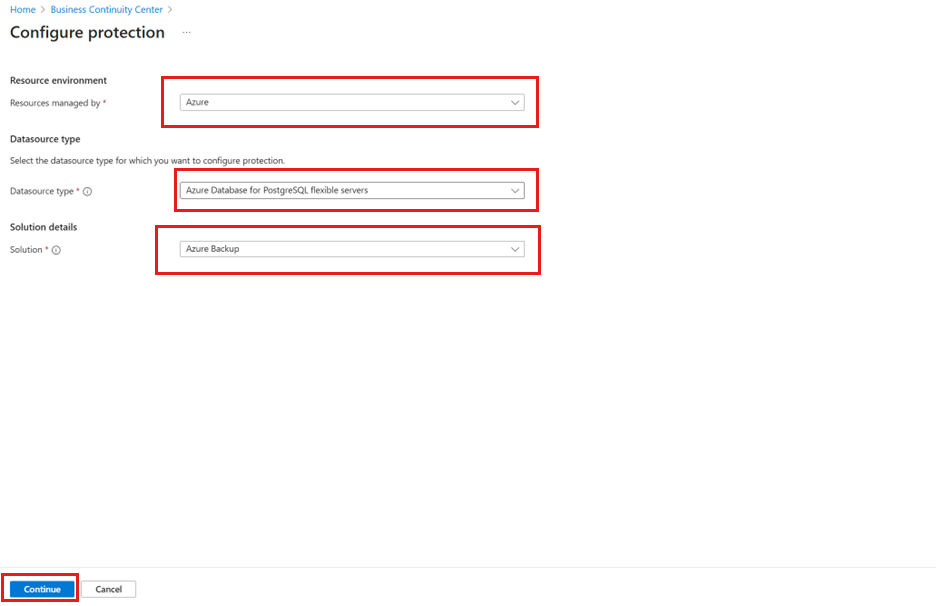
On the Configure protection pane, select Resource managed by as Azure, Datasource type as Azure Database for PostgreSQL flexible servers, and Solution as Azure Backup, and then select Continue.
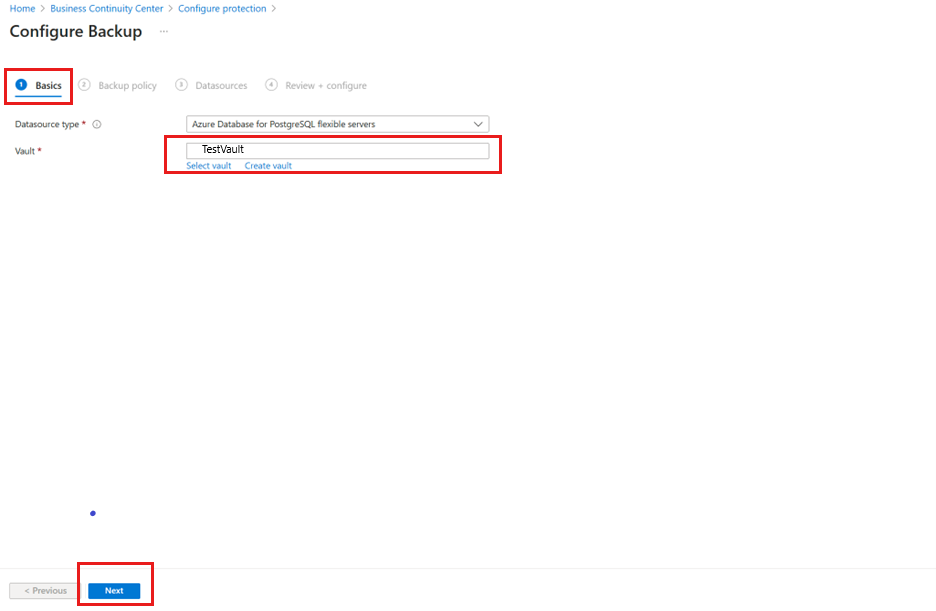
On the Configure Backup pane, on the Basics tab, check if Datasource type appears as Azure Database for PostgreSQL flexible servers, click Select vault under Vault and choose an existing Backup vault from the dropdown list, and then select Next.
If you don't have a Backup vault, create a new one.
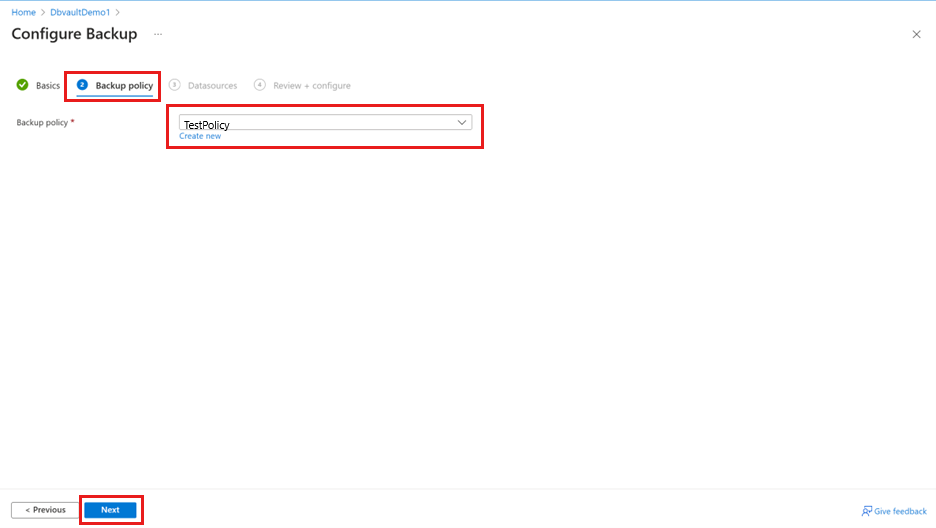
On the Backup policy tab, select a Backup policy that defines the backup schedule and the retention duration, and then select Next.
If you don't have a Backup policy, create one on the go.
On the Datasources tab, choose the datasource name.
On the Select resources to backup pane, select the Azure PostgreSQL – Flexible Servers to back up, and then click Select.
Note
Ensure that you choose the Azure PostgreSQL – flexible Servers in the same region as that of the vault.

Once you're on the Datasources tab, the Azure Backup service validates if it has all the necessary access permissions to connect to the server. If one or more access permissions are missing, one of the following error messages appears – User cannot assign roles or Role assignment not done.
User cannot assign roles: This message appears when you (the backup admin) don’t have the write access on the PostgreSQL - flexible Server as listed under View details. To assign the necessary permissions on the required resources, select Download role assignment template to fetch the ARM template, and run the template as a PostgreSQL database administrator. Once the template is run successfully, select Revalidate.
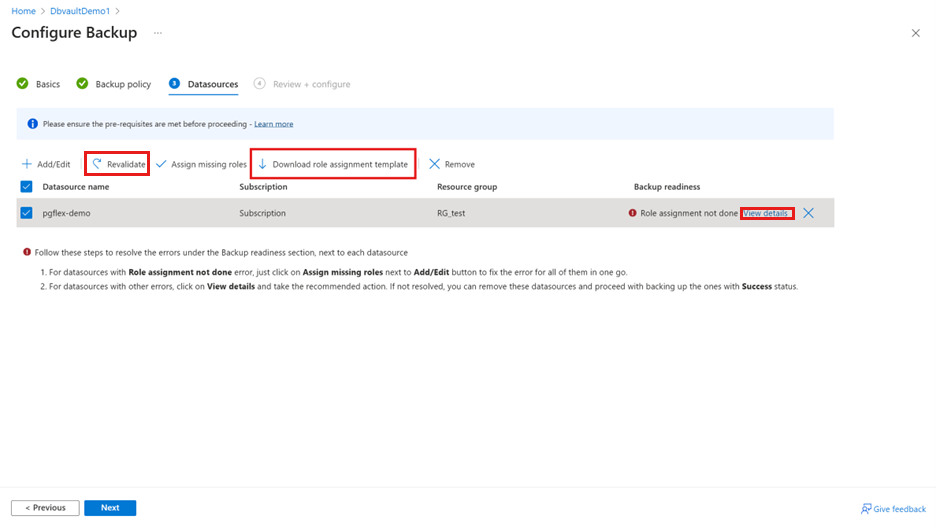
Role assignment not done: This message appears when you (the backup admin) have the write access on the PostgreSQL – flexible Server to assign missing permissions as listed under View details. To grant permissions on the PostgreSQL - flexible Server inline, select Assign missing roles.
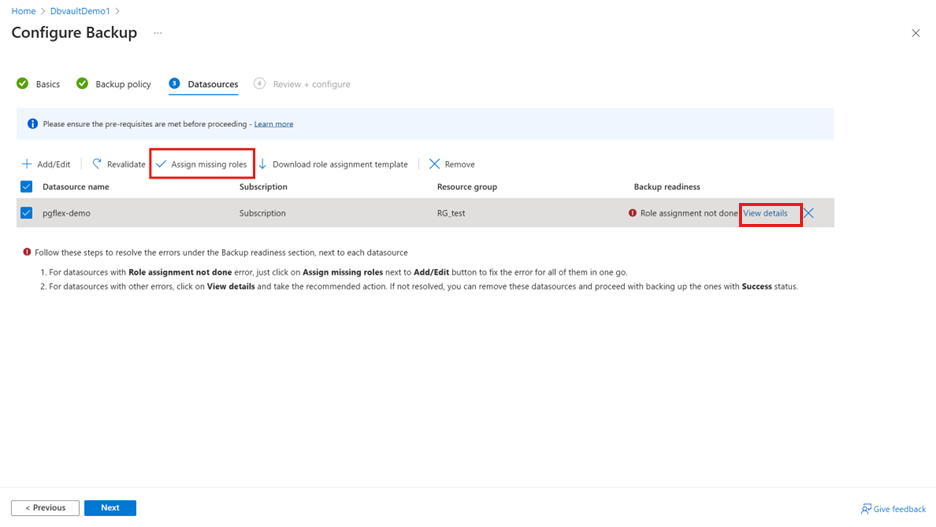
Once the process starts, the missing access permissions on the PostgreSQL – flexible servers are granted to the backup vault. You can define the scope at which the access permissions must be granted. When the action is complete, revalidation starts.
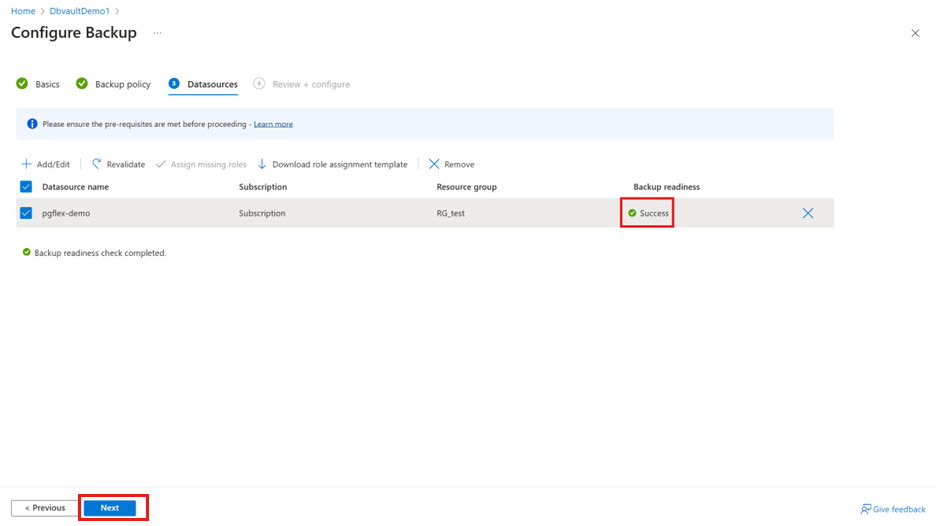
Once the role assignment validation shows Success, select Next to proceed to last step of submitting the operation.
On the Review + configure tab, select Configure backup.


Create a backup policy
You can create a backup policy on the go during the backup configuration flow.
To create a backup policy, follow these steps:
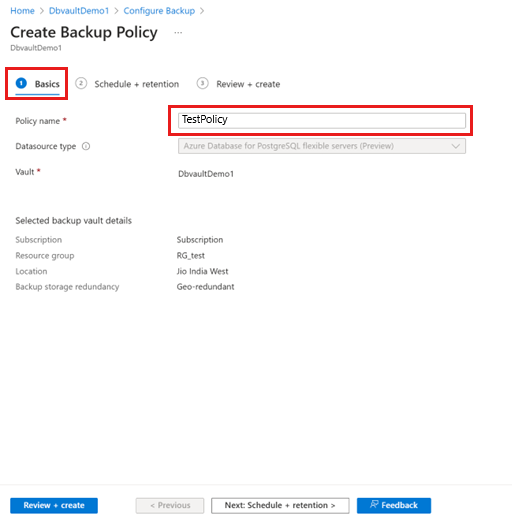
On the Configure Backup pane, select the Backup policy tab.
On the Backup policy tab, select Create new under Backup policy.
On the Create Backup Policy pane, on the Basics tab, provide a name for the new policy on Policy name.
On the Schedule + retention tab, under Backup schedule, define the Backup frequency.
Note
The Weekly backup option is currently available. However, you can schedule the backups on multiple days of the week.
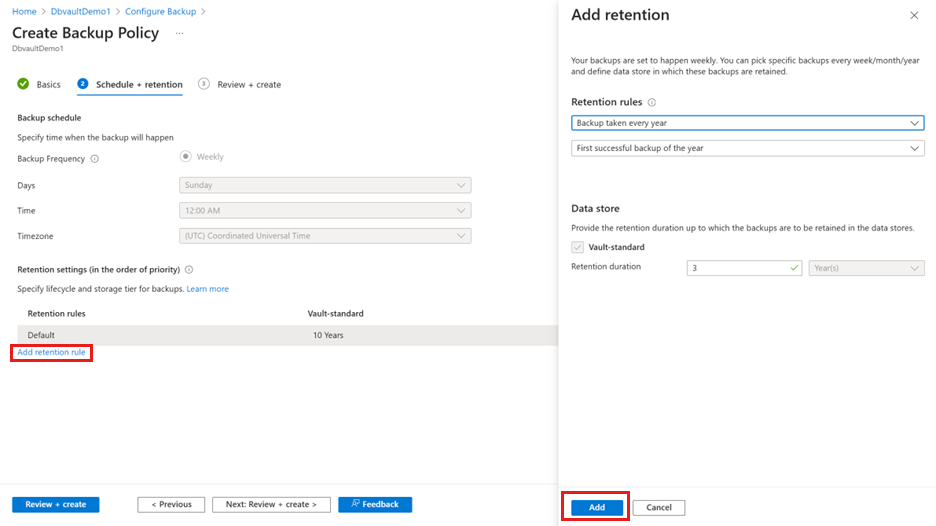
Under Retention rules, select Add retention rule.
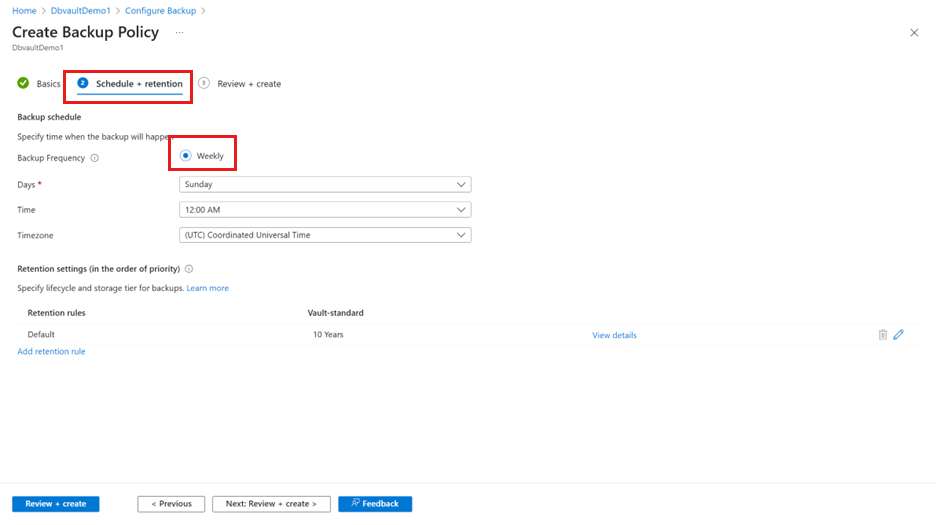
On the Add retention pane, define the retention period, and then select Add.
Note
The default retention period for Weekly backup is 10 years. You can add retention rules for specific backups, including data store and retention duration.
Once you are on the Create Backup Policy pane, select Review + create.
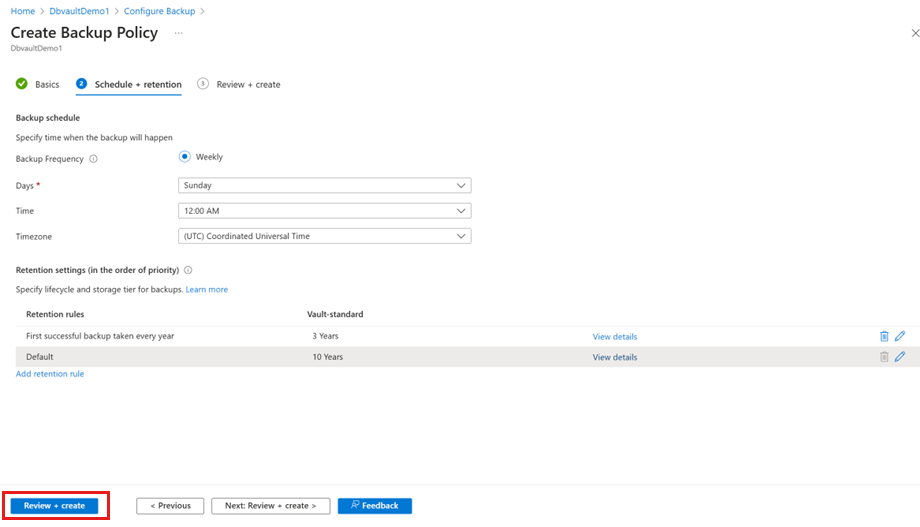
Note
The retention rules are evaluated in a pre-determined order of priority. The priority is the highest for the yearly rule, followed by the monthly, and then the weekly rule. Default retention settings are applied when no other rules qualify. For example, the same recovery point may be the first successful backup taken every week as well as the first successful backup taken every month. However, as the monthly rule priority is higher than that of the weekly rule, the retention corresponding to the first successful backup taken every month applies.


When the backup configuration is complete, you can run an on-demand backup and track the progress of the backup operation.
Next steps
Restore Azure Database for PostgreSQL - Flexible Server using Azure portal.