Walkthrough 5: Display enhanced session information by displaying session name and overview data
In the previous walkthrough, Walkthrough 4: Display a record in a session in your agent application, you learned how to display your customer record stored in a session in Unified Service Desk. However, the experience would be better if you can identify each session with a unique name along with some key overview information about the record in a session.
This walkthrough demonstrates how to dynamically display session name and session overview information to enhance the customer-interaction experience for your agents. This walkthrough is built on top of the previous walkthrough, Walkthrough 4: Display a record in a session in your agent application.
Prerequisites
You must have completed Walkthrough 1: Build a simple agent application and Walkthrough 4: Display a record in a session in your agent application. The configurations that you completed in those walkthroughs are required in this walkthrough.
This walkthrough assumes that you’ll be using the same user credential that you used in walkthrough 1 to sign in to the agent application at the end of the walkthrough to test the application. If a different user will be testing the application, you must assign the user to Contoso Configuration. More information: Walkthrough 1: Build a simple agent application
You must know about the following in Unified Service Desk:
Session Lines and Session Tabs type of hosted control. More information: Session Lines (Hosted Control) and Session Tabs (Hosted Control)
Configure session name and session overview information. More information: Configure session information
Filter access using Unified Service Desk configuration. More information: Manage access using Unified Service Desk configuration
In This Walkthrough
Step 1: Create a Session Lines type of hosted control to display session overview information
Step 2: Define session name information
Step 3: Define session overview information
Step 4: Add the controls to the configuration
Step 1: Create a Session Lines type of hosted control to display session overview information
To display session overview information in your agent application, create an instance of a Session Lines type of hosted control in your agent application.
Sign in to the Dynamics 365 instance.
Go to Settings > Unified Service Desk.
Click Hosted Controls.
Click New.
On the New Hosted Control page, specify the following values:
Field Value Name Contoso Session Overview USD Component Type Session Lines Display Group SessionExplorerPanel 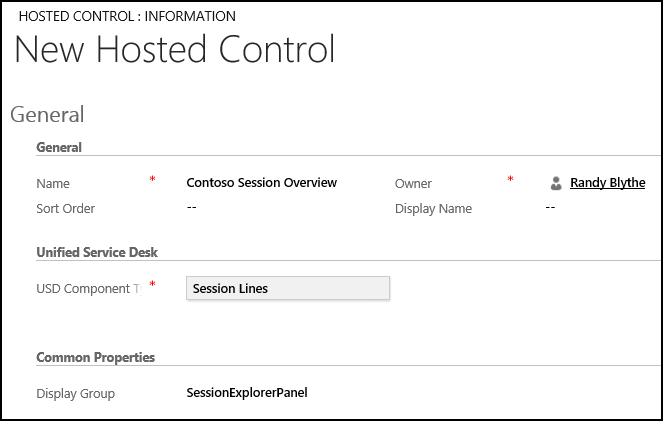
Click Save.
Step 2: Define session name information
To dynamically display the session tab name, you’ll configure a session lines rule using the replacement parameters.
Sign in to the Dynamics 365 instance.
Go to Settings > Unified Service Desk.
Click Session Lines.
Click New.
On the New Session Information page, specify the following values:
Field Value Order Any random value; say 5 Name Contoso Session Name Selected Entity account Type Session Name Display Session: [[account.name]]
We are using the replacement parameters to define the session tab name format. In this case the session name will be Session: followed by the name of the account record that is displayed in the session.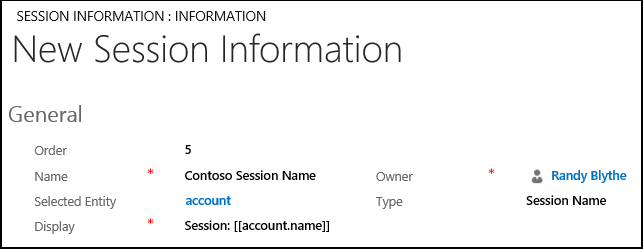
Click Save.
Step 3: Define session overview information
Define the session overview information to display in the Session Lines type of hosted control that you configured in step 1.
Sign in to the Dynamics 365 instance.
Go to Settings > Unified Service Desk.
Click Session Lines.
Click New.
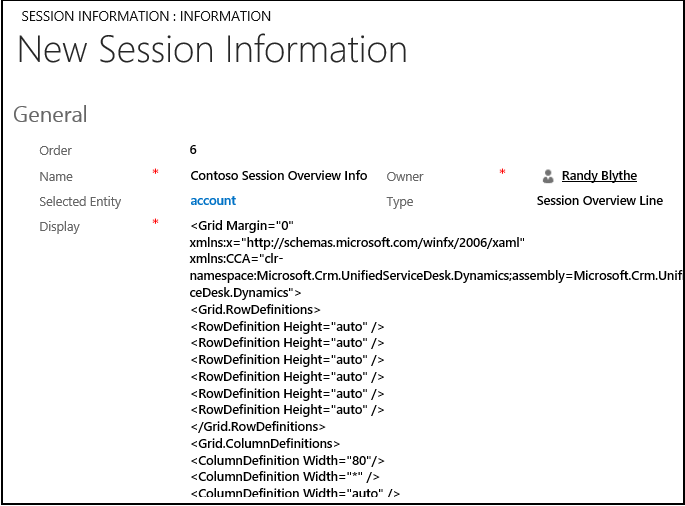
On the New Session Information page, specify the following values.
Order: Any random value; say 6.
Name: Contoso Session Overview Info
Selected Entity: account
Type: Session Overview
Display:
<Grid Margin="0"      xmlns:x="https://schemas.microsoft.com/winfx/2006/xaml"      xmlns:CCA="clr-namespace:Microsoft.Crm.UnifiedServiceDesk.Dynamics;assembly=Microsoft.Crm.UnifiedServiceDesk.Dynamics">
  <Grid.RowDefinitions>
    <RowDefinition Height="auto" />
    <RowDefinition Height="auto" />
    <RowDefinition Height="auto" />
    <RowDefinition Height="auto" />
    <RowDefinition Height="auto" />
    <RowDefinition Height="auto" />
  </Grid.RowDefinitions>
  <Grid.ColumnDefinitions>
    <ColumnDefinition Width="80"/>
    <ColumnDefinition Width="*" />
    <ColumnDefinition Width="auto" />
  </Grid.ColumnDefinitions>
  <TextBlock Margin="5,0,0,0" Grid.Row="0" TextWrapping="Wrap" Padding="3,0,0,3" Grid.ColumnSpan="3" FontFamily="Tohoma" FontSize="14" Style="{DynamicResource AutoCollapse}" Text="Primary Contact: [[account.primarycontactid.name]x]" />
  <TextBlock Margin="5,0,0,0" Grid.Row="1" TextWrapping="Wrap" Padding="3,0,0,3" Grid.ColumnSpan="3" FontFamily="Tohoma" FontSize="14" Text="[[account.address1_line1]x]"/>
  <TextBlock Margin="5,0,0,0" Grid.Row="2" TextWrapping="Wrap" Padding="3,0,0,3" Grid.ColumnSpan="3" FontFamily="Tohoma" FontSize="14" Style="{DynamicResource AutoCollapse}" Text="[[account.address1_line2]+x]" />
  <TextBlock Margin="5,0,0,0" Grid.Row="3" TextWrapping="Wrap" Padding="3,0,0,3" Grid.ColumnSpan="3" FontFamily="Tohoma" FontSize="14" Style="{DynamicResource AutoCollapse}" Text="[[account.address1_line3]+x]" />
  <TextBlock Margin="5,0,0,0" Grid.Row="4" TextWrapping="Wrap" Padding="3,0,0,3" Grid.ColumnSpan="3" FontFamily="Tohoma" FontSize="14" Style="{DynamicResource AutoCollapse}" Text="[[account.address1_city]x], [[account.address1_stateorprovince]x] [[account.address1_postalcode]x]" />
  <TextBlock Margin="5,0,0,0" Grid.Row="5" TextWrapping="Wrap" Padding="3,0,0,3" Grid.ColumnSpan="3" FontFamily="Tohoma" FontSize="14" Style="{DynamicResource AutoCollapse}" Text="Phone: [[account.telephone1]x]" />
</Grid>
Note
This sample uses XAML and replacement parameters to define the session overview information that displays the current account’s primary contact, address, and phone number in the session overview area.
Click Save.
Step 4: Add the controls to the configuration
In this step, you’ll add the hosted control and session line rules that were configured in this walkthrough to Contoso Configuration to display these controls to the user who is assigned to the configuration. Contoso Configuration was created in Walkthrough 1: Build a simple agent application.
Add the following to Contoso Configuration.
| Control name | Control type |
|---|---|
| Contoso Session Overview | Hosted Control |
| Contoso Session Name | Session Line |
| Contoso Session Overview Info | Session Line |
To add a control to the configuration:
Sign in to the Dynamics 365 instance.
Go to Settings > Unified Service Desk.
Click Configuration.
Click Contoso Configuration to open the definition.
On the nav bar, click the down arrow next to Contoso Configuration, and select Hosted Controls.
On the next page, click Add Existing Hosted Control, type “
Contoso Session Overview” in the search bar, and then press ENTER or click the search icon.In the search result box, click the hosted control to add it to Contoso Configuration.
Similarly, add the session line controls by clicking the down arrow next to Contoso Configuration, and clicking Session Lines.
Click Save.
Step 5: Test the application
Start the Unified Service Desk client application, and sign in to the Dynamics 365 instance where you configured Unified Service Desk by using the same user credentials that is assigned to Contoso Configuration in Walkthrough 1: Build a simple agent application. For information about connecting to Dataverse instance using the Unified Service Desk client application, see Connect to a model-driven app instance using the Unified Service Desk client
Click the down arrow next to the Search button in the toolbar, and then click Account to display the account records from your Dataverse instance.
Click the expander to display the left pane (SessionExplorerPanel).
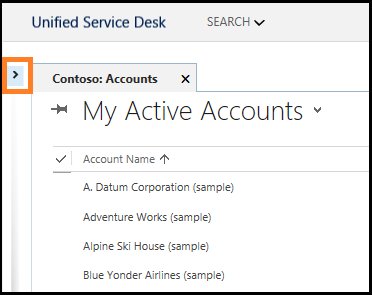
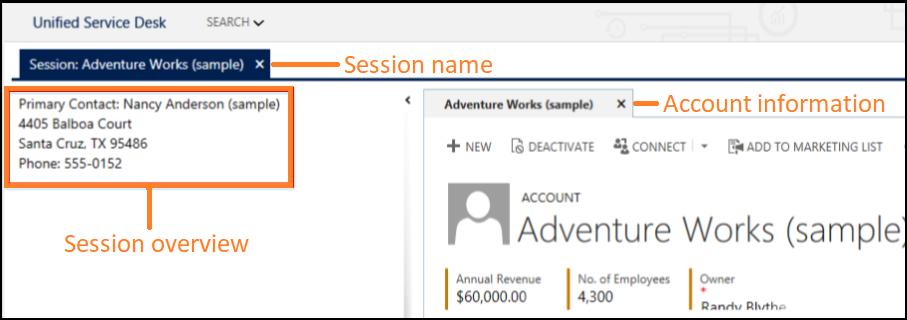
Click any of the account records to display the respective account information in a session in the agent application. Note that the name of the session tab automatically displays the word Session: followed by the current account name. The left pane displays the session overview information that was defined earlier.
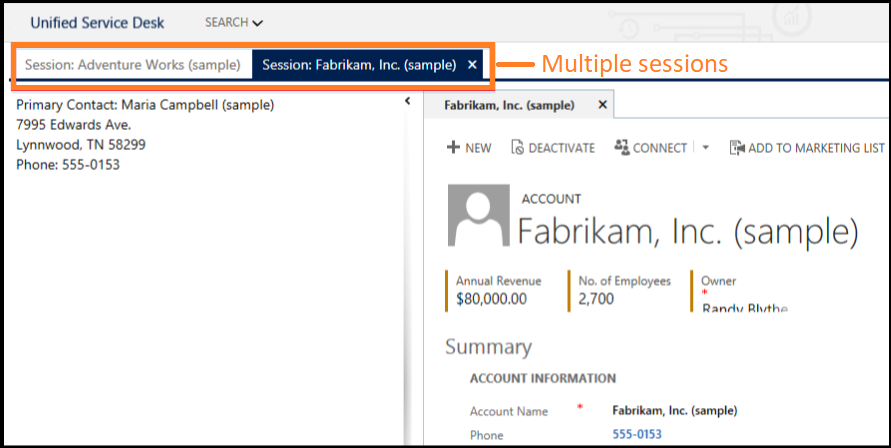
If you open another account record, it will be displayed in another session in your client application. To open another account, click the down arrow next to the Search button, click Account, and then click an account name to display the account information in another session.
Conclusion
In this walkthrough, you saw how to use the session lines configuration rules to contextually display the session tab name and key overview information about the record in a session in your agent application. You also learned how to filter access to Unified Service Desk controls using configuration.
See also
Walkthrough 1: Build a simple agent application
Walkthrough 2: Display an external webpage in your agent application
Walkthrough 3: Display records in your agent application
Walkthrough 4: Display a record in a session in your agent application
Walkthrough 6: Configure the Debugger hosted control in your agent application
Walkthrough 7: Configure agent scripting in your agent application