Automate continuous integration using Azure Pipelines releases
APPLIES TO:  Azure Data Factory
  Azure Synapse Analytics
Tip
Try out Data Factory in Microsoft Fabric, an all-in-one analytics solution for enterprises. Microsoft Fabric covers everything from data movement to data science, real-time analytics, business intelligence, and reporting. Learn how to start a new trial for free!
The following is a guide for setting up an Azure Pipelines release that automates the deployment of a data factory to multiple environments.
Requirements
An Azure subscription linked to Azure DevOps Server (formerly Visual Studio Team Foundation Server) or Azure Repos that uses the Azure Resource Manager service endpoint.
A data factory configured with Azure Repos Git integration.
An Azure key vault that contains the secrets for each environment.
Set up an Azure Pipelines release
In Azure DevOps, open the project that's configured with your data factory.
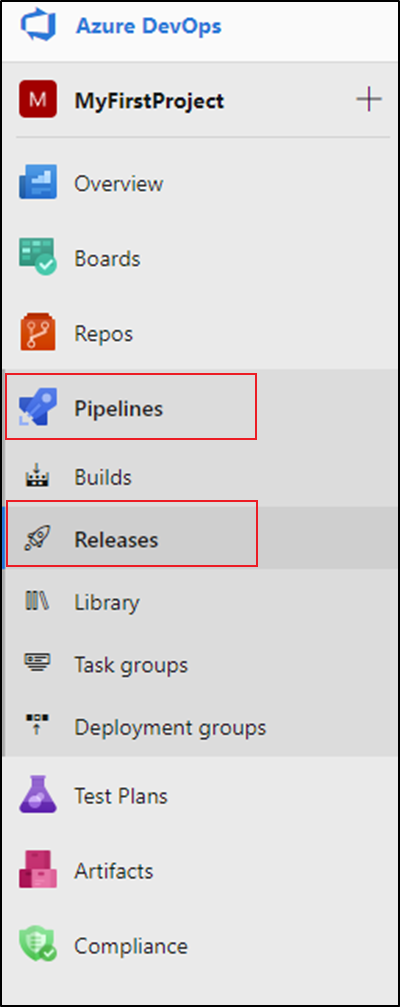
On the left side of the page, select Pipelines, and then select Releases.
Select New pipeline, or, if you have existing pipelines, select New and then New release pipeline.
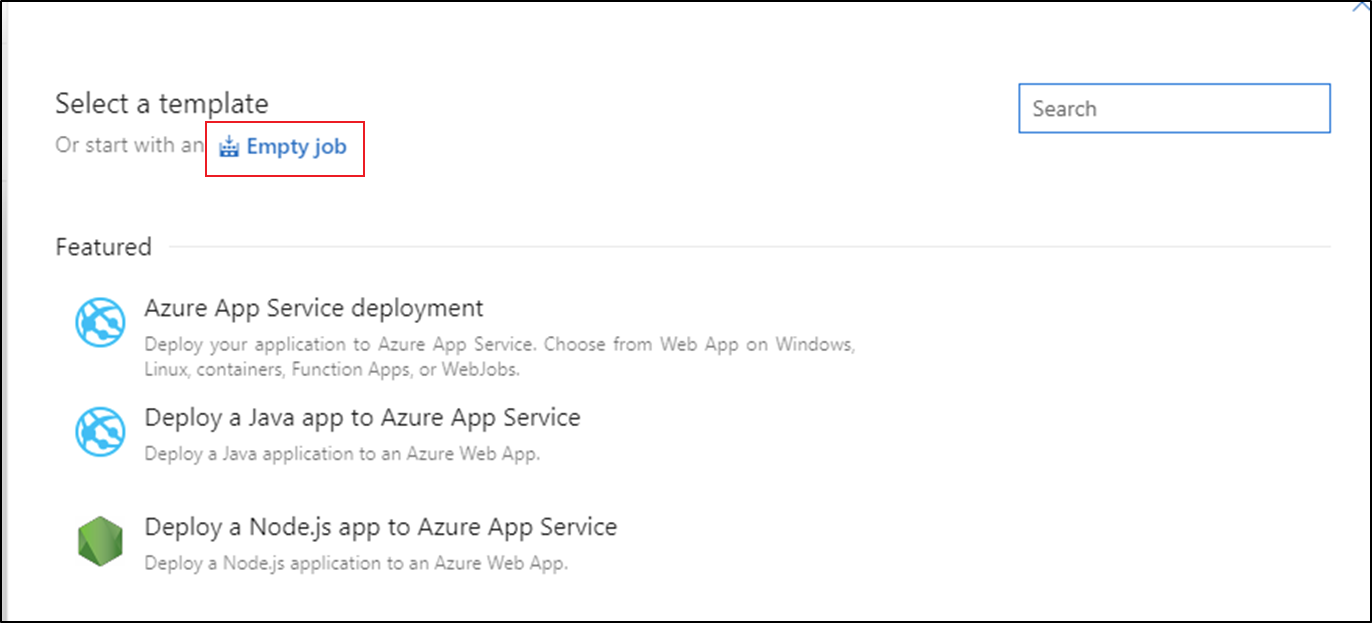
Select the Empty job template.
In the Stage name box, enter the name of your environment.
Select Add artifact, and then select the git repository configured with your development data factory. Select the publish branch of the repository for the Default branch. By default, this publish branch is
adf_publish. For the Default version, select Latest from default branch.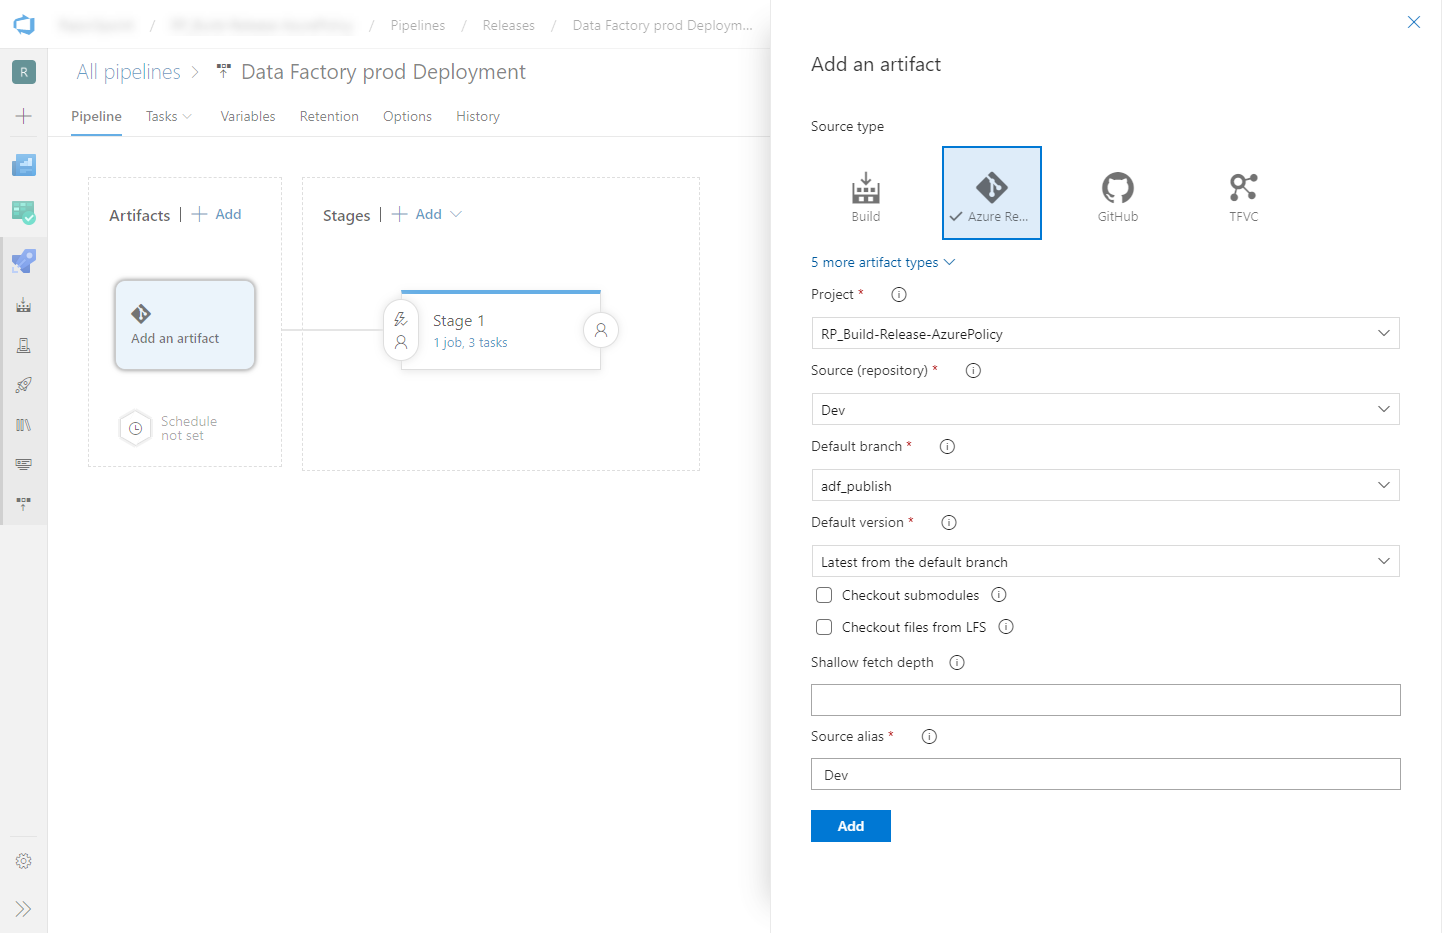
Add an Azure Resource Manager Deployment task:
In the stage view, select View stage tasks.
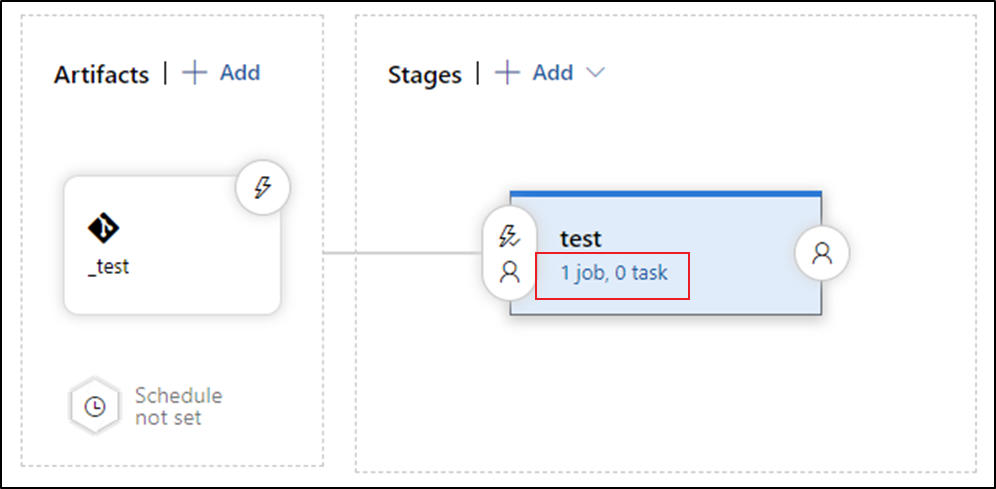
Create a new task. Search for ARM Template Deployment, and then select Add.
In the Deployment task, select the subscription, resource group, and location for the target data factory. Provide credentials if necessary.
In the Action list, select Create or update resource group.
Select the ellipsis button (…) next to the Template box. Browse for the Azure Resource Manager template that is generated in your publish branch of the configured git repository. Look for the file
ARMTemplateForFactory.jsonin the <FactoryName> folder of the adf_publish branch. For more details about using linked ARM templates, see Deploying linked ARM templates with VSTS and Using linked templates.Select … next to the Template parameters box to choose the parameters file. Look for the file
ARMTemplateParametersForFactory.jsonin the >FactoryName< folder of the adf_publish branch.Select … next to the Override template parameters box, and enter the desired parameter values for the target data factory. For credentials that come from Azure Key Vault, enter the secret's name between double quotation marks. For example, if the secret's name is cred1, enter "$(cred1)" for this value.
Select Incremental for the Deployment mode.
Warning
In Complete deployment mode, resources that exist in the resource group but aren't specified in the new Resource Manager template will be deleted. For more information, please refer to Azure Resource Manager Deployment Modes
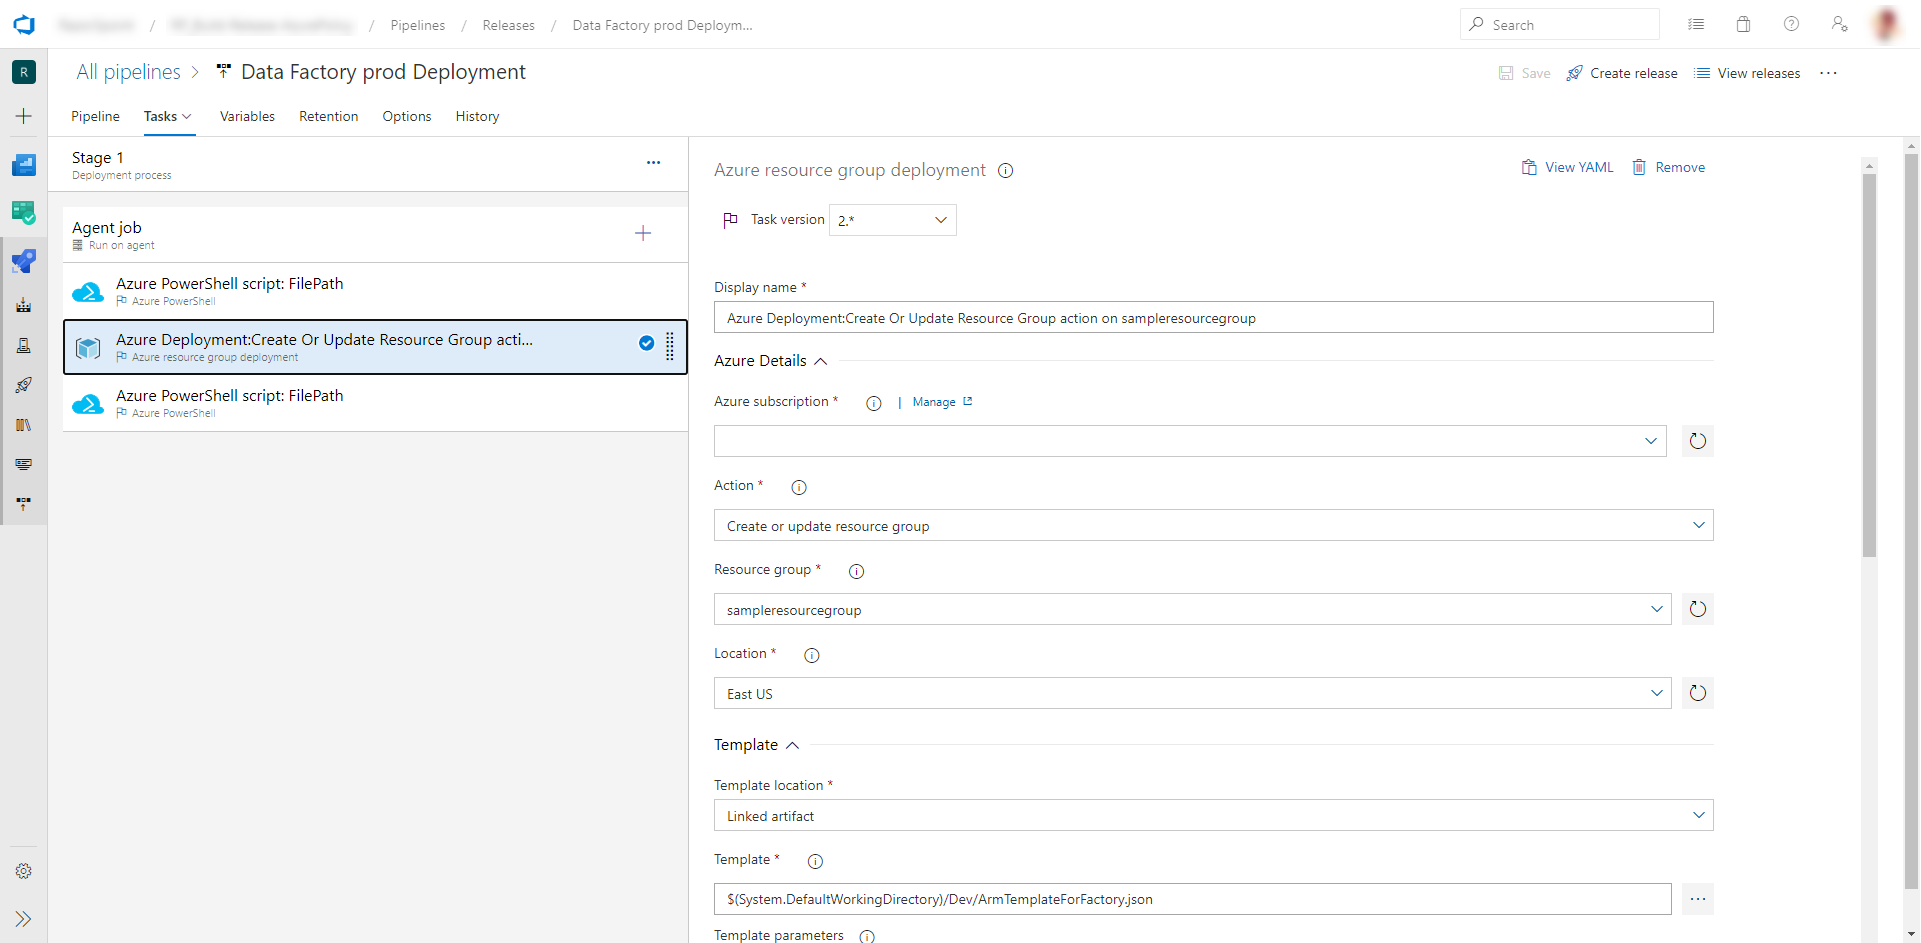
Save the release pipeline.
To trigger a release, select Create release. To automate the creation of releases, see Azure DevOps release triggers

Important
In CI/CD scenarios, the integration runtime (IR) type in different environments must be the same. For example, if you have a self-hosted IR in the development environment, the same IR must also be of type self-hosted in other environments, such as test and production. Similarly, if you're sharing integration runtimes across multiple stages, you have to configure the integration runtimes as linked self-hosted in all environments, such as development, test, and production.
Get secrets from Azure Key Vault
If you have secrets to pass in an Azure Resource Manager template, we recommend that you use Azure Key Vault with the Azure Pipelines release.
There are two ways to handle secrets:
Add the secrets to parameters file. For more info, see Use Azure Key Vault to pass secure parameter value during deployment.
Create a copy of the parameters file that's uploaded to the publish branch. Set the values of the parameters that you want to get from Key Vault by using this format:
{
    "parameters": {
        "azureSqlReportingDbPassword": {
            "reference": {
                "keyVault": {
                    "id": "/subscriptions/<subId>/resourceGroups/<resourcegroupId> /providers/Microsoft.KeyVault/vaults/<vault-name> "
                },
                "secretName": " < secret - name > "
            }
        }
    }
}
When you use this method, the secret is pulled from the key vault automatically.
The parameters file needs to be in the publish branch as well.
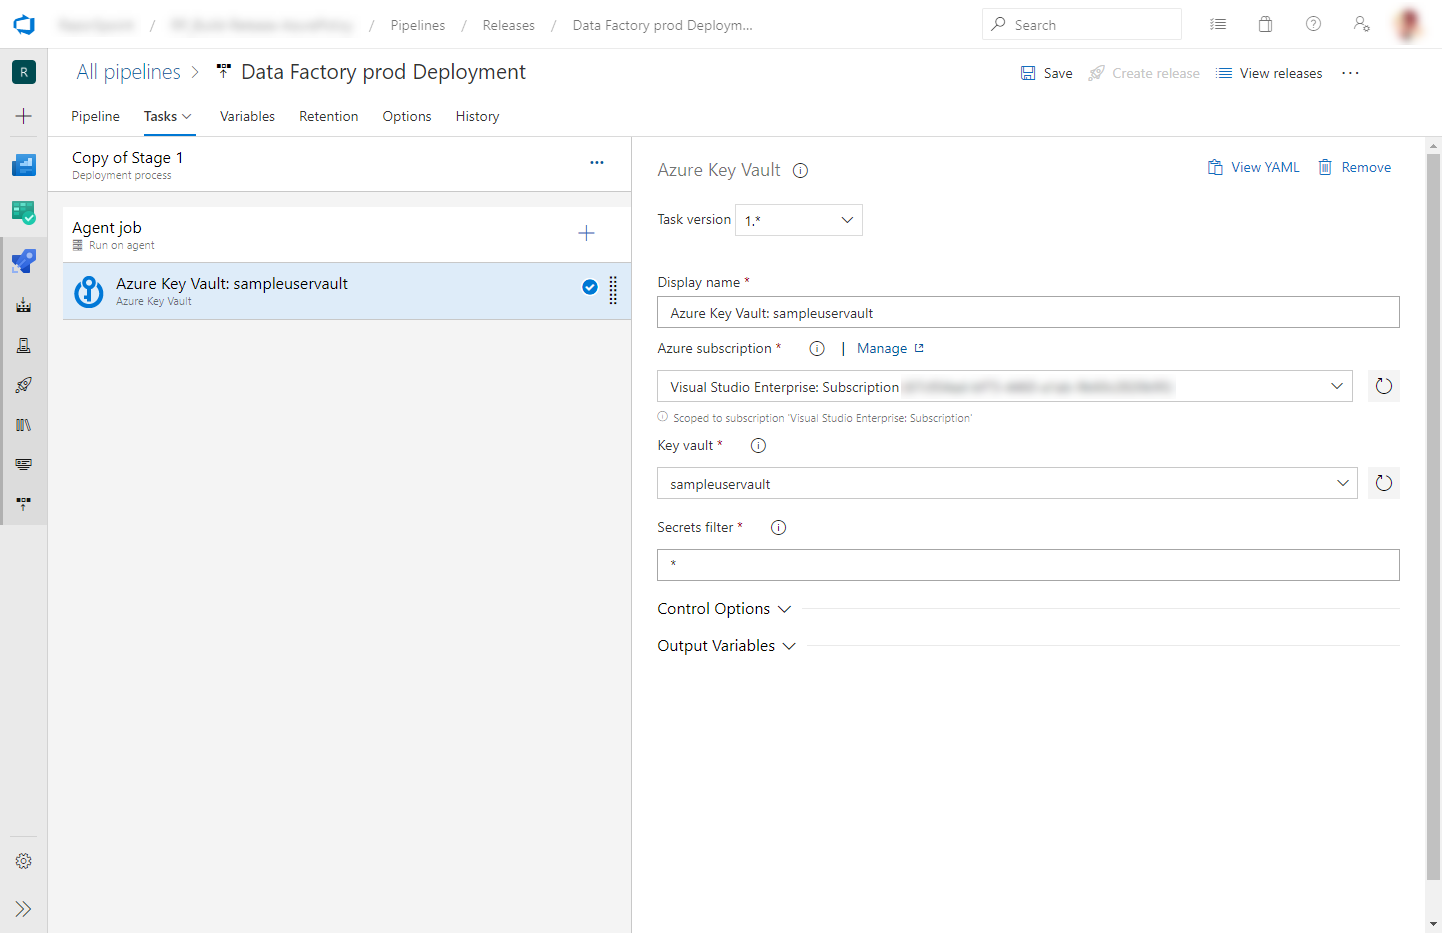
Add an Azure Key Vault task before the Azure Resource Manager Deployment task described in the previous section:
On the Tasks tab, create a new task. Search for Azure Key Vault and add it.
In the Key Vault task, select the subscription in which you created the key vault. Provide credentials if necessary, and then select the key vault.
Grant permissions to the Azure Pipelines agent
The Azure Key Vault task might fail with an Access Denied error if the correct permissions aren't set. Download the logs for the release, and locate the .ps1 file that contains the command to give permissions to the Azure Pipelines agent. You can run the command directly. Or you can copy the principal ID from the file and add the access policy manually in the Azure portal. Get and List are the minimum permissions required.
Updating active triggers
Install the latest Azure PowerShell modules by following instructions in How to install and configure Azure PowerShell.
Warning
If you do not use latest versions of PowerShell and Data Factory module, you may run into deserialization errors while running the commands.
Deployment can fail if you try to update active triggers. To update active triggers, you need to manually stop them and then restart them after the deployment. You can do this by using an Azure PowerShell task:
On the Tasks tab of the release, add an Azure PowerShell task. Choose task version the latest Azure PowerShell version.
Select the subscription your factory is in.
Select Script File Path as the script type. This requires you to save your PowerShell script in your repository. The following PowerShell script can be used to stop triggers:
$triggersADF = Get-AzDataFactoryV2Trigger -DataFactoryName $DataFactoryName -ResourceGroupName $ResourceGroupName

$triggersADF | ForEach-Object { Stop-AzDataFactoryV2Trigger -ResourceGroupName $ResourceGroupName -DataFactoryName $DataFactoryName -Name $_.name -Force }
You can complete similar steps (with the Start-AzDataFactoryV2Trigger function) to restart the triggers after deployment.
The data factory team has provided a sample pre- and post-deployment script.
Note
Use the PrePostDeploymentScript.Ver2.ps1 if you would like to turn off/ on only the triggers that have been modified instead of turning all triggers off/ on during CI/CD.
Warning
Make sure to use PowerShell Core in ADO task to run the script