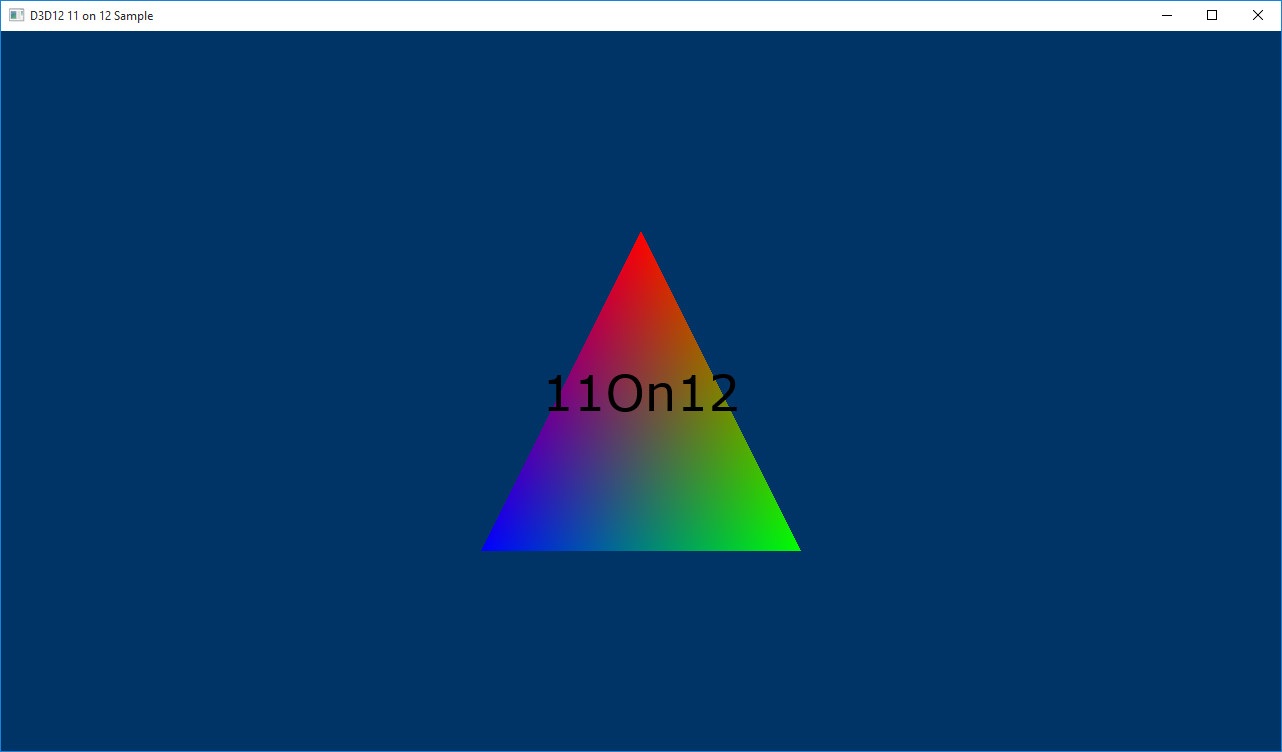
使用 D3D11on12 的 D2D
D3D1211on12範例示範如何透過 D3D12 內容轉譯 D2D 內容,方法是在 11 型裝置與以 12 為基礎的裝置之間共用資源。
建立 ID3D11On12Device
第一個步驟是在建立ID3D11Device之後建立ID3D11On12Device,這牽涉到透過 API D3D111On12CreateDevice建立ID3D11Device。 此 API 也會接受 ID3D12CommandQueue 的其他參數,讓 11On12 裝置可以提交其命令。 建立 ID3D11Device 之後,您可以從該介面查詢 ID3D11On12Device 介面。 這是將用來設定 D2D 的主要裝置物件。
在 LoadPipeline 方法中,設定裝置。
 // Create an 11 device wrapped around the 12 device and share
    // 12's command queue.
    ComPtr<ID3D11Device> d3d11Device;
    ThrowIfFailed(D3D11On12CreateDevice(
        m_d3d12Device.Get(),
        d3d11DeviceFlags,
        nullptr,
        0,
        reinterpret_cast<IUnknown**>(m_commandQueue.GetAddressOf()),
        1,
        0,
        &d3d11Device,
        &m_d3d11DeviceContext,
        nullptr
        ));

    // Query the 11On12 device from the 11 device.
    ThrowIfFailed(d3d11Device.As(&m_d3d11On12Device));
| 通話流程 | 參數 |
|---|---|
| ID3D11Device | |
| D3D11On12CreateDevice |
建立 D2D 處理站
既然我們有 11On12 裝置,我們會使用它來建立 D2D 處理站和裝置,就像一般使用 D3D11 一樣。
將 新增至 LoadAssets 方法。
 // Create D2D/DWrite components.
    {
        D2D1_DEVICE_CONTEXT_OPTIONS deviceOptions = D2D1_DEVICE_CONTEXT_OPTIONS_NONE;
        ThrowIfFailed(D2D1CreateFactory(D2D1_FACTORY_TYPE_SINGLE_THREADED, __uuidof(ID2D1Factory3), &d2dFactoryOptions, &m_d2dFactory));
        ComPtr<IDXGIDevice> dxgiDevice;
        ThrowIfFailed(m_d3d11On12Device.As(&dxgiDevice));
        ThrowIfFailed(m_d2dFactory->CreateDevice(dxgiDevice.Get(), &m_d2dDevice));
        ThrowIfFailed(m_d2dDevice->CreateDeviceContext(deviceOptions, &m_d2dDeviceContext));
        ThrowIfFailed(DWriteCreateFactory(DWRITE_FACTORY_TYPE_SHARED, __uuidof(IDWriteFactory), &m_dWriteFactory));
    }
| 通話流程 | 參數 |
|---|---|
| D2D1_DEVICE_CONTEXT_OPTIONS | |
| D2D1CreateFactory | D2D1_FACTORY_TYPE |
| IDXGIDevice | |
| ID2D1Factory3::CreateDevice | |
| ID2D1Device::CreateDeviceCoNtext | |
| DWriteCreateFactory | DWRITE_FACTORY_TYPE |
建立 D2D 的轉譯目標
D3D12 擁有交換鏈結,因此,如果我們想要使用 11On12 裝置轉譯回後端緩衝區, (D2D 內容) ,則我們需要從ID3D11Resource 類型的後端緩衝區建立 ID3D11Resource的包裝資源。 這會連結 ID3D12Resource 與以 D3D11 為基礎的介面,以便與 11On12 裝置搭配使用。 在擁有包裝的資源之後,我們接著可以在 LoadAssets 方法中建立 D2D 的轉譯目標介面來轉譯。
// Initialize *hwnd* with the handle of the window displaying the rendered content.
HWND hwnd;

// Query the window's dpi settings, which will be used to create
// D2D's render targets.
float dpi = GetDpiForWindow(hwnd);
D2D1_BITMAP_PROPERTIES1 bitmapProperties = D2D1::BitmapProperties1(
    D2D1_BITMAP_OPTIONS_TARGET | D2D1_BITMAP_OPTIONS_CANNOT_DRAW,
    D2D1::PixelFormat(DXGI_FORMAT_UNKNOWN, D2D1_ALPHA_MODE_PREMULTIPLIED),
    dpi,
    dpi);

// Create frame resources.
{
    CD3DX12_CPU_DESCRIPTOR_HANDLE rtvHandle(m_rtvHeap->GetCPUDescriptorHandleForHeapStart());

    // Create a RTV, D2D render target, and a command allocator for each frame.
    for (UINT n = 0; n < FrameCount; n++)
    {
        ThrowIfFailed(m_swapChain->GetBuffer(n, IID_PPV_ARGS(&m_renderTargets[n])));
        m_d3d12Device->CreateRenderTargetView(m_renderTargets[n].Get(), nullptr, rtvHandle);

        // Create a wrapped 11On12 resource of this back buffer. Since we are
        // rendering all D3D12 content first and then all D2D content, we specify
        // the In resource state as RENDER_TARGET - because D3D12 will have last
        // used it in this state - and the Out resource state as PRESENT. When
        // ReleaseWrappedResources() is called on the 11On12 device, the resource
        // will be transitioned to the PRESENT state.
        D3D11_RESOURCE_FLAGS d3d11Flags = { D3D11_BIND_RENDER_TARGET };
        ThrowIfFailed(m_d3d11On12Device->CreateWrappedResource(
            m_renderTargets[n].Get(),
            &d3d11Flags,
            D3D12_RESOURCE_STATE_RENDER_TARGET,
            D3D12_RESOURCE_STATE_PRESENT,
            IID_PPV_ARGS(&m_wrappedBackBuffers[n])
            ));

        // Create a render target for D2D to draw directly to this back buffer.
        ComPtr<IDXGISurface> surface;
        ThrowIfFailed(m_wrappedBackBuffers[n].As(&surface));
        ThrowIfFailed(m_d2dDeviceContext->CreateBitmapFromDxgiSurface(
            surface.Get(),
            &bitmapProperties,
            &m_d2dRenderTargets[n]
            ));

        rtvHandle.Offset(1, m_rtvDescriptorSize);

        ThrowIfFailed(m_d3d12Device->CreateCommandAllocator(
            D3D12_COMMAND_LIST_TYPE_DIRECT,
            IID_PPV_ARGS(&m_commandAllocators[n])));
    }
}
| 通話流程 | 參數 |
|---|---|
| GetDpiForWindow | 視窗控制碼 |
| D2D1_BITMAP_PROPERTIES1 |
[D2D1_BITMAP_OPTIONS] (/windows/desktop/api/d2d1_1/ne-d2d1_1-d2d1_bitmap_options) [PixelFormat] (/windows/desktop/api/d2d1helper/nf-d2d1helper-pixelformat) [DXGI_FORMAT] (/windows/desktop/api/dxgiformat/ne-dxgiformat-dxgi_format) [D2D1_ALPHA_MODE] (/windows/desktop/api/dcommon/ne-dcommon-d2d1_Alpha_mode) |
| CD3DX12_CPU_DESCRIPTOR_HANDLE | GetCPUDescriptorHandleForHeapStart |
| IDXGISwapChain::GetBuffer | |
| CreateRenderTargetView | |
| D3D11_RESOURCE_FLAGS | D3D11_BIND_FLAG |
| CreateWrappedResource | D3D12_RESOURCE_STATES |
| IDXGISurface | |
| ID2D1DeviceCoNtext::CreateBitmapFromDxgiSurface | |
| CreateCommandAllocator | D3D12_COMMAND_LIST_TYPE |
建立基本 D2D 文字物件
現在我們有一個 ID3D12Device 可轉譯 3D 內容,這是一個 ID2D1Device ,透過 ID3D11On12Device 與 12 裝置共用,我們可用來轉譯 2D 內容,而且兩者都設定為轉譯為相同的交換鏈結。 此範例只會使用 D2D 裝置在 3D 場景中轉譯文字,類似于遊戲如何轉譯其 UI。 因此,我們需要在 LoadAssets 方法中建立一些基本的 D2D 物件。
 // Create D2D/DWrite objects for rendering text.
    {
        ThrowIfFailed(m_d2dDeviceContext->CreateSolidColorBrush(D2D1::ColorF(D2D1::ColorF::Black), &m_textBrush));
        ThrowIfFailed(m_dWriteFactory->CreateTextFormat(
            L"Verdana",
            NULL,
            DWRITE_FONT_WEIGHT_NORMAL,
            DWRITE_FONT_STYLE_NORMAL,
            DWRITE_FONT_STRETCH_NORMAL,
            50,
            L"en-us",
            &m_textFormat
            ));
        ThrowIfFailed(m_textFormat->SetTextAlignment(DWRITE_TEXT_ALIGNMENT_CENTER));
        ThrowIfFailed(m_textFormat->SetParagraphAlignment(DWRITE_PARAGRAPH_ALIGNMENT_CENTER));
    }
更新主要轉譯迴圈
現在,範例的初始化已完成,我們可以移至主要轉譯迴圈。
// Render the scene.
void D3D1211on12::OnRender()
{
    // Record all the commands we need to render the scene into the command list.
    PopulateCommandList();

    // Execute the command list.
    ID3D12CommandList* ppCommandLists[] = { m_commandList.Get() };
    m_commandQueue->ExecuteCommandLists(_countof(ppCommandLists), ppCommandLists);

    RenderUI();

    // Present the frame.
    ThrowIfFailed(m_swapChain->Present(0, 0));

    MoveToNextFrame();
}
| 通話流程 | 參數 |
|---|---|
| ID3D12CommandList | |
| ExecuteCommandLists | |
| IDXGISwapChain1::Present1 |
轉譯迴圈的唯一新功能是 RenderUI 呼叫,這會使用 D2D 來轉譯 UI。 請注意,我們會先執行所有 D3D12 命令清單來轉譯我們的 3D 場景,然後在其中轉譯 UI。 在深入探討 RenderUI之前,我們必須查看 PopulateCommandLists 的變更。 在其他範例中,我們通常會在命令清單上放置資源屏障,再關閉命令清單,以將背景緩衝區從轉譯目標狀態轉換為目前狀態。 不過,在此範例中,我們會移除該資源屏障,因為我們仍然需要使用 D2D 轉譯回後端緩衝區。 請注意,當我們建立後端緩衝區的包裝資源時,會將轉譯目標狀態指定為 「IN」 狀態,並將目前狀態指定為 「OUT」 狀態。
RenderUI 在 D2D 使用方面相當直接。 我們會設定轉譯目標並轉譯文字。 不過,在 11On12 裝置上使用任何包裝的資源之前,例如後端緩衝區轉譯目標,我們必須在 11On12 裝置上呼叫 AcquireWrappedResources API。 轉譯之後,我們會在 11On12 裝置上呼叫 ReleaseWrappedResources API。 藉由呼叫 ReleaseWrappedResources ,我們會在幕後產生資源屏障,將指定的資源轉換為建立時指定的「OUT」狀態。 在我們的案例中,這是目前的狀態。 最後,為了將所有在 11On12 裝置上執行的命令提交至共用ID3D12CommandQueue,我們必須在ID3D11DeviceCoNtext上呼叫Flush。
// Render text over D3D12 using D2D via the 11On12 device.
void D3D1211on12::RenderUI()
{
    D2D1_SIZE_F rtSize = m_d2dRenderTargets[m_frameIndex]->GetSize();
    D2D1_RECT_F textRect = D2D1::RectF(0, 0, rtSize.width, rtSize.height);
    static const WCHAR text[] = L"11On12";

    // Acquire our wrapped render target resource for the current back buffer.
    m_d3d11On12Device->AcquireWrappedResources(m_wrappedBackBuffers[m_frameIndex].GetAddressOf(), 1);

    // Render text directly to the back buffer.
    m_d2dDeviceContext->SetTarget(m_d2dRenderTargets[m_frameIndex].Get());
    m_d2dDeviceContext->BeginDraw();
    m_d2dDeviceContext->SetTransform(D2D1::Matrix3x2F::Identity());
    m_d2dDeviceContext->DrawTextW(
        text,
        _countof(text) - 1,
        m_textFormat.Get(),
        &textRect,
        m_textBrush.Get()
        );
    ThrowIfFailed(m_d2dDeviceContext->EndDraw());

    // Release our wrapped render target resource. Releasing
    // transitions the back buffer resource to the state specified
    // as the OutState when the wrapped resource was created.
    m_d3d11On12Device->ReleaseWrappedResources(m_wrappedBackBuffers[m_frameIndex].GetAddressOf(), 1);

    // Flush to submit the 11 command list to the shared command queue.
    m_d3d11DeviceContext->Flush();
}
執行範例

相關主題