使用 C++ 開發 Azure 檔案服務
提示
Microsoft Azure 儲存體總管
Microsoft Azure 儲存體總管 是一個免費的獨立應用程式,可讓您在 Windows、MacOS 和 Linux 上以視覺化方式處理 Azure 儲存體資料。
適用於
| 檔案共用類型 | SMB | NFS |
|---|---|---|
| 標準檔案共用 (GPv2)、LRS/ZRS | ||
| 標準檔案共用 (GPv2)、GRS/GZRS | ||
| 進階檔案共用 (FileStorage)、LRS/ZRS |
關於本教學課程
在此教學課程中,您將了解如何在 Azure 檔案儲存體上使用 C++ 執行基本作業。 如果您是 Azure 檔案儲存體的新手,閱讀下列各節中的概念,對於了解範例將很有幫助。 涵蓋的部分範例包括:
- 建立及刪除 Azure 檔案共用
- 建立及刪除目錄
- 上傳、下載及刪除檔案
- 設定並列出檔案的中繼資料
注意
由於 Azure 檔案服務可透過 SMB 存取,因此您可以使用標準 C++ I/O 類別和函式撰寫簡單的應用程式,以存取 Azure 檔案共用。 本文將說明如何撰寫使用 Azure 儲存體 C++ SDK 的應用程式,其會使用 File REST API 與 Azure 檔案服務通訊。
必要條件
設定
本節會引導您準備專案以搭配適用於 C++ 的 Azure Blob 儲存體用戶端程式庫 v12 使用。
安裝套件
vcpkg install 命令將安裝適用於 C++ 的 Azure 儲存體 Blob SDK 和必要相依性:
vcpkg.exe install azure-storage-files-shares-cpp:x64-windows
如需詳細資訊,請瀏覽 GitHub 以取得並建置適用於 C++ 的 Azure SDK \(英文\)。
建立專案
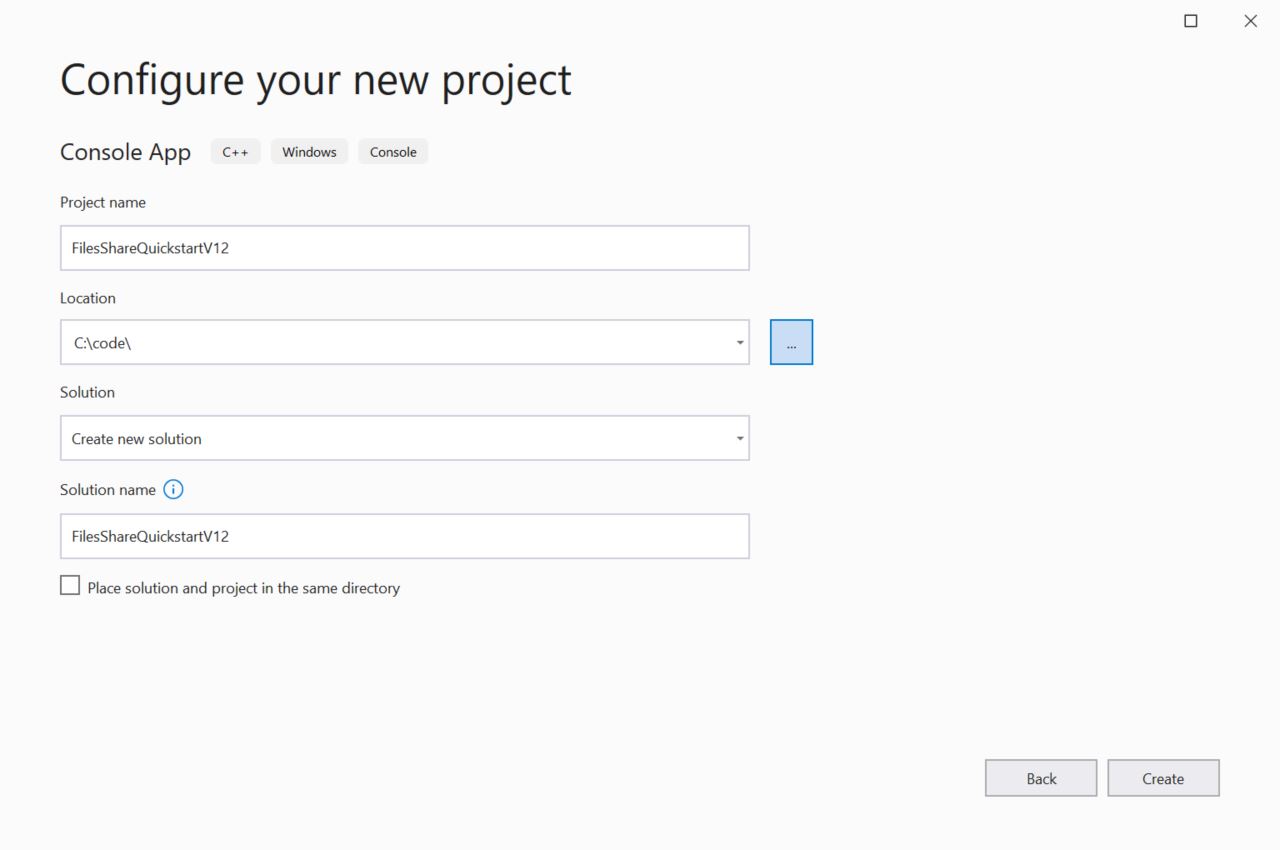
在 Visual Studio 中,為 Windows 建立名為 FilesShareQuickstartV12 的新 C++ 主控台應用程式。

從 Azure 入口網站複製您的認證
當應用程式範例向 Azure 儲存體發出要求時,該要求必須獲得授權。 若要對要求授權,請以連接字串的形式將儲存體帳戶認證新增至應用程式。 若要檢視您的儲存體帳戶認證,請遵循下列步驟:
登入 Azure 入口網站。
找出您的儲存體帳戶。
在 [儲存體帳戶] 功能表窗格的 [安全性 + 網路] 下方,選取 [存取金鑰]。 在此處,您可以檢視帳戶存取金鑰,和每個金鑰的完整連接字串。

在 [存取金鑰] 窗格中,選取 [顯示金鑰]。
在 [金鑰 1] 區段中,找出連接字串值。 選取 [複製到剪貼簿] 圖示以複製連接字串。 在下一小節中,您會將該連接字串值新增至環境變數。

設定儲存體連接字串
在複製連接字串後,請在執行應用程式的本機電腦上,將該字串寫入至新的環境變數中。 若要設定環境變數,請開啟主控台視窗,並遵循您的作業系統所適用的指示。 將 <yourconnectionstring> 用實際的連接字串取代。
setx AZURE_STORAGE_CONNECTION_STRING "<yourconnectionstring>"
在 Windows 中新增環境變數之後,您必須啟動新的命令視窗執行個體。
重新啟動程式
新增環境變數之後,請重新啟動任何需要讀取環境變數的執行中程式。 例如,請先重新啟動您的開發環境或編輯器,然後再繼續。
程式碼範例
這些範例程式碼片段示範如何使用適用於 C++ 的 Azure 檔案儲存體共用用戶端程式庫來執行下列工作:
新增 Include 檔案
從專案目錄:
- 在 Visual Studio 中,開啟 FilesShareQuickstartV12.sln 解決方案檔。
- 在 Visual Studio 中,開啟 FilesShareQuickstartV12.cpp 來源檔案。
- 移除
main中所有自動產生的程式碼。 - 新增
#include陳述式。
#include <iostream>
#include <stdlib.h>
#include <vector>

#include <azure/storage/files/shares.hpp>
取得連接字串
下列程式碼會從設定儲存體連接字串中建立的環境變數,擷取儲存體帳戶的連接字串。
將此程式碼新增到 main() 中:
        // Retrieve the connection string for use with the application. The storage
        // connection string is stored in an environment variable on the machine
        // running the application called AZURE_STORAGE_CONNECTION_STRING.
        // Note that _MSC_VER is set when using MSVC compiler.
        static const char* AZURE_STORAGE_CONNECTION_STRING = "AZURE_STORAGE_CONNECTION_STRING";
#if !defined(_MSC_VER)
        const char* connectionString = std::getenv(AZURE_STORAGE_CONNECTION_STRING);
#else
        // Use getenv_s for MSVC
        size_t requiredSize;
        getenv_s(&requiredSize, NULL, NULL, AZURE_STORAGE_CONNECTION_STRING);
        if (requiredSize == 0) {
            throw std::runtime_error("missing connection string from env.");
        }
        std::vector<char> value(requiredSize);
        getenv_s(&requiredSize, value.data(), value.size(), AZURE_STORAGE_CONNECTION_STRING);
        std::string connectionStringStr = std::string(value.begin(), value.end());
        const char* connectionString = connectionStringStr.c_str();
#endif
建立檔案共用
呼叫 CreateFromConnectionString \(英文\) 函式,以建立 ShareClient \(英文\) 類別的執行個體。 接著,呼叫 CreateIfNotExists \(英文\),在您的儲存體帳戶中建立實際的檔案共用。
將此程式碼新增到 main() 的結尾處:
using namespace Azure::Storage::Files::Shares;

std::string shareName = "sample-share";

// Initialize a new instance of ShareClient
auto shareClient = ShareClient::CreateFromConnectionString(connectionString, shareName);

// Create the files share. This will do nothing if the files share already exists.
std::cout << "Creating files share: " << shareName << std::endl;
shareClient.CreateIfNotExists();
將檔案上傳至檔案共用
下列程式碼片段:
- 宣告包含 "Hello Azure!" 的字串。
- 透過取得根 ShareDirectoryClient \(英文\),然後在來自建立檔案共用一節的檔案共用上呼叫 GetFileClient \(英文\),來取得對 ShareFileClient \(英文\) 物件的參考。
- 呼叫 ,將字串上傳至檔案上傳From 函式。 如果檔案尚未存在,此函式會建立該檔案,若已存在,則會加以更新。
將此程式碼新增到 main() 的結尾處:
std::string fileName = "sample-file";
uint8_t fileContent[] = "Hello Azure!";

// Create the ShareFileClient
ShareFileClient fileClient = shareClient.GetRootDirectoryClient().GetFileClient(fileName);

// Upload the file
std::cout << "Uploading file: " << fileName << std::endl;
fileClient.UploadFrom(fileContent, sizeof(fileContent));
設定檔案的中繼資料
透過呼叫 ShareFileClient.SetMetadata \(英文\) 函式來設定檔案的中繼資料屬性。
將此程式碼新增到 main() 的結尾處:
Azure::Storage::Metadata fileMetadata = { {"key1", "value1"}, {"key2", "value2"} };
fileClient.SetMetadata(fileMetadata);
列出檔案的中繼資料
透過呼叫 ShareFileClient.GetProperties \(英文\) 函式來取得檔案的中繼資料屬性。 中繼資料位於已傳回 Value 的 Metadata 欄位底下。 中繼資料將是機碼/值組,類似於設定檔案的中繼資料中的範例。
// Retrieve the file properties
auto properties = fileClient.GetProperties().Value;
std::cout << "Listing blob metadata..." << std::endl;
for (auto metadata : properties.Metadata)
{
    std::cout << metadata.first << ":" << metadata.second << std::endl;
}
下載檔案
假設已在列出檔案的中繼資料中擷取檔案的屬性,則使用已上傳檔案的屬性來建立新的 std::vector<uint8_t> 物件。 呼叫 ,將先前建立的檔案下載到新的 std::vector<uint8_t> 物件中ShareFileClient 基底類別中的 DownloadTo 函式。 最後,顯示下載的檔案資料。
將此程式碼新增到 main() 的結尾處:
std::vector<uint8_t> fileDownloaded(properties.FileSize);
fileClient.DownloadTo(fileDownloaded.data(), fileDownloaded.size());

std::cout << "Downloaded file contents: " << std::string(fileDownloaded.begin(), fileDownloaded.end()) << std::endl;
刪除檔案
下列程式碼透過呼叫 ShareFileClient.Delete \(英文\) 函式,從 Azure 儲存體檔案共用刪除 Blob。
std::cout << "Deleting file: " << fileName << std::endl;
fileClient.DeleteIfExists();
刪除檔案共用
下列程式碼透過使用 ShareClient 來刪除整個檔案共用,以清除應用程式所建立的資源。刪除。
將此程式碼新增到 main() 的結尾處:
std::cout << "Deleting files share: " << shareName << std::endl;
shareClient.DeleteIfExists();
執行程式碼
此應用程式會建立容器,並將文字檔上傳至 Azure Blob 儲存體。 接著,範例會列出容器中的 Blob、下載檔案,並顯示檔案內容。 最後,應用程式會刪除 Blob 和容器。
應用程式的輸出類似下列範例:
Azure Files Shares storage v12 - C++ quickstart sample
Creating files share: sample-share
Uploading file: sample-file
Listing file metadata...
key1:value1
key2:value2
Downloaded file contents: Hello Azure!
Deleting file: sample-file
Deleting files share: sample-share
下一步
在此快速入門中,您已了解如何使用 C++ 上傳、下載及列出檔案。 您也了解如何建立和刪除 Azure 儲存體檔案共用。
若要查看 C++ Blob 儲存體範例,請繼續參閱: