Build agents with Copilot Studio agent builder
The Copilot Studio agent builder provides a simple interface that you can use to quickly and easily build declarative agents, either by using natural language or manually.
To get started with the Copilot Studio agent builder, open the Microsoft 365 Copilot app, and in the right rail, choose Create agents. You can also choose Create agents from Microsoft 365 Copilot in Teams.
Note
Copilot Studio agent builder capabilities differ based on the user's license. For details, see Agent capabilities for Microsoft 365 users.
You can author your declarative agent in two ways:
- Via the Describe tab, using natural language
- Via the Configure tab where you can build it manually
Both tabs work seamlessly to provide a rich authoring experience.
Note
The Describe tab is only available when your Microsoft 365 language is set to one of the available languages. You can build your agent via the Configure tab if the Describe tab is not supported in your preferred language.
Describe your agent
The Describe tab allows you to create an agent using plain language. As you provide information conversationally, the agent's name, description, and instructions update continuously to refine the agent's behavior. This experience provides a rich yet simple natural language way to create a customized agent. After you create an agent, you can return to the agent and use the Describe tab to update it using natural language.
You build agents in plain language by answering the questions the agent builder asks. The builder progressively updates the agent in each turn of the conversation, and changes are saved automatically. You can make updates to the agent in any turn of the conversation. Changes to the agent's name, description, and instructions update automatically. However, you can't add an icon or knowledge sources directly from the Describe tab. Use the Configure tab to add an icon, knowledge sources, or capabilities.
Configure your agent
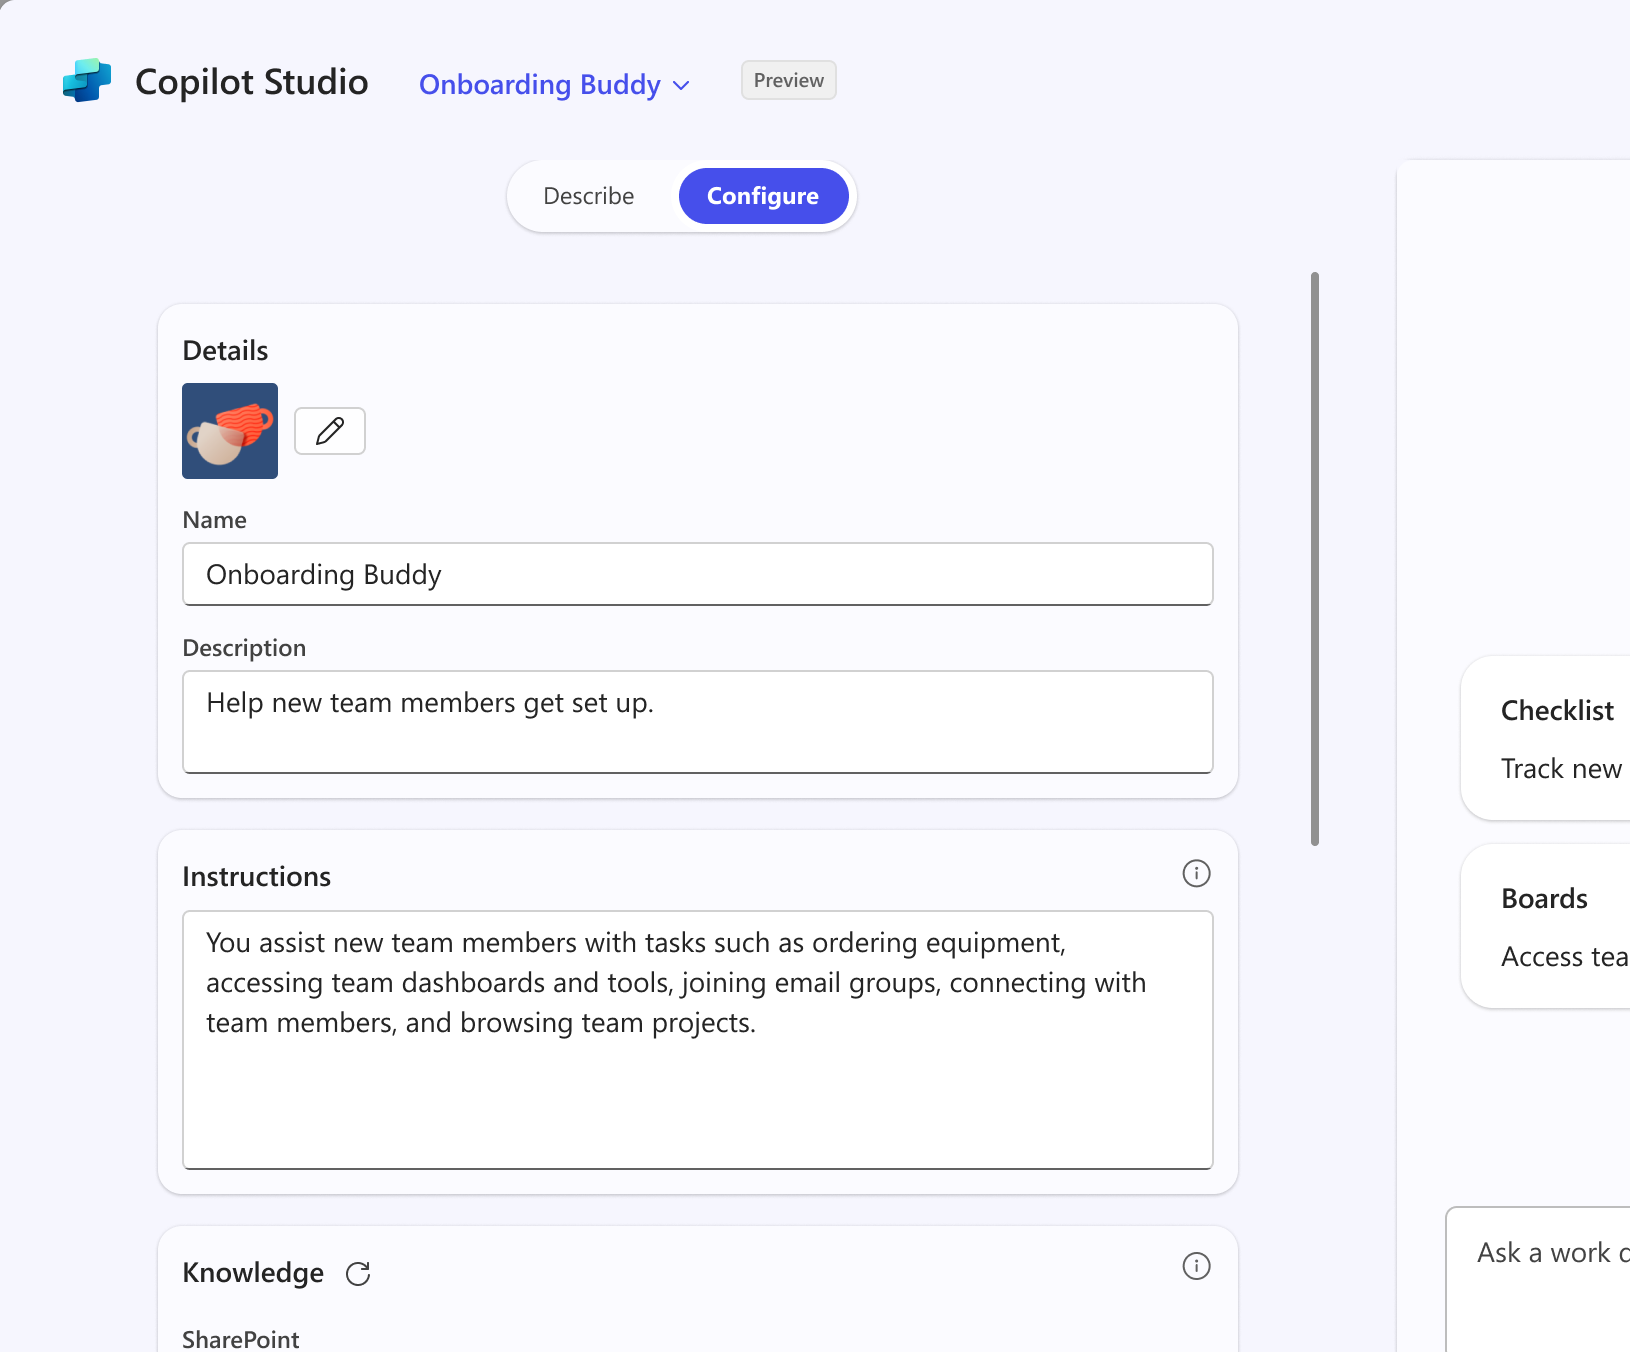
In addition to using the Describe tab, you can also directly configure the agent's behavior using the Configure tab.
The Configure tab provides you with the ability to view and edit information about the agent, giving you more control and more precision. The Describe and Configure tabs are in sync. The fields in the Configure tab update to reflect the latest changes from the Describe tab. You can switch between the tabs to use the experience that is most comfortable to you to author the agent.

The following table describes the fields that make up the agent.
| Field | Description |
|---|---|
| Name | The name of your agent. Use something that is descriptive and unique. Character limit of 30 characters. |
| Icon | You can manually upload an image to represent your agent and give it a unique personality.
|
| Description | The description helps the Large Language Model (LLM) identify and use your agent for a specific task or situation. Make it as short, precise, and simple as possible. It's also displayed in the app file for use in the app catalog. Character limit of 1,000 characters. |
| Instructions | Specific instructions to the LLM that you want to use to extend the capabilities of Microsoft 365 Copilot. They direct the behavior of the agent, including its tasks and how it completes them. If you're using the Describe tab, they're autogenerated for you. Character limit of 8,000 characters. For more information, see Write effective instructions. |
| Knowledge | You can specify up to 20 knowledge sources (including SharePoint sites, folders, and files) or Microsoft Graph connectors. For details, see the Add knowledge sources section. |
| Capabilities | You can enhance the user experience of your declarative agent by adding capabilities. For details, see Add capabilities to your declarative agent. |
| Starter Prompts | Starter prompts help other users understand commonly supported scenarios by your agent. Each starter prompt comes with a name and description. There's no minimum number of starter prompts. |
Try your agent
The agent in the right pane is an ephemeral instance of the agent that shows up as a side-by-side screen within the authoring experience. You can use it to test the agent while you're creating or making updates to it. You can test your agent in the test pane to experience it in a similar way to end users. The test pane is enabled after the agent has name, description, and instructions. It behaves according to those instructions like a fully fledged agent, including the ability to respond to complex queries within its realm of specified knowledge. The agent updates during each turn of the conversation as new information is added in the Describe or Configure tab.
The agent you see in the test pane isn't created yet, so some features aren't available. For example, you can't use it to share prompts, provide feedback, or @mention other agents in the Microsoft 365 Copilot app. These features become available after you create the agent.
The test pane initially appears with suggested starter prompts, which when clicked invokes the prompt and starts the conversation. You can select New Chat to start a new conversation with the agent to view the starter prompts again.
Add knowledge sources
The agent builder allows you to configure specific knowledge sources for the agent to reference. This feature helps the agent provide more relevant answers based on specific files, folders, and sites from SharePoint and Microsoft Graph connectors.
Web content
You can add specific public websites as agent knowledge sources to make your agent context-aware. When you reference websites as knowledge sources, the following limits apply:
- Public website URLs must only be two levels; for example,
https://example.org/a/b/cis an invalid URL because it's more than two levels. - URLs can't contain query parameters; for example,
https://example.org?test=1is invalid. - You can add up to four URLs.
SharePoint content
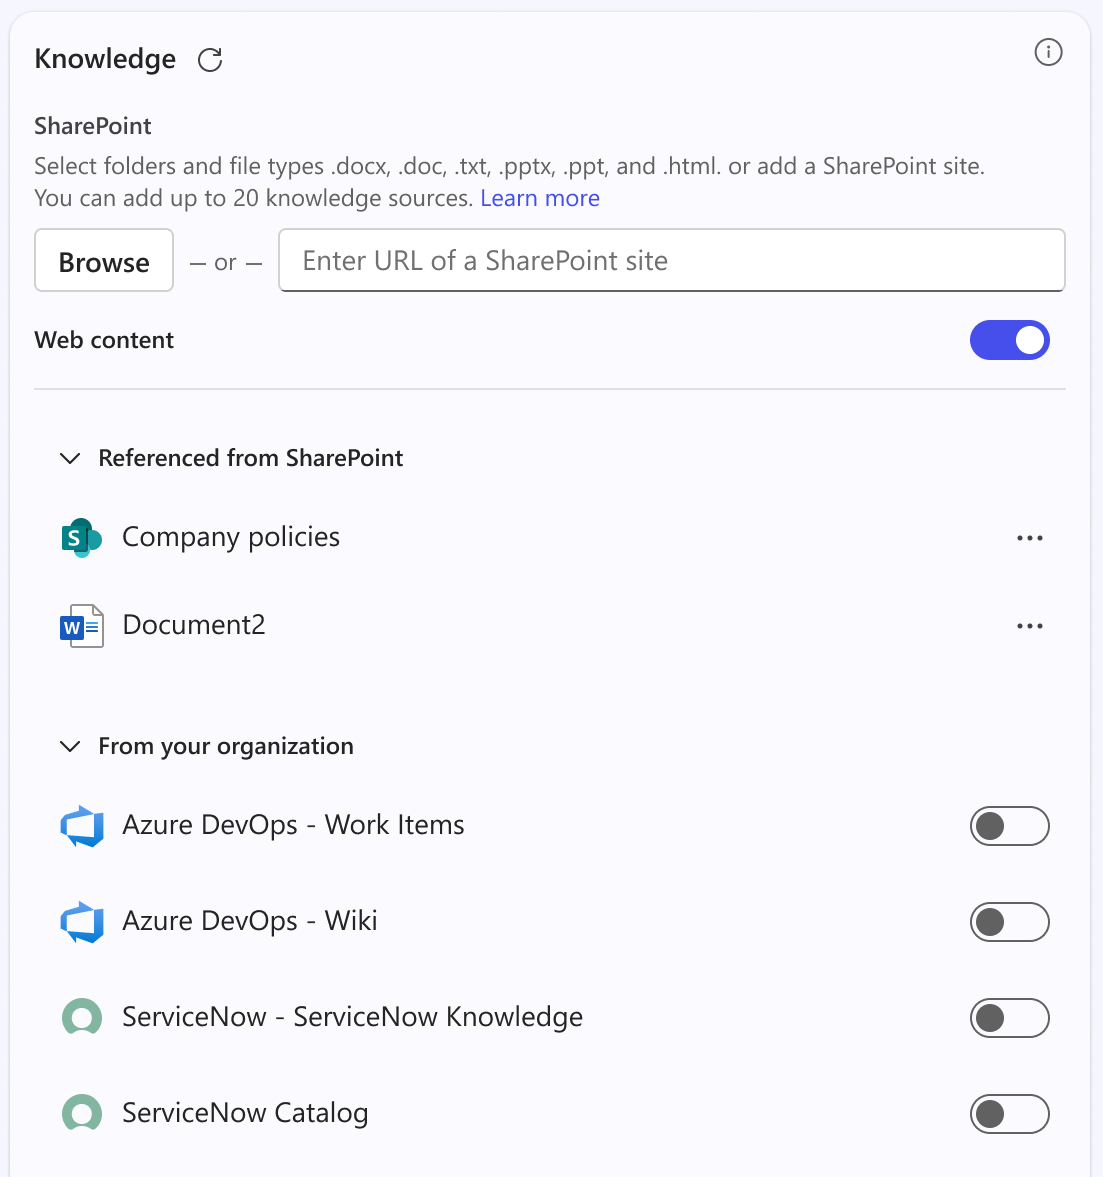
The agent can reference specific SharePoint sites, files, and folders as its knowledge source. When referencing sources from SharePoint, consider the following limits:
- A total of 20 knowledge sources (including sites, folders, and files) can be selected for each agent.
- Files already uploaded to SharePoint might have existing permissions and sensitivity labels, which are respected when the agent is generating a response.
The following table lists the supported file types and their respective limits.
| File type | File size limit |
|---|---|
| .doc | 150 MB |
| .docx | 512 MB |
| .html | 150 MB |
| 512 MB | |
| .ppt | 150 MB |
| .pptx | 512 MB |
| .txt | 150 MB |
| .xls | 150 MB |
| .xlsx | 150 MB |
Important
If Restricted SharePoint Search is enabled, you won't be able to use SharePoint as a knowledge source.
Entering a URL for a SharePoint site, folder, or file
You can enter a URL for a SharePoint site, folder, or file, such as contoso.sharepoint.com/sites/policies. The agent searches the URL and subpaths. For example, a URL such as contoso.sharepoint.com/sites also includes subpaths like contoso.sharepoint.com/sites/policies. The agent uses relevant information to provide a targeted response.
After you provide the SharePoint URL, press Enter to add it as a knowledge source.
Opening the SharePoint file picker
You can also select files or folders from the SharePoint file picker. The left pane displays your recently accessed SharePoint sites. To view more SharePoint sites, select More places. If you recently created a site, it will appear after several minutes.
Note
The SharePoint picker might not show all the communication sites that you have access to. Communication sites only show up in the Quick Access and Recent sections of the SharePoint picker.
After you select a site, you can select several files and folders. Doing so adds the SharePoint file or folder to the agent's knowledge sources. When the same site includes multiple folders, select the button next to the folder name to view other folders.

You can also upload files into SharePoint by using the picker. The file appears in the same folder after it's finished uploading and is ready for use in agent builder.
File readiness
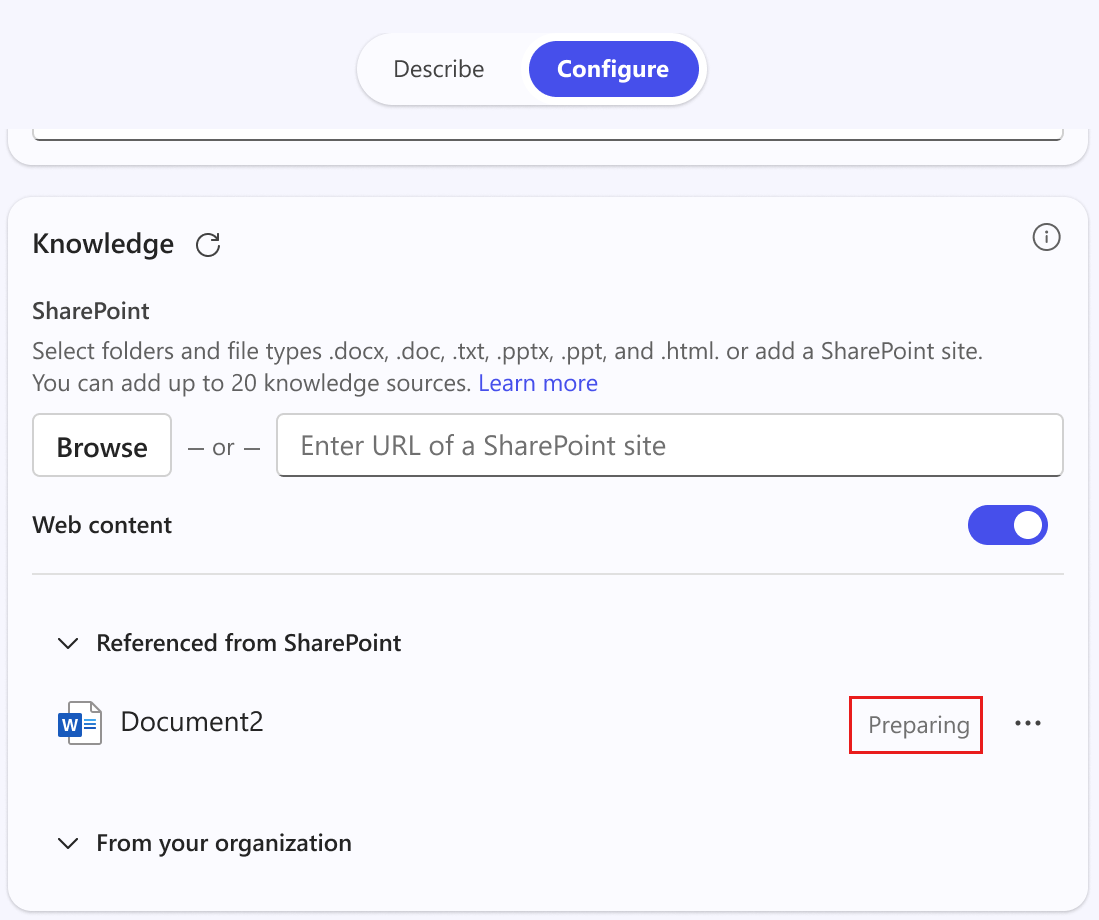
When new files are uploaded to SharePoint, they can take up to several minutes to be ready for the agent to include in its response. You can still test your agent in the test pane if sources aren't ready. However, responses won't include information from the newly uploaded file until it's ready.
You can check the file readiness by looking in the Knowledge section in the Configure tab; the file has the word "Preparing" next to it. When the underlying file uploaded to SharePoint is renamed or deleted, the agent picks up the changes. You can also select the reload button on top of the Knowledge section to manually reload the state.

Microsoft Graph connectors
Microsoft Graph connectors allow agents to include knowledge from external repositories or systems such as customer accounts, incident tickets, and knowledge articles. Admins must enable and configure Microsoft Graph connectors in the Microsoft Admin Center. At first, the connectors may be collapsed in the From your organization section of the Knowledge sources.
If at least one connector is enabled, you can add it to your agent. Your agent is able to answer questions related to that connector. The information retrieved from the connector is indexed and refreshed according to the way in which the connector was configured. The agent can cite relevant information from the indexed data and link the end user to the data source.

Add capabilities
In the Capabilities section of the Configure tab, you can choose to add the following capabilities to your agent:
- Code interpreter - Uses Python code to solve complex math problems, analyze data, and generate visualizations.
- Image generator - Generates images base on user prompts.
To add one or more capabilities to your agent, choose the toggle next to the capability you want to enable.