瞭解訊息架構
架構登錄是 Azure Device Registry 所提供的功能,是雲端和邊緣的同步存放庫。 架構登錄會儲存來自邊緣資產的訊息定義,然後公開 API 以存取邊緣的這些架構。
OPC UA 的連接器可以建立訊息架構,並將其新增至架構登錄,或者客戶可以將架構上傳至作業體驗 Web UI 或使用 ARM/Bicep 範本。
邊緣服務會使用訊息架構來篩選和轉換訊息,因為它們會路由傳送到您的產業邊緣案例。
架構是描述訊息格式及其內容的檔,可啟用處理和內容化。
訊息架構定義
架構登錄需要訊息架構中的下列必要欄位:
| 必要欄位 | 定義 |
|---|---|
$schema |
http://json-schema.org/draft-07/schema# 或 Delta/1.0。 在數據流中,JSON 架構會用於來源端點,而差異架構則用於目的地端點。 |
type |
Object |
properties |
訊息定義。 |
範例架構
下列範例架構提供每個格式定義訊息架構的範例。
JSON:
{
  "$schema": "http://json-schema.org/draft-07/schema#",
  "name": "foobarbaz",
  "description": "A representation of an event",
  "type": "object",
  "required": [ "dtstart", "summary" ],
  "properties": {
    "summary": {
      "type": "string"
    },
    "location": {
      "type": "string"
    },
    "url": {
      "type": "string"
    },
    "duration": {
      "type": "string",
      "description": "Event duration"
    }
  }
}
三角洲:
{
  "$schema": "Delta/1.0",
  "type": "object",
  "properties": {
    "type": "struct",
    "fields": [
      { "name": "asset_id", "type": "string", "nullable": false, "metadata": {} },
      { "name": "asset_name", "type": "string", "nullable": false, "metadata": {} },
      { "name": "location", "type": "string", "nullable": false, "metadata": {} },
      { "name": "manufacturer", "type": "string", "nullable": false, "metadata": {} },
      { "name": "production_date", "type": "string", "nullable": false, "metadata": {} },
      { "name": "serial_number", "type": "string", "nullable": false, "metadata": {} },
      { "name": "temperature", "type": "double", "nullable": false, "metadata": {} }
    ]
  }
}
產生架構
若要從範例數據檔產生架構,請使用 Schema Gen Helper。
如需使用架構產生器的教學課程,請參閱 教學課程:將數據從 OPC UA 伺服器傳送至 Azure Data Lake Storage Gen 2。
數據流如何使用訊息架構
訊息架構會用於數據流的所有三個階段:定義來源輸入、套用數據轉換,以及建立目的地輸出。
輸入結構描述
每個數據流來源可以選擇性地指定訊息架構。 目前,數據流不會對來源訊息架構執行運行時間驗證。
資產來源具有由 OPC UA 連接器所建立的預先定義訊息架構。
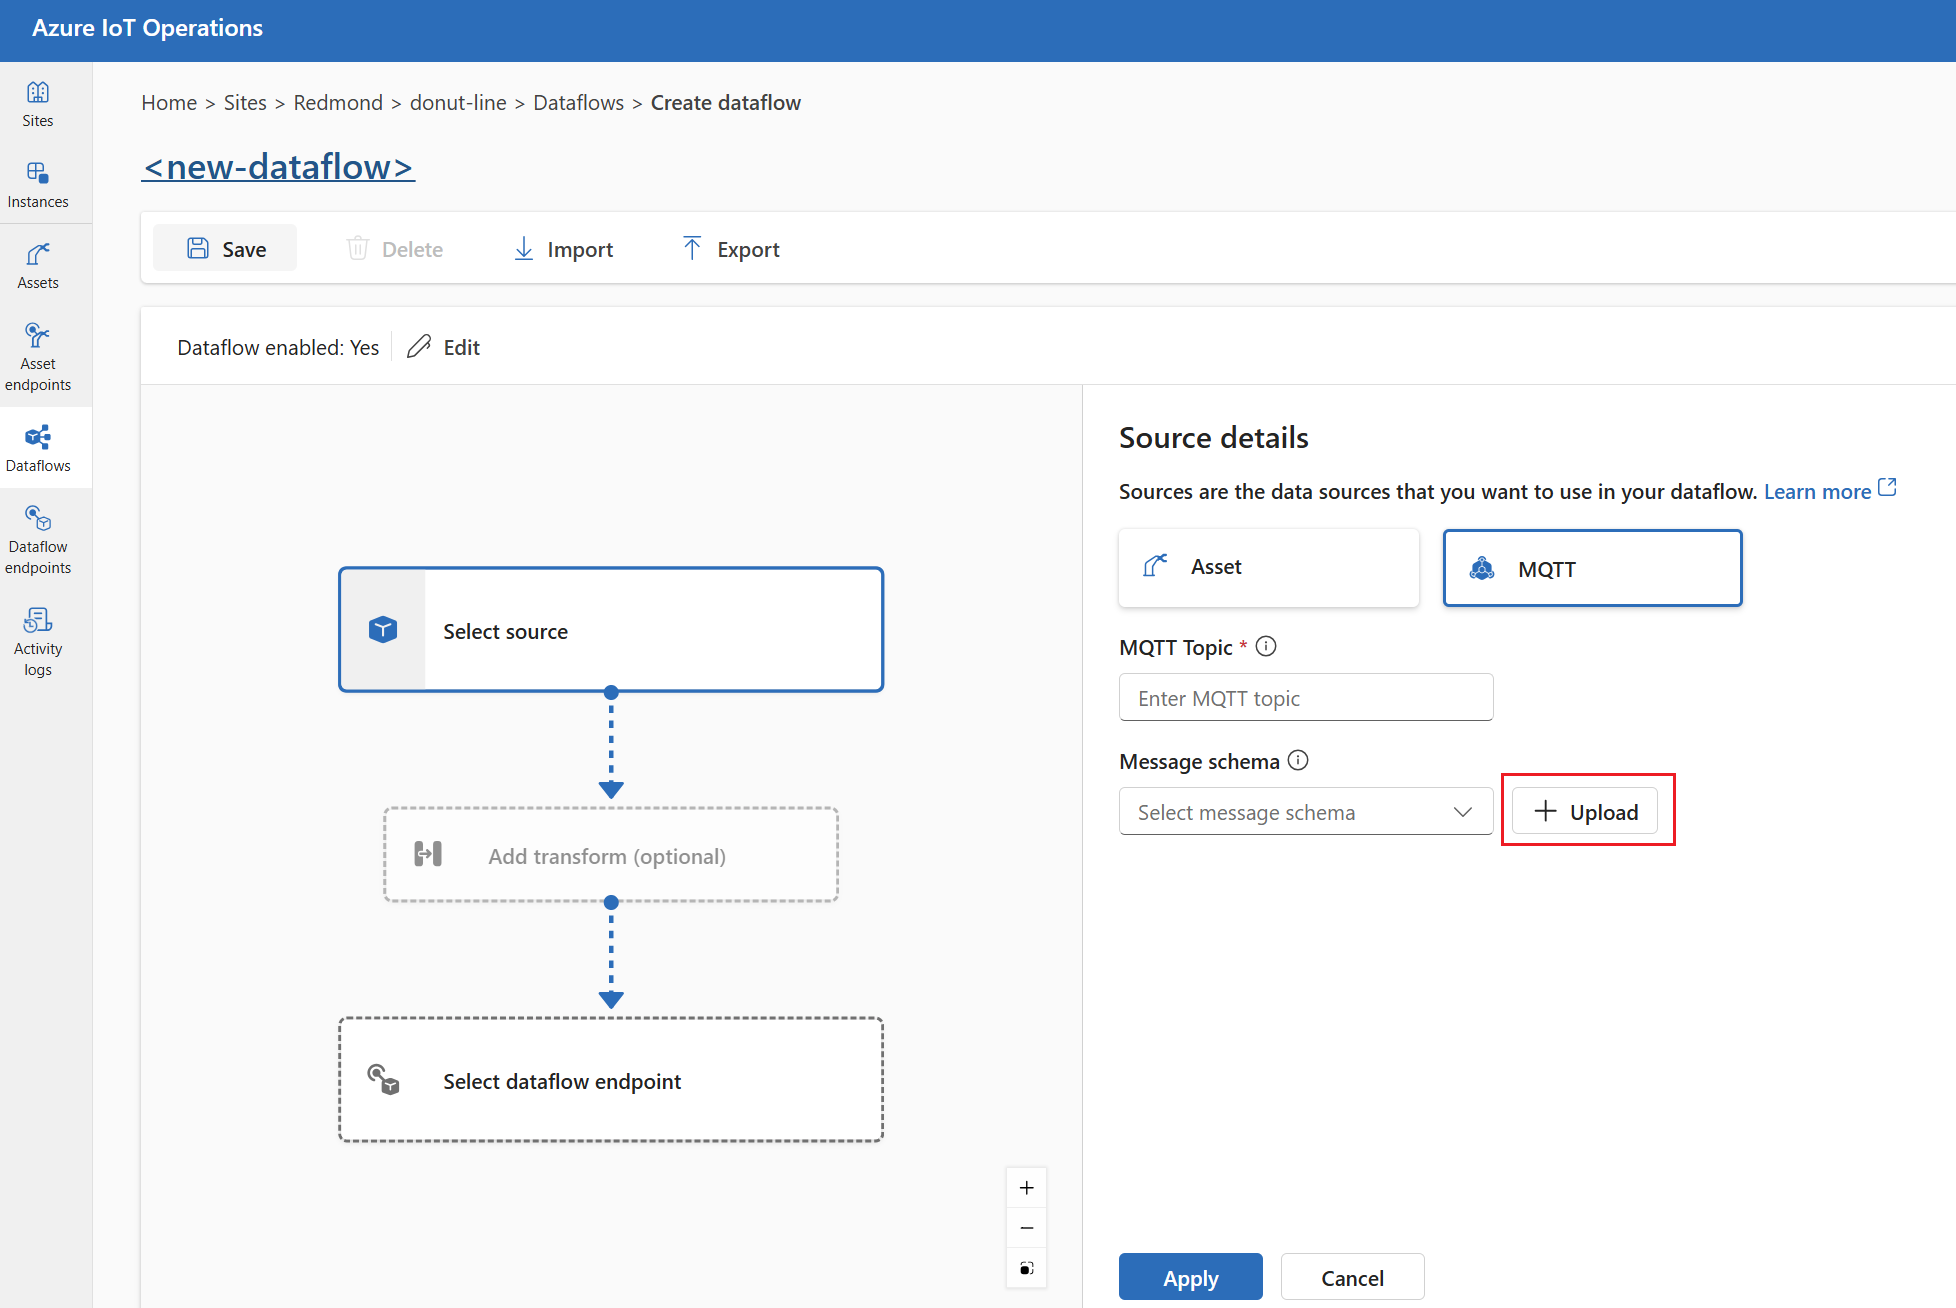
訊息代理程式來源可以上傳架構。 目前,Azure IoT 作業支援來源架構的 JSON,也稱為輸入架構。 在作業體驗中,您可以在定義訊息代理程式來源時選取現有的架構或上傳架構:

轉換
作業體驗會使用輸入架構作為數據的起點,讓您更輕鬆地根據已知的輸入訊息格式來選取轉換。
輸出結構描述
輸出架構與數據流目的地相關聯。
在作業體驗入口網站中,您可以為支援 Parquet 輸出的下列目的地端點設定輸出架構:
- 本機記憶體
- Fabric OneLake
- Azure 儲存體 (ADLS Gen2)
- Azure 資料總管
注意:Delta 架構格式用於 Parquet 和 Delta 輸出。
如果您使用 Bicep 或 Kubernetes,您可以使用 MQTT 和 Kafka 目的地端點的 JSON 輸出來設定輸出架構。 MQTT 和 Kafka 型目的地不支援 Delta 格式。
針對這些數據流,作業體驗會將任何轉換套用至輸入架構,然後以 Delta 格式建立新的架構。 建立數據流自定義資源時,它會包含指向 schemaRef 儲存在架構登錄中之所產生架構的值。
若要上傳輸出架構,請參閱 上傳架構。
上傳結構描述
輸入架構可以在作業體驗入口網站中上傳,如本文的輸入架構一節所述。 您也可以使用 Azure CLI 或 Bicep 範本來上傳架構。
使用 CLI 上傳架構
az iot ops schema 命令群組包含命令,可讓您在架構登錄中建立、檢視及管理架構。
您可以藉由參考 JSON 檔案或將架構納入為內嵌內容,來上傳架構。
下列範例會使用最少的輸入來建立從檔案呼叫 myschema 的架構。 未指定版本號碼時,架構版本為 1。
az iot ops schema create -n myschema -g myresourcegroup --registry myregistry --format json --type message --version-content myschema.json
下列範例會從內嵌內容建立名為 myschema 的架構,並指派版本號碼。
az iot ops schema create -n myschema -g myresourcegroup --registry myregistry --format delta --type message --version-content '{\"hello\": \"world\"}' --ver 14
提示
如果您不知道您的登錄名稱,請使用 schema registry list 命令來查詢它。 例如:
az iot ops schema registry list -g myresourcegroup --query "[].{Name:name}" -o tsv
create命令完成後,您應該會在記憶體帳戶容器中看到具有架構內容的 Blob。 Blob 的名稱格式 schema-namespace/schema/version為 。
您可以使用 Helper 命令 az iot ops schema -h查看更多選項。
使用 Bicep 範本上傳架構
建立 Bicep .bicep 檔案,並將架構內容新增至頂端做為變數。 此範例是對應至快速入門中 OPC UA 數據的 Delta 架構。
// Delta schema content matching OPC UA data from quickstart
// For ADLS Gen2, ADX, and Fabric destinations
var opcuaSchemaContent = '''
{
  "$schema": "Delta/1.0",
  "type": "object",
  "properties": {
    "type": "struct",
    "fields": [
      {
        "name": "temperature",
        "type": {
          "type": "struct",
          "fields": [
            {
              "name": "SourceTimestamp",
              "type": "string",
              "nullable": true,
              "metadata": {}
            },
            {
              "name": "Value",
              "type": "integer",
              "nullable": true,
              "metadata": {}
            },
            {
              "name": "StatusCode",
              "type": {
                "type": "struct",
                "fields": [
                  {
                    "name": "Code",
                    "type": "integer",
                    "nullable": true,
                    "metadata": {}
                  },
                  {
                    "name": "Symbol",
                    "type": "string",
                    "nullable": true,
                    "metadata": {}
                  }
                ]
              },
              "nullable": true,
              "metadata": {}
            }
          ]
        },
        "nullable": true,
        "metadata": {}
      },
      {
        "name": "Tag 10",
        "type": {
          "type": "struct",
          "fields": [
            {
              "name": "SourceTimestamp",
              "type": "string",
              "nullable": true,
              "metadata": {}
            },
            {
              "name": "Value",
              "type": "integer",
              "nullable": true,
              "metadata": {}
            },
            {
              "name": "StatusCode",
              "type": {
                "type": "struct",
                "fields": [
                  {
                    "name": "Code",
                    "type": "integer",
                    "nullable": true,
                    "metadata": {}
                  },
                  {
                    "name": "Symbol",
                    "type": "string",
                    "nullable": true,
                    "metadata": {}
                  }
                ]
              },
              "nullable": true,
              "metadata": {}
            }
          ]
        },
        "nullable": true,
        "metadata": {}
      }
    ]
  }
}
'''
然後,在架構正下方的相同檔案中,定義架構資源,以及您部署 Azure IoT 作業中現有架構登錄資源的指標。
// Replace placeholder values with your actual resource names
param schemaRegistryName string = '<SCHEMA_REGISTRY_NAME>'

// Pointers to existing resources from AIO deployment
resource schemaRegistry 'Microsoft.DeviceRegistry/schemaRegistries@2024-09-01-preview' existing = {
  name: schemaRegistryName
}

// Name and version of the schema
param opcuaSchemaName string = 'opcua-output-delta'
param opcuaSchemaVer string = '1'

// Define the schema resource to be created and instantiate a version
resource opcSchema 'Microsoft.DeviceRegistry/schemaRegistries/schemas@2024-09-01-preview' = {
  parent: schemaRegistry
  name: opcuaSchemaName
  properties: {
    displayName: 'OPC UA Delta Schema'
    description: 'This is a OPC UA delta Schema'
    format: 'Delta/1.0'
    schemaType: 'MessageSchema'
  }
}
resource opcuaSchemaVersion 'Microsoft.DeviceRegistry/schemaRegistries/schemas/schemaVersions@2024-09-01-preview' = {
  parent: opcSchema
  name: opcuaSchemaVer
  properties: {
    description: 'Schema version'
    schemaContent: opcuaSchemaContent
  }
}
定義架構內容和資源之後,您可以部署 Bicep 範本,以在架構登錄中建立架構。
az deployment group create --resource-group <RESOURCE_GROUP> --template-file <FILE>.bicep