教學課程:將數據從 OPC UA 伺服器傳送至 Azure Data Lake Storage Gen 2
在快速入門中,您已建立數據流,以將數據從 Azure IoT 作業傳送至事件中樞,然後透過 EventStreams Microsoft Fabric。
不過,您也可以在不使用事件中樞的情況下,將數據直接傳送至記憶體端點。 此方法需要建立代表數據的 Delta Lake 架構、將架構上傳至 Azure IoT 作業,然後建立數據流,以從 OPC UA 伺服器讀取數據,並將其寫入記憶體端點。
本教學課程是以快速入門設定為基礎,並示範如何將數據雙向處理至 Azure Data Lake Storage Gen 2。 此方法可讓您將數據直接儲存在可調整且安全的 Data Lake 中,以用於進一步分析和處理。
必要條件
完成快速入門的第二個步驟,從 OPC UA 伺服器將數據傳送至 Azure IoT Operations MQTT 訊息代理程式。 請確定您可以在事件中樞中看到數據。
使用 Data Lake Storage 功能建立記憶體帳戶
首先,請遵循步驟來 建立具有 Data Lake Storage Gen 2 功能的記憶體帳戶。
- 為記憶體帳戶選擇令人難忘的但唯一名稱,因為後續步驟中需要它。
- 為了獲得最佳結果,請使用接近 Azure IoT 作業執行所在 Kubernetes 叢集的位置。
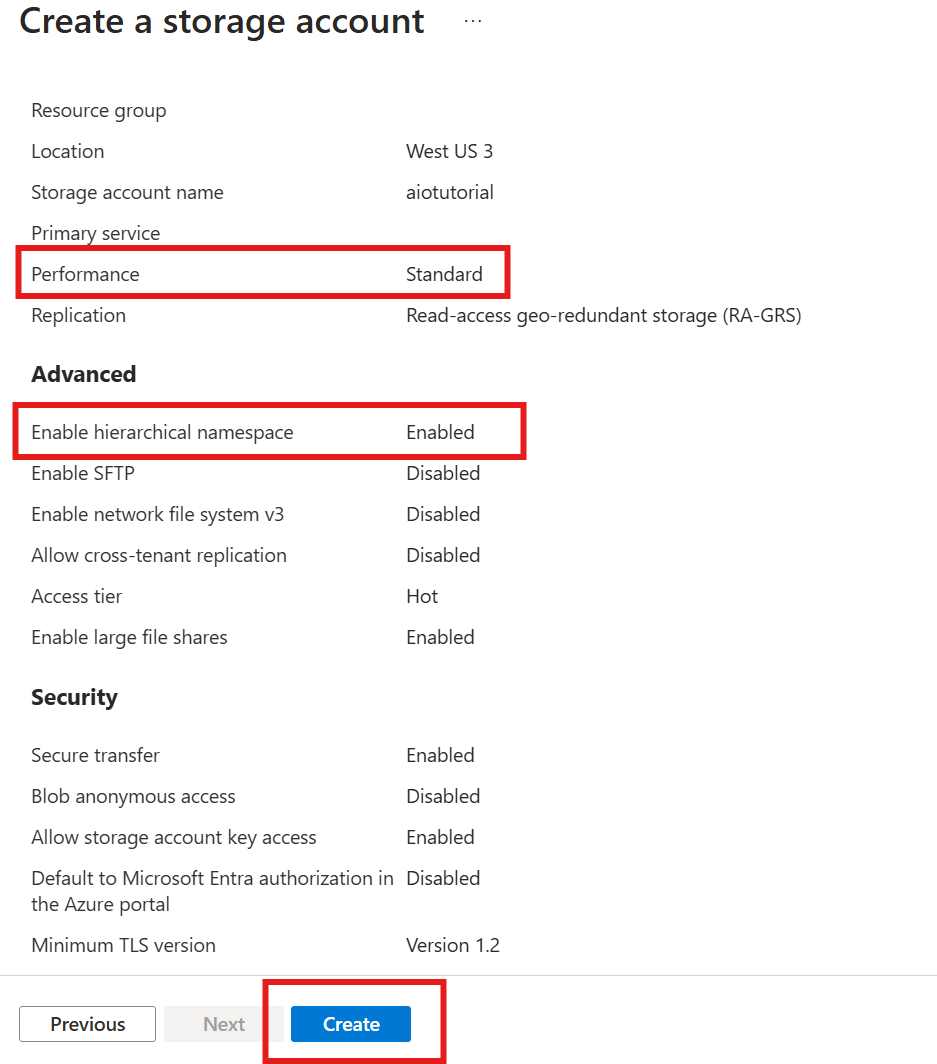
- 在建立程式期間,啟用 階層命名空間 設定。 需要此設定,Azure IoT 作業才能寫入記憶體帳戶。
- 您可以將其他設定保留為預設值。
在 [ 檢閱 ] 步驟中,確認設定,然後選取 [建立 ] 以建立記憶體帳戶。
取得 Azure IoT 作業的延伸模組名稱
在 Azure 入口網站 中,尋找您在快速入門中建立的 Azure IoT 作業實例。 在 [ 概觀] 刀鋒視窗中,尋找 Arc延伸 模組區段,並查看延伸模組的名稱。 該名稱應會顯示為 azure-iot-operations-xxxxx。
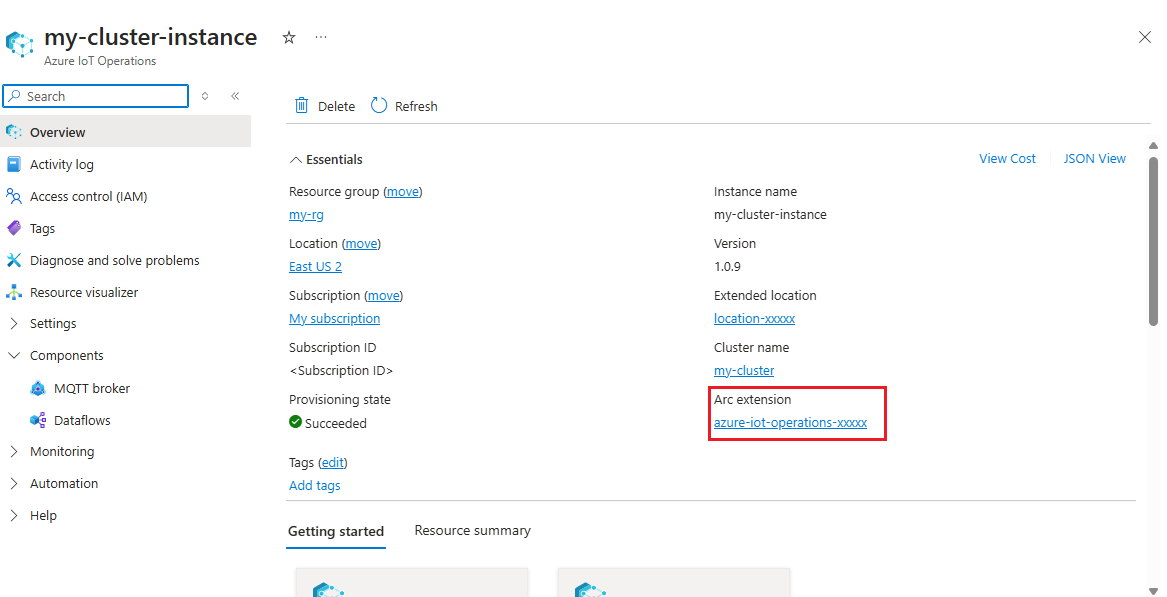
後續步驟會使用此擴充功能名稱,將許可權指派給記憶體帳戶。
將許可權指派給 Azure IoT 作業以寫入記憶體帳戶
首先,在記憶體帳戶中,移至 [訪問控制 (IAM)] 刀鋒視窗,然後選取 [+ 新增角色指派]。 在 [新增角色指派] 刀鋒視窗中,搜尋記憶體 Blob 數據參與者角色並加以選取。
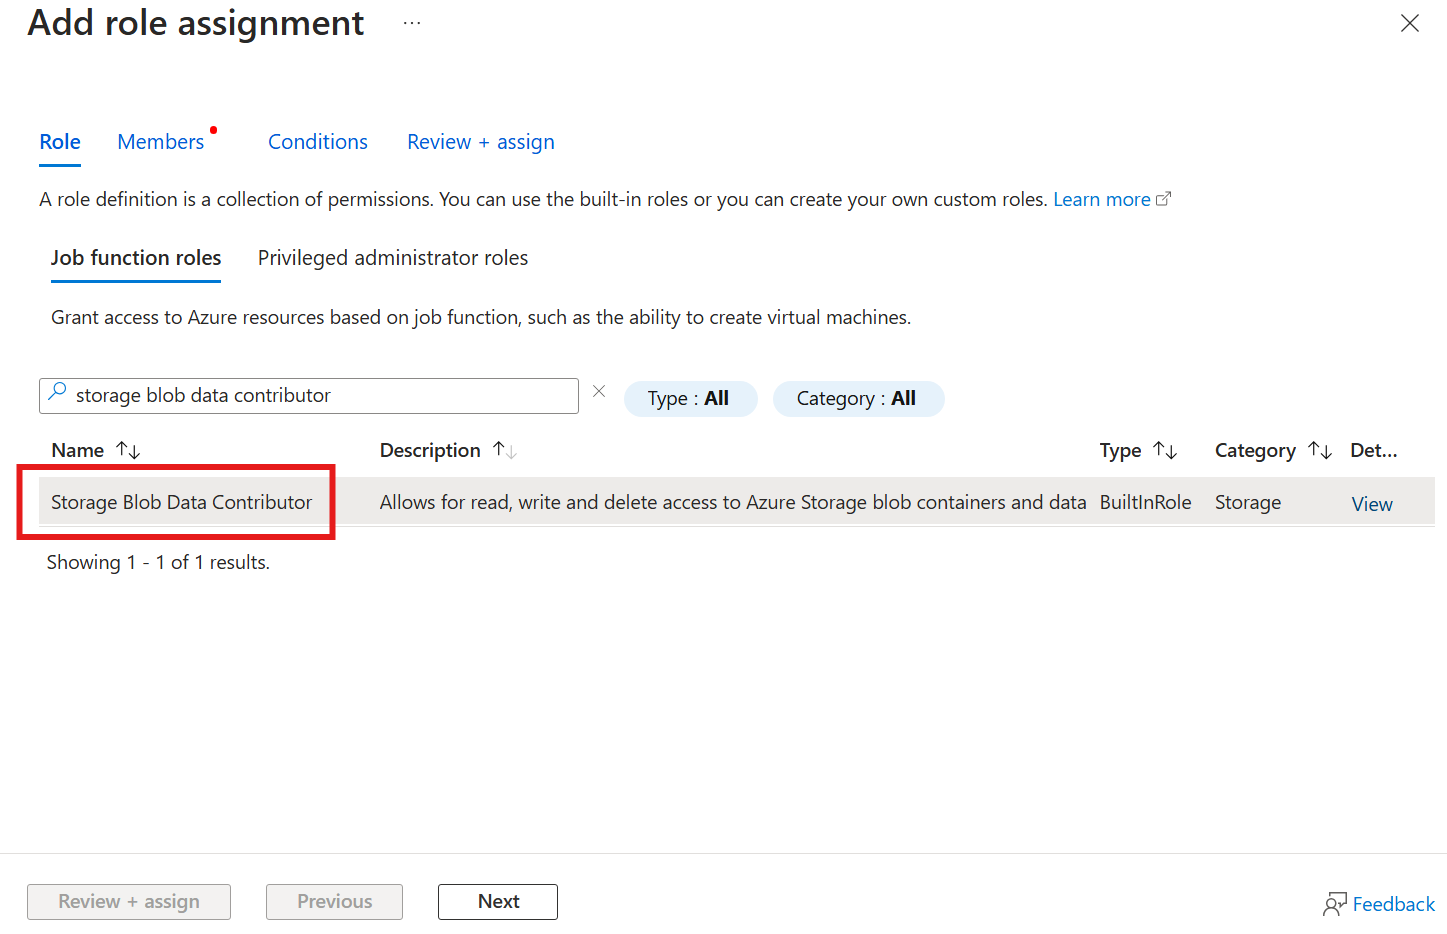
然後,選取 [下一步 ] 以取得 [ 成員 ] 區段。
接下來,選擇 [選取成員],然後在 [選取] 方塊中,搜尋名為 azure-iot-operations-xxxxx 的 Azure IoT Operations Arc 擴充功能的受控識別,然後加以選取。
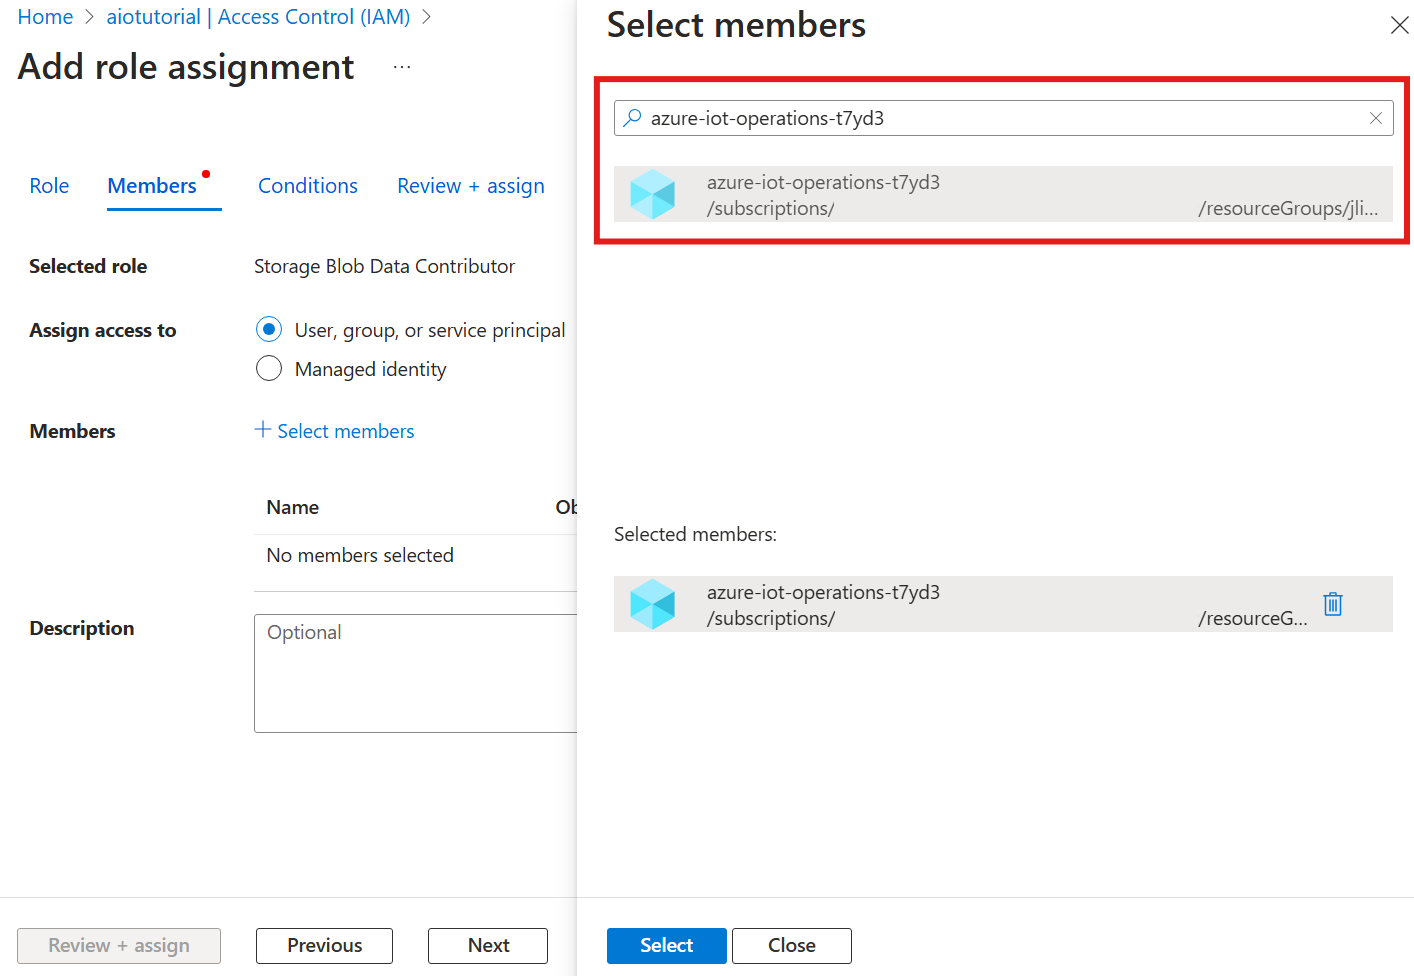
使用 [檢閱 + 指派] 完成指派。
在儲存體帳戶中建立容器
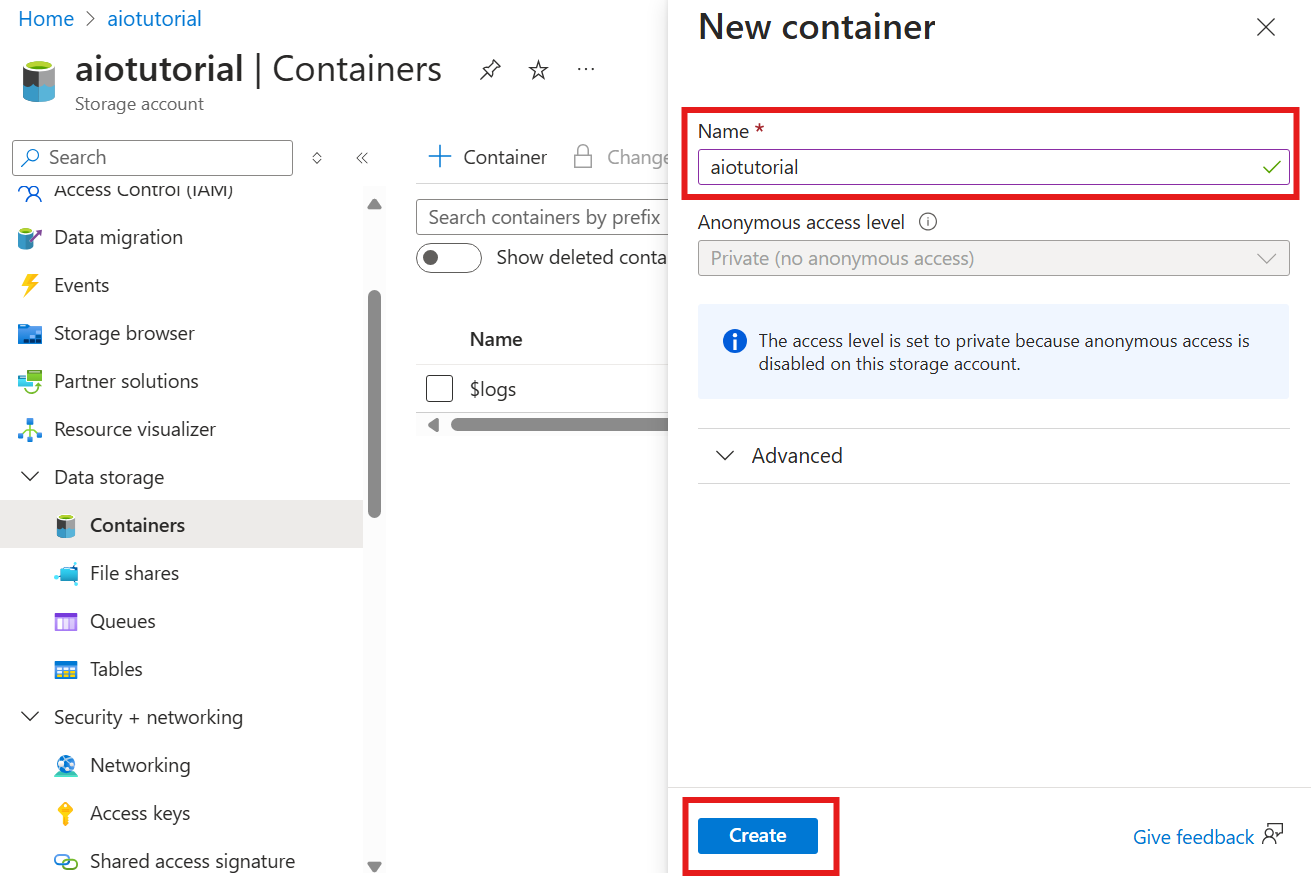
在記憶體帳戶中,移至 [容器] 刀鋒視窗,然後選取 [+ 容器]。 在本教學課程中,將容器 aiotutorial命名為 。 選取 [建立] 建立容器。
取得架構登錄名稱和命名空間
若要將架構上傳至 Azure IoT 作業,您必須知道架構登錄名稱和命名空間。 您可以使用 Azure CLI 取得此資訊。
執行下列命令以取得架構登錄名稱和命名空間。 以您的值取代預留位置。
az iot ops schema registry list -g <RESOURCE_GROUP> --query "[0].{name: name, namespace: properties.namespace}" -o tsv
輸出應該看起來像這樣:
<REGISTRY_NAME> <SCHEMA_NAMESPACE>
儲存後續步驟的值。
將架構上傳至 Azure IoT 作業
在快速入門中,來自烤箱資產的數據看起來如下:
{
  "Temperature": {
    "SourceTimestamp": "2024-11-15T21:40:28.5062427Z",
    "Value": 6416
  },
  "FillWeight": {
    "SourceTimestamp": "2024-11-15T21:40:28.5063811Z",
    "Value": 6416
  },
  "EnergyUse": {
    "SourceTimestamp": "2024-11-15T21:40:28.506383Z",
    "Value": 6416
  }
}
Delta Lake 的必要架構格式是遵循 Delta Lake 架構串行化格式的 JSON 物件。 架構應該定義數據的結構,包括每個欄位的類型和屬性。 如需架構格式的詳細資訊,請參閱 Delta Lake 架構串行化格式檔。
提示
若要從範例數據檔產生架構,請使用 Schema Gen Helper。
在本教學課程中,數據的架構如下所示:
{
  "$schema": "Delta/1.0",
  "type": "object",
  "properties": {
    "type": "struct",
    "fields": [
      {
        "name": "Temperature",
        "type": {
          "type": "struct",
          "fields": [
            {
              "name": "SourceTimestamp",
              "type": "timestamp",
              "nullable": false,
              "metadata": {}
            },
            {
              "name": "Value",
              "type": "integer",
              "nullable": false,
              "metadata": {}
            }
          ]
        },
        "nullable": false,
        "metadata": {}
      },
      {
        "name": "FillWeight",
        "type": {
          "type": "struct",
          "fields": [
            {
              "name": "SourceTimestamp",
              "type": "timestamp",
              "nullable": false,
              "metadata": {}
            },
            {
              "name": "Value",
              "type": "integer",
              "nullable": false,
              "metadata": {}
            }
          ]
        },
        "nullable": false,
        "metadata": {}
      },
      {
        "name": "EnergyUse",
        "type": {
          "type": "struct",
          "fields": [
            {
              "name": "SourceTimestamp",
              "type": "timestamp",
              "nullable": false,
              "metadata": {}
            },
            {
              "name": "Value",
              "type": "integer",
              "nullable": false,
              "metadata": {}
            }
          ]
        },
        "nullable": false,
        "metadata": {}
      }
    ]
  }
}
將它儲存為名為 opcua-schema.json的檔案。
然後,使用 Azure CLI 將架構上傳至 Azure IoT 作業。 以您的值取代預留位置。
az iot ops schema create -n opcua-schema -g <RESOURCE_GROUP> --registry <REGISTRY_NAME> --format delta --type message --version-content opcua-schema.json --ver 1
這會使用 版本1在 Azure IoT Operations 登錄中建立名為 opcua-schema 的架構。
若要確認架構已上傳,請使用 Azure CLI 列出架構版本。
az iot ops schema version list -g <RESOURCE_GROUP> --schema opcua-schema --registry <REGISTRY_NAME>
建立數據流端點
數據流端點是傳送數據的目的地。 在此情況下,數據會傳送至 Azure Data Lake Storage Gen 2。 驗證方法是系統指派的受控識別,您設定為有權寫入記憶體帳戶。
使用 Bicep 建立數據流端點。 以您的值取代預留位置。
// Replace with your values
param aioInstanceName string = '<AIO_INSTANCE_NAME>'
param customLocationName string = '<CUSTOM_LOCATION_NAME>'

// Tutorial specific values
param endpointName string = 'adls-gen2-endpoint'
param host string = 'https://<ACCOUNT>.blob.core.windows.net'

resource aioInstance 'Microsoft.IoTOperations/instances@2024-11-01' existing = {
  name: aioInstanceName
}

resource customLocation 'Microsoft.ExtendedLocation/customLocations@2021-08-31-preview' existing = {
  name: customLocationName
}

resource adlsGen2Endpoint 'Microsoft.IoTOperations/instances/dataflowEndpoints@2024-11-01' = {
  parent: aioInstance
  name: endpointName
  extendedLocation: {
    name: customLocation.id
    type: 'CustomLocation'
  }
  properties: {
    endpointType: 'DataLakeStorage'
    dataLakeStorageSettings: {
      host: host
      authentication: {
        method: 'SystemAssignedManagedIdentity'
        systemAssignedManagedIdentitySettings: {}
      }
    }
  }
}
將檔案儲存為 adls-gen2-endpoint.bicep ,並使用 Azure CLI 進行部署
az deployment group create -g <RESOURCE_GROUP> --template-file adls-gen2-endpoint.bicep
建立資料流程
若要將數據傳送至 Azure Data Lake Storage Gen 2,您必須建立數據流,以從 OPC UA 伺服器讀取數據,並將其寫入記憶體帳戶。 在此情況下,不需要轉換,因此數據會依目前情況寫入。
使用 Bicep 建立數據流。 以您的值取代預留位置。
// Replace with your values
param aioInstanceName string = '<AIO_INSTANCE_NAME>'
param customLocationName string = '<CUSTOM_LOCATION_NAME>'
param schemaNamespace string = '<SCHEMA_NAMESPACE>'

// Tutorial specific values
param schema string = 'opcua-schema'
param schemaVersion string = '1'
param dataflowName string = 'tutorial-adls-gen2'
param assetName string = 'oven'
param endpointName string = 'adls-gen2-endpoint'
param containerName string = 'aiotutorial'
param serialFormat string = 'Delta'

resource aioInstance 'Microsoft.IoTOperations/instances@2024-11-01' existing = {
  name: aioInstanceName
}

resource customLocation 'Microsoft.ExtendedLocation/customLocations@2021-08-31-preview' existing = {
  name: customLocationName
}

// Pointer to the default data flow profile
resource defaultDataflowProfile 'Microsoft.IoTOperations/instances/dataflowProfiles@2024-11-01' existing = {
  parent: aioInstance
  name: 'default'
}

resource adlsEndpoint 'Microsoft.IoTOperations/instances/dataflowEndpoints@2024-11-01' existing = {
  parent: aioInstance
  name: endpointName
}

resource defaultDataflowEndpoint 'Microsoft.IoTOperations/instances/dataflowEndpoints@2024-11-01' existing = {
  parent: aioInstance
  name: 'default'
}

resource asset 'Microsoft.DeviceRegistry/assets@2024-11-01' existing = {
  name: assetName
}

resource dataflow 'Microsoft.IoTOperations/instances/dataflowProfiles/dataflows@2024-11-01' = {
  // Reference to the parent data flow profile, the default profile in this case
  // Same usage as profileRef in Kubernetes YAML
  parent: defaultDataflowProfile
  name: dataflowName
  extendedLocation: {
    name: customLocation.id
    type: 'CustomLocation'
  }
  properties: {
    mode: 'Enabled'
    operations: [
      {
        operationType: 'Source'
        sourceSettings: {
          endpointRef: defaultDataflowEndpoint.name
          assetRef: asset.name
          dataSources: ['azure-iot-operations/data/${assetName}']
        }
      }
      // Transformation optional
      {
        operationType: 'BuiltInTransformation'
        builtInTransformationSettings: {
          serializationFormat: serialFormat
          schemaRef: 'aio-sr://${schemaNamespace}/${schema}:${schemaVersion}'
          map: [
            {
              type: 'PassThrough'
              inputs: [
                '*'
              ]
              output: '*'
            }
         ]
        }
      }
      {
        operationType: 'Destination'
        destinationSettings: {
          endpointRef: adlsEndpoint.name
          dataDestination: containerName
        }
      }
    ]
  }
}
將檔案儲存為 adls-gen2-dataflow.bicep ,並使用 Azure CLI 進行部署
az deployment group create -g <RESOURCE_GROUP> --template-file adls-gen2-dataflow.bicep
確認 Azure Data Lake Storage Gen 2 中的數據
在記憶體帳戶中,移至 [容器] 刀鋒視窗,然後選取您建立的容器 aiotutorial 。 您應該會看到名為 aiotutorial 的資料夾,並在其中看到具有 OPC UA 伺服器數據的 Parquet 檔案。 檔案名格式 part-00001-44686130-347f-4c2c-81c8-eb891601ef98-c000.snappy.parquet為 。
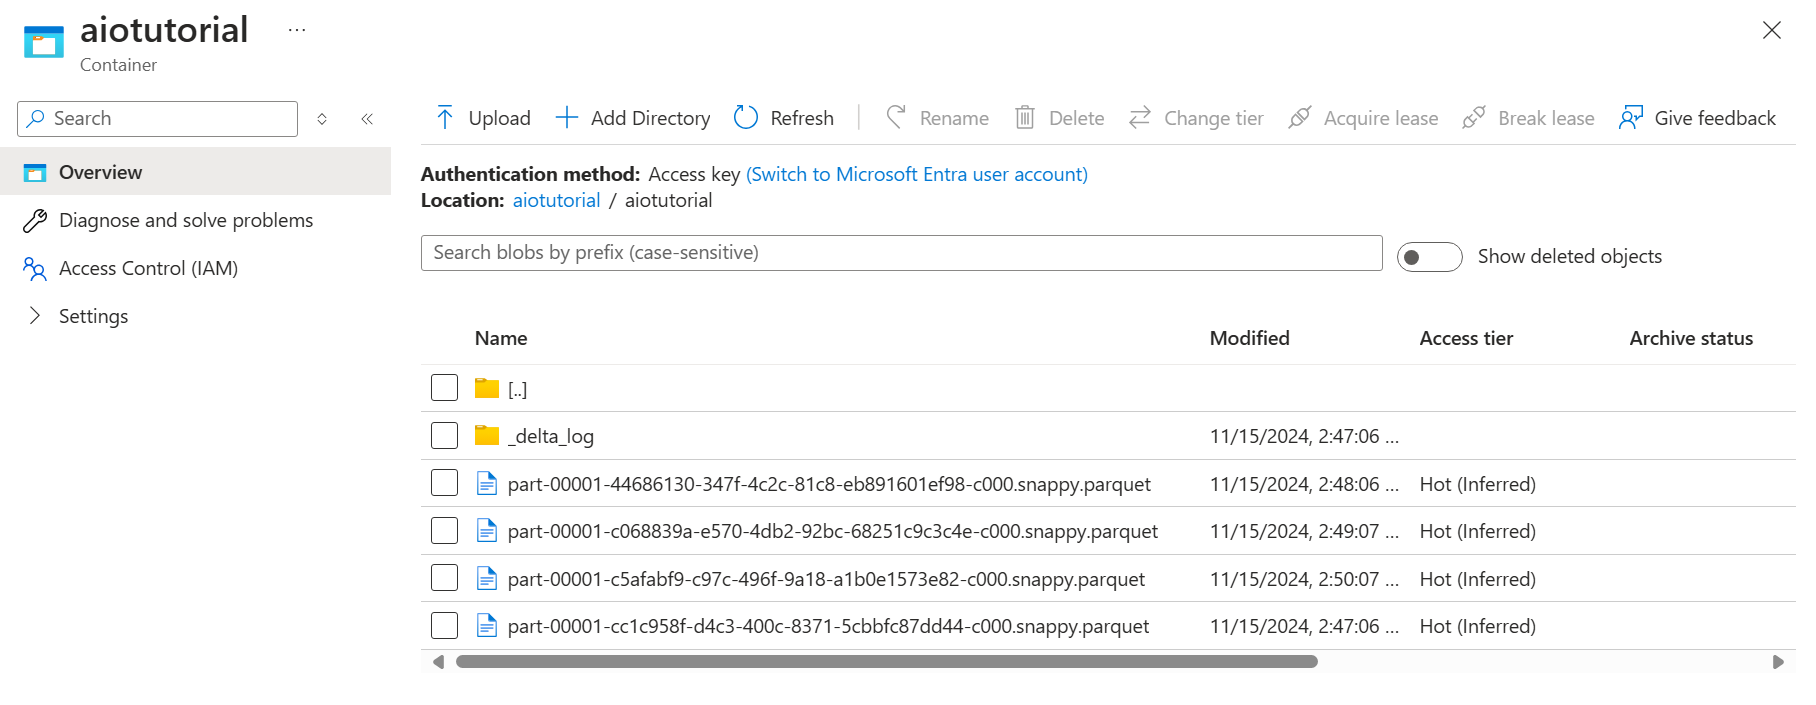
若要查看檔案的內容,請選取每個檔案,然後選取 [ 編輯]。
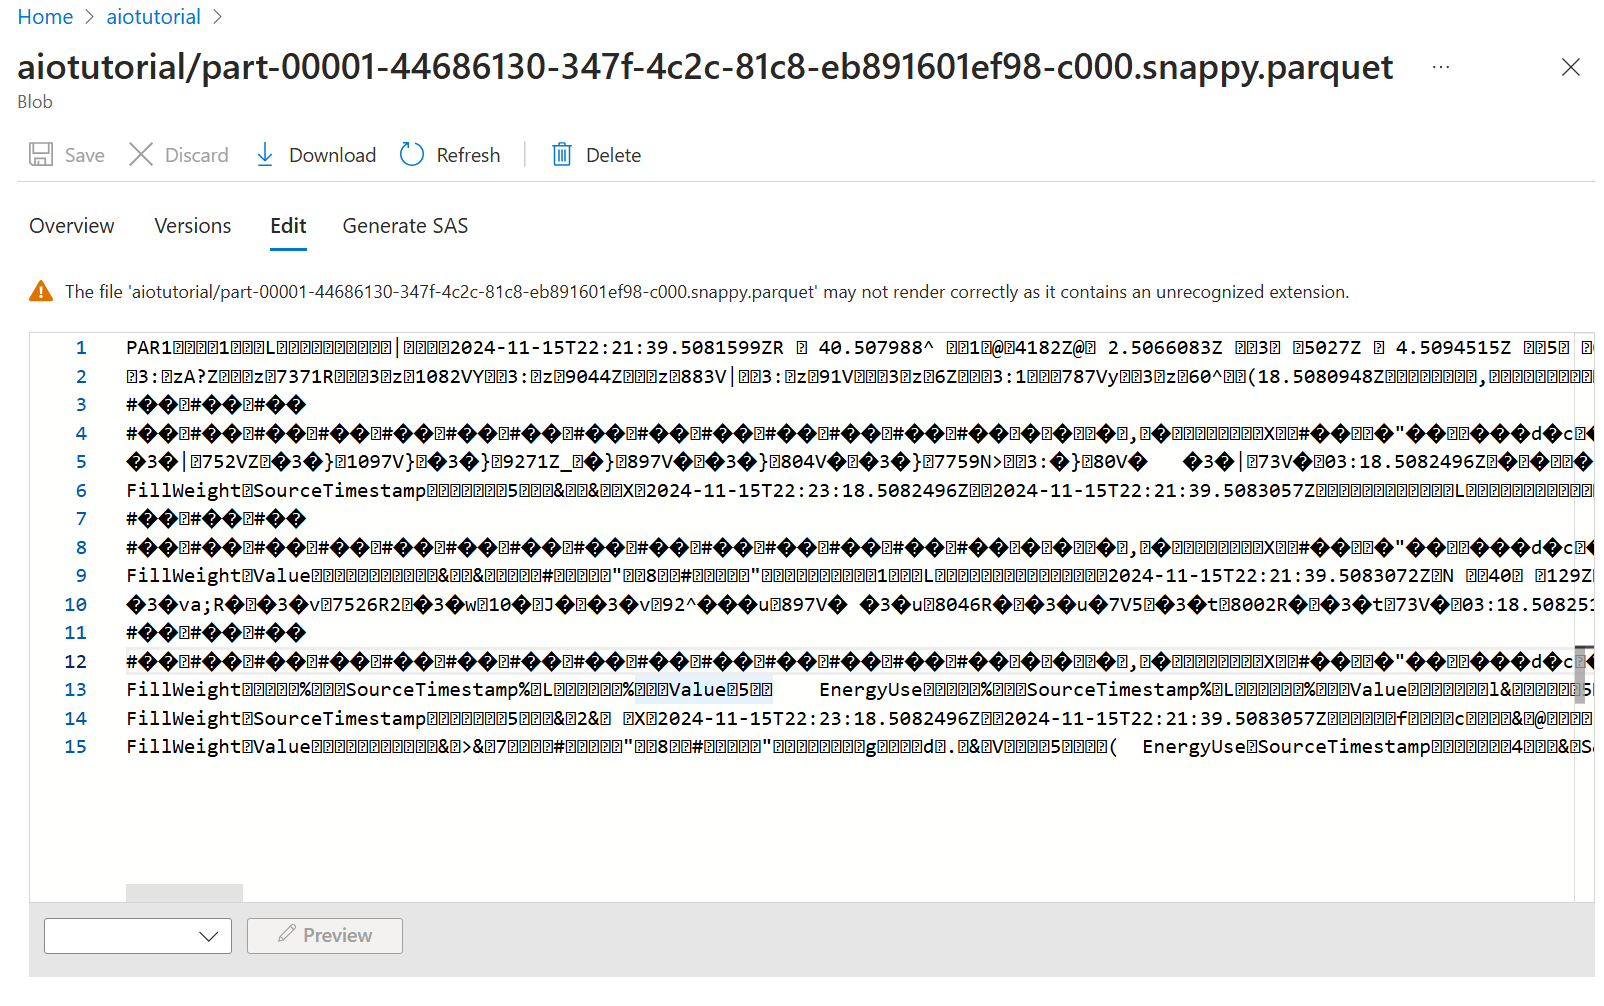
內容無法在 Azure 入口網站 中正確轉譯,但您可以下載檔案,並在 Parquet Viewer 之類的工具中開啟它。