快速入門:搭配 Azure SDK for Go 使用適用於數據表的 Azure Cosmos DB
在本快速入門中,您會使用 Azure SDK for Go 部署適用於資料表的基本 Azure Cosmos DB 應用程式。 Azure Cosmos DB for Table 是無架構的數據存放區,可讓應用程式將結構化數據表數據儲存在雲端中。 您將瞭解如何使用 Azure SDK for Go,在 Azure Cosmos DB 資源內建立數據表、數據列及執行基本工作。
連結庫原始程式碼 | 套件 (Go) | Azure 開發人員 CLI
必要條件
- Azure Developer CLI
- Docker Desktop
Go1.21 或更新
如果您沒有 Azure 帳戶,請在您開始之前先建立 免費帳戶。
初始化專案
使用 Azure 開發人員 CLI (azd) 建立適用於資料表帳戶的 Azure Cosmos DB,並部署容器化範例應用程式。 應用程式範例使用用戶端程式庫管理、建立、讀取和查詢樣本資料。
在空的目錄中開啟終端機。
如果您尚未通過驗證,請使用
azd auth login向 Azure 開發人員 CLI 進行驗證。 依照工具指定的步驟,使用您慣用的 Azure 認證向 CLI 進行驗證。azd auth login使用
azd init來初始化專案。azd init --template cosmos-db-table-go-quickstart在初始化期間,請設定唯一的環境名稱。
使用
azd up部署 Azure Cosmos DB 帳戶。 Bicep 範本也會部署範例 Web 應用程式。azd up在布建程式期間,選取您的訂用帳戶、所需的位置和目標資源群組。 等候佈建程序完成。 此流程「大約需要五分鐘」的時間。
Azure 資源佈建完成後,輸出將包含正在執行的 Web 應用程式的 URL。
Deploying services (azd deploy)

  (✓) Done: Deploying service web
- Endpoint: <https://[container-app-sub-domain].azurecontainerapps.io>

SUCCESS: Your application was provisioned and deployed to Azure in 5 minutes 0 seconds.
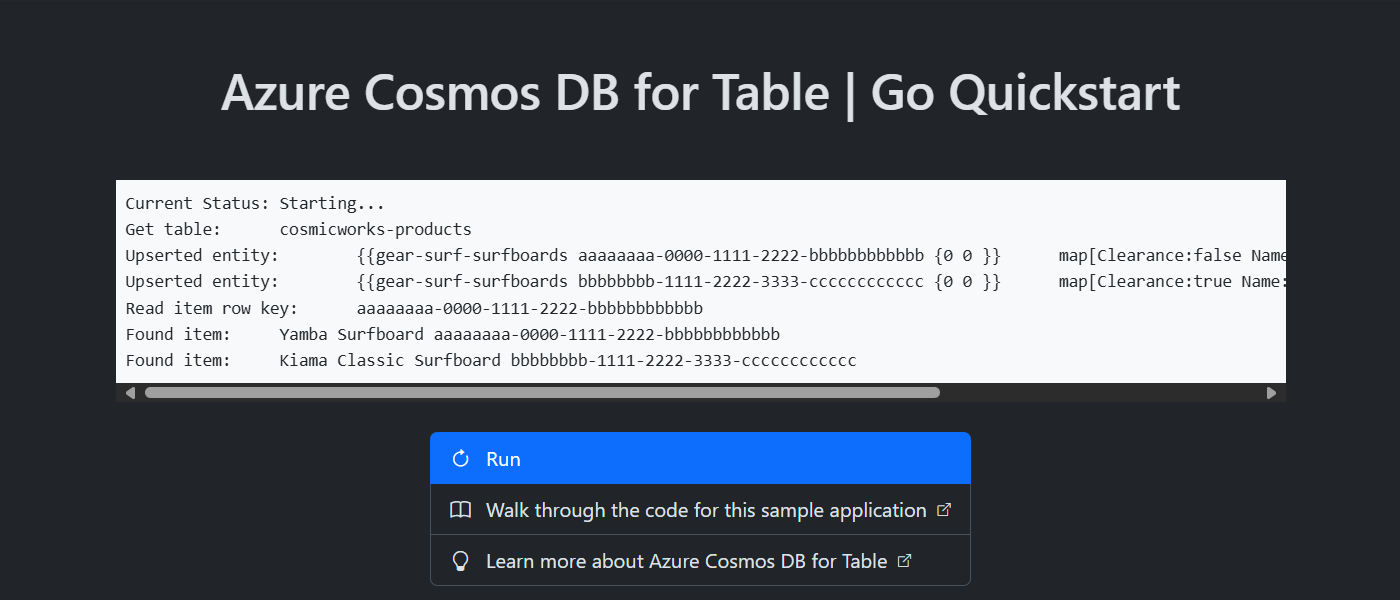
請使用主控台中的 URL,以在瀏覽器中導覽至您的 Web 應用程式。 觀察執行中應用程式的輸出。

安裝用戶端程式庫
用戶端程式庫可透過 Go 以 aztables 套件形式提供。
開啟終端機,然後導覽至
/src資料夾。cd ./src如果尚未安裝,則請使用
go install來安裝aztables套件。go install github.com/Azure/azure-sdk-for-go/sdk/data/aztables開啟並檢閱 src/go.mod 檔案,以驗證
github.com/Azure/azure-sdk-for-go/sdk/data/aztables專案是否存在。
物件模型
| 名稱 | 描述 |
|---|---|
ServiceClient |
此類型是主要客戶端類型,可用來管理全帳戶元數據或資料庫。 |
Client |
此類型代表帳戶內數據表的用戶端。 |
程式碼範例
範本中的範例程式代碼會使用名為 的 cosmicworks-products數據表。 數據表 cosmicworks-products 包含詳細數據,例如名稱、類別、數量、價格、唯一標識碼,以及每個產品的銷售旗標。 容器會使用唯一 標識碼 作為數據列索引鍵,而 類別 目錄作為分割區索引鍵。
驗證用戶端
此範例會建立 型別 ServiceClient 的新實例。
credential, err := azidentity.NewDefaultAzureCredential(nil)
if err != nil {
    return err
}

client, err := aztables.NewServiceClient("<azure-cosmos-db-table-account-endpoint>", credential)
if err != nil {
    log.Fatal(err)
}
取得數據表
此範例會使用 NewClient 型別的 Client 函式,建立 型別的ServiceClient實例。
table, err := client.NewClient("<azure-cosmos-db-table-name>")
if err != nil {
    log.Fatal(err)
}
建立實體
在數據表中建立新實體最簡單的方式是建立 類型的 aztables.EDMEntity實例。 使用 型別設定 RowKey 和 PartitionKey 屬性, aztables.Entity 然後使用字串對應設定任何額外的屬性。
entity := aztables.EDMEntity{
    Entity: aztables.Entity{
        RowKey:       "aaaaaaaa-0000-1111-2222-bbbbbbbbbbbb",
        PartitionKey: "gear-surf-surfboards",
    },
    Properties: map[string]any{
        "Name":      "Yamba Surfboard",
        "Quantity":  12,
        "Price":     850.00,
        "Clearance": false,
    },
}
使用 json.Marshal 將實體串連成位元組數位,然後使用 在數據表 UpsertEntity中建立實體。
bytes, err := json.Marshal(entity)
if err != nil {
    panic(err)
}

_, err = table.UpsertEntity(context.TODO(), bytes, nil)
if err != nil {
    panic(err)
}
取得實體
您可以使用 從資料表 GetEntity擷取特定實體。 然後 json.Unmarshal ,您可以使用 來剖 aztables.EDMEntity 析類型。
rowKey := "aaaaaaaa-0000-1111-2222-bbbbbbbbbbbb"
partitionKey := "gear-surf-surfboards"

response, err := table.GetEntity(context.TODO(), partitionKey, rowKey, nil)
if err != nil {
    panic(err)
}

var entity aztables.EDMEntity
err = json.Unmarshal(response.Value, &entity)
if err != nil {
    panic(err)
}
查詢實體
插入實體之後,您也可以執行查詢來取得所有符合特定篩選 NewListEntitiesPager 的實體,方法是搭配字元串篩選。
category := "gear-surf-surfboards"
// Ensure the value is OData-compliant by escaping single quotes
safeCategory := strings.ReplaceAll(category, "'", "''")
filter := fmt.Sprintf("PartitionKey eq '%s'", safeCategory)

options := &aztables.ListEntitiesOptions{
    Filter: &filter,
}

pager := table.NewListEntitiesPager(options)
使用 More 呼叫器的 函式來剖析查詢的分頁結果,以判斷是否有更多頁面,然後 NextPage 函式取得下一頁的結果。
for pager.More() {
    response, err := pager.NextPage(context.TODO())
    if err != nil {
        panic(err)
    }
    for _, entityBytes := range response.Entities {
        var entity aztables.EDMEntity
        err := json.Unmarshal(entityBytes, &entity)
        if err != nil {
            panic(err)
        }

        writeOutput(fmt.Sprintf("Found entity:\t%s\t%s", entity.Properties["Name"], entity.RowKey))
    }
}
清除資源
當您不再需要範例應用程式或資源時,請移除對應的部署和所有資源。
azd down