适用于基于 ARM64 的设备的 Linux 上的Microsoft Defender for Endpoint (预览版)
- Microsoft Defender for Endpoint 服务器版
- 服务器的Microsoft Defender
基于 ARM64 设备的 Linux 上的 Defender for Endpoint 概述
你可能已经知道,Linux 上的Microsoft Defender for Endpoint是一种统一的终结点安全解决方案,可帮助你保护服务器设备免受高级威胁。 Linux 上的 Defender for Endpoint 现在以预览版的形式扩展了对基于 ARM64 的 Linux 服务器的支持。 与基于 x64 的 Linux 服务器 ((包括 Intel 和 AMD 64 位平台) )类似,包括以下功能:
- Microsoft Defender 防病毒
- 终结点检测和响应 (EDR)
- 实时响应
- 设备隔离
- 高级搜寻
- 漏洞管理
- 使用安全设置管理的集中式策略配置
最初,预览版支持以下 Linux 分发版:
Ubuntu 20.04 ARM64
Ubuntu 22.04 ARM64
Ubuntu 24.04 ARM64
Amazon Linux 2 ARM64
Amazon Linux 2023 ARM64
RHEL 8.x ARM64
RHEL 9.x ARM64
Oracle Linux 8.x ARM64
Oracle Linux 9.x ARM64
SUSE Linux Enterprise Server 15 (SP5、SP6) ARM64
注意
计划在此预览计划中支持更多 Linux 发行版。
在 Linux 上为基于 ARM64 的设备部署 Defender for Endpoint
本文中的部署过程在基于 ARM64 的设备上从预览体验成员慢速通道安装代理版本 101.24102.0003 。 (请参阅 Linux.) 上的 Microsoft Defender for Endpoint 中的新增功能
可以从多种方法中进行选择,将 Linux 上的 Defender for Endpoint 部署到基于 ARM64 的设备:
开始之前
确保满足 Linux 上的 Defender for Endpoint 的先决条件
若要将服务器载入 Defender for Endpoint,需要 服务器许可证 。 可以从以下选项中进行选择:
- Microsoft Defender服务器计划 1 或计划 2 (作为 Defender for Cloud) 产品/服务的一部分;或者
- Microsoft Defender for Endpoint 服务器版
使用安装程序脚本进行部署
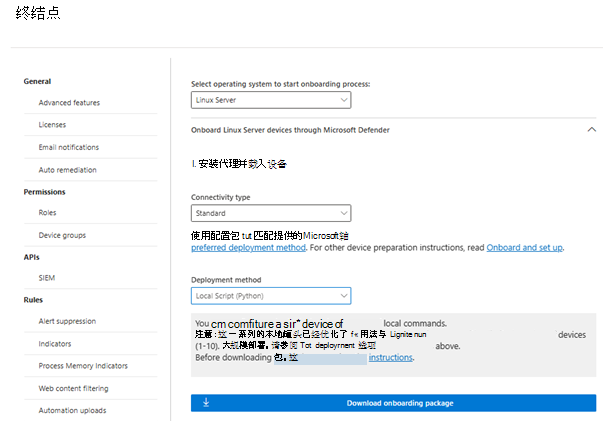
在Microsoft Defender门户中,转到“设置>终结点”“>设备管理>”“载入”。
在载入屏幕中,选择以下选项:

在 “选择要启动载入过程的作系统 ”列表中,选择“ Linux Server”。
在 “连接类型” 列表中,选择“ 简化”。 或者,如有必要,可以选择“Standard”。 (有关详细信息,请参阅为 Microsoft Defender for Endpoint.) 使用简化连接加入设备
在 “部署方法 ”列表中,选择“ 本地脚本 (Python) 。
选择“下载载入包”。
在新的浏览器窗口中,下载 Defender for Endpoint 安装程序 bash 脚本。
使用以下命令授予脚本所需的权限:
$chmod +x /mde_installer.sh运行以下命令以执行安装程序脚本:
$sudo ~/mde_installer.sh --install --channel insiders-slow --onboard ~/MicrosoftDefenderATPOnboardingLinuxServer.py按照以下步骤验证部署:
在设备上,运行以下命令以检查运行状况。 返回值 表示
true产品按预期运行:$ mdatp health --field healthy在Microsoft Defender门户中的“资产>设备”下,查找刚加入的 Linux 设备。 设备可能需要大约 20 分钟才能显示在门户中。
如果遇到问题,请参阅排查本文 () 部署 问题 。
将安装程序脚本与 Ansible 配合使用进行部署
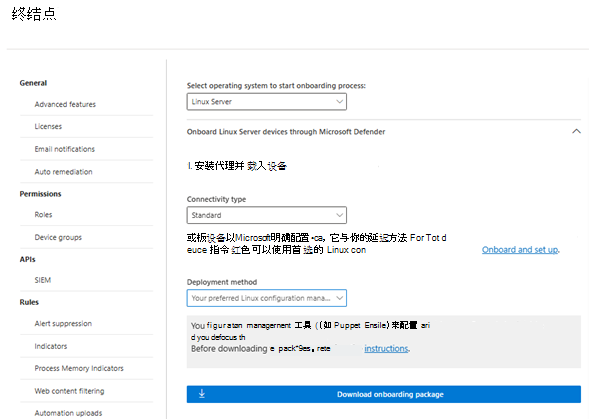
在Microsoft Defender门户中,转到“设置>终结点”“>设备管理>”“载入”。
在载入屏幕中,选择以下选项:

在 “选择要启动载入过程的作系统 ”列表中,选择“ Linux Server”。
在 “连接类型” 列表中,选择“ 简化”。 或者,如有必要,可以选择“Standard”。 (有关详细信息,请参阅为 Microsoft Defender for Endpoint.) 使用简化连接加入设备
在 “部署方法 ”列表中,选择“ 首选 Linux 配置管理工具”。
选择“下载载入包”。
在新的浏览器窗口中,下载 Defender for Endpoint 安装程序 bash 脚本。
在 Ansible 服务器上创建安装 YAML 文件。 例如,
/etc/ansible/playbooks/install_mdatp.yml使用mde_installer.sh在步骤 3 中下载的 。name: Install and Onboard MDE hosts: servers tasks: - name: Create a directory if it does not exist ansible.builtin.file: path: /tmp/mde_install state: directory mode: '0755' - name: Copy Onboarding script ansible.builtin.copy: src: "{{ onboarding_script }}" dest: /tmp/mde_install/mdatp_onboard.json - name: Install MDE on host ansible.builtin.script: "{{ mde_installer_script }} --install --channel {{ channel | default('insiders-slow') }} --onboard /tmp/mde_install/mdatp_onboard.json" register: script_output args: executable: sudo - name: Display the installation output debug: msg: "Return code [{{ script_output.rc }}] {{ script_output.stdout }}" - name: Display any installation errors debug: msg: "{{ script_output.stderr }}"使用以下命令在 Linux 上部署 Defender for Endpoint。 根据需要编辑相应的路径和通道。
ansible-playbook -i /etc/ansible/hosts /etc/ansible/playbooks/install_mdatp.yml --extra-vars "onboarding_script=<path to mdatp_onboard.json > mde_installer_script=<path to mde_installer.sh> channel=<channel to deploy for: insiders-slow > "按照以下步骤验证部署:
在设备上运行以下命令,检查设备运行状况、连接性、防病毒和 EDR 检测:
- name: Run post-installation basic MDE test hosts: myhosts tasks: - name: Check health ansible.builtin.command: mdatp health --field healthy register: health_status - name: MDE health test failed fail: msg="MDE is not healthy. health status => \n{{ health_status.stdout }}\nMDE deployment not complete" when: health_status.stdout != "true" - name: Run connectivity test ansible.builtin.command: mdatp connectivity test register: connectivity_status - name: Connectivity failed fail: msg="Connectivity failed. Connectivity result => \n{{ connectivity_status.stdout }}\n MDE deployment not complete" when: connectivity_status.rc != 0 - name: Check RTP status ansible.builtin.command: mdatp health --field real_time_protection_enabled register: rtp_status - name: Enable RTP ansible.builtin.command: mdatp config real-time-protection --value enabled become: yes become_user: root when: rtp_status.stdout != "true" - name: Pause for 5 second to enable RTP ansible.builtin.pause: seconds: 5 - name: Download EICAR ansible.builtin.get_url: url: https://secure.eicar.org/eicar.com.txt dest: /tmp/eicar.com.txt - name: Pause for 5 second to detect eicar ansible.builtin.pause: seconds: 5 - name: Check for EICAR file stat: path=/tmp/eicar.com.txt register: eicar_test - name: EICAR test failed fail: msg="EICAR file not deleted. MDE deployment not complete" when: eicar_test.stat.exists - name: MDE Deployed debug: msg: "MDE succesfully deployed"在Microsoft Defender门户中的“资产>设备”下,查找刚加入的 Linux 设备。 设备可能需要大约 20 分钟才能显示在门户中。
如果遇到问题,请参阅排查本文 () 部署 问题 。
通过 Puppet 使用安装程序脚本进行部署
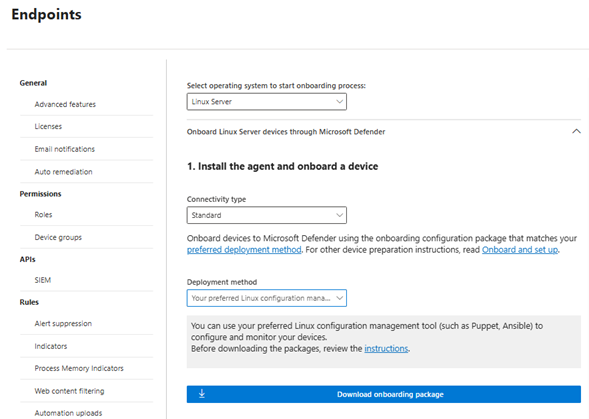
在Microsoft Defender门户中,转到“设置>终结点”“>设备管理>”“载入”。
在载入屏幕中,选择以下选项:

在 “选择要启动载入过程的作系统 ”列表中,选择“ Linux Server”。
在 “连接类型” 列表中,选择“ 简化”。 或者,如有必要,可以选择“Standard”。 (有关详细信息,请参阅为 Microsoft Defender for Endpoint.) 使用简化连接加入设备
在 “部署方法 ”列表中,选择“ 首选 Linux 配置管理工具”。
选择“下载载入包”。 将文件另存为
WindowsDefenderATPOnboardingPackage.zip。
使用以下命令提取载入包的内容:
unzip WindowsDefenderATPOnboardingPackage.zip应会看到以下输出:
Archive:  WindowsDefenderATPOnboardingPackage.zip
inflating: mdatp_onboard.json
在新的浏览器窗口中,下载 Defender for Endpoint 安装程序 bash 脚本 , (此脚本称为
mde_installer.sh) 。使用以下过程创建 Puppet 清单,该过程使用步骤 4 中的
mde_installer.sh脚本。在 Puppet 安装的 modules 文件夹中,创建以下文件夹:
install_mdatp/filesinstall_mdatp/manifests
modules 文件夹通常位于
/etc/puppetlabs/code/environments/production/modulesPuppet 服务器上。将
mdatp_onboard.json之前创建的文件复制到install_mdatp/files文件夹。复制到
mde_installer.shinstall_mdatp/files folder。在 中创建
install_mdatp/manifests包含以下init.pp部署说明的文件:tree install_mdatp Output: install_mdatp ├── files │ ├── mdatp_onboard.sh │ └── mde_installer.sh └── manifests └── init.pp
使用 Puppet 清单在设备上在 Linux 上安装 Defender for Endpoint。
# Puppet manifest to install Microsoft Defender for Endpoint on Linux.
# @param channel The release channel based on your environment, insider-fast or prod.

class install_mdatp (
  $channel = 'insiders-slow',
) {
  # Ensure that the directory /tmp/mde_install exists
  file { '/tmp/mde_install':
    ensure => directory,
    mode   => '0755',
  }

# Copy the installation script to the destination
file { '/tmp/mde_install/mde_installer.sh':
  ensure => file,
  source => 'puppet:///modules/install_mdatp/mde_installer.sh',
  mode   => '0777',
  }

# Copy the onboarding script to the destination
file { '/tmp/mde_install/mdatp_onboard.json':
 ensure => file,
 source => 'puppet:///modules/install_mdatp/mdatp_onboard.json',
 mode   => '0777',
 }

#Install MDE on the host using an external script
exec { 'install_mde':
 command     => "/tmp/mde_install/mde_installer.sh --install --channel ${channel} --onboard /tmp/mde_install/mdatp_onboard.json",
 path        => '/bin:/usr/bin',
 user        => 'root',
 logoutput   => true,
 require     => File['/tmp/mde_install/mde_installer.sh', '/tmp/mde_install/mdatp_onboard.json'], # Ensure the script is copied before running the installer
}
}
验证部署。 在Microsoft Defender门户中的“资产>设备”下,查找刚加入的 Linux 设备。 设备可能需要大约 20 分钟才能显示在门户中。
使用 Microsoft Defender for Cloud 在 Linux 上部署 Defender for Endpoint
如果你的组织正在使用 Defender for Cloud,则可以使用它在 Linux 上部署 Defender for Endpoint。
建议在基于 ARM64 的 Linux 设备上启用自动部署。 预配 VM 后,在设备上的 文件
/etc/mde.arm.d/mde.conf下定义变量,如下所示:OPT_FOR_MDE_ARM_PREVIEW=1等待 1-6 小时以完成载入。
在Microsoft Defender门户中的“资产>设备”下,查找刚加入的 Linux 设备。
需要有关 Defender for Cloud 的帮助?
请参阅以下文章:
排查部署问题
如果在将 Linux 上的 Defender for Endpoint 部署到基于 ARM64 的设备时遇到问题,可提供帮助。 首先,查看常见问题列表及其解决方法。 如果问题仍然存在, 请与我们联系。
常见问题及其解决方法
下表汇总了常见问题及其解决方法。
| 错误消息或问题 | 需执行的操作 |
|---|---|
mdatp not found |
存储库可能未正确配置。 检查是否在安装程序脚本中将通道设置为insiders-slow |
mdatp health 指示缺少许可证 |
确保将正确的载入脚本或 json 文件传递给自动化脚本或工具 |
| 排除项未按预期工作 | 如果排除项在其他设备上工作,但它们不能在基于 ARM64 的 Linux 服务器上工作,请通过 mdearmsupport@microsoft.com联系我们。 需要客户端分析器日志。 |
| 需要有关优化 mdatp 的帮助。 | 请通过 mdearmsupport@microsoft.com联系我们。 |
如果需要帮助,请与我们联系
在 联系我们 mdearmsupport@microsoft.com时,请确保详细说明问题。 如果可能,请包括屏幕截图和客户端分析器日志。
XMDE 客户端分析器 ARM 预览版
使用 Bash 下载 XMDE 客户端分析器 ARM 预览版。
wget --quiet -O XMDEClientAnalyzerARMPreview.zip https://go.microsoft.com/fwlink/?linkid=2299668运行支持工具。
sudo ./MDESupportTool -d --mdatp-log debug按照屏幕上的说明进行作,然后在日志收集结束时跟进。 日志位于 目录中
/tmp。日志集由根用户拥有,因此可能需要根权限才能删除日志集。