watchOS Notifications in Xamarin
Watch apps can receive notifications if the containing iOS app supports them. There is built-in notification handling so you do not need to add the additional notification support described below, however if you wish to customize notification behavior and appearance then read on.
Refer to the iOS Notifications doc for more information on adding notification support to the iOS app in your solution.
Creating Notification Controllers
On the storyboard notifications controllers have a special type of segue triggering them. When you drag a new Notification Interface Controller onto a storyboard it will automatically have a segue attached:
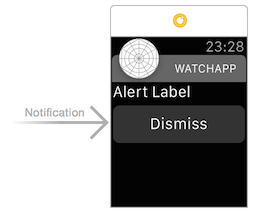
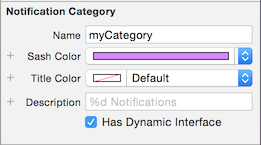
When the notification segue is selected you can edit its properties:
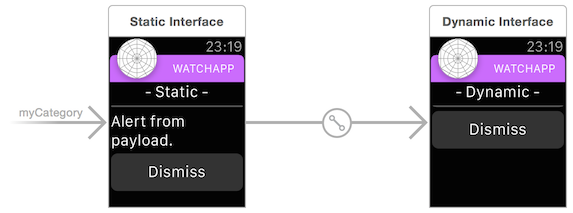
After you have customized the controller it may look like this example from the WatchKitCatalog:
There are two types of notification:
Short-look - non-scrollable static view defined by the system.
Long-look - scrollable, customizable view defined by you! A simpler, static version and a more complex dynamic version can be specified.
Short-Look Notification Controller
The short-look UI consists of just the app icon, app name and the notification title string.
If the user does not ignore the notification, the system will automatically switch to a long-look notification that provides more information.
Long-Look Notification Controller
The OS decides whether to display the static or dynamic view based on a number of factors. You must provide a static interface, and can optionally also include a dynamic interface for notifications.
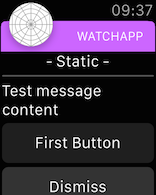
Static
The static view should be simple and quick to display.
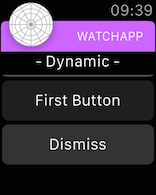
Dynamic
The dynamic view can display more data and provide more interactivity.
Generating Notifications
Notifications can come from a remote server or can be generated locally in the iOS app.
Refer to the iOS Notifications walkthrough for an example of how to generate local notifications.
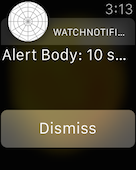
Local notifications must have the AlertTitle set to be displayed on the Apple Watch -
the AlertTitle string is displayed in the Short-Look interface. Both the AlertTitle
and AlertBody are displayed in the notifications list; and the AlertBody is displayed
in the Long-Look interface.
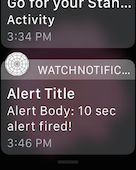
This screenshot shows the AlertTitle being displayed in the notifications list, and the
AlertBody displayed in the Long-Look interface:
Testing Notifications
Notifications (both local and remote) can only be properly tested on a device, however they can be simulated using a .json file in the iOS Simulator.
Testing on Apple Watch
When testing notifications on an Apple Watch, remember that Apple's documentation states the following:
When one of your app’s local or remote notifications arrives on the user’s iPhone, iOS decides whether to display that notification on the iPhone or on the Apple Watch.
This is alluding to the fact that iOS decides whether a notification will appear on the iPhone or on the Watch. If the paired iPhone is active when a notification is received, the notification is likely to be displayed on the iPhone and not routed to the Watch.
To ensure the notification appears on the watch, turn off the iPhone screen (pressing the power button once) or let it go to sleep. If the paired Watch is in range, has power and is being worn on your wrist, the notification will be routed there and appear on the Watch (accompanied by a subtle ).
Testing on the iOS Simulator
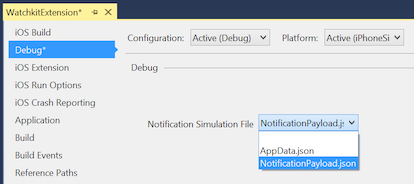
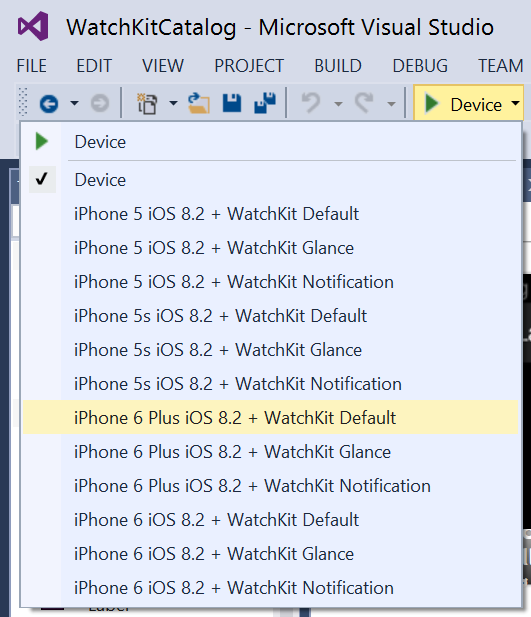
You must provide a test JSON payload when testing notification mode in the iOS Simulator. Set the path in the Custom Execution Arguments window in Visual Studio for Mac.
Visual Studio for Mac will display additional options when a watch extension is set as the Startup project. Right-click on the watch extension project and choose Run With > Custom Parameters...:
This opens the Execution Arguments window which contains a WatchKit tab. Select Notification and provide a JSON payload, then press Execute to start the watch app in the simulator:
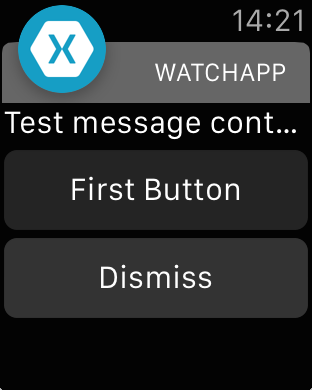
The default notification controller looks like this when testing on the simulator with the default payload JSON file:
It is also possible to use the command line to start the iOS Simulator.
Example Notification Payload
An example payload JSON file NotificationPayload.json is shown below:
{
    "aps": {
        "alert": "Test message content",
        "title": "Optional title",
        "category": "myCategory"
        },

        "WatchKit Simulator Actions": [
        {
            "title": "First Button",
            "identifier": "firstButtonAction"
        }
        ],

        "customKey": "Use this file to define a testing payload for your notifications. The aps dictionary specifies the category, alert text and title. The WatchKit Simulator Actions array can provide info for one or more action buttons in addition to the standard Dismiss button. Any other top level keys are custom payload. If you have multiple such JSON files in your project, you'll be able to choose between them in when selecting to debug the notification interface of your Watch App."
    }


