Installing and Using watchOS in Xamarin
watchOS 4 requires macOS Sierra (10.12) with Xcode 9.
watchOS 1 originally required OS X Yosemite (10.10) with Xcode 7.
Warning
watchOS 1 updates will not be accepted after April 1, 2018. Future updates must use watchOS 2 SDK or later; building with the watchOS 4 SDK is recommended.
Project Structure
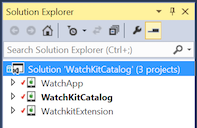
A watch app consists of three projects:
Xamarin.iOS iPhone app project - This is a normal iPhone project, it can be any of the Xamarin.iOS templates. The Watch App and its extension will be bundled inside this main project.
Watch Extension project - This contains the code (such as Controller classes) for the Watch App.
Watch App project - This contains the User Interface storyboard file with all the UI resources for the Watch App.
The sample solution looks like this in Xamarin.Studio:
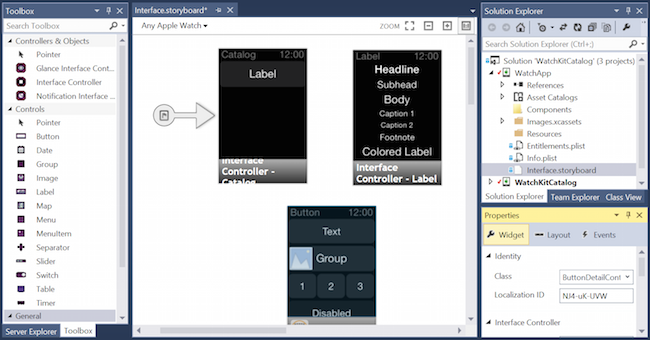
Screens from the sample can be found on the Controls page.
Creating a New Project
You cannot create a new "Watch Solution"... rather you can add a Watch App to an existing iOS application. Follow these steps to create a watch app:
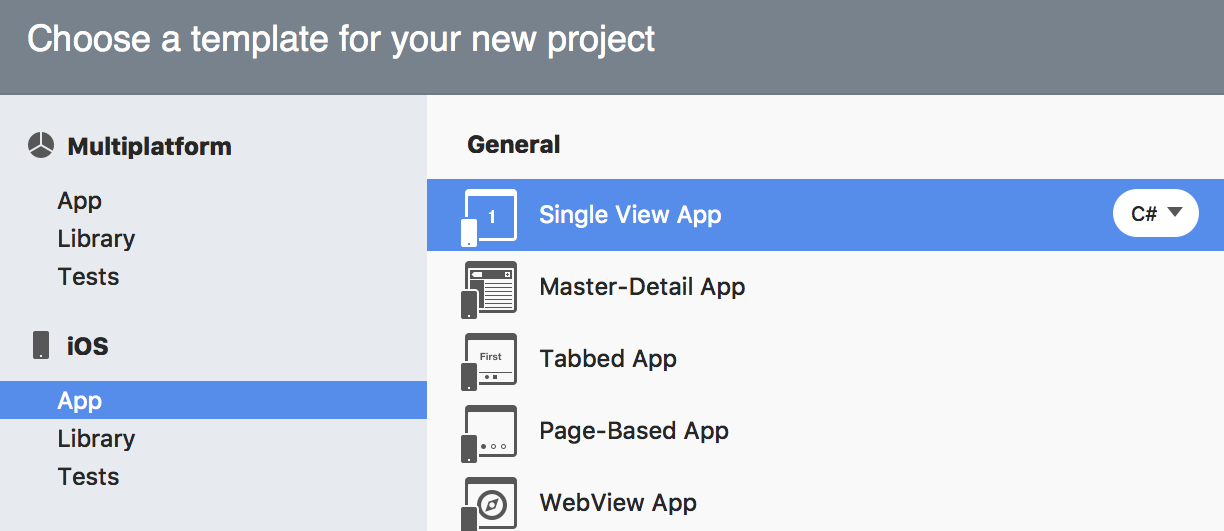
If you don't have an existing project, first choose File > New Solution and create an iOS app (for example, a Single View App):
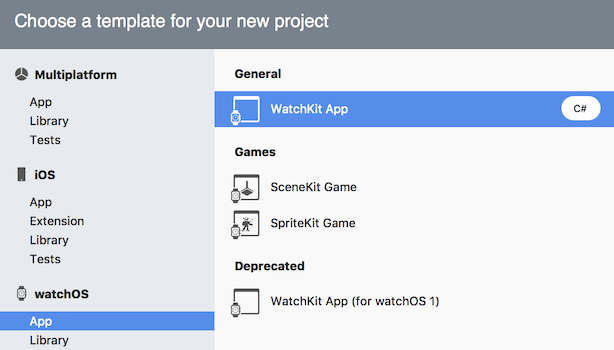
Once the iOS app is created (or you plan to use your existing iOS app), right-click on the solution and choose Add > Add New Project... In the New Project window select watchOS > App > WatchKit App:
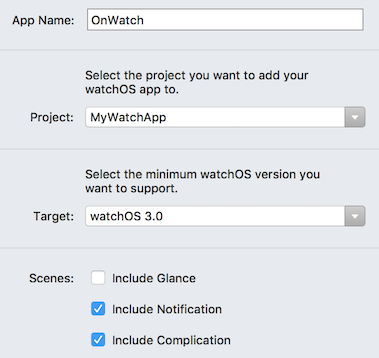
The next screen lets you choose which iOS app project should include the watch app:
Finally, choose the location to save the project (and optionally enabled source control):
Visual Studio for Mac automatically configures project references and Info.plist settings for you.
Creating the Watch User Interface
Using the Xamarin iOS Designer
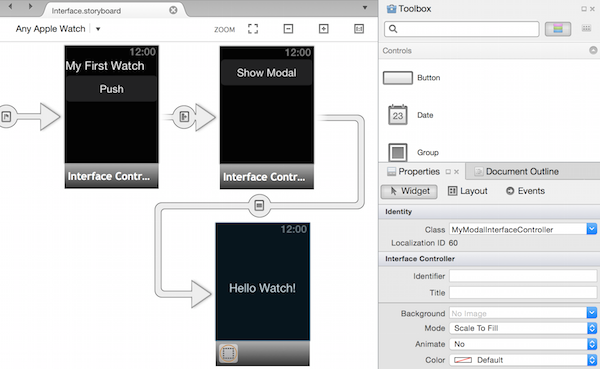
Double-click on the watch app's Interface.storyboard to edit using the iOS Designer. You can drag interface controllers and UI controls onto the storyboard from the Toolbox and configure them using the Properties pad:
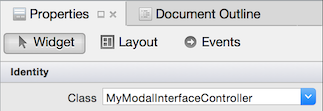
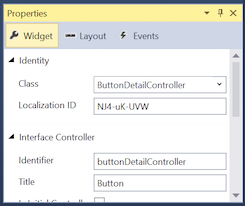
You should give each new interface controller a Class by selecting it and then entering the name in the Properties pad (this will create the required C# codebehind files automatically):
Create segues by Ctrl + dragging from a button, table or interface controller onto another interface controller.
Using Xcode on the Mac
You can continue to use Xcode to build your user interface by right-clicking on the Interface.storyboard file and selecting Open With > Xcode Interface Builder:

If using Xcode, then you should follow the same steps for watch apps as for normal iOS app storyboards (such as creating outlets and actions by Ctrl+dragging into the .h header file).
When you save the storyboard in Xcode Interface Builder it will automatically add the outlets and actions you create to the C# .designer.cs files in the watch extension project.
Adding Additional Screens in Xcode
When you add additional screens (beyond what is included in the template by default) to your storyboard using Xcode Interface Builder you must manually add the C# code files for each new interface controller.
Refer to the Advanced instructions on how to add new interface controllers to a storyboard.
The Xamarin iOS Designer does this automatically, no manual steps are required.
Building
A project that includes a watch app builds like other iOS projects. The building process will result in an iPhone application (.app) that contains a watch extension (.appex), which in turn contains the code-less watch application (.app).
Launching
You can launch watch apps in the simulator using either Visual Studio for Mac or Visual Studio (starts on the Mac Build Host).
There are two modes for launching a WatchKit app:
- normal app mode (the default), and
- Notifications (which requires a test notification payload in JSON format).
Xcode 8 support
Once Xcode 8 (or later) is installed, Apple Watch simulators are separate from iOS Simulators (unlike Xcode 6, where they appeared as an external display). When you select the Watch App project and make it the startup project, the simulator list will show iOS Simulators to choose from (as shown below).
When you start debugging, two simulators should start - the iOS Simulator and the Apple Watch Simulator. Use Command+Shift+H to navigate to the watch menu and clock face; and use the Hardware menu to set the Force Touch Pressure. Scrolling on the trackpad or mouse will simulate using the Digital Crown.
Troubleshooting
The following error will appear in the Application Output if you try to launch to a simulator that does not have a paired watch:
error MT0000: Unexpected error - Please file a bug report at https://github.com/xamarin/xamarin-macios/issues/new
error HE0020: Could not find a paired Watch device for the iOS device 'iPhone 6'.
Refer to Apple's forums for instructions on configuring the simulators, if the defaults do not work.
Xcode 6 and watchOS 1
You must make the watch extension project the Startup Project before running or debugging the app. You cannot "start" the watch app itself, and if you choose the iOS app then it will start as normal in the iOS Simulator.
By default a watch app starts in normal app mode (not Glance or Notifications mode) from Visual Studio for Mac's Run or Debug commands.
When using Xcode 6, only the iPhone 5, iPhone 5S, iPhone 6, and iPhone 6 Plus can activate the external display for either Apple Watch - 38mm or Apple Watch - 42mm where the watch applications will be displayed.
Note
Remember that the watch screen does not automatically appear in the iOS Simulator when using Xcode 6. Use the Hardware > External Displays menu to show the watch screen.
Launching Notification Mode
Refer to the Notifications page for information how to handle notifications in code.
Visual Studio for Mac can start the watch app with a notification startup modes for notifications:
Right-click on the watch app project and choose Run With > Custom Configuration...:
This opens the Custom Parameters window where you can select Notification (and provide a JSON payload), then press Run to start the watch app in the simulator:
Debugging
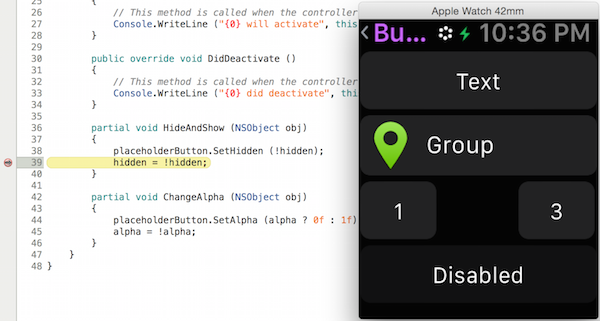
Debugging is supported in both Visual Studio for Mac and Visual Studio. Remember to supply a notification JSON file when debugging in notifications mode. This screenshot shows a debug breakpoint being hit in a watch app:
After following the launch instructions you will end up with
your watch app running on the iOS Simulator (Watch).
For the notification mode you can select Debug > Open System Log
(CMD + /) and use Console.WriteLine in your code.
Debugging Lifecycle Event Handlers
The watchOS template files (such as InterfaceController,
ExtensionDelegate, NotificationController, and ComplicationController)
come with their required lifecycle methods already implemented. Add
Console.WriteLine calls and read the Application Output to better
understand the event lifecycle.

