Create or delete administrative units
Important
Restricted management administrative units are currently in PREVIEW. See the Product Terms for legal terms that apply to Azure features that are in beta, preview, or otherwise not yet released into general availability.
Administrative units let you subdivide your organization into any unit that you want, and then assign specific administrators that can manage only the members of that unit. For example, you could use administrative units to delegate permissions to administrators of each school at a large university, so they could control access, manage users, and set policies only in the School of Engineering.
This article describes how to create or delete administrative units to restrict the scope of role permissions in Microsoft Entra ID.
Prerequisites
- Microsoft Entra ID P1 or P2 license for each administrative unit administrator
- Microsoft Entra ID Free licenses for administrative unit members
- Privileged Role Administrator role
- Microsoft Graph PowerShell module when using PowerShell
- Admin consent when using Graph Explorer for Microsoft Graph API
For more information, see Prerequisites to use PowerShell or Graph Explorer.
Create an administrative unit
You can create a new administrative unit by using either the Microsoft Entra admin center, Microsoft Entra PowerShell, or Microsoft Graph.
Sign in to the Microsoft Entra admin center as at least a Privileged Role Administrator.
Browse to Identity > Roles & admins > Admin units.
Select Add.
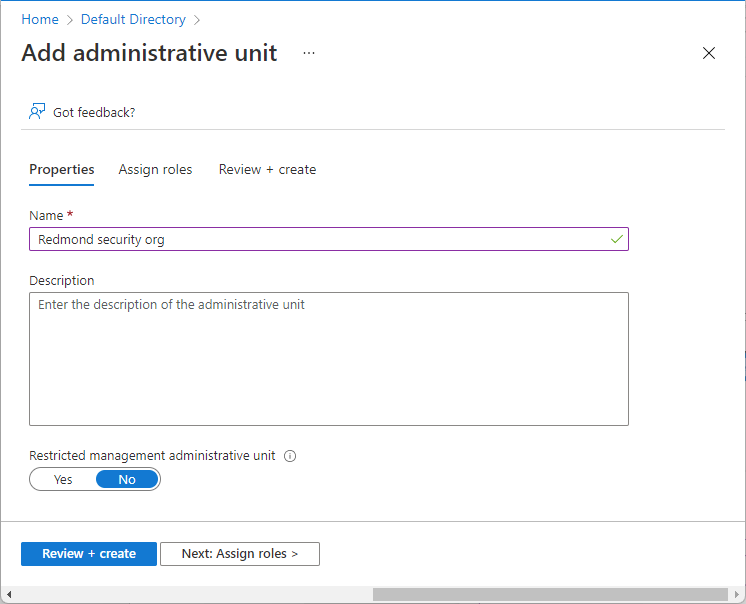
In the Name box, enter the name of the administrative unit. Optionally, add a description of the administrative unit.
If you don't want tenant-level administrators to be able to access this administrative unit, set the Restricted management administrative unit toggle to Yes. For more information, see Restricted management administrative units.
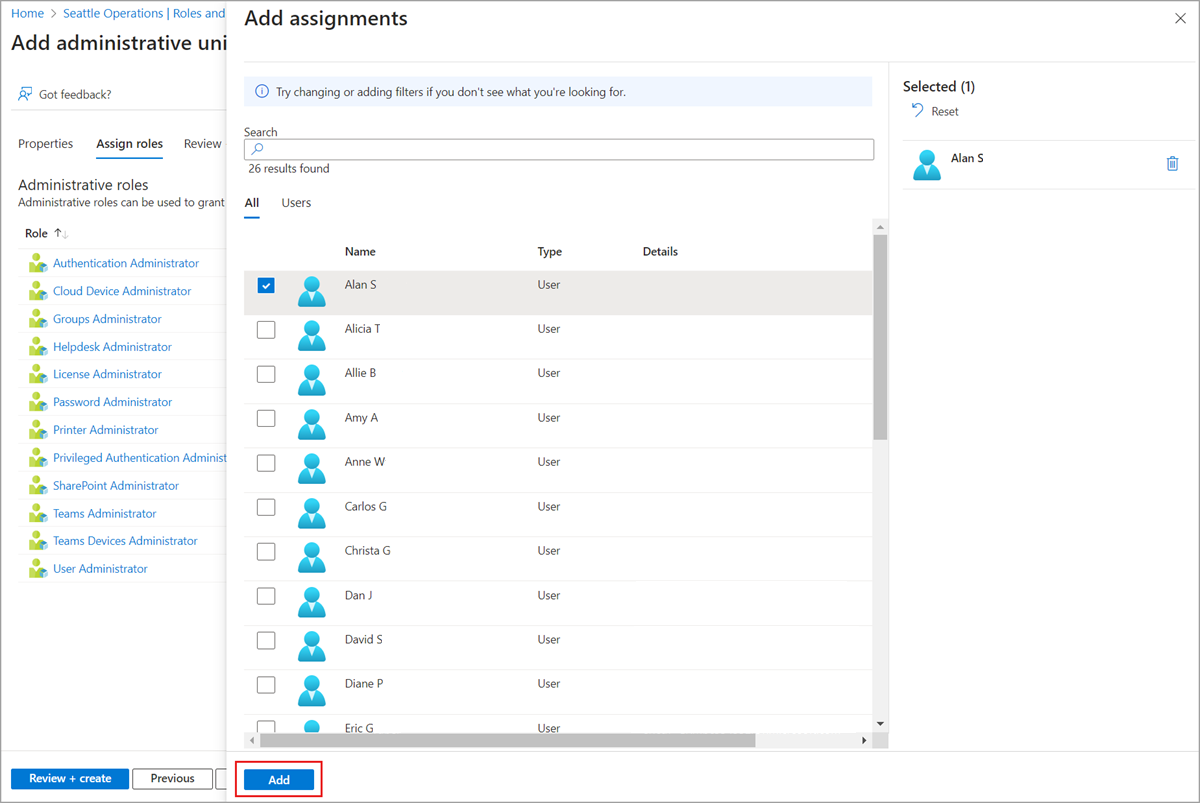
Optionally, on the Assign roles tab, select a role and then select the users to assign the role to with this administrative unit scope.
On the Review + create tab, review the administrative unit and any role assignments.
Select the Create button.
Delete an administrative unit
In Microsoft Entra ID, you can delete an administrative unit that you no longer need as a unit of scope for administrative roles. Before you delete the administrative unit, you should remove any role assignments with that administrative unit scope.
Sign in to the Microsoft Entra admin center as at least a Privileged Role Administrator.
Browse to Identity > Roles & admins > Admin units.
Select the administrative unit you want to delete.
Select Roles and administrators, and then open a role to view the role assignments.
Remove all the role assignments with the administrative unit scope.
Browse to Identity > Roles & admins > Admin units.
Add a check mark next to the administrative unit you want to delete.
Select Delete.
To confirm that you want to delete the administrative unit, select Yes.


