Configure Azure VPN Client for P2S certificate authentication connections - Windows
If your point-to-site (P2S) VPN gateway is configured to use OpenVPN and certificate authentication, you can connect to your virtual network using the Azure VPN Client. This article walks you through the steps to configure the Azure VPN Client and connect to your virtual network.
Before you begin
Before beginning client configuration steps, verify that you're on the correct VPN client configuration article. The following table shows the configuration articles available for VPN Gateway point-to-site VPN clients. Steps differ, depending on the authentication type, tunnel type, and the client OS.
| Authentication method | Tunnel type | Client OS | VPN client |
|---|---|---|---|
| Certificate | |||
| IKEv2, SSTP | Windows | Native VPN client | |
| IKEv2 | macOS | Native VPN client | |
| IKEv2 | Linux | strongSwan | |
| OpenVPN | Windows | Azure VPN client OpenVPN client version 2.x OpenVPN client version 3.x |
|
| OpenVPN | macOS | OpenVPN client | |
| OpenVPN | iOS | OpenVPN client | |
| OpenVPN | Linux | Azure VPN Client OpenVPN client |
|
| Microsoft Entra ID | |||
| OpenVPN | Windows | Azure VPN client | |
| OpenVPN | macOS | Azure VPN Client | |
| OpenVPN | Linux | Azure VPN Client |
Prerequisites
This article assumes that you already completed the following prerequisites:
- You created and configured your VPN gateway for point-to-site certificate authentication and the OpenVPN tunnel type. See Configure server settings for P2S VPN Gateway connections - certificate authentication for steps.
- You generated and downloaded the VPN client configuration files. See Generate VPN client profile configuration files for steps.
- You can either generate client certificates, or acquire the appropriate client certificates necessary for authentication.
Connection requirements
To connect to Azure, each connecting client computer requires the following items:
- The Azure VPN Client software must be installed on each client computer.
- The Azure VPN Client profile is configured using the settings contained in the downloaded azurevpnconfig.xml or azurevpnconfig_cert.xml configuration file.
- The client computer must have a client certificate installed locally.
Generate and install client certificates
For certificate authentication, a client certificate must be installed on each client computer. The client certificate you want to use must be exported with the private key, and must contain all certificates in the certification path. Additionally, for some configurations, you'll also need to install root certificate information.
- For information about working with certificates, see Point-to site: Generate certificates.
- To view an installed client certificate, open Manage User Certificates. The client certificate is installed in Current User\Personal\Certificates.
Install the client certificate
Each computer needs a client certificate in order to authenticate. If the client certificate isn't already installed on the local computer, you can install it using the following steps:
- Locate the client certificate. For more information about client certificates, see Install client certificates.
- Install the client certificate. Typically, you can do this by double-clicking the certificate file and providing a password (if required).
View configuration files
The VPN client profile configuration package contains specific folders. The files within the folders contain the settings needed to configure the VPN client profile on the client computer. The files and the settings they contain are specific to the VPN gateway and the type of authentication and tunnel your VPN gateway is configured to use.
Locate and unzip the VPN client profile configuration package you generated. For Certificate authentication and OpenVPN, you'll see the AzureVPN folder. In this folder, you'll see either the azurevpnconfig_cert.xml file or the azurevpnconfig.xml file, depending on whether your P2S configuration includes multiple authentication types. The .xml file contains the settings you use to configure the VPN client profile.
If you don't see either file, or you don't have an AzureVPN folder, verify that your VPN gateway is configured to use the OpenVPN tunnel type and that certificate authentication is selected.
Download the Azure VPN Client
The features and settings that are available for the Azure VPN Client are dependent on the version of the client that you're using. For information about Azure VPN Client versions, see the Azure VPN Client versions article.
Download the latest version of the Azure VPN Client install files using one of the following links:
- Install using Client Install files: https://aka.ms/azvpnclientdownload.
- Install directly, when signed in on a client computer: Microsoft Store.
Install the Azure VPN Client to each computer.
Verify that the Azure VPN Client has permission to run in the background. For steps, see Windows background apps.
To verify the installed client version, open the Azure VPN Client. Go to the bottom of the client and click ... -> ? Help. In the right pane, you can see the client version number.
Configure the Azure VPN Client and connect
Open the Azure VPN Client.
Select + on the bottom left of the page, then select Import.
In the window, navigate to the azurevpnconfig.xml or azurevpnconfig_cert.xml file, depending on your configuration. Select the file, then select Open.
On the client profile page, notice that many of the settings are already specified. The preconfigured settings are contained in the VPN client profile package that you imported. Even though most of the settings are already specified, you need to configure settings specific to the client computer.
From the Certificate Information dropdown, select the name of the child certificate (the client certificate). For example, P2SChildCert. For this exercise, for secondary profile, select None.
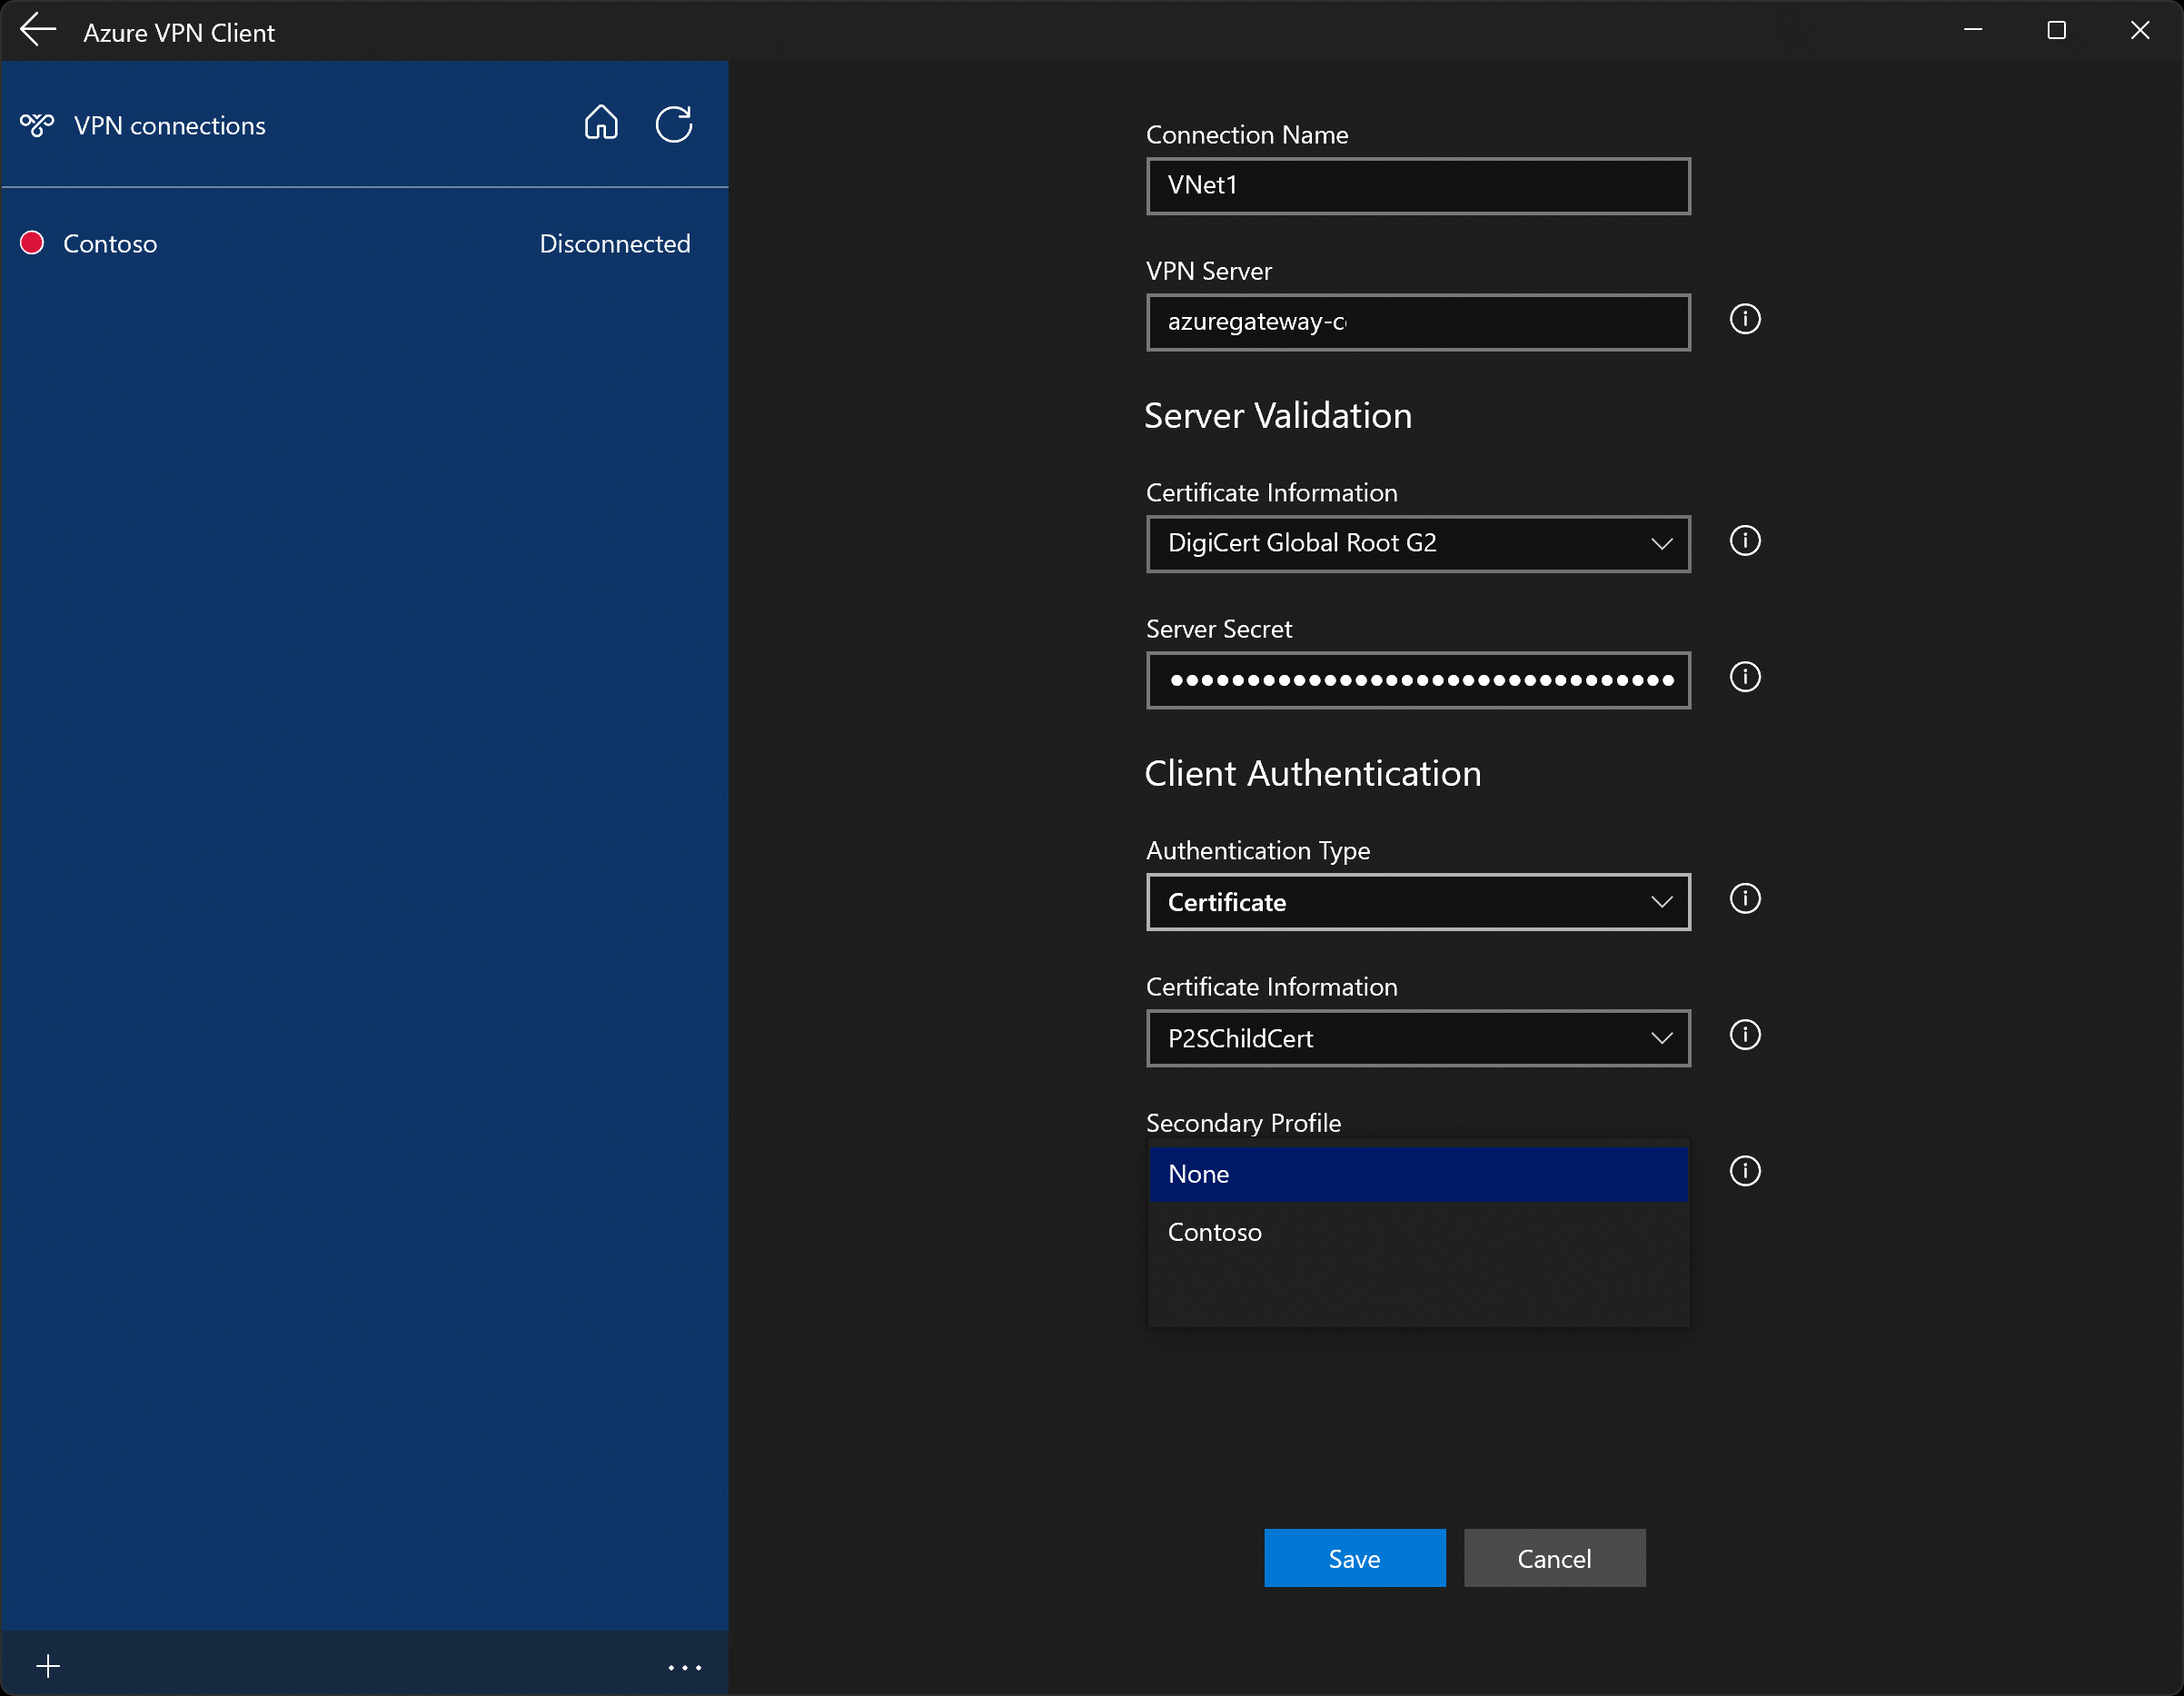
If you don't see a client certificate in the Certificate Information dropdown, you'll need to cancel the profile configuration import and fix the issue before proceeding. It's possible that one of the following things is true:
- The client certificate isn't installed locally on the client computer.
- There are multiple certificates with exactly the same name installed on your local computer (common in test environments).
- The child certificate is corrupt.
After the import validates (imports with no errors), select Save.
In the left pane, locate the VPN connection, then select Connect.
-
The Azure VPN Client system tray, available in version 4.0.0.0 and later, lets you close the Azure VPN Client application while keeping the connection active. When you close the application, you can see the application in the Windows system tray. You can reopen the Azure VPN Client app in compact mode by clicking the tray icon.


If you experience connection issues, if you're running the v4.0.0.0 version of the Azure VPN Client or later, you can click the ... at the bottom of the Azure VPN Client page and select Prerequisites. On the Test Application Prerequisites page, select Run Prerequisites Test. Fix any issues and try connecting again. For more information, see Azure VPN Client prerequisites check.
Export and distribute a client profile
Once you have a working profile and need to distribute it to other users, you can export it using the following steps:
Highlight the VPN client profile that you want to export, select the ..., then select Export.

Select the location that you want to save this profile to, leave the file name as is, then select Save to save the xml file.

Delete a client profile
Highlight the VPN client profile that you want to export, select the ..., then select Remove.
On the confirmation popup, select Remove to delete.
Configure a secondary profile
The Azure VPN Client provides high availability for client profiles. Adding a secondary client profile gives the client a more resilient way to access the VPN. If there's a region outage or failure to connect to the primary VPN client profile, the Azure VPN Client autoconnects to the secondary client profile without causing any disruptions. This feature requires the Azure VPN Client version 2.2124.51.0 or later.
For this example, we'll add a secondary profile to an already existing profile. If the client can't connect to VNet1, it will automatically connect to Contoso without causing disruptions.
Add another VPN client profile to the Azure VPN Client. For this example, we imported a VPN client profile file and added a connection to Contoso.
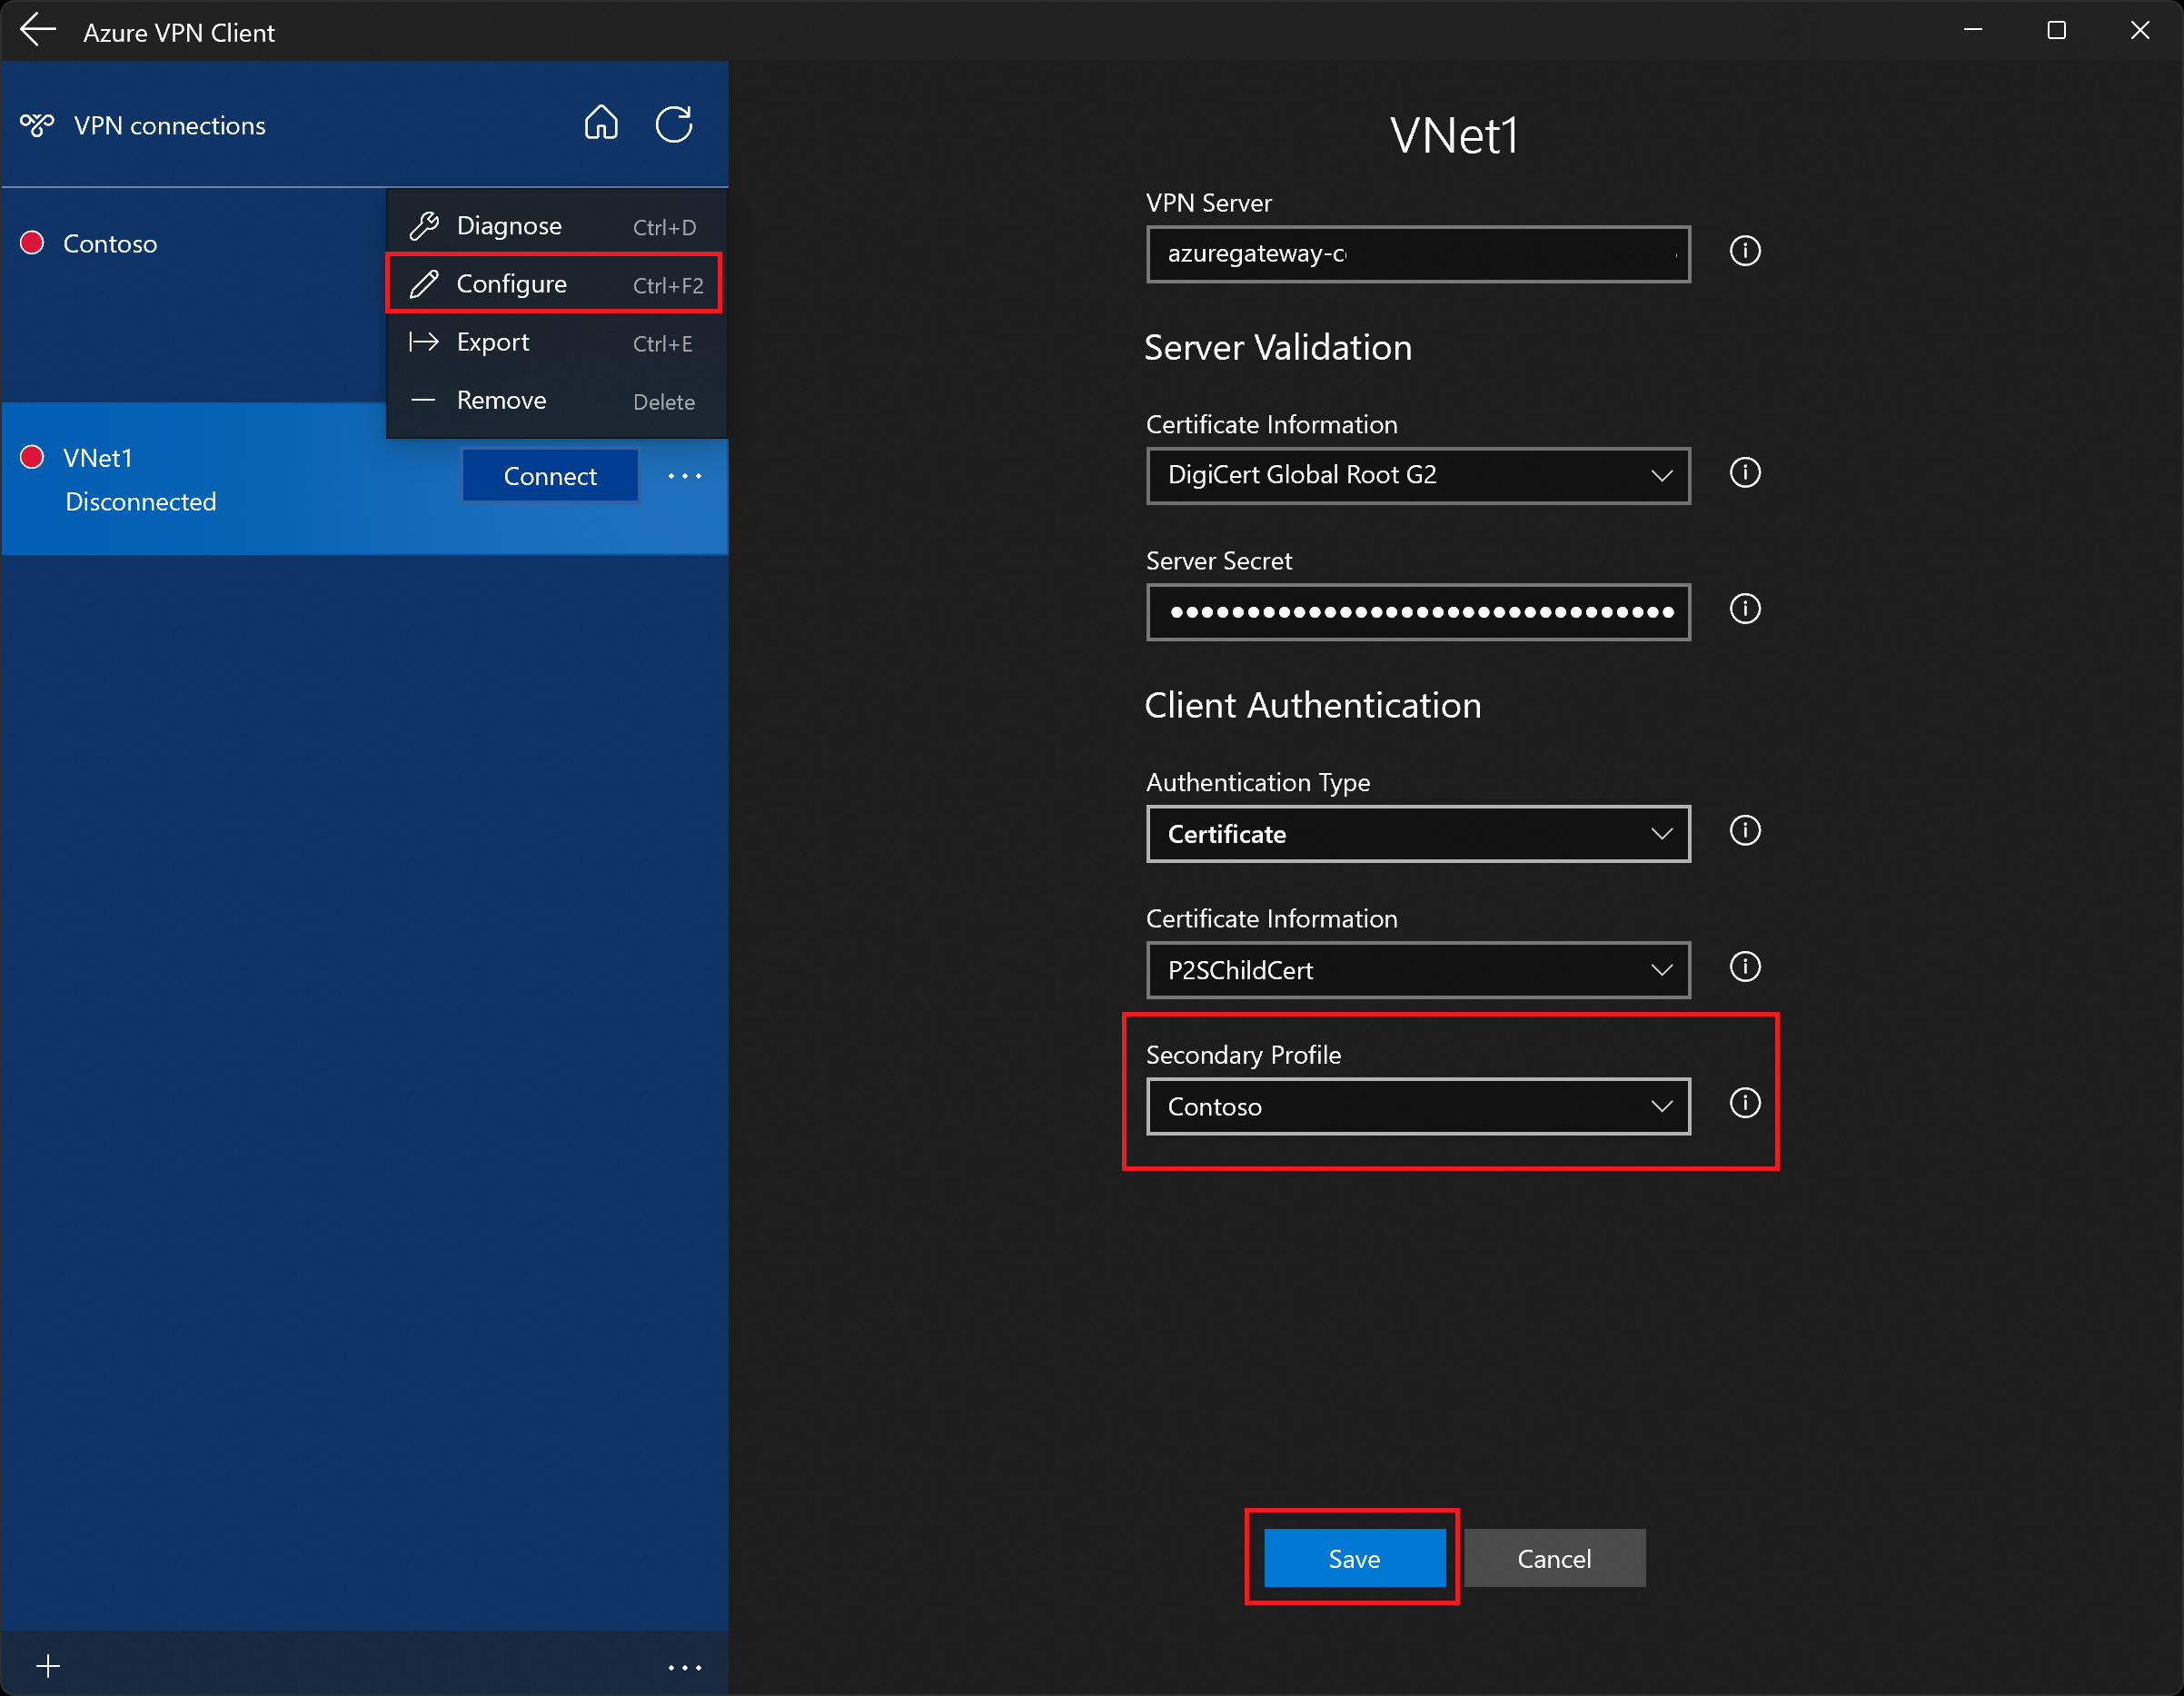
Next, go to the VNet1 profile and click "...", then Configure.
From the Secondary Profile dropdown, select the profile for Contoso. Then, Save your settings.

Working with connections
To connect automatically
These steps help you configure your connection to connect automatically with Always-on.
On the home page for your VPN client, select VPN Settings. If you see the switch apps dialogue box, select Yes.

If the profile that you want to configure is connected, disconnect the connection, then highlight the profile and select the Connect automatically check box.
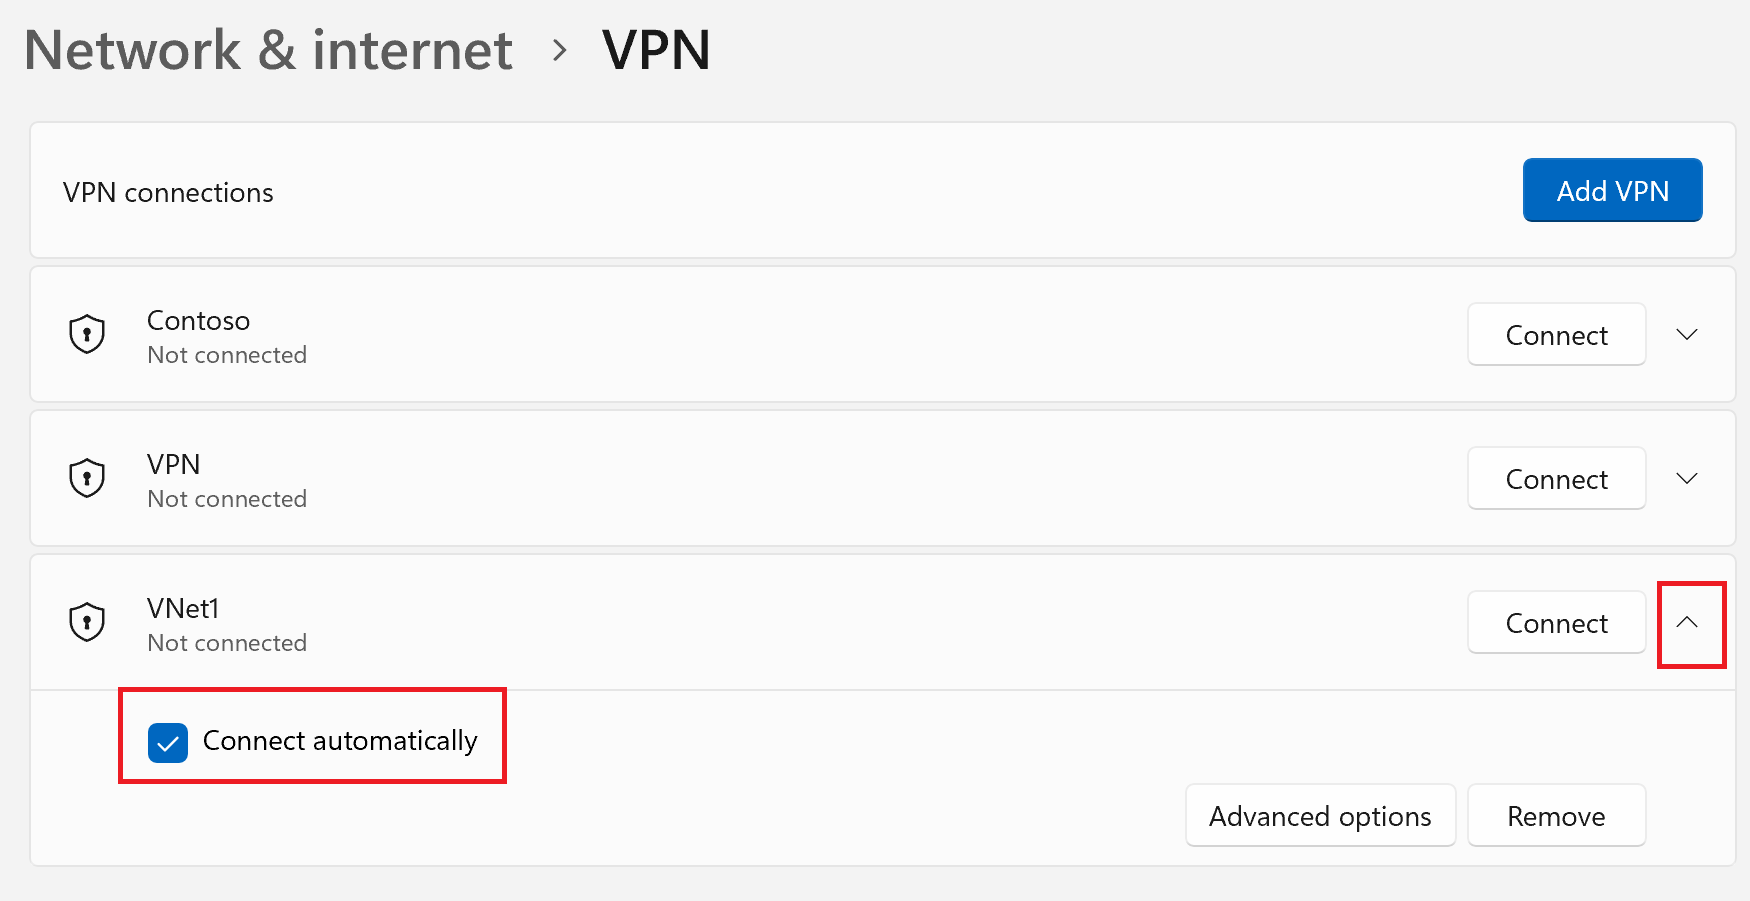
Select Connect to initiate the VPN connection.


Diagnose connection issues
Prerequisites check
If your Azure VPN Client is version 4.0.0.0 or later, you can run a prerequisites check to verify that your computer has the necessary items configured and installed in order to successfully connect. To view the version number of an installed Azure VPN Client, launch the client and select Help.
- Click the ... at the bottom of the Azure VPN Client page and select Prerequisites.
- On the Test Application Prerequisites page, select Run Prerequisites Test.
- Fix any issues and try connecting again. For more information, see Azure VPN Client prerequisites check.
Diagnostics tool
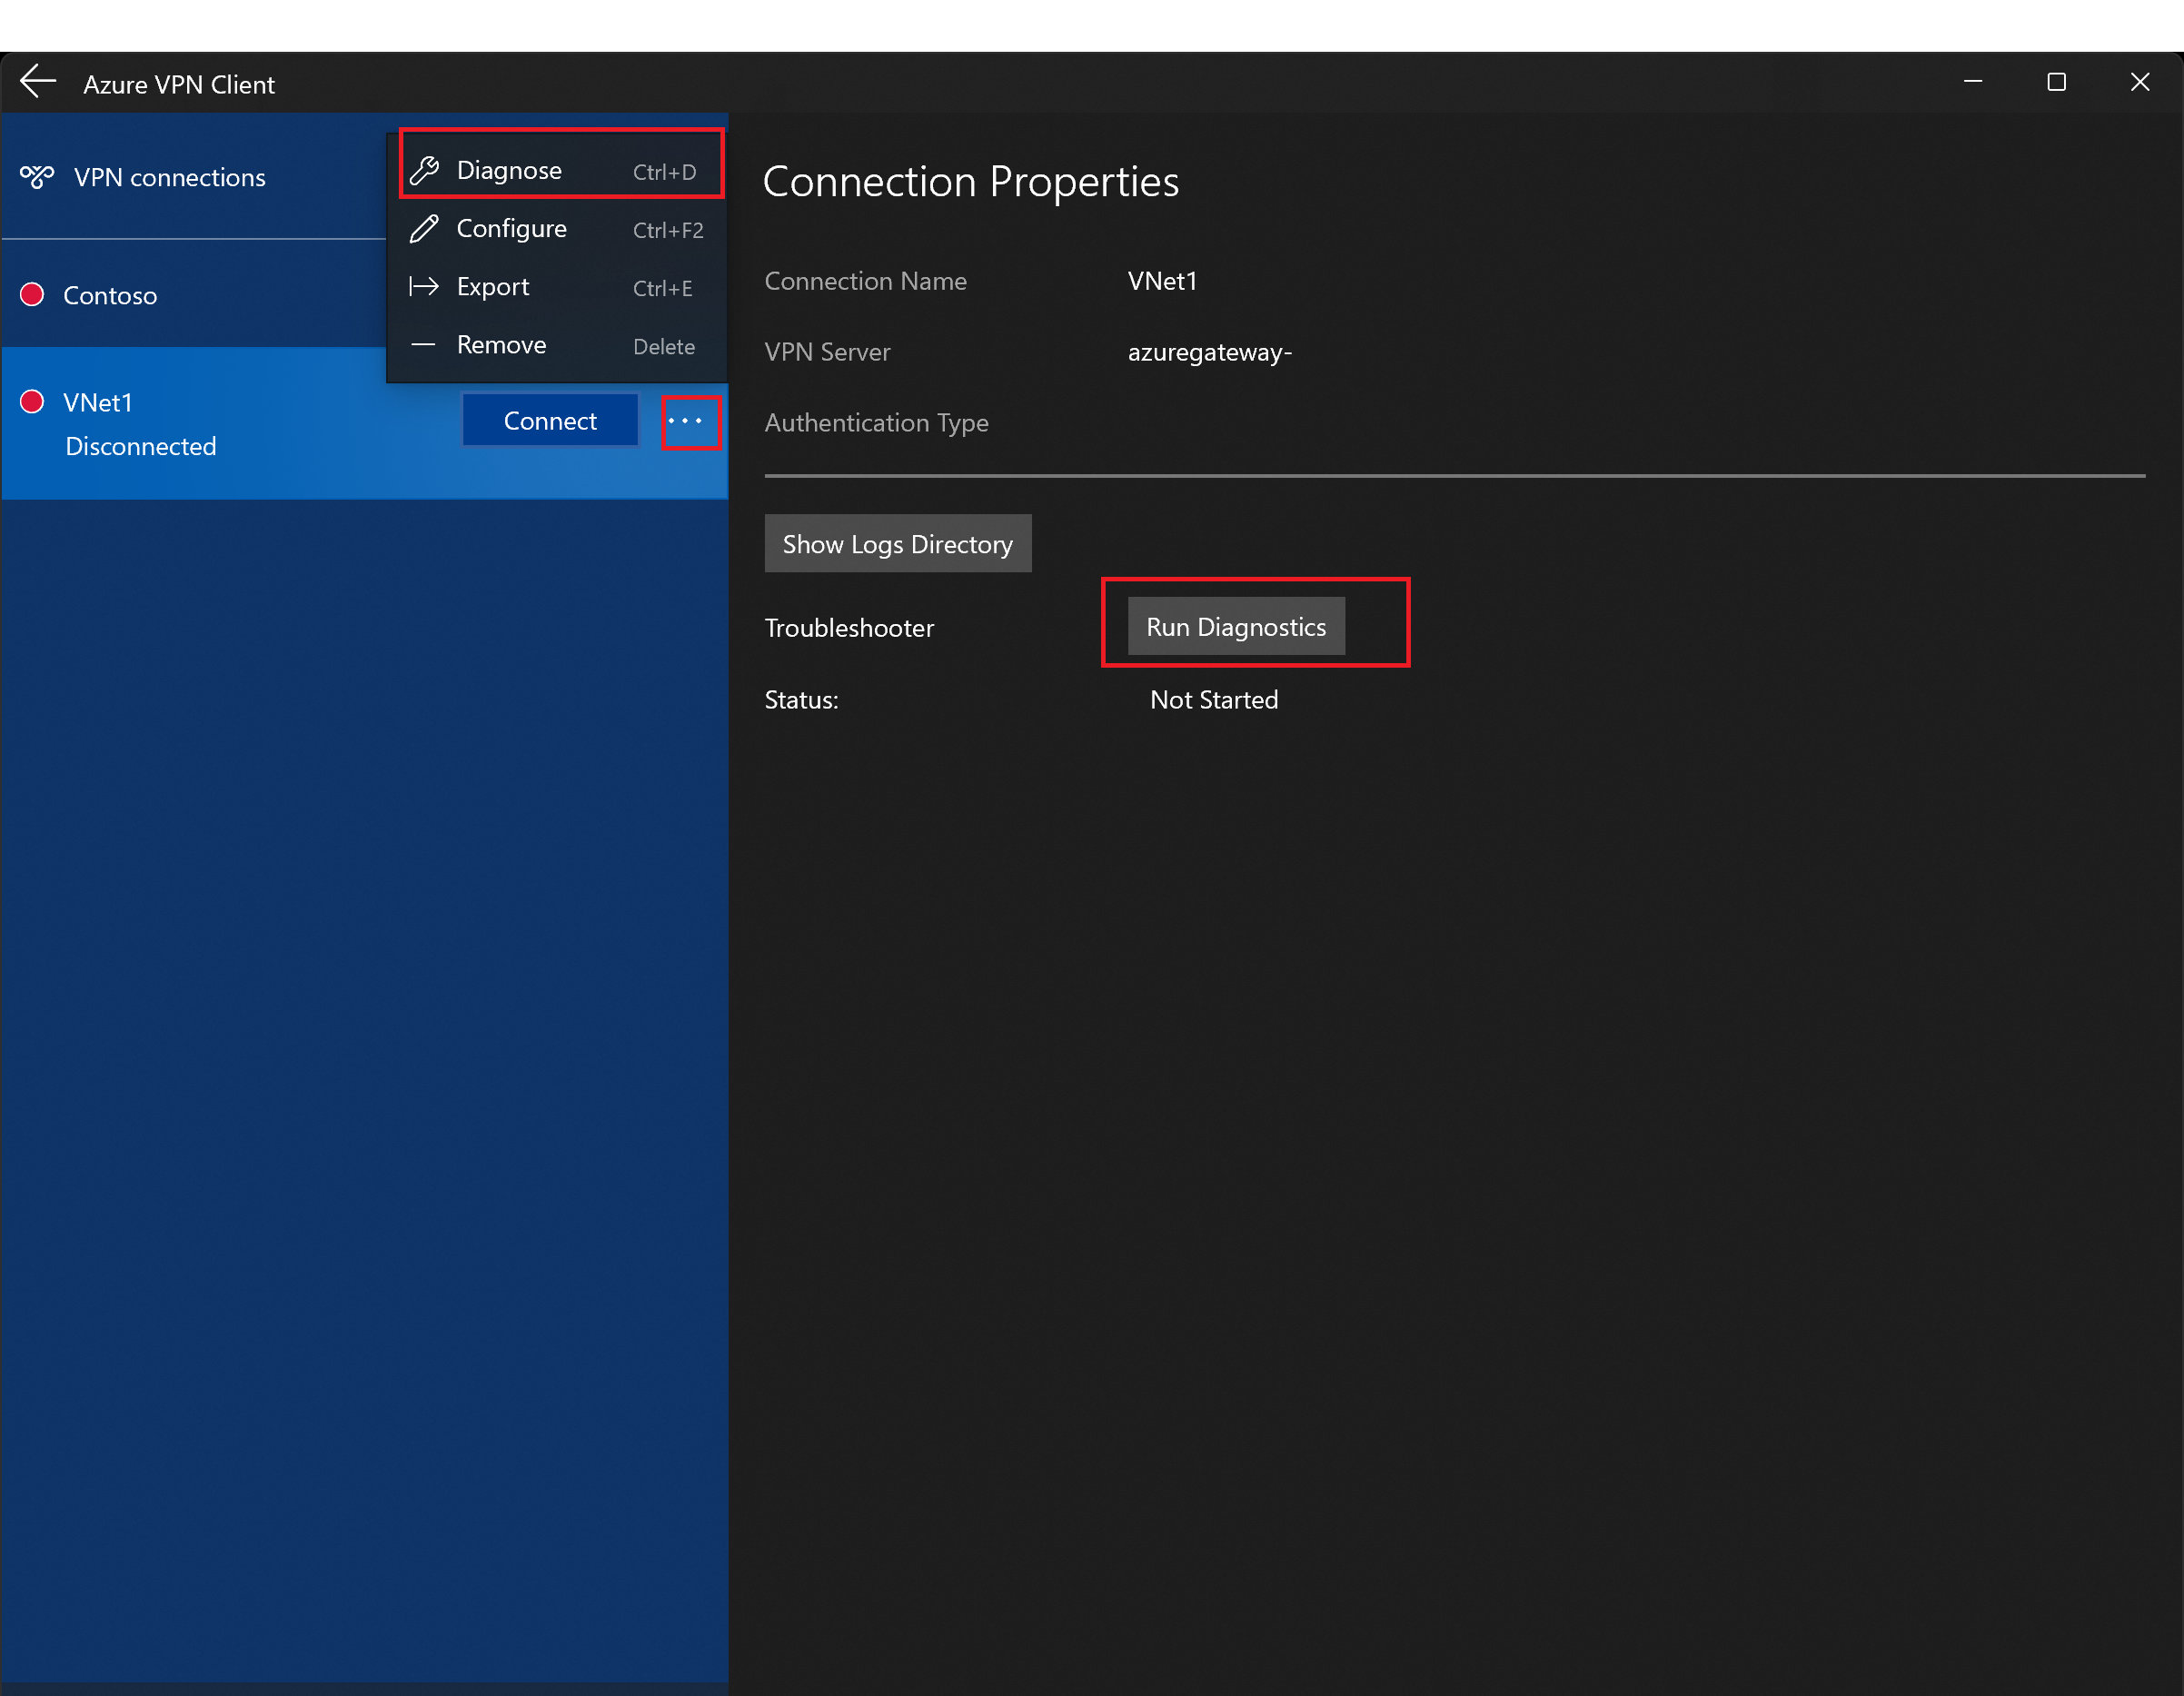
Select the ... next to the VPN connection that you want to diagnose to reveal the menu. Then select Diagnose.
On the Connection Properties page, select Run Diagnostics. If asked, sign in with your credentials, then view the results.

Custom settings: DNS and routing
You can configure the Azure VPN Client with optional configuration settings such as more DNS servers, custom DNS, forced tunneling, custom routes, and other settings. For a description of the available settings and configuration steps, see Azure VPN Client optional settings.
Next steps
Follow up with any additional server or connection settings. See Point-to-site configuration steps.