Manage update configuration settings
Applies to: ✔️ Windows VMs ✔️ Linux VMs ✔️ On-premises environment ✔️ Azure Arc-enabled servers.
This article describes how to configure update settings from Azure Update Manager to control the update settings on your Azure virtual machines (VMs) and Azure Arc-enabled servers for one or more machines.
Configure settings on a single VM
To configure update settings on your machines on a single VM:
You can schedule updates from Overview or Machines on the Update Manager page or from the selected VM.
Note
You can schedule updates from the Overview blade or Machines blade in Update Manager page or from the selected VM.
Sign in to the Azure portal.
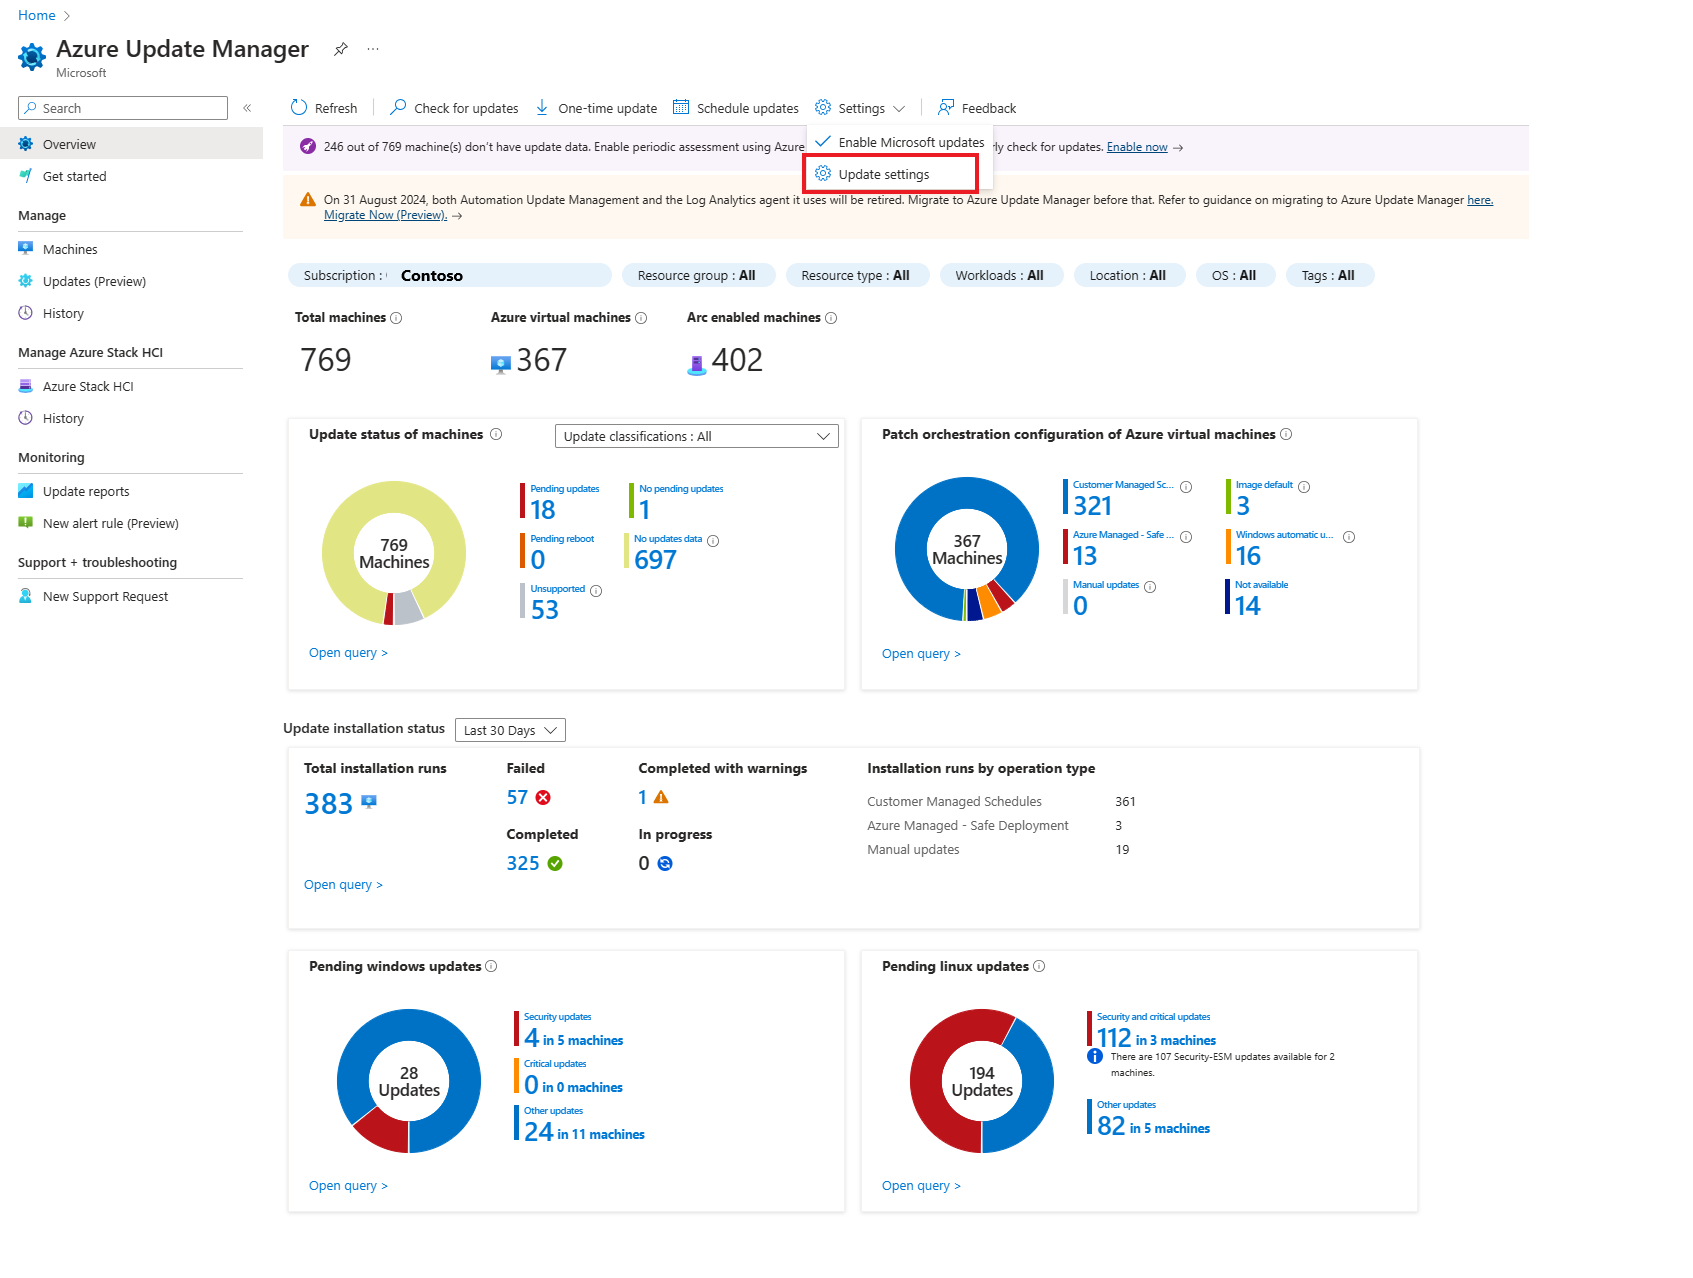
In Azure Update Manager, select Overview, select your Subscription, and select Update settings.
In Change update settings, select +Add machine to select the machine for which you want to change the update settings.
In Select resources, select the machine and select Add.
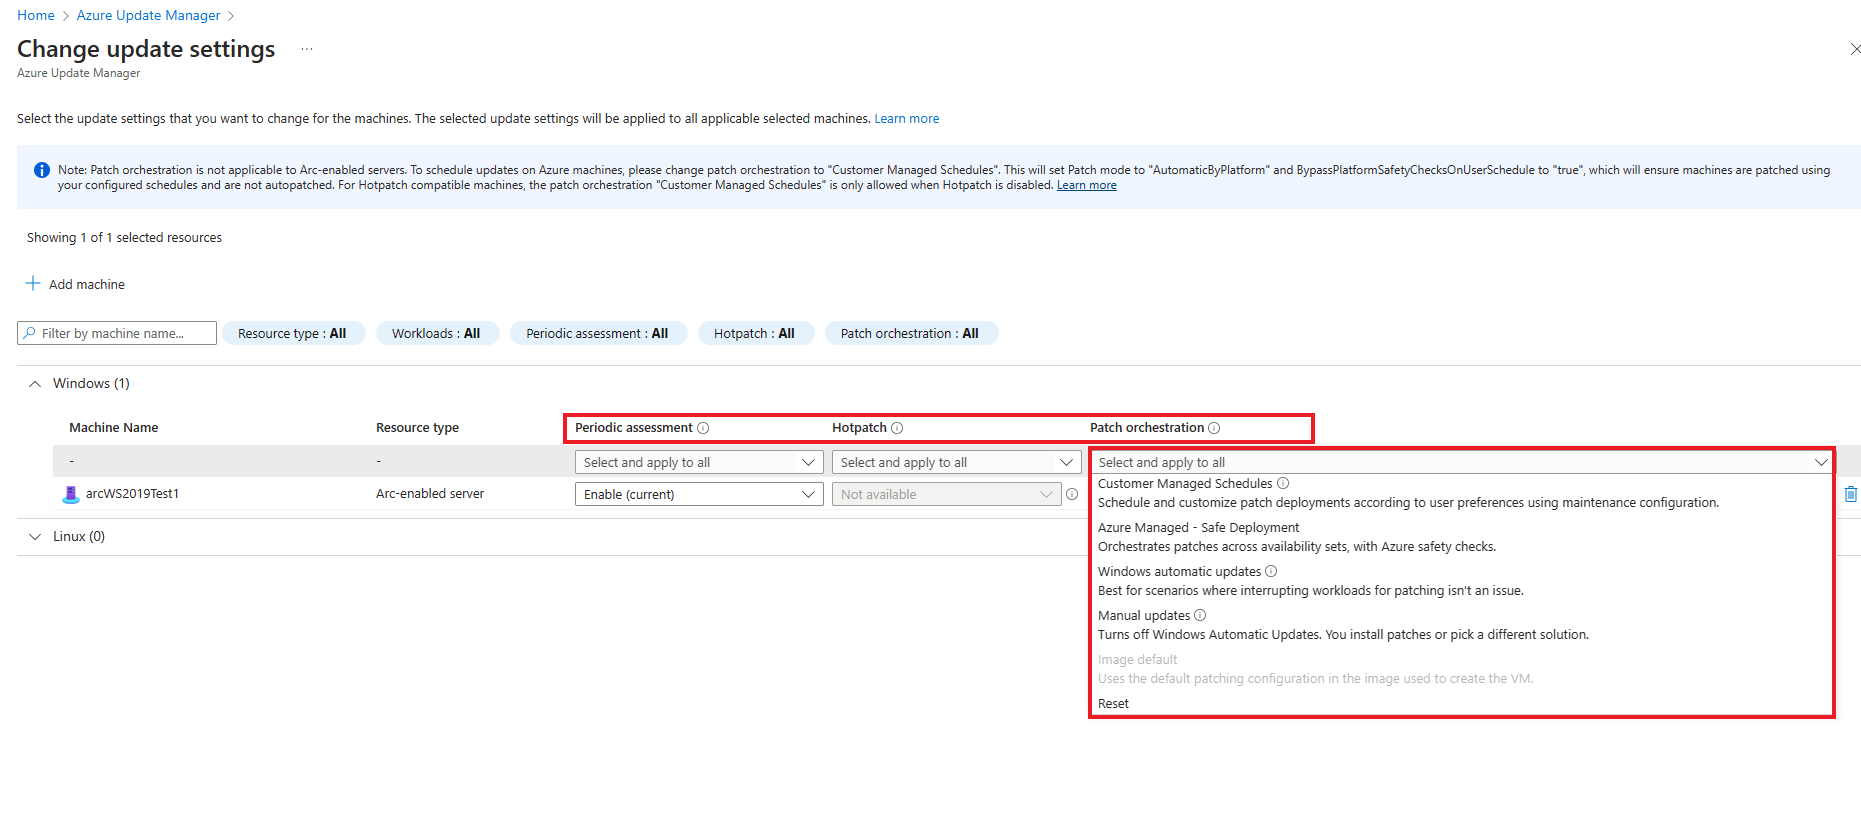
In the Change update settings page, you will see the machine classified as per the operating system with the list of following updates that you can select and apply.

The following update settings are available for configuration for the selected machines:
Periodic assessment: The periodic assessment is set to run every 24 hours. You can either enable or disable this setting.
Hotpatch: You can enable hotpatching for Windows Server Azure Edition VMs. Hotpatching is a new way to install updates on supported Windows Server Azure Edition VMs that doesn't require a reboot after installation. You can use Update Manager to install other patches by scheduling patch installation or triggering immediate patch deployment. You can enable, disable, or reset this setting.
Patch orchestration option provides:
- Customer Managed Schedules—enables schedule patching on your existing VMs. The new patch orchestration option enables the two VM properties - Patch mode = Azure-orchestrated and BypassPlatformSafetyChecksOnUserSchedule = TRUE on your behalf after receiving your consent.
- Azure Managed - Safe Deployment—for a group of virtual machines undergoing an update, the Azure platform will orchestrate updates. (not applicable for Arc-enabled server). The VM is set to automatic VM guest patching.(i.e), the patch mode is AutomaticByPlatform. There are different implications depending on whether customer schedule is attached to it or not. For more information, see the user scenarios.
- Available Critical and Security patches are downloaded and applied automatically on the Azure VM using automatic VM guest patching. This process kicks off automatically every month when new patches are released. Patch assessment and installation are automatic, and the process includes rebooting the VM as required.
- Windows Automatic Updates (AutomaticByOS) - When the workload running on the VM doesn't have to meet availability targets, the operating system updates are automatically downloaded and installed. Machines are rebooted as needed.
- Manual updates - This mode disables Windows automatic updates on VMs. Patches are installed manually or using a different solution.
- Image Default - Only supported for Linux Virtual Machines, this mode uses the default patching configuration in the image used to create the VM.
After you make the selection, select Save.
A notification appears to confirm that the update settings are successfully changed.
Configure settings at scale
Follow these steps to configure update settings on your machines at scale.
Note
You can schedule updates from Overview or Machines.
Sign in to the Azure portal.
In Azure Update Manager, select Overview, select your Subscription and select Update settings.
In Change update settings, select the update settings that you want to change for your machines. Follow the procedure from step 3 listed in From Overview blade of Configure settings on single VM.
A notification appears to confirm that the update settings are successfully changed.
Next steps
- View assessment compliance and deploy updates for a selected Azure VM or Azure Arc-enabled server, or across multiple machines in your subscription in the Azure portal.
- To view update assessment and deployment logs generated by Update Manager, see Query logs.
- To troubleshoot issues, see Troubleshoot issues with Update Manager.
