Create and assign a User Assigned Managed Identity
In this how-to guide, you learn how to:
- Create a User Assigned Managed Identity (UAMI) for your Site Network Service (SNS).
- Assign that User Assigned Managed Identity permissions.
The requirement for a User Assigned Managed Identity and the required permissions depend on the Network Service Design (NSD) and must have been communicated to you by the Network Service Designer.
Prerequisites
You must have created a custom role via Create a custom role. This article assumes that you named the custom role 'Custom Role - AOSM Service Operator access to Publisher.'
Your Network Service Designer must have told you which other permissions your Managed Identity requires and which Network Function Definition Version (NFDV) your SNS uses.
To perform this task, you need either the 'Owner' or 'User Access Administrator' role over the Network Function Definition Version resource from your chosen Publisher. You also must have a Resource Group over which you have the 'Owner' or 'User Access Administrator' role assignment in order to create the Managed Identity and assign it permissions.
Create a User Assigned Managed Identity
Create a User Assigned Managed Identity. For details, refer to Create a User Assigned Managed Identity for your SNS.
Assign custom role
Assign a custom role to your User Assigned Managed Identity.
Choose scope for assigning custom role
The publisher resources that you need to assign the custom role to are:
- The Network Function Definition Version(s)
You must decide if you want to assign the custom role individually to this NFDV, or to a parent resource such as the publisher resource group or Network Function Definition Group.
Applying to a parent resource grants access over all child resources. For example, applying to the whole publisher resource group gives the managed identity access to:
All the Network Function Definition Groups and Versions.
All the Network Service Design Groups and Versions.
All the Configuration Group Schemas.
The custom role permissions limit access to the list of the permissions shown here:
Microsoft.HybridNetwork/Publishers/NetworkFunctionDefinitionGroups/NetworkFunctionDefinitionVersions/use/action
Microsoft.HybridNetwork/Publishers/NetworkFunctionDefinitionGroups/NetworkFunctionDefinitionVersions/read
Microsoft.HybridNetwork/Publishers/NetworkServiceDesignGroups/NetworkServiceDesignVersions/use/action
Microsoft.HybridNetwork/Publishers/NetworkServiceDesignGroups/NetworkServiceDesignVersions/read
Microsoft.HybridNetwork/Publishers/ConfigurationGroupSchemas/read
Note
Do not provide write or delete access to any of these publisher resources.
Assign custom role
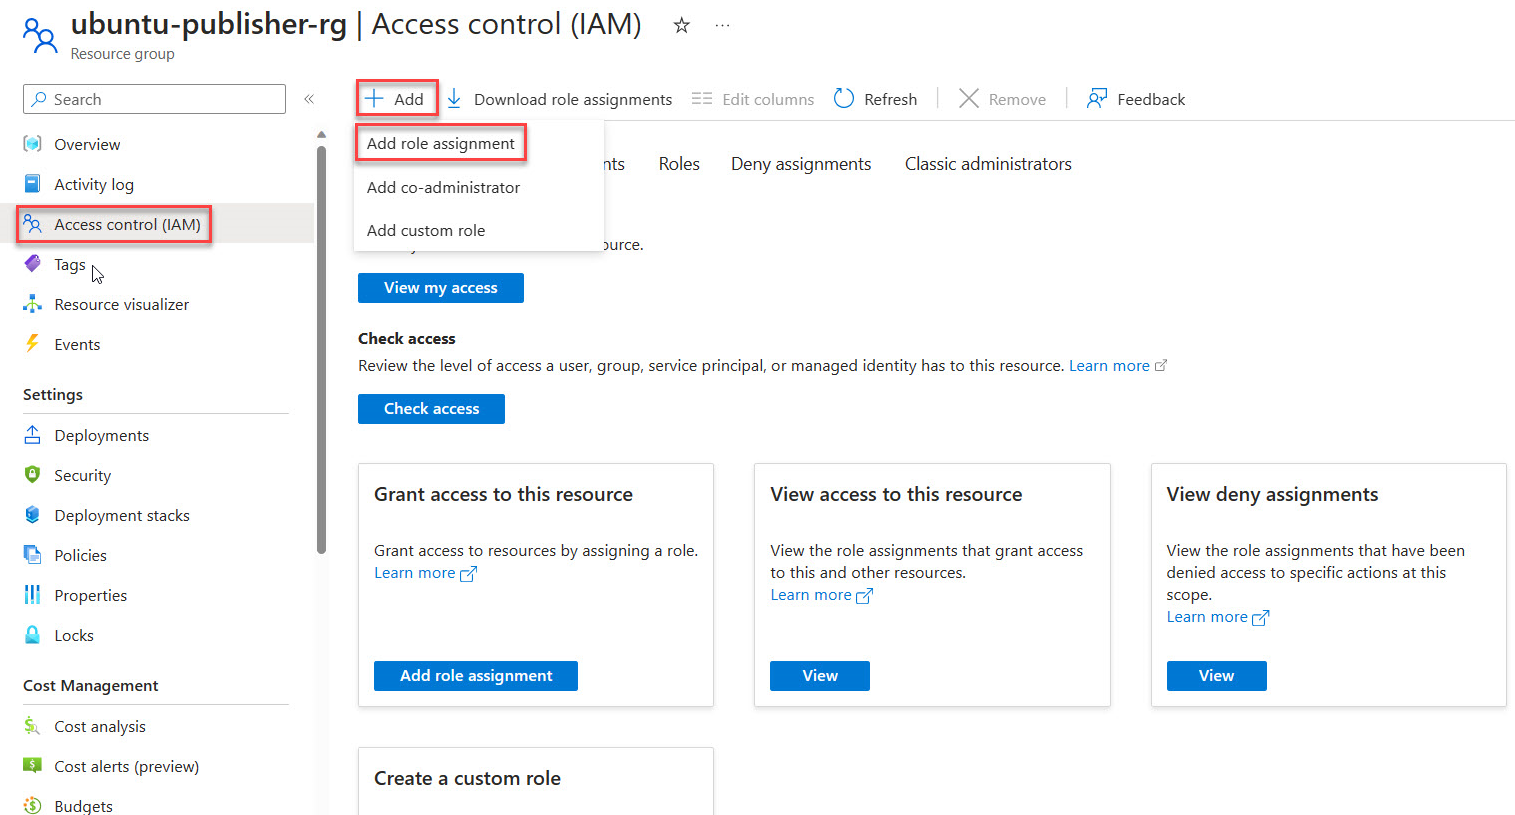
Access the Azure portal and open your chosen scope; Publisher Resource Group or Network Function Definition Version.
In the side menu of this item, select Access Control (IAM).
Choose Add Role Assignment.
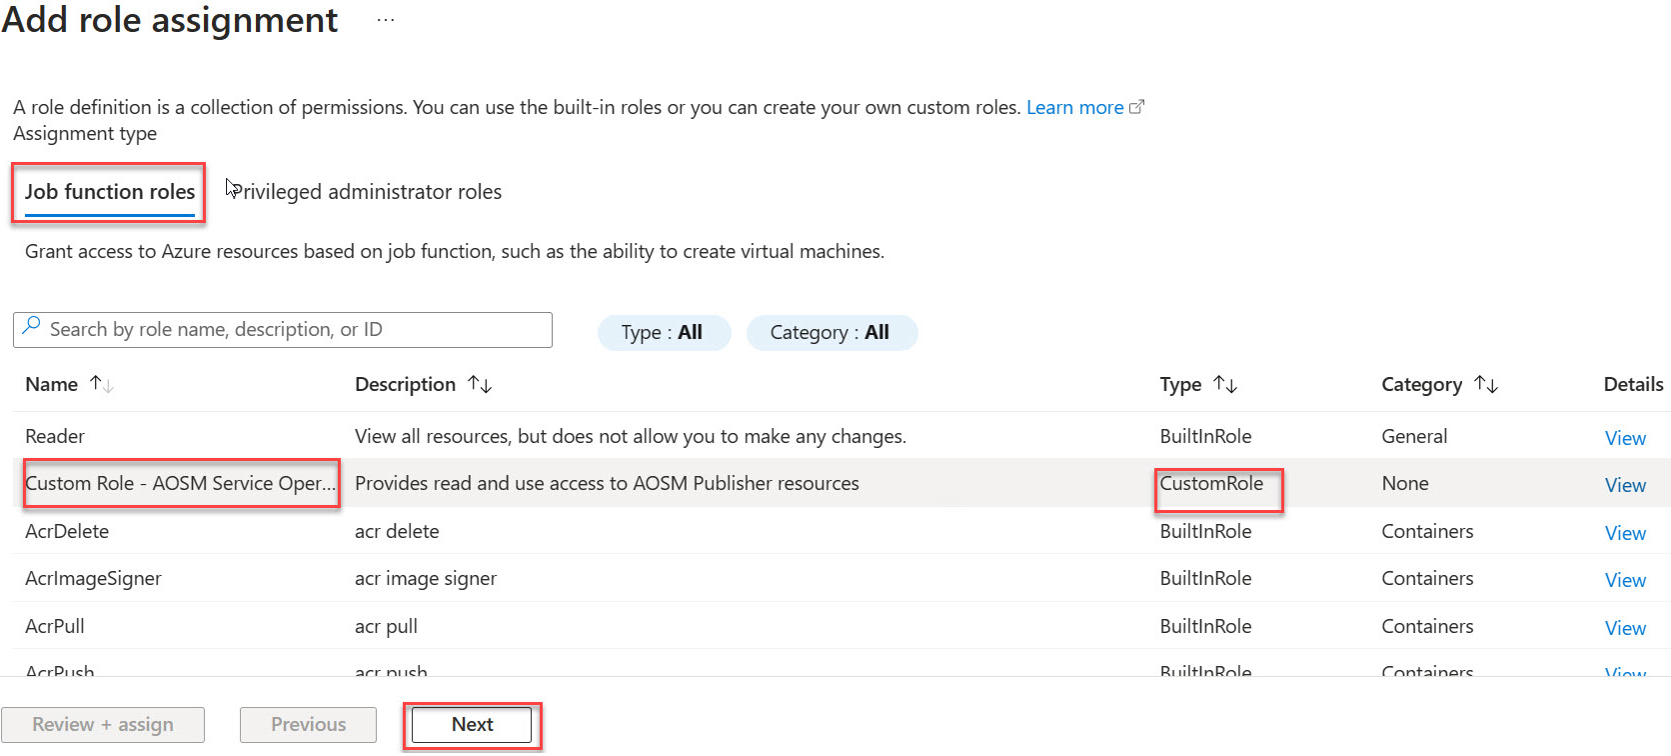
Under Job function roles find your Custom Role in the list then proceed with Next.
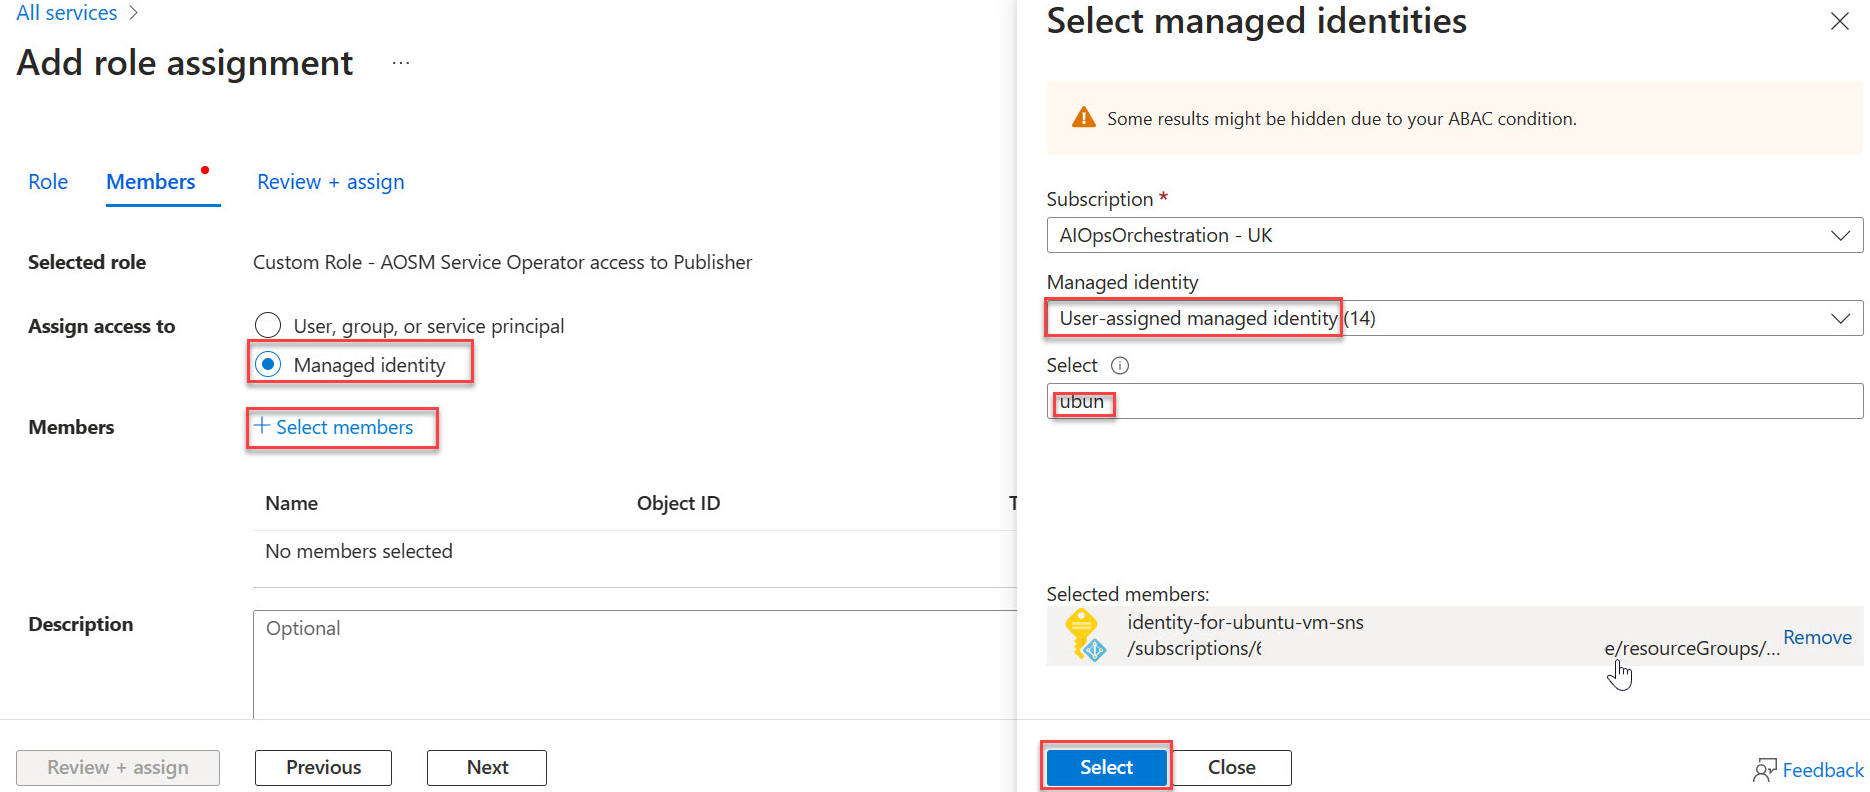
Select Managed Identity, then Choose + Select Members then find and choose your new managed identity. Choose Select.
Select Review and assign.
Repeat the role assignment
Repeat the role assignment tasks for all of your chosen scopes.
Assign Managed Identity Operator role to the Managed Identity itself
Go to the Azure portal and search for Managed Identities.
Select identity-for-nginx-sns from the list of Managed Identities.
On the side menu, select Access Control (IAM).
Choose Add Role Assignment and select the Managed Identity Operator role.

Select the Managed Identity Operator role.
Select Managed identity.
Select + Select members and navigate to the user-assigned managed identity and proceed with the assignment.
Completion of all the tasks outlined in this article ensures that the Site Network Service (SNS) has the necessary permissions to function effectively within the specified Azure environment.
Assign other required permissions to the Managed Identity
Repeat this process to assign any other permissions to the Managed Identity that your Network Service Designer identified.


