Manage a dev box by using the Microsoft Dev Box developer portal
In this article, you learn how to manage a dev box by using the Microsoft Dev Box developer portal. Developers can access their dev boxes directly in the developer portal, instead of having to use the Azure portal.
The developer portal is your central location to manage all of your dev boxes. In the developer portal, you can view information about your dev boxes. You can perform many actions on a dev box in the Microsoft Dev Box developer portal by using the actions menu on the dev box tile. The available options depend on the state of the dev box and the configuration of the dev box pool it belongs to. For example, you can shut down or restart a running dev box, or start a stopped dev box. You can also
Create a dev box
You can create as many dev boxes as you need through the Microsoft Dev Box developer portal. You might create a separate dev box for different scenarios, for example:
- Dev box per workload. Create a dev box for your front-end work and a separate dev box for your back-end work. You can also create multiple dev boxes for your back-end system.
- Dev box for bug fixing. Use a separate dev box for the bug fix to work on the specific task and troubleshoot the issue without impacting your primary machine.
You can create a dev box by using the Microsoft Dev Box developer portal. For more information, see Quickstart: Create a dev box by using the developer portal.
You can also create a dev box through the Azure CLI dev center extension. For more information, see Configure Microsoft Dev Box from the command-line with the Azure CLI.
Connect through an app
After you create your dev box, you can connect to it through a Remote Desktop application like Windows App or through the browser.
Windows App is the recommended client for Microsoft Dev Box; it provides an enhanced user experience, including support for multiple monitors.
If necessary, you can also connect to your dev box by using the legacy Remote Desktop client.
Connect through the Windows App
Windows App is the default app for connecting to your dev box. You can use the Windows App to connect to your dev box from any device, including your phone or laptop. The Windows App is available on multiple platforms, including Windows, macOS, iOS/iPadOS, Android/Chrome OS (preview), and web browsers.
To connect to a dev box by using the Windows App:
Install Windows App on your device. Download Windows App.
Sign in to the developer portal.
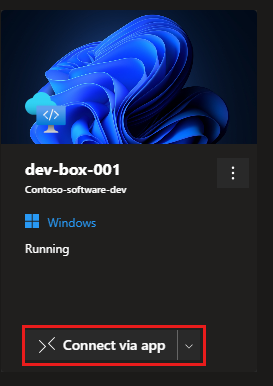
Select Connect via app.
Connect through the legacy Remote Desktop client
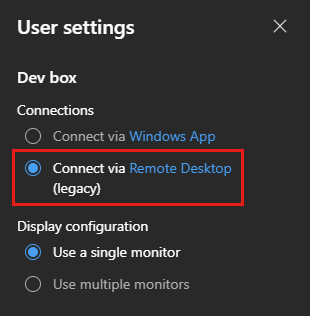
If you prefer to use the legacy Remote Desktop client, you can do so. You set the app you want to use to connect through the user settings in the developer portal:
Sign in to the developer portal.
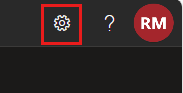
Select the user settings icon in the top right corner.
In User settings, select Connect via Remote Desktop (legacy).
Close User settings.
Connect through the browser
You can use a browser like Microsoft Edge for lighter workloads. When you access your dev box via your phone or laptop, you can use the browser. The browser is useful for tasks such as a quick bug fix or a review of a GitHub pull request. For more information, see the steps for using a browser to connect to a dev box.
To connect to a dev box by using the browser:
Sign in to the developer portal.
Select Open in browser.


A new tab opens with a new session through which you can use your dev box. Use a work or school account to sign in to your dev box, not a personal Microsoft account.
Configure multiple monitors
You can configure multiple monitors for your dev box. This is useful when you want to work on multiple tasks at the same time, such as debugging and writing code. You can also use multiple monitors to view different applications side by side.
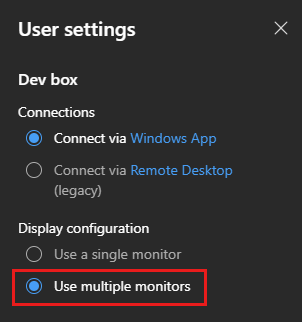
You enable or disable multiple monitors through the user settings in the developer portal:
Sign in to the developer portal.
Select the user settings icon in the top right corner.

In User settings, select Use multiple monitors.
Close User settings.
Shut down, restart, or start a dev box
To shut down or restart a dev box:
Sign in to the developer portal.
On the dev box you that want to shut down or restart, select the actions menu.

For a running dev box, you can select Shut down or Restart.
To start a dev box:
Sign in to the developer portal.
On the dev box you that want to start, select the actions menu.
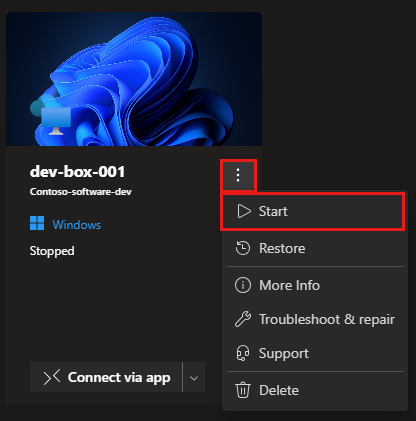
For a stopped dev box, you can select Start.
Get information about a dev box
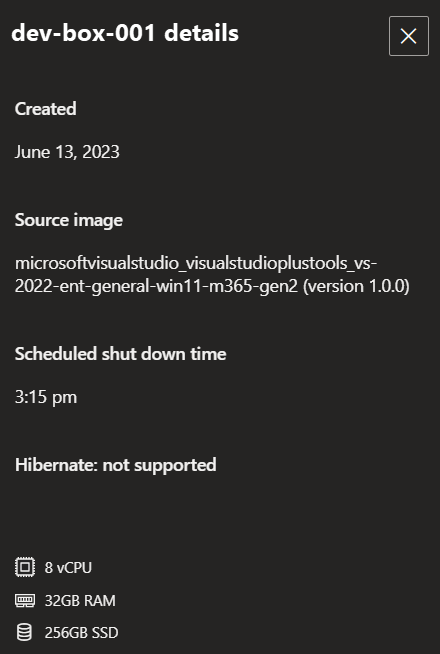
You can use the Microsoft Dev Box developer portal to view information about a dev box, such as the creation date, and the dev center and dev box pool it belongs to. You can also check the source image in use.
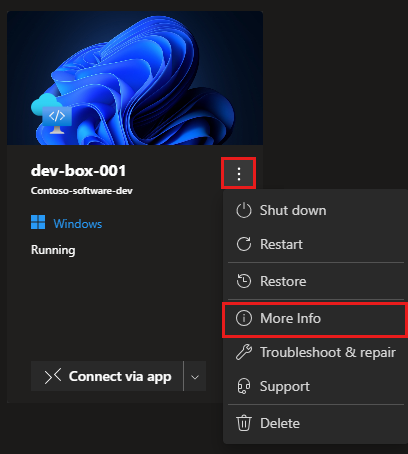
To get more information about your dev box:
Sign in to the developer portal.
On the dev box that you want to view, select the actions menu, and then select More Info.
In the dev box details pane, you see more information about your dev box, like the following example:
Delete a dev box
When you no longer need a dev box, you can delete it in the developer portal.
There are many reasons why you might not need a dev box anymore. Maybe you completed your testing, or you finished working on a specific project within your product.
You can delete dev boxes after you finish your tasks. Suppose you finish fixing your bug and merge your pull request. Now, you can delete your dev box and create new dev boxes to work on new items.
Important
You can't retrieve a dev box after deletion. Before you delete a dev box, confirm that you and your team members don't need the dev box for future tasks.
Sign in to the developer portal.
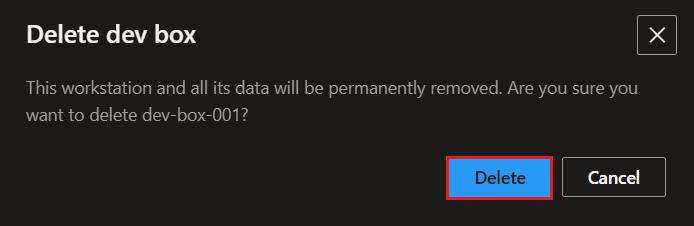
For the dev box that you want to delete, select the actions menu and then select Delete.
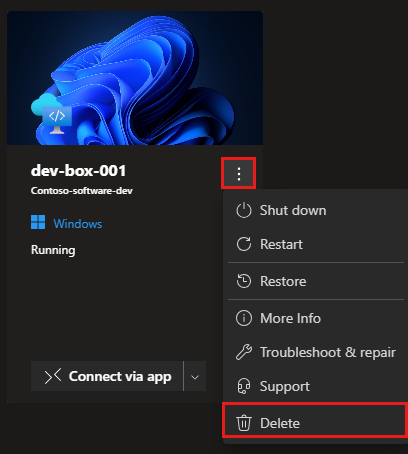
To confirm the deletion, select Delete.
Discover more dev box actions
Dependent on how your dev box is configured, you can perform more actions on a dev box in the Microsoft Dev Box developer portal. For example, you can:
Hibernate or resume: If your dev box has hibernation enabled, you can hibernate or resume the dev box. Hibernation is useful when you want to save the current state of your dev box and resume it later. For more information, see Hibernate a dev box in Microsoft Dev Box.
Troubleshoot & repair: If you encounter issues connecting to your dev box, you can use the Troubleshoot and repair to relsove the issue. For more information, see Troubleshoot and repair a dev box in Microsoft Dev Box.