Quickstart: Manage feature flags in Azure App Configuration
Azure App Configuration includes feature flags, which you can use to enable or disable a functionality, and variant feature flags, which allow multiple variations of a feature flag.
The Feature manager in the Azure portal provides a UI for creating and managing the feature flags and the variant feature flags that you use in your applications.
Prerequisites
- An Azure account with an active subscription. Create one for free.
- An App Configuration store. Create a store.
Create a feature flag
Add a new feature flag by following the steps below.
Open your Azure App Configuration store in the Azure portal and from the Operations menu, select Feature manager > Create. Then select Feature flag.

Under Create, select or enter the following information:
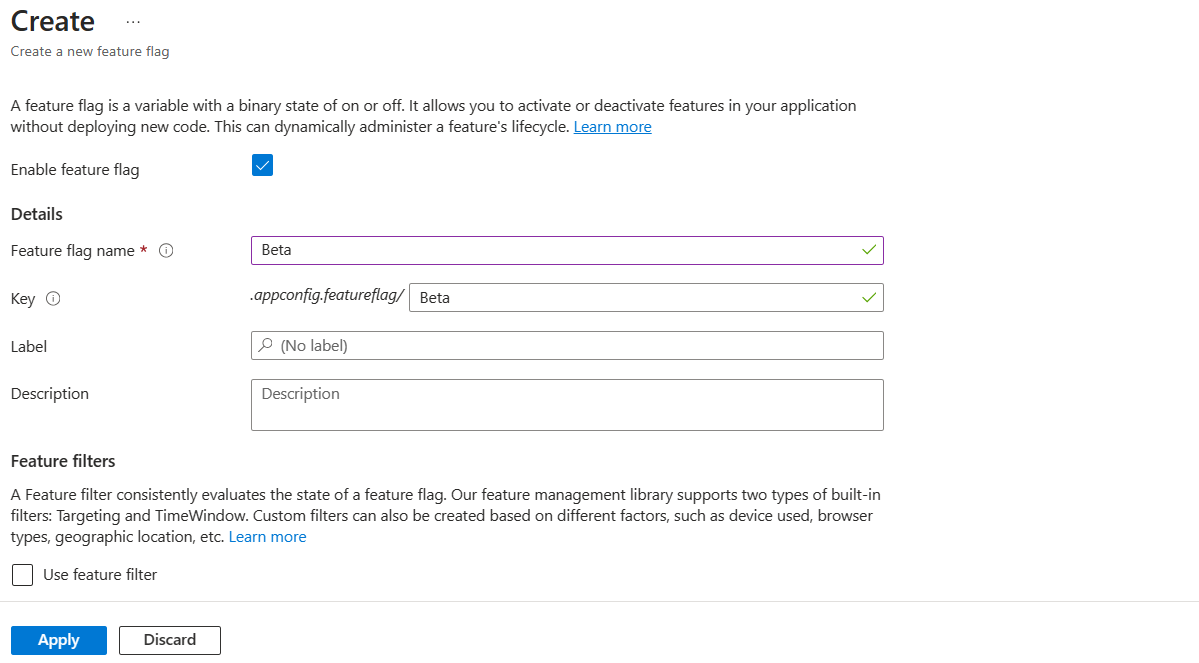
Setting Example value Description Enable feature flag Box is checked This option enables the feature flag upon creation. If you leave this box unchecked, the new feature flag's configuration will be saved but the new feature flag will remain disabled. Feature flag name Beta The feature flag name is what you use to reference the flag in your code. It must be unique within an application. Key Beta You can use the key to filter feature flags that are loaded in your application. The key is generated from the feature flag name by default, but you can also add a prefix or a namespace to group your feature flags, for example, .appconfig.featureflag/myapp/Beta. Label Leave empty You can use labels to create different feature flags for the same key and filter flags loaded in your application based on the label. By default, a feature flag has no label. Description Leave empty Leave empty or enter a description for your feature flag. Use feature filter Box is unchecked Leave the feature filter box unchecked. To learn more about feature filters, visit Use feature filters to enable conditional feature flags and Enable staged rollout of features for targeted audiences. Select Apply to create the feature flag.
Create a variant feature flag
Add a new variant feature flag by opening your Azure App Configuration store in the Azure portal and from the Operations menu, select Feature manager > Create. Then select Variant feature flag.

Configure basics
In the Details tabs, select or enter the following information:
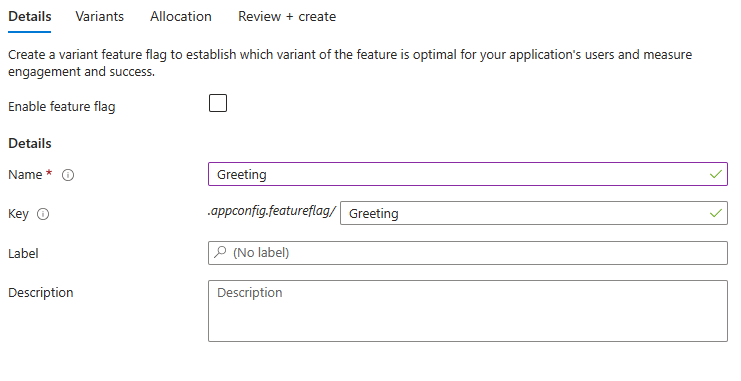
| Setting | Example value | Description |
|---|---|---|
| Enable feature flag | Box is checked | This option enables the feature flag upon creation. If you leave this box unchecked, the new feature flag's configuration will be saved but the new feature flag will remain disabled. |
| Name | Greeting | The feature flag name is what you use to reference the flag in your code. It must be unique within an application. |
| Key | Greeting | You can use the key to filter feature flags that are loaded in your application. The key is generated from the feature flag name by default, but you can also add a prefix or a namespace to group your feature flags, for example, .appconfig.featureflag/myapp/Greeting. |
| Label | Leave empty | You can use labels to create different feature flags for the same key and filter flags loaded in your application based on the label. By default, a feature flag has no label. |
| Description | Leave empty | Leave empty or enter a description for your feature flag. |
Select Next > to add Variants.
Add variants
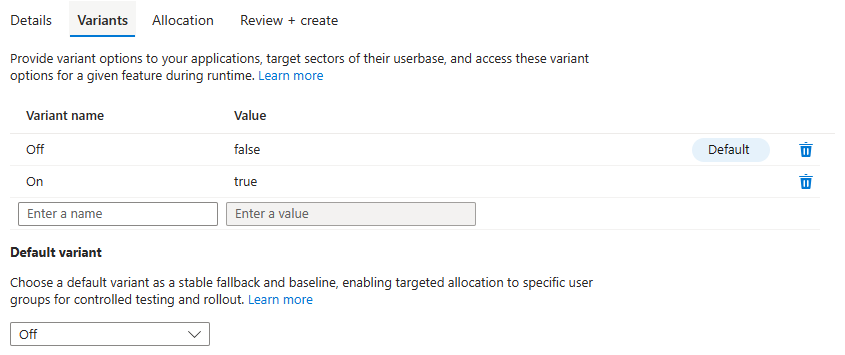
In the Variants tab, select or enter the following information.
| Setting | Example value | Description |
|---|---|---|
| Variant name | Off & On | Two variants are added by default. Update them or enter a name for a new variant. Variant names must be unique within a feature flag. |
| Value | false & true | Provide a value for each variant. The value can be a string, a number, a boolean, or a configuration object. To edit the value in a JSON editor, you can select Edit value in multiline. |
| Default variant | Off | Choose the default variant from the dropdown list. The feature flag returns the default variant when no variant is assigned to an audience or the feature flag is disabled. Next to the designated default variant, the word Default is displayed. |
Select Next > to access Allocation settings.
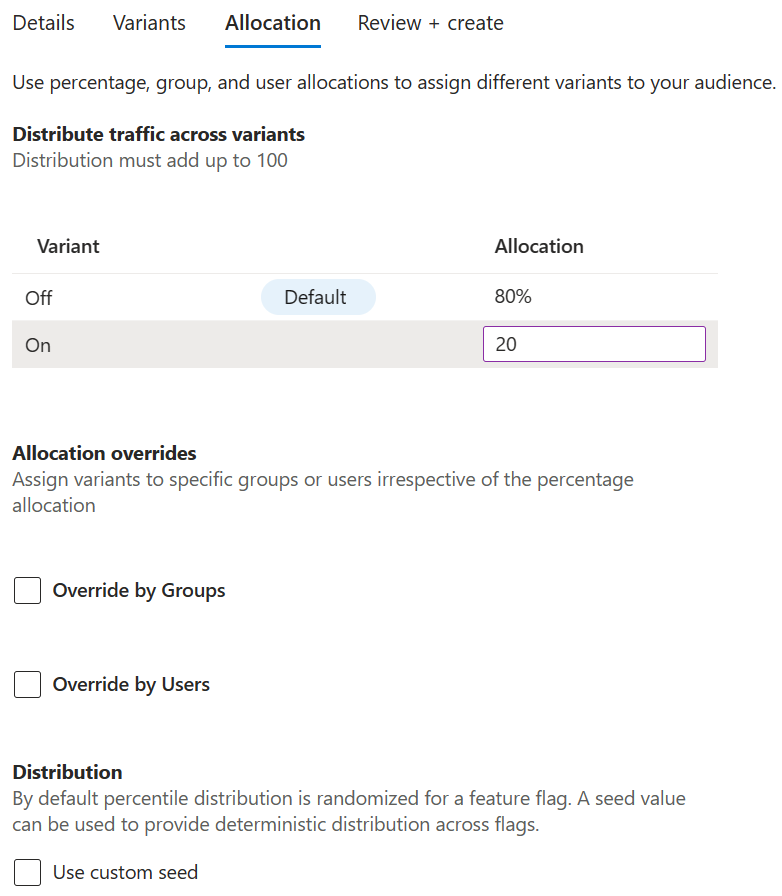
Allocate traffic
In the Allocation tab, select or enter the following information:
Distribute traffic across each variant, adding up to exactly 100%.
Optionally select the options Override by Groups and Override by Users to assign variants for select groups or users. These options are disabled by default.
Under Distribution, Optionally select Use custom seed and provide a nonempty string as a new seed value. Using a common seed across multiple feature flags allows the same user to be allocated to the same percentile. It is useful when you roll out multiple feature flags at the same time and you want to ensure consistent experience for each segment of your audience. If no custom seed is specified, a default seed is used based on the feature name.
Select Review + create to see a summary of your new variant feature flag, and then select Create to finalize your operation. A notification indicates that the new feature flag was created successfully.
Edit feature flags
To update a feature flag or variant feature flag:
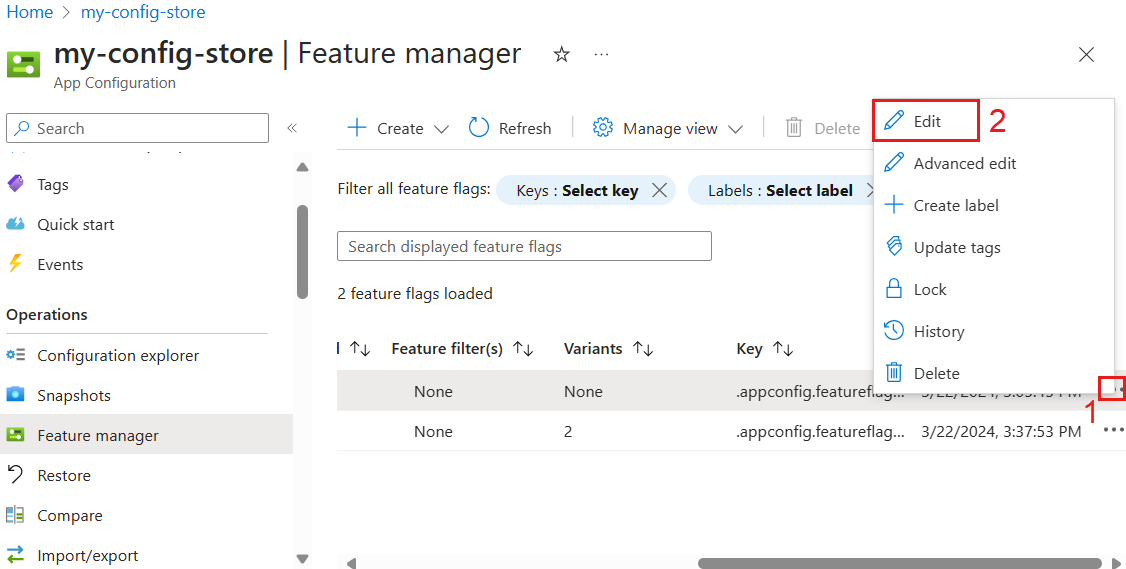
From the Operations menu, select Feature manager.
Move to the right end of the feature flag or variant feature flag you want to modify and select the More actions ellipsis (...). From this menu, you can edit the flag, lock or unlock it, create a label, update tags, review the history, or delete the flag.
Select Edit and update the flag.
Optionally change the state of a feature flag by turning on or turning off the Enabled toggle.
Manage views
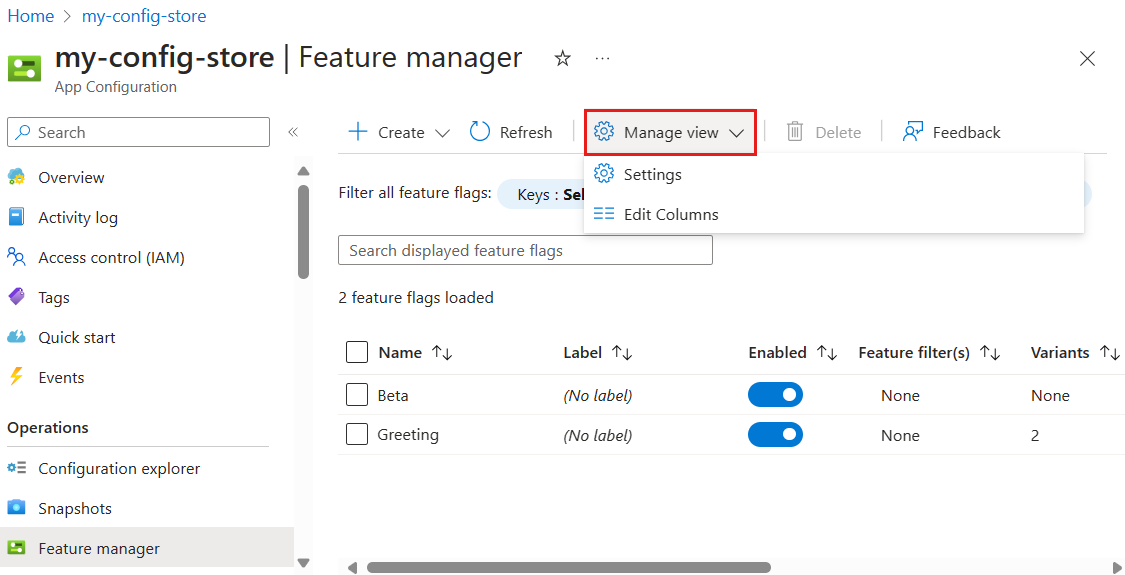
The Feature manager menu displays the feature flags and variant feature flags stored in Azure App Configuration. You can change the Feature manager display in the Azure portal by selecting Manage view.
Settings lets you choose how many feature flags will be loaded per Load more action. Load more will only be visible if there are more than 200 feature flags.
Edit Columns lets you add or remove columns and change the column order.
Feature flags created with the Feature manager are stored as regular key-values. They're kept with the special prefix .appconfig.featureflag/ and content type application/vnd.microsoft.appconfig.ff+json;charset=utf-8. To view the underlying key-values of feature flags in Configuration explorer, follow the steps below.
In the Operations menu, open the Configuration explorer, then select Manage view > Settings.
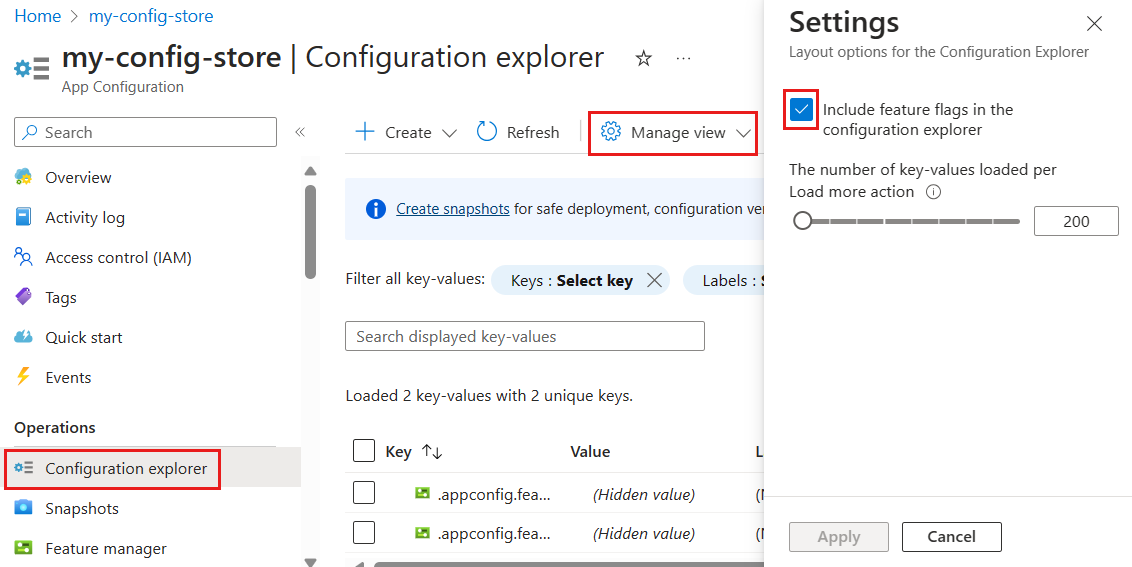
Select Include feature flags in the configuration explorer and Apply.
Next steps
To start using feature flags with Azure App Configuration, continue to the following quickstarts specific to your application’s language or platform.
