Train a custom speech model
In this article, you learn how to train a custom model to improve recognition accuracy from the Microsoft base model. The speech recognition accuracy and quality of a custom speech model remains consistent, even when a new base model is released.
Note
You pay for custom speech model usage and endpoint hosting. You'll also be charged for custom speech model training if the base model was created on October 1, 2023 and later. You are not charged for training if the base model was created prior to October 2023. For more information, see Azure AI Speech pricing and the Charge for adaptation section in the speech to text 3.2 migration guide.
Training a model is typically an iterative process. You first select a base model that is the starting point for a new model. You train a model with datasets that can include text and audio, and then you test. If the recognition quality or accuracy doesn't meet your requirements, you can create a new model with more or modified training data, and then test again.
You can use a custom model for a limited time after it was trained. You must periodically recreate and adapt your custom model from the latest base model to take advantage of the improved accuracy and quality. For more information, see Model and endpoint lifecycle.
Important
If you train a custom model with audio data, select a service resource in a region with dedicated hardware for training audio data. After a model is trained, you can copy it to an AI Services resource for Speech in another region as needed.
In regions with dedicated hardware for custom speech training, the Speech service will use up to 100 hours of your audio training data, and can process about 10 hours of data per day. See footnotes in the regions table for more information.
Create a model
Sign in to the Azure AI Foundry portal.
Select Fine-tuning from the left pane.
Select AI Service fine-tuning.
Select the custom model that you want to manage from the Model name column.
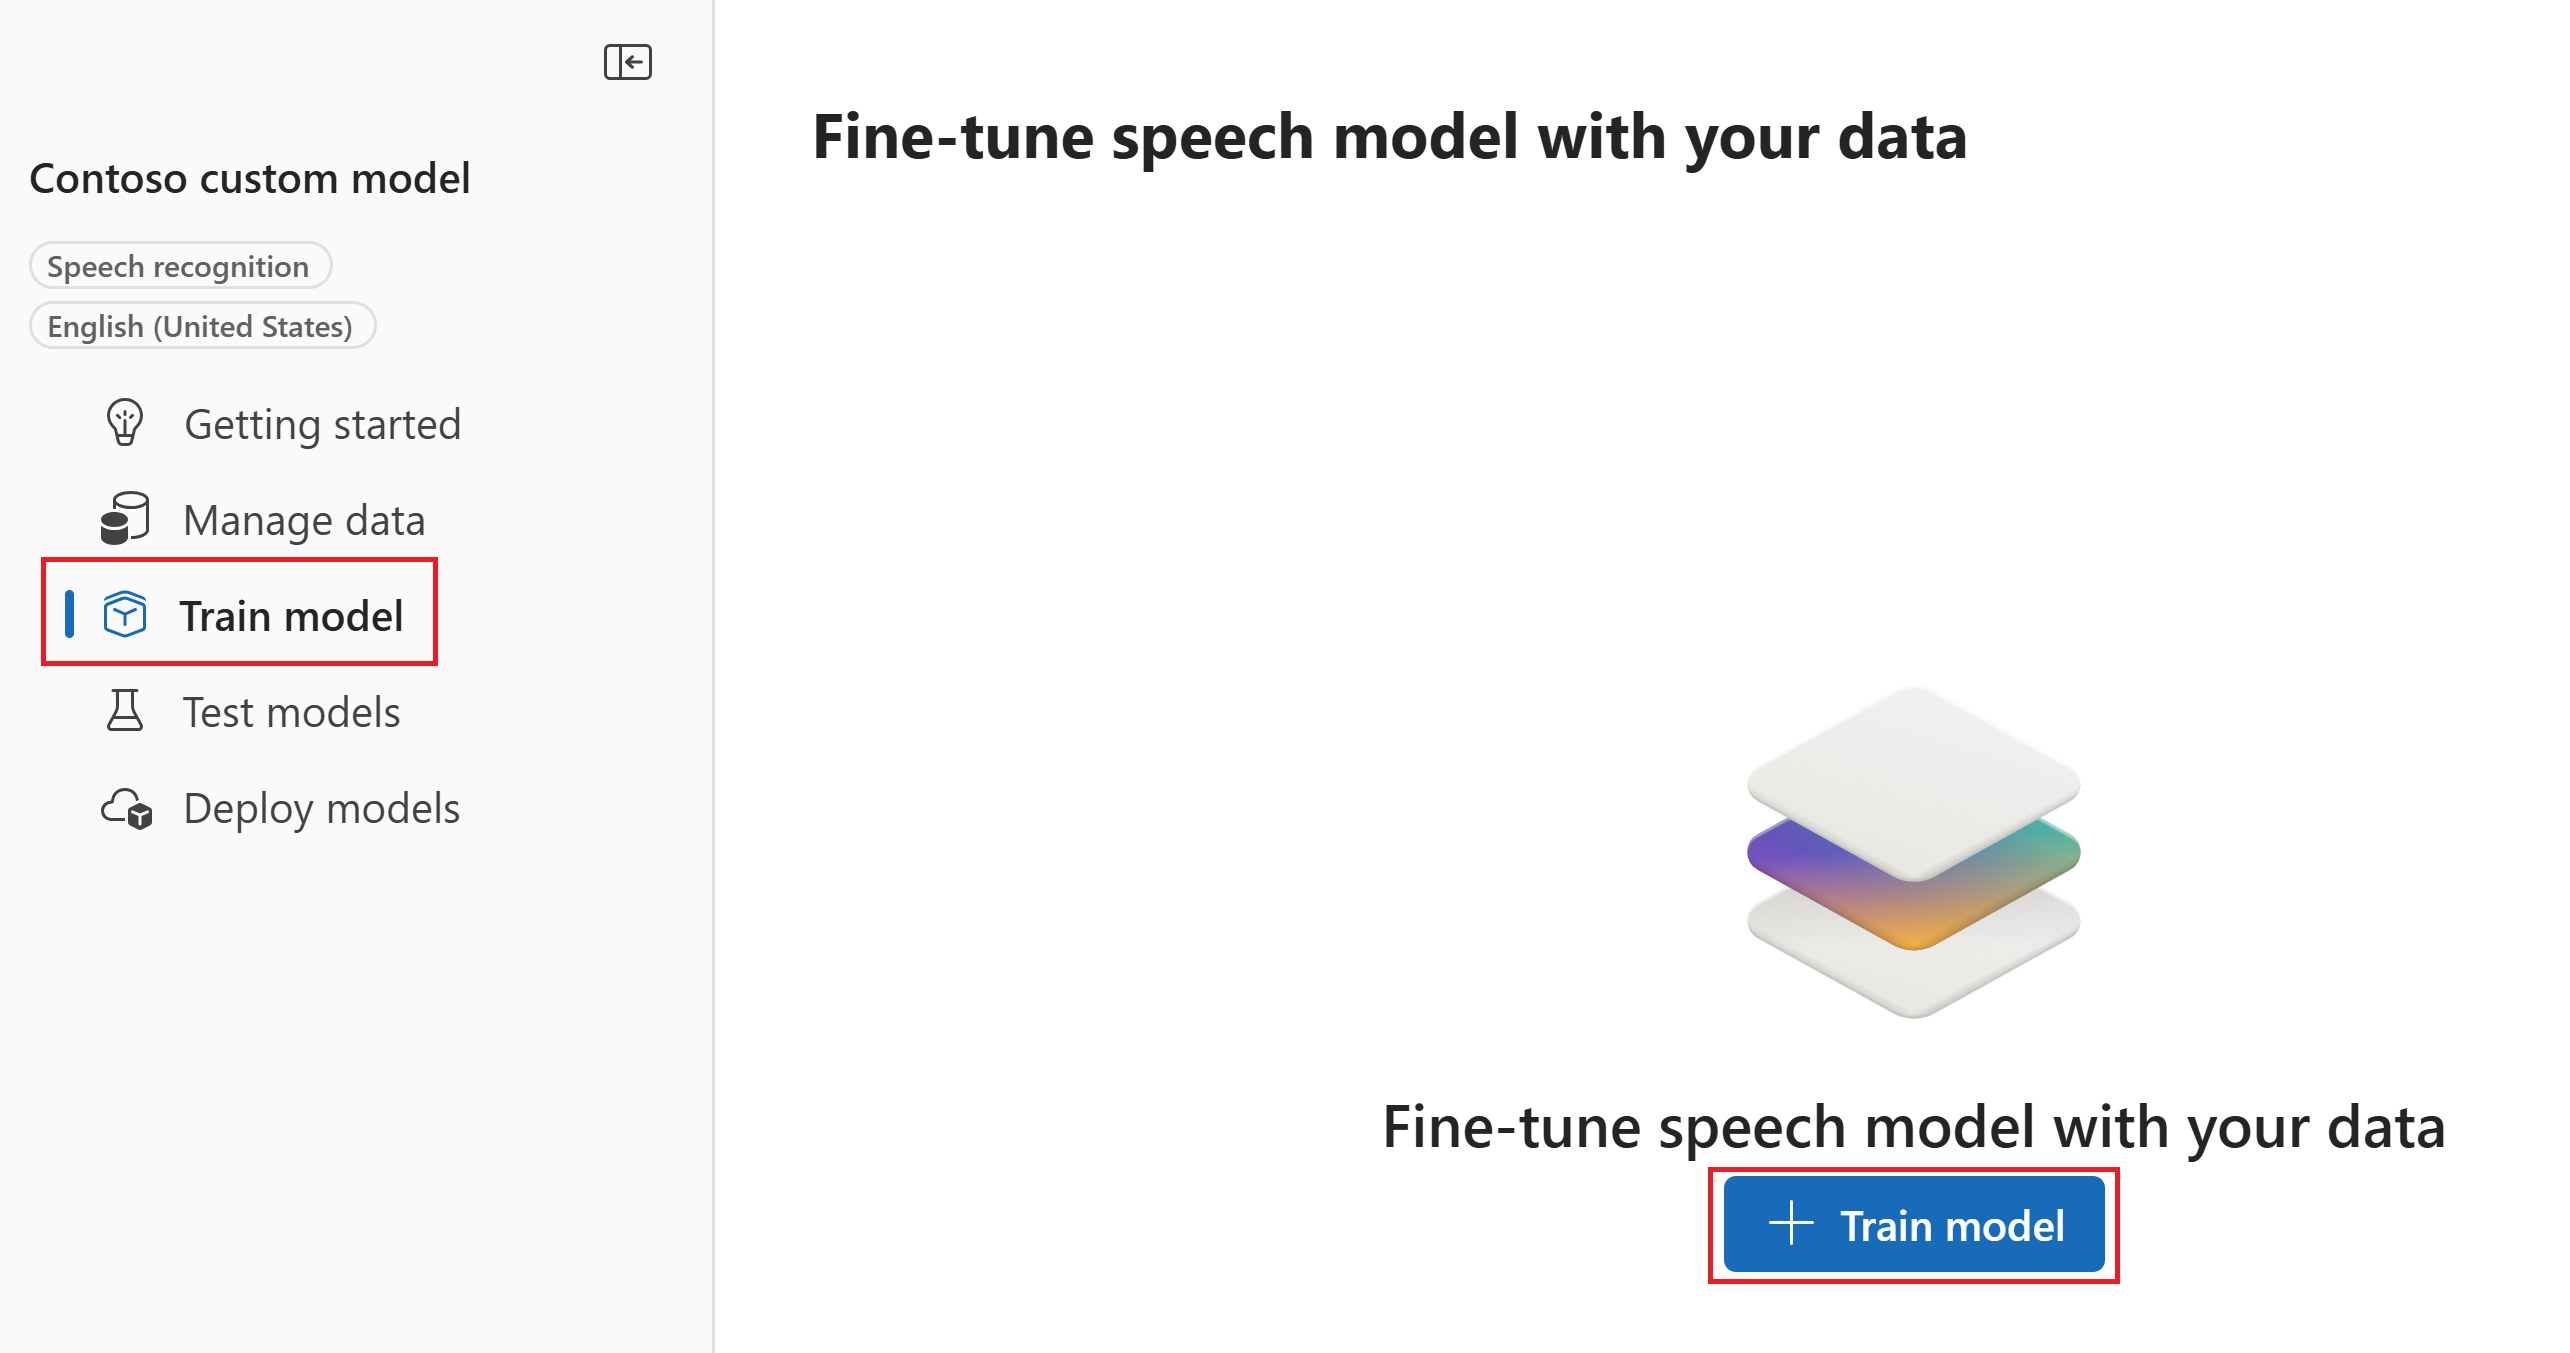
After the data is processed, select Train model from the left menu. Then select + Train model.
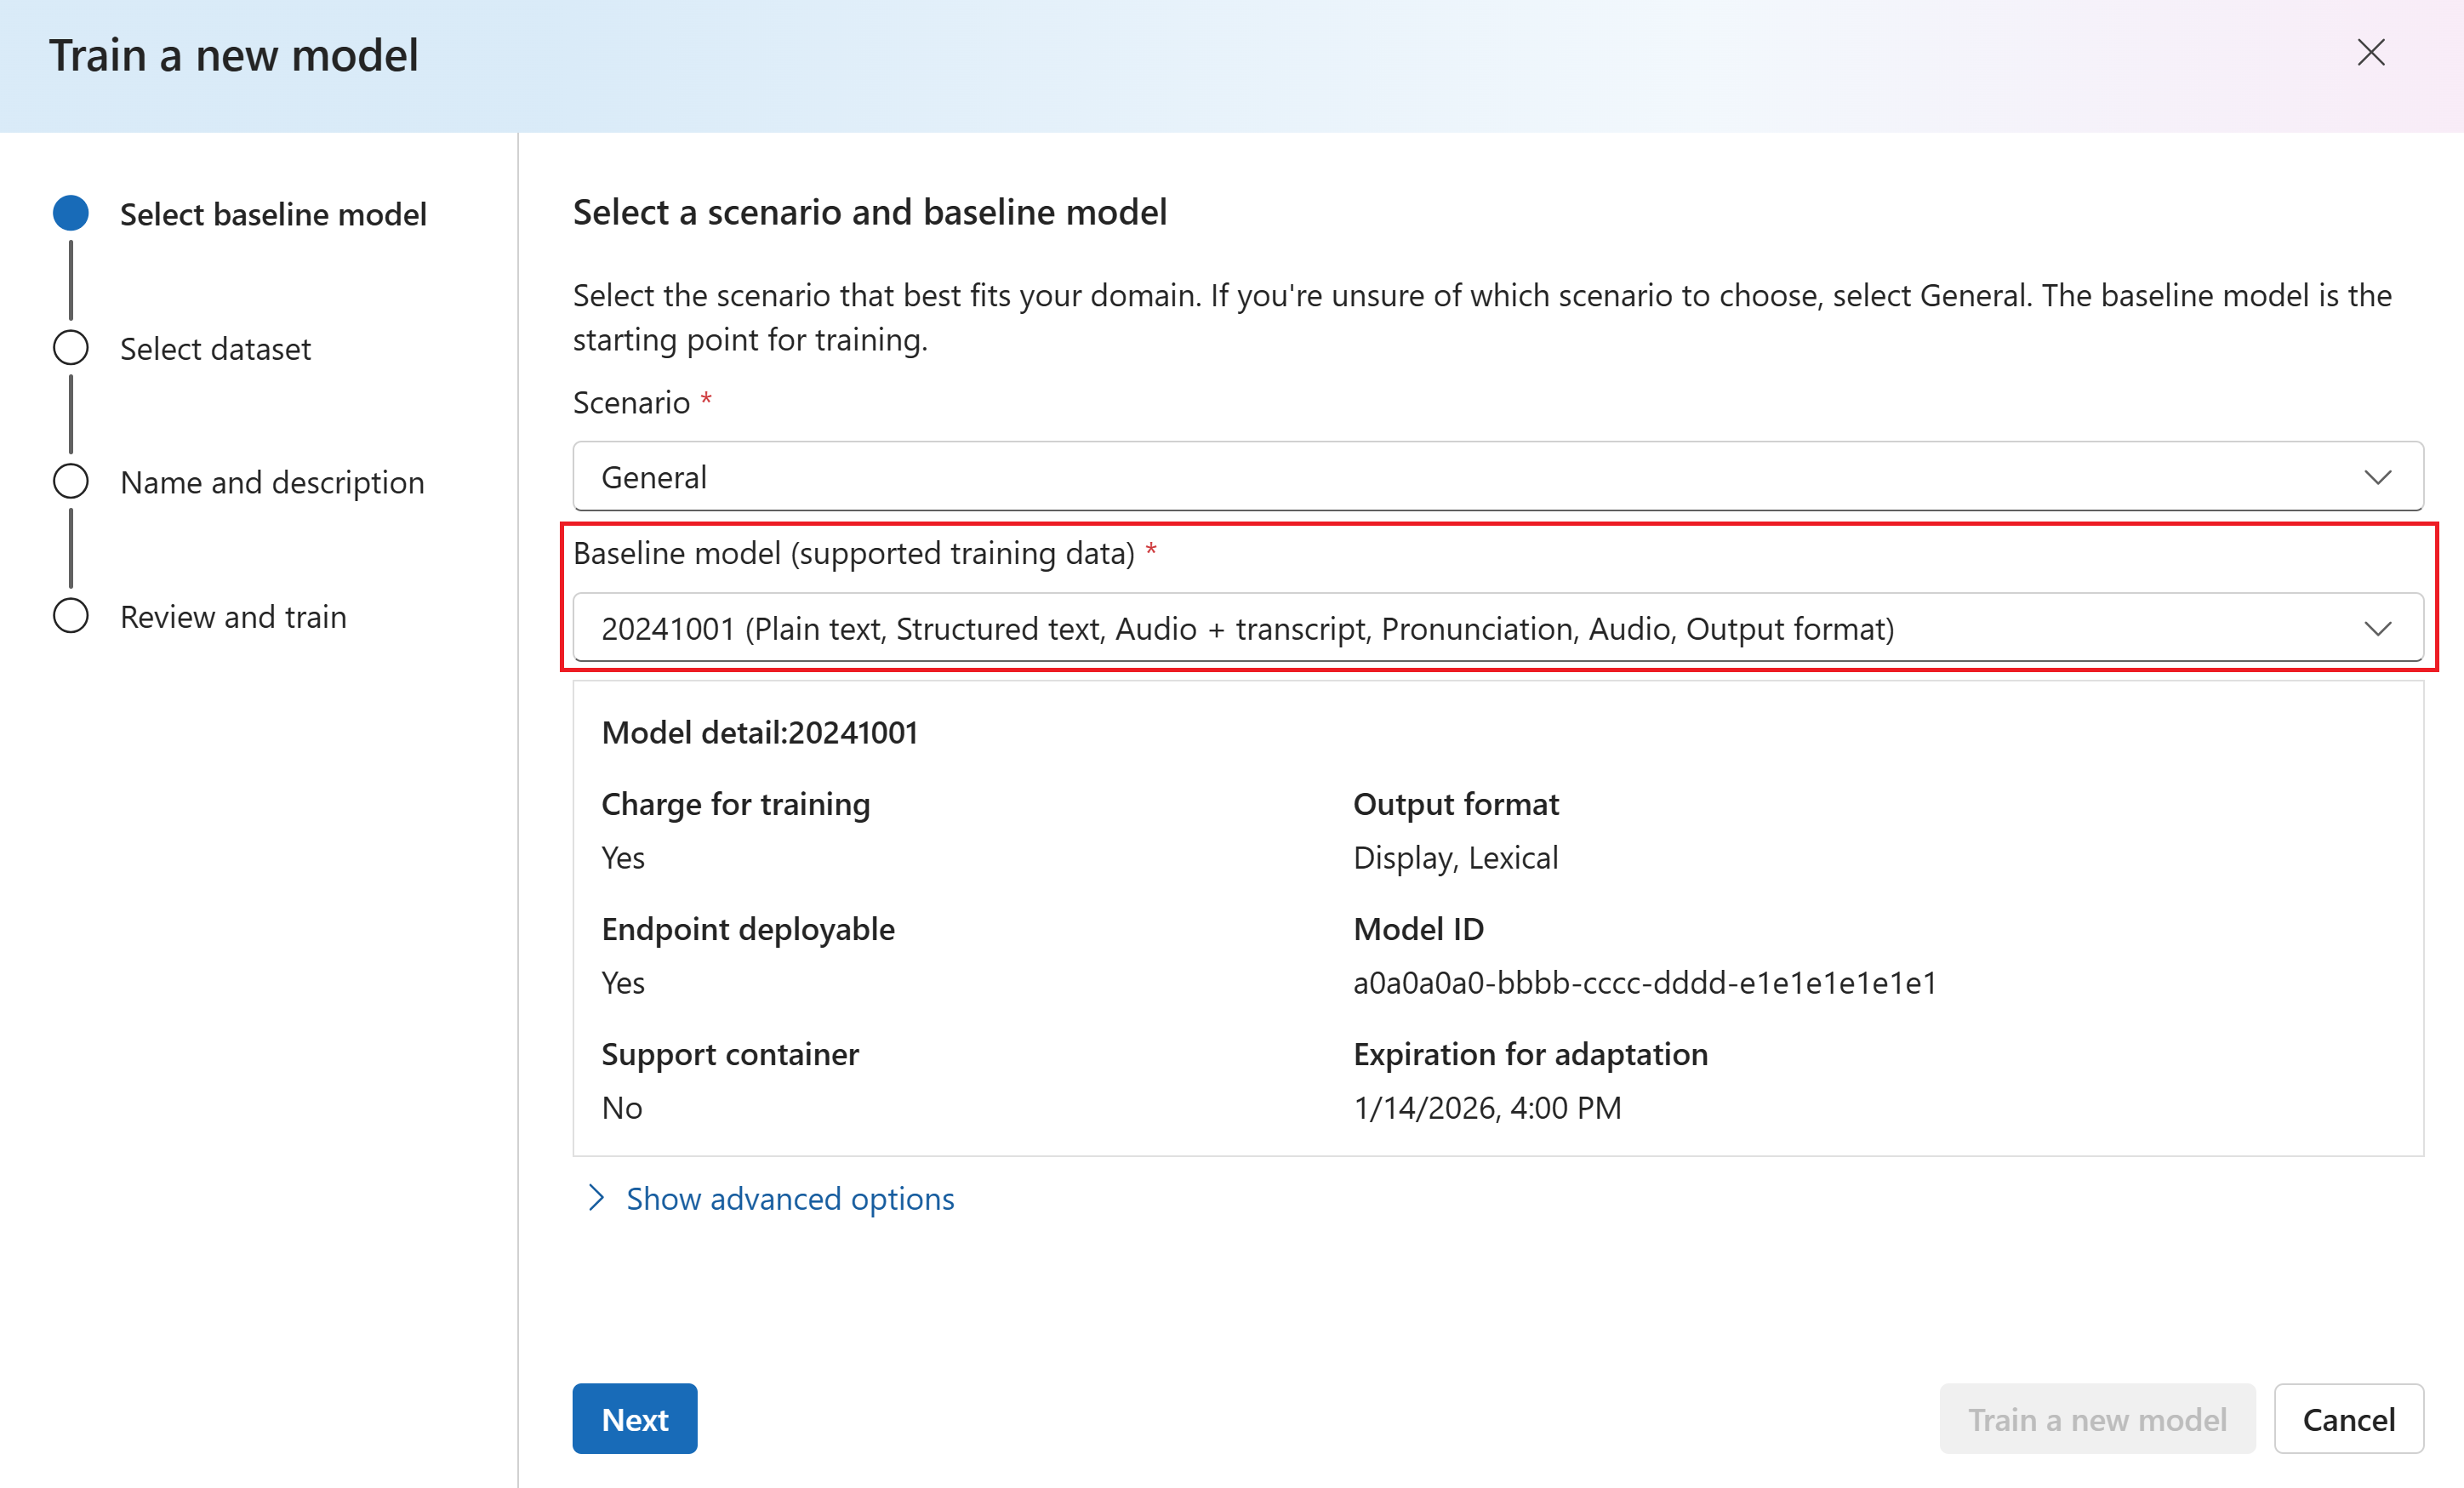
In the Train a new model wizard, select the base model that you want to fine-tune. Then select Next.
Select the data that you want to use for training. Then select Next.
Enter a name and description for the model. Then select Next.
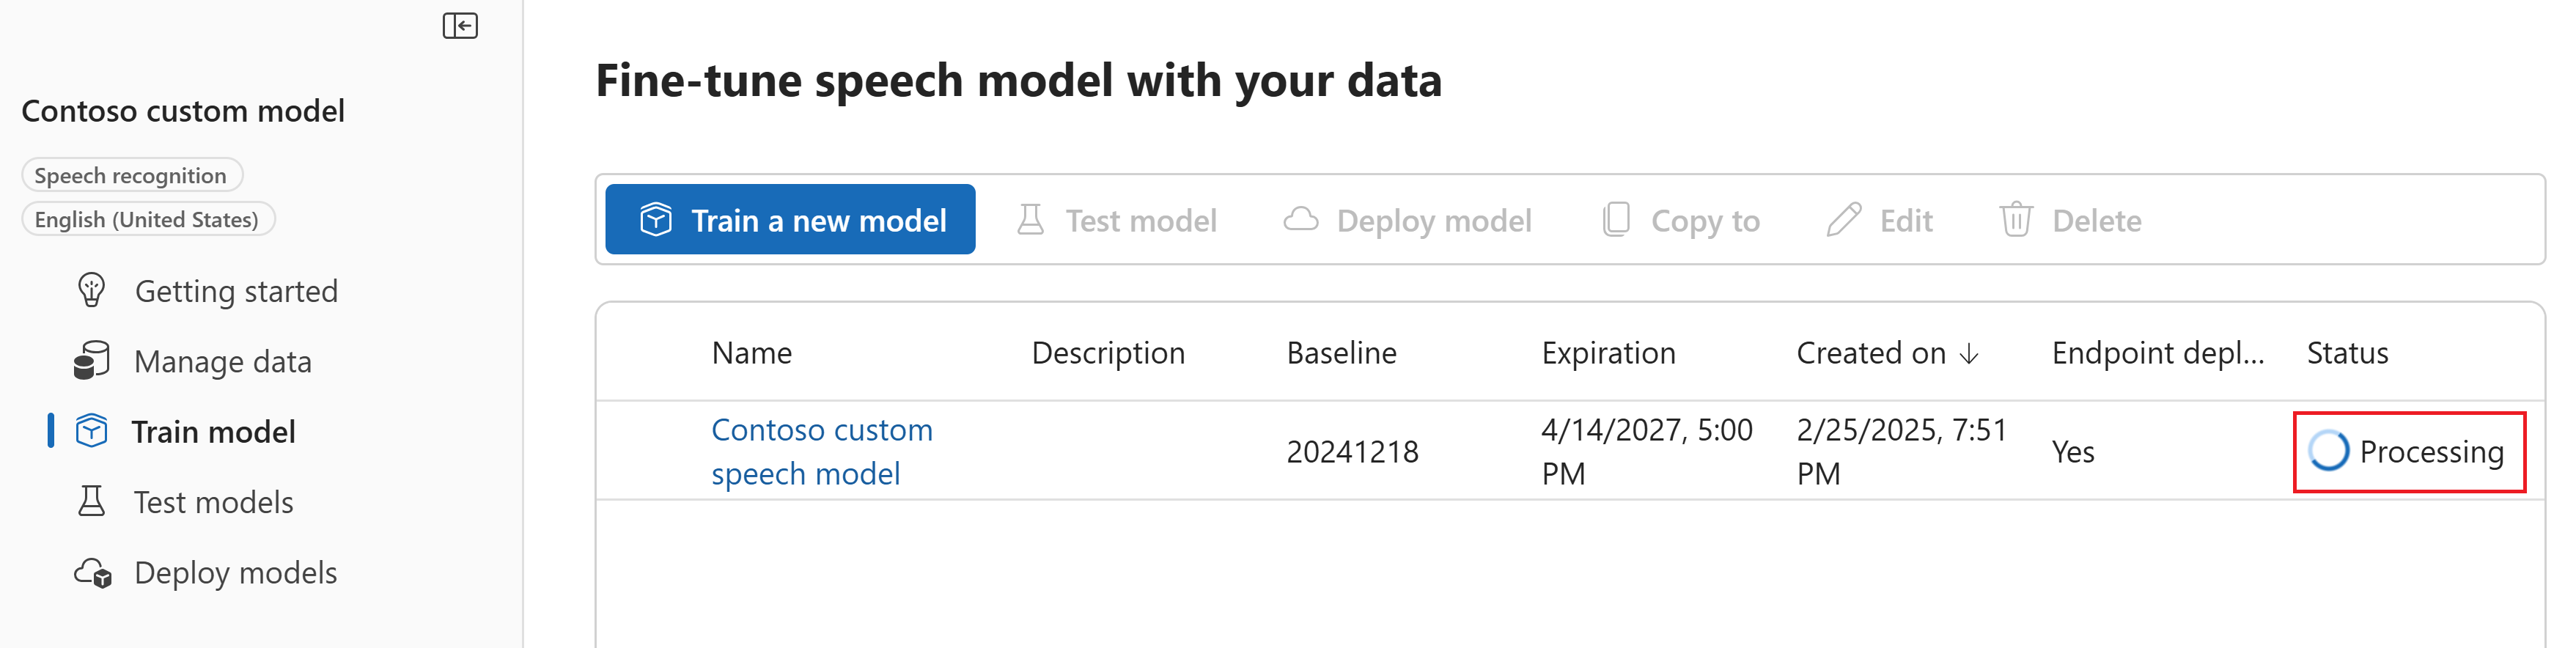
Review the settings and select Train a new model. You're taken back to the Train model page. The status of the data is Processing.


After you upload training datasets, follow these instructions to start training your model:
Sign in to the Speech Studio.
Select Custom speech > Your project name > Train custom models.
Select Train a new model.
On the Select a baseline model page, select a base model, and then select Next. If you aren't sure, select the most recent model from the top of the list. The name of the base model corresponds to the date when it was released in YYYYMMDD format. The customization capabilities of the base model are listed in parenthesis after the model name in Speech Studio.
Important
Take note of the Expiration for adaptation date. This is the last date that you can use the base model for training. For more information, see Model and endpoint lifecycle.
On the Choose data page, select one or more datasets that you want to use for training. If there aren't any datasets available, cancel the setup, and then go to the Speech datasets menu to upload datasets.
Enter a name and description for your custom model, and then select Next.
Optionally, check the Add test in the next step box. If you skip this step, you can run the same tests later. For more information, see Test recognition quality and Test model quantitatively.
Select Save and close to kick off the build for your custom model.
Return to the Train custom models page.
Important
Take note of the Expiration date. This is the last date that you can use your custom model for speech recognition. For more information, see Model and endpoint lifecycle.
To create a model with datasets for training, use the spx csr model create command. Construct the request parameters according to the following instructions:
- Set the
projectproperty to the ID of an existing project. This property is recommended so that you can also view and manage the model in the Azure AI Foundry portal. You can run thespx csr project listcommand to get available projects. - Set the required
datasetproperty to the ID of a dataset that you want used for training. To specify multiple datasets, set thedatasets(plural) parameter and separate the IDs with a semicolon. - Set the required
languageproperty. The dataset locale must match the locale of the project. The locale can't be changed later. The Speech CLIlanguageproperty corresponds to thelocaleproperty in the JSON request and response. - Set the required
nameproperty. This parameter is the name that is displayed in the Azure AI Foundry portal. The Speech CLInameproperty corresponds to thedisplayNameproperty in the JSON request and response. - Optionally, you can set the
baseproperty. For example:--base 5988d691-0893-472c-851e-8e36a0fe7aaf. If you don't specify thebase, the default base model for the locale is used. The Speech CLIbaseproperty corresponds to thebaseModelproperty in the JSON request and response.
Here's an example Speech CLI command that creates a model with datasets for training:
spx csr model create --api-version v3.2 --project YourProjectId --name "My Model" --description "My Model Description" --dataset YourDatasetId --language "en-US"
Note
In this example, the base isn't set, so the default base model for the locale is used. The base model URI is returned in the response.
You should receive a response body in the following format:
{
  "self": "https://eastus.api.cognitive.microsoft.com/speechtotext/v3.2/models/9e240dc1-3d2d-4ac9-98ec-1be05ba0e9dd",
  "baseModel": {
    "self": "https://eastus.api.cognitive.microsoft.com/speechtotext/v3.2/models/base/5988d691-0893-472c-851e-8e36a0fe7aaf"
  },
  "datasets": [
    {
      "self": "https://eastus.api.cognitive.microsoft.com/speechtotext/v3.2/datasets/23b6554d-21f9-4df1-89cb-f84510ac8d23"
    }
  ],
  "links": {
    "manifest": "https://eastus.api.cognitive.microsoft.com/speechtotext/v3.2/models/9e240dc1-3d2d-4ac9-98ec-1be05ba0e9dd/manifest",
    "copy": "https://eastus.api.cognitive.microsoft.com/speechtotext/v3.2/models/9e240dc1-3d2d-4ac9-98ec-1be05ba0e9dd:copy",
    "files": "https://eastus.api.cognitive.microsoft.com/speechtotext/v3.2/models/9e240dc1-3d2d-4ac9-98ec-1be05ba0e9dd/files"
  },
  "project": {
    "self": "https://eastus.api.cognitive.microsoft.com/speechtotext/v3.2/projects/0198f569-cc11-4099-a0e8-9d55bc3d0c52"
  },
  "properties": {
    "deprecationDates": {
      "transcriptionDateTime": "2026-07-15T00:00:00Z"
    },
    "customModelWeightPercent": 30,
    "features": {
      "supportsTranscriptions": true,
      "supportsEndpoints": true,
      "supportsTranscriptionsOnSpeechContainers": false,
      "supportedOutputFormats": [
        "Display",
        "Lexical"
      ]
    }
  },
  "lastActionDateTime": "2024-07-14T21:38:40Z",
  "status": "Running",
  "createdDateTime": "2024-07-14T21:38:40Z",
  "locale": "en-US",
  "displayName": "My Model",
  "description": "My Model Description"
}
Important
Take note of the date in the adaptationDateTime property. This is the last date that you can use the base model for training. For more information, see Model and endpoint lifecycle.
Take note of the date in the transcriptionDateTime property. This is the last date that you can use your custom model for speech recognition. For more information, see Model and endpoint lifecycle.
The top-level self property in the response body is the model's URI. Use this URI to get details about the model's project, manifest, and deprecation dates. You also use this URI to update or delete a model.
For Speech CLI help with models, run the following command:
spx help csr model
To create a model with datasets for training, use the Models_Create operation of the Speech to text REST API. Construct the request body according to the following instructions:
- Set the
projectproperty to the URI of an existing project. This property is recommended so that you can also view and manage the model in the Azure AI Foundry portal. You can make a Projects_List request to get available projects. - Set the required
datasetsproperty to the URI of the datasets that you want used for training. - Set the required
localeproperty. The model locale must match the locale of the project and base model. The locale can't be changed later. - Set the required
displayNameproperty. This property is the name that is displayed in the Azure AI Foundry portal. - Optionally, you can set the
baseModelproperty. For example:"baseModel": {"self": "https://eastus.api.cognitive.microsoft.com/speechtotext/v3.2/models/base/5988d691-0893-472c-851e-8e36a0fe7aaf"}. If you don't specify thebaseModel, the default base model for the locale is used.
Make an HTTP POST request using the URI as shown in the following example. Replace YourSubscriptionKey with your Speech resource key, replace YourServiceRegion with your Speech resource region, and set the request body properties as previously described.
curl -v -X POST -H "Ocp-Apim-Subscription-Key: YourSubscriptionKey" -H "Content-Type: application/json" -d '{
  "project": {
    "self": "https://eastus.api.cognitive.microsoft.com/speechtotext/v3.2/projects/0198f569-cc11-4099-a0e8-9d55bc3d0c52"
  },
  "displayName": "My Model",
  "description": "My Model Description",
  "baseModel": null,
  "datasets": [
    {
      "self": "https://eastus.api.cognitive.microsoft.com/speechtotext/v3.2/datasets/23b6554d-21f9-4df1-89cb-f84510ac8d23"
    }
  ],
  "locale": "en-US"
}'  "https://YourServiceRegion.api.cognitive.microsoft.com/speechtotext/v3.2/models"
Note
In this example, the baseModel isn't set, so the default base model for the locale is used. The base model URI is returned in the response.
You should receive a response body in the following format:
{
  "self": "https://eastus.api.cognitive.microsoft.com/speechtotext/v3.2/models/9e240dc1-3d2d-4ac9-98ec-1be05ba0e9dd",
  "baseModel": {
    "self": "https://eastus.api.cognitive.microsoft.com/speechtotext/v3.2/models/base/5988d691-0893-472c-851e-8e36a0fe7aaf"
  },
  "datasets": [
    {
      "self": "https://eastus.api.cognitive.microsoft.com/speechtotext/v3.2/datasets/23b6554d-21f9-4df1-89cb-f84510ac8d23"
    }
  ],
  "links": {
    "manifest": "https://eastus.api.cognitive.microsoft.com/speechtotext/v3.2/models/9e240dc1-3d2d-4ac9-98ec-1be05ba0e9dd/manifest",
    "copy": "https://eastus.api.cognitive.microsoft.com/speechtotext/v3.2/models/9e240dc1-3d2d-4ac9-98ec-1be05ba0e9dd:copy",
    "files": "https://eastus.api.cognitive.microsoft.com/speechtotext/v3.2/models/9e240dc1-3d2d-4ac9-98ec-1be05ba0e9dd/files"
  },
  "project": {
    "self": "https://eastus.api.cognitive.microsoft.com/speechtotext/v3.2/projects/0198f569-cc11-4099-a0e8-9d55bc3d0c52"
  },
  "properties": {
    "deprecationDates": {
      "transcriptionDateTime": "2026-07-15T00:00:00Z"
    },
    "customModelWeightPercent": 30,
    "features": {
      "supportsTranscriptions": true,
      "supportsEndpoints": true,
      "supportsTranscriptionsOnSpeechContainers": false,
      "supportedOutputFormats": [
        "Display",
        "Lexical"
      ]
    }
  },
  "lastActionDateTime": "2024-07-14T21:38:40Z",
  "status": "Running",
  "createdDateTime": "2024-07-14T21:38:40Z",
  "locale": "en-US",
  "displayName": "My Model",
  "description": "My Model Description"
}
Important
Take note of the date in the adaptationDateTime property. This is the last date that you can use the base model for training. For more information, see Model and endpoint lifecycle.
Take note of the date in the transcriptionDateTime property. This is the last date that you can use your custom model for speech recognition. For more information, see Model and endpoint lifecycle.
The top-level self property in the response body is the model's URI. Use this URI to get details about the model's project, manifest, and deprecation dates. You also use this URI to update or delete the model.
Copy a model
You can copy a model to another project that uses the same locale. For example, after a model is trained with audio data in a region with dedicated hardware for training, you can copy it to an AI Services resource for Speech in another region as needed.
Follow these instructions to copy a model to a project in another region:
- Sign in to the Speech Studio.
- Select Custom speech > Your project name > Train custom models.
- Select Copy to.
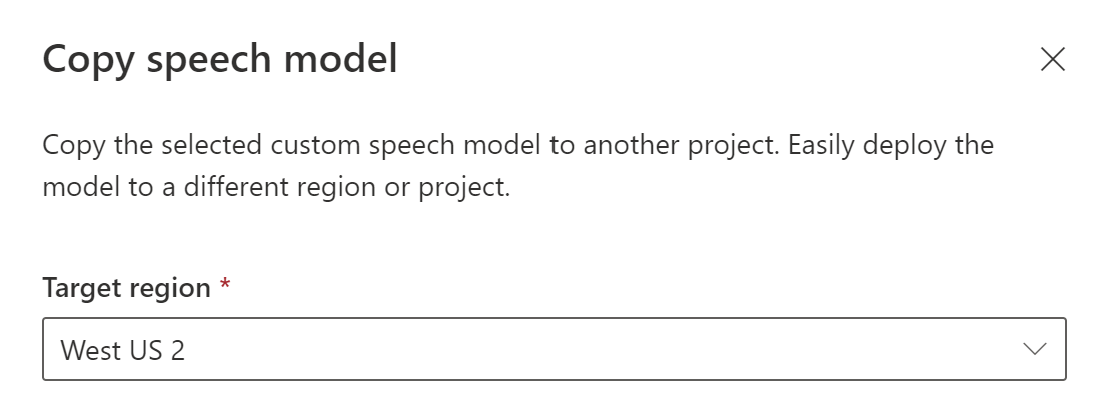
- On the Copy speech model page, select a target region where you want to copy the model.
- Select an AI Services resource for Speech in the target region, or create a new Speech resource.
- Select a project where you want to copy the model, or create a new project.
- Select Copy.

After the model is successfully copied, you'll be notified and can view it in the target project.
Copying a model directly to a project in another region isn't supported with the Speech CLI. You can copy a model to a project in another region using the Azure AI Foundry portal, Speech Studio, or Speech to text REST API.
To copy a model to another Speech resource, use the Models_Copy operation of the Speech to text REST API. Construct the request body according to the following instructions:
- Set the required
targetSubscriptionKeyproperty to the key of the destination Speech resource.
Make an HTTP POST request using the URI as shown in the following example. Use the region and URI of the model you want to copy from. Replace YourModelId with the model ID, replace YourSubscriptionKey with your Speech resource key, replace YourServiceRegion with your Speech resource region, and set the request body properties as previously described.
curl -v -X POST -H "Ocp-Apim-Subscription-Key: YourSubscriptionKey" -H "Content-Type: application/json" -d '{
  "targetSubscriptionKey": "ModelDestinationSpeechResourceKey"
} '  "https://YourServiceRegion.api.cognitive.microsoft.com/speechtotext/v3.2/models/YourModelId:copy"
Note
Only the targetSubscriptionKey property in the request body has information about the destination Speech resource.
You should receive a response body in the following format:
{
  "self": "https://eastus.api.cognitive.microsoft.com/speechtotext/v3.2/models/9df35ddb-edf9-4e91-8d1a-576d09aabdae",
  "baseModel": {
    "self": "https://eastus.api.cognitive.microsoft.com/speechtotext/v3.2/models/base/eb5450a7-3ca2-461a-b2d7-ddbb3ad96540"
  },
  "links": {
    "manifest": "https://eastus.api.cognitive.microsoft.com/speechtotext/v3.2/models/9df35ddb-edf9-4e91-8d1a-576d09aabdae/manifest",
    "copy": "https://eastus.api.cognitive.microsoft.com/speechtotext/v3.2/models/9df35ddb-edf9-4e91-8d1a-576d09aabdae:copy"
  },
  "properties": {
    "deprecationDates": {
      "adaptationDateTime": "2023-01-15T00:00:00Z",
      "transcriptionDateTime": "2024-07-15T00:00:00Z"
    }
  },
  "lastActionDateTime": "2022-05-22T23:15:27Z",
  "status": "NotStarted",
  "createdDateTime": "2022-05-22T23:15:27Z",
  "locale": "en-US",
  "displayName": "My Model",
  "description": "My Model Description",
  "customProperties": {
    "PortalAPIVersion": "3",
    "Purpose": "",
    "VadKind": "None",
    "ModelClass": "None",
    "UsesHalide": "False",
    "IsDynamicGrammarSupported": "False"
  }
}
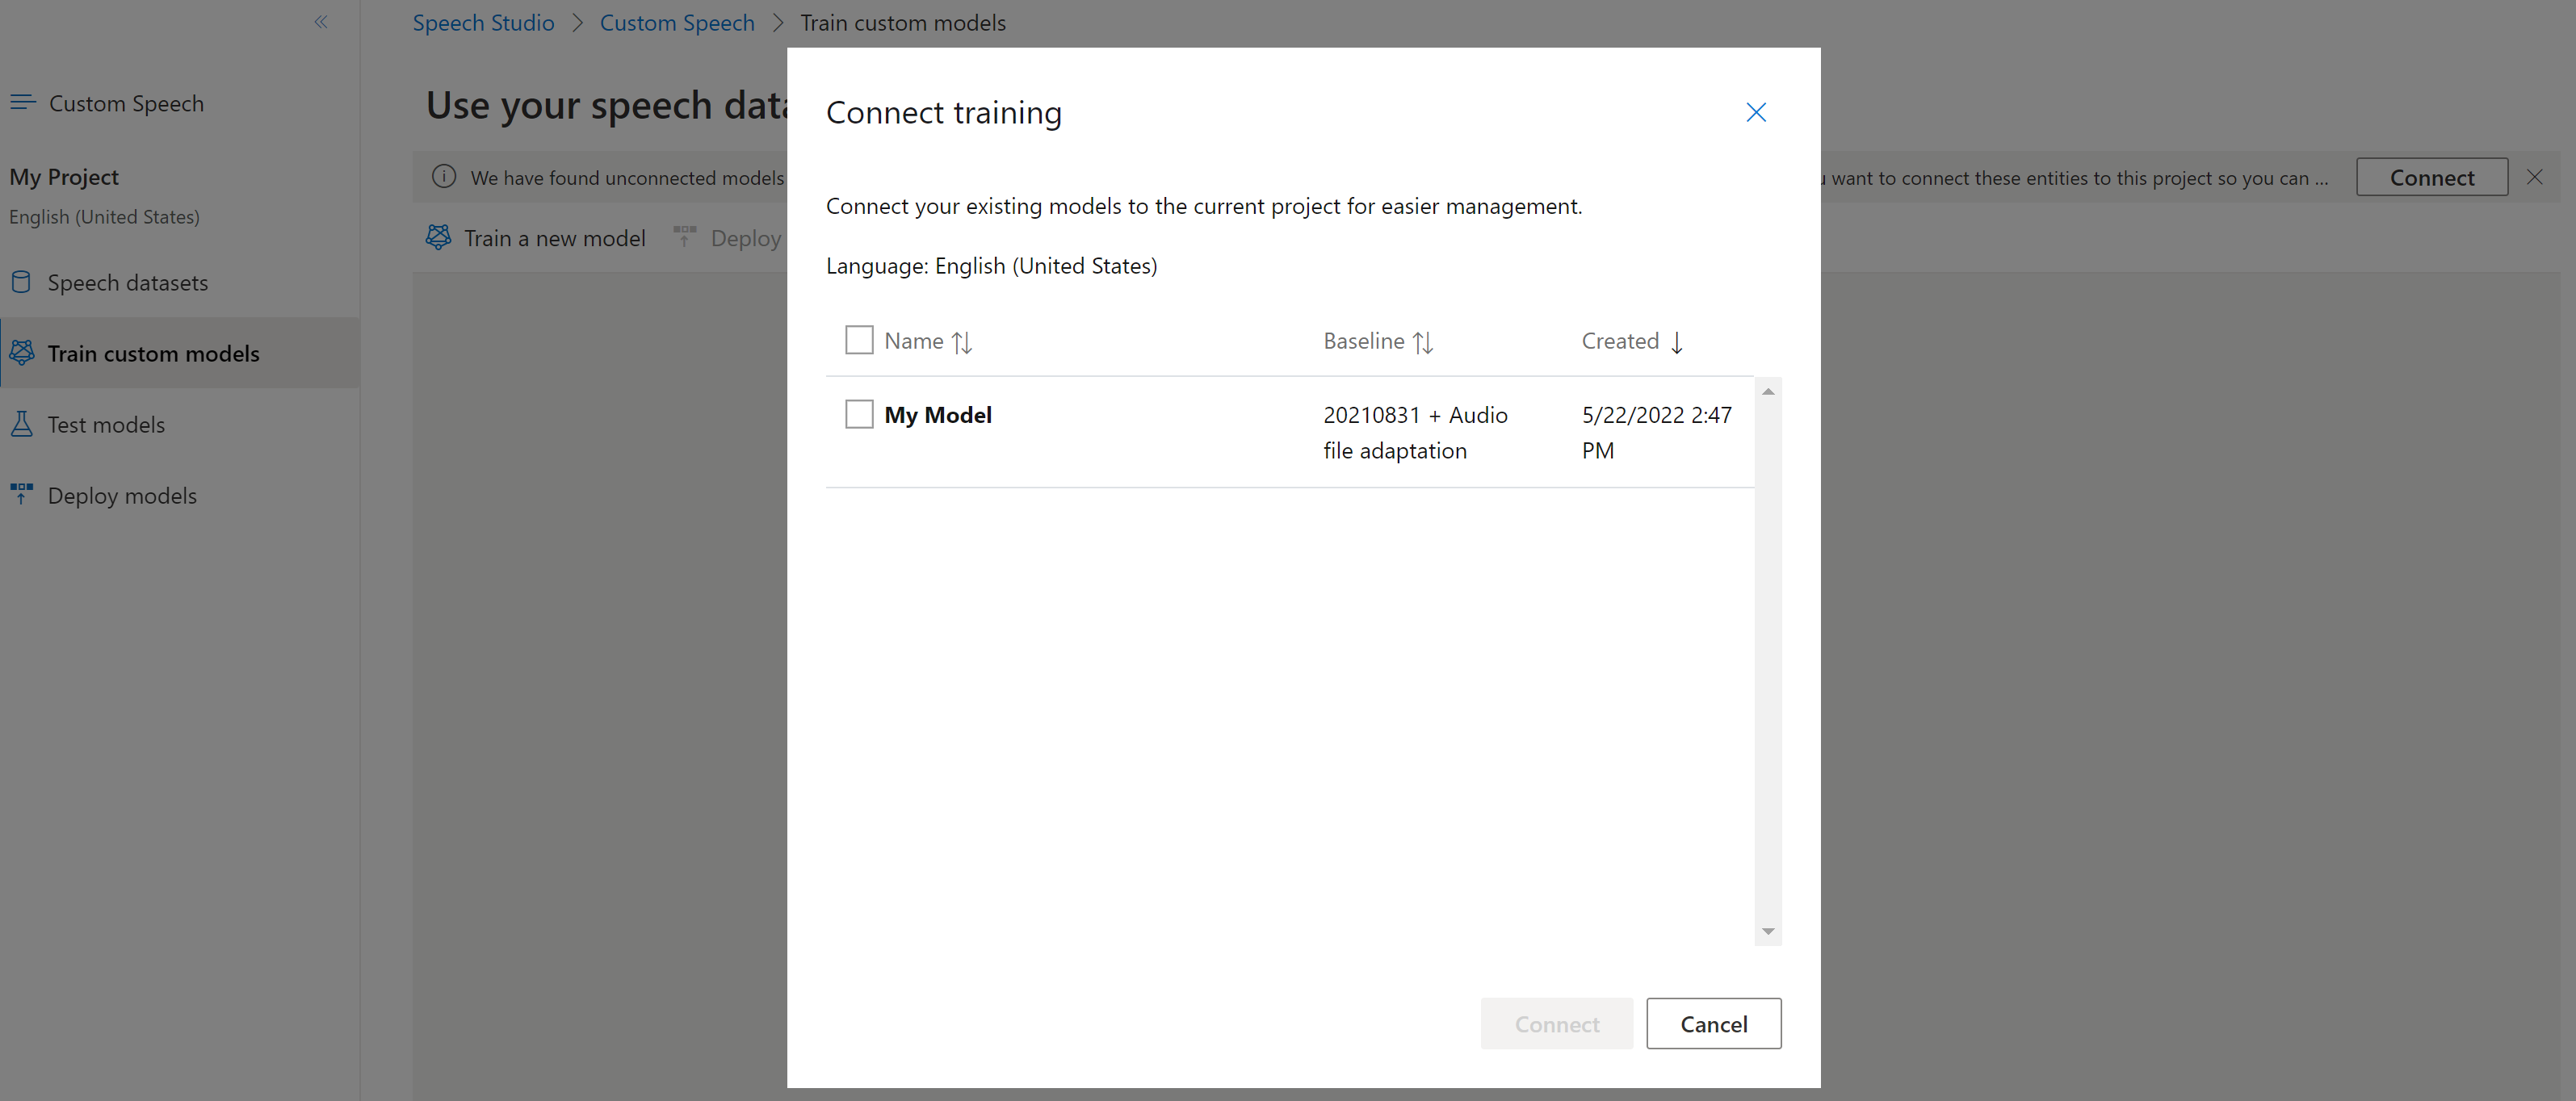
Connect a model
Models might have been copied from one project using the Speech CLI or REST API, without being connected to another project. Connecting a model is a matter of updating the model with a reference to the project.
If you're prompted in Speech Studio, you can connect them by selecting the Connect button.
To connect a model to a project, use the spx csr model update command. Construct the request parameters according to the following instructions:
- Set the
projectproperty to the URI of an existing project. This property is recommended so that you can also view and manage the model in the Azure AI Foundry portal. You can run thespx csr project listcommand to get available projects. - Set the required
modelIdproperty to the ID of the model that you want to connect to the project.
Here's an example Speech CLI command that connects a model to a project:
spx csr model update --api-version v3.2 --model YourModelId --project YourProjectId
You should receive a response body in the following format:
{
  "project": {
    "self": "https://eastus.api.cognitive.microsoft.com/speechtotext/v3.2/projects/0198f569-cc11-4099-a0e8-9d55bc3d0c52"
  },
}
For Speech CLI help with models, run the following command:
spx help csr model
To connect a new model to a project of the Speech resource where the model was copied, use the Models_Update operation of the Speech to text REST API. Construct the request body according to the following instructions:
- Set the required
projectproperty to the URI of an existing project. This property is recommended so that you can also view and manage the model in the Azure AI Foundry portal. You can make a Projects_List request to get available projects.
Make an HTTP PATCH request using the URI as shown in the following example. Use the URI of the new model. You can get the new model ID from the self property of the Models_Copy response body. Replace YourSubscriptionKey with your Speech resource key, replace YourServiceRegion with your Speech resource region, and set the request body properties as previously described.
curl -v -X PATCH -H "Ocp-Apim-Subscription-Key: YourSubscriptionKey" -H "Content-Type: application/json" -d '{
  "project": {
    "self": "https://eastus.api.cognitive.microsoft.com/speechtotext/v3.2/projects/0198f569-cc11-4099-a0e8-9d55bc3d0c52"
  },
}'  "https://YourServiceRegion.api.cognitive.microsoft.com/speechtotext/v3.2/models"
You should receive a response body in the following format:
{
  "project": {
    "self": "https://eastus.api.cognitive.microsoft.com/speechtotext/v3.2/projects/0198f569-cc11-4099-a0e8-9d55bc3d0c52"
  },
}