Debug your Teams app
Microsoft Teams Toolkit helps you to debug and preview your Microsoft Teams app. Debug is the process of checking, detecting, and correcting issues or bugs to ensure the program runs successfully in Teams.
Debug your Teams app for Visual Studio Code
Teams Toolkit in Microsoft Visual Studio Code automates the debug process. You can detect errors and fix them as well as preview the teams app. You can also customize debug settings to create your tab or bot.
During the debug process:
- Teams Toolkit automatically starts app services, launches debuggers, and uploads the Teams app.
- Teams Toolkit checks the prerequisites during the debug background process.
- Your Teams app is available for preview in Teams web client locally after debugging.
- You can also customize debug settings to use your bot endpoints, development certificate, or debug partial component to load your configured app.
- Visual Studio Code allows you to debug tab, bot, message extension, and Azure Functions.
Key debug features of Teams Toolkit
Teams Toolkit supports the following debug features:
- Start debugging
- Multi-target debugging
- Toggle breakpoints
- Hot reload
- Stop debugging
- Teams App Test Tool
- Debug apps in Teams desktop client
Teams Toolkit performs background functions during debug process, which include verifying the prerequisites required for debug. You can see the progress of the verification process in the output channel of Teams Toolkit. In the setup process you can register and configure your Teams app.
Start debugging
You can press F5 as a single operation to start debugging. Teams Toolkit starts to check prerequisites, registers Microsoft Entra app, Teams app, and registers bot, starts services, and launches browser.
Multi-target debugging
Teams Toolkit utilizes multi-target debugging feature to debug tab, bot, message extension, and Azure Functions at the same time.
Toggle breakpoints
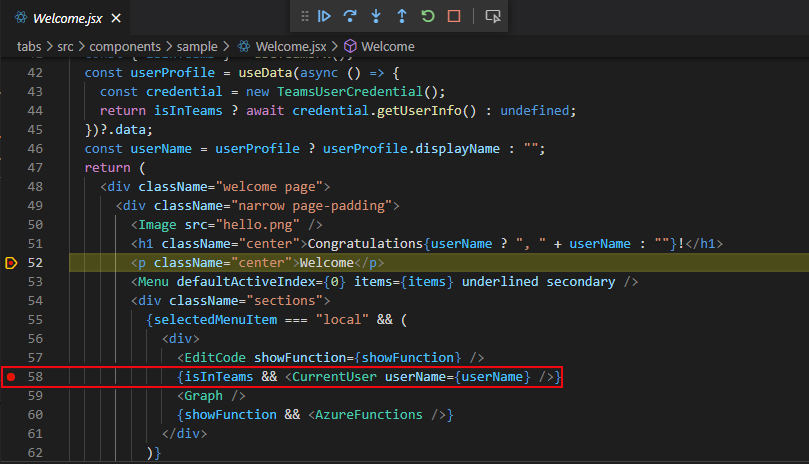
You can toggle breakpoints on the source codes of tabs, bots, message extensions, and Azure Functions. The breakpoints execute when you interact with the Teams app in a web browser. The following image shows toggle breakpoint:
Hot reload
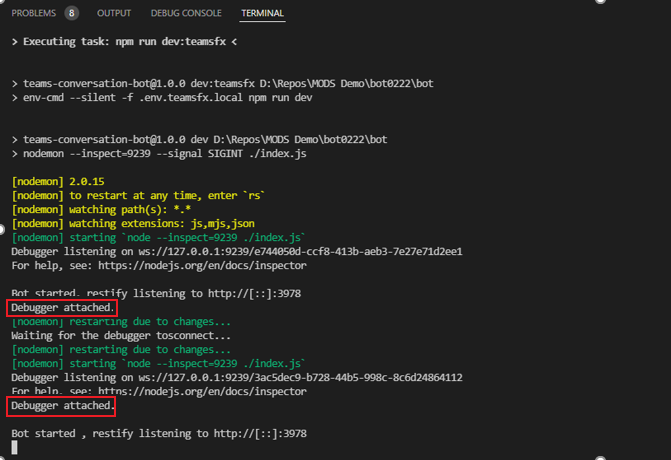
You can update and save the source codes of tab, bot, message extension, and Azure Functions at the same time when you're debugging the Teams app. The app reloads and the debugger reattach to the programming languages.
Stop debugging
When you complete local debug, you can select Stop (Shift+F5) or [Alt] Disconnect (Shift+F5) from the floating debugging toolbar to stop all debug sessions and terminate tasks. The following image shows the stop debug action:

Teams App Test Tool
The Teams App Test Tool makes debugging your bot-based apps effortless. You can chat with your bot and see its messages and adaptive cards as they appear in Teams. You don’t need a Microsoft 365 developer account, tunneling, or Teams app and bot registration to use the Test Tool. For more information, see Teams App Test Tool.
Debug apps in Teams desktop client
Microsoft Teams Toolkit helps you to debug and preview your Microsoft Teams app in desktop client. For more information, see debug apps in Teams desktop client.
Prepare for debug
The following steps help you to prepare for debug:
Sign in to Microsoft 365
If you've signed up for Microsoft 365 already, sign in to Microsoft 365. For more information, see Microsoft 365 developer program.
Toggle breakpoints
Ensure that you can toggle breakpoints on the source codes of tabs, bots, message extensions, and Azure Functions. For more information, see Toggle breakpoints.
Customize debug settings
Teams Toolkit allows you to customize the debug settings to create your tab or bot. For more information on the full list of customizable options, see debug settings doc.
You can also customize debug settings for your existing bot app.
Learn how to use an existing bot for debugging
Teams Toolkit creates Microsoft Entra apps for projects with bot by default using botAadApp/create action.
To use an existing bot, you can set BOT_ID and SECRET_BOT_PASSWORD in env/.env.local with your own values.
Use the following code snippet example to set up an existing bot for debugging:
# env/.env.local

# Built-in environment variables
TEAMSFX_ENV=local

# Generated during provision, you can also add your own variables.
BOT_ID={YOUR_OWN_BOT_ID}
...

SECRET_BOT_PASSWORD={YOUR_OWN_BOT_PASSWORD}
...
Customize scenarios
Here's a list of debug scenarios that you can use:
Skip prerequisite checks
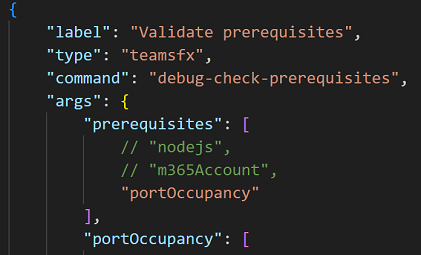
In .vscode/tasks.json under "Validate prerequisites" > "args" > "prerequisites", update the prerequisite checks you want to skip.
Use your development certificate
In
teamsapp.local.yml, removedevCertfromdevTool/installaction (or remove the wholedevTool/installaction if it only containsdevCert).In
teamsapp.local.yml, set"SSL_CRT_FILE"and"SSL_KEY_FILE"infile/createOrUpdateEnvironmentFileaction to your certificate file path and key file path.# teamsapp.local.yml ... # Remove devCert or this whole action - uses: devTool/install with: # devCert: ... - uses: file/createOrUpdateEnvironmentFile with: target: ./.localSettings envs: ... # set your own cert values SSL_CRT_FILE: ... SSL_KEY_FILE: ... ...
Customize npm install command
In teamsapp.local.yml, edit args of cli/runNpmCommand action.
# teamsapp.local.yml
...
  - uses: cli/runNpmCommand
    with:
      # edit the npm command args
      args: install --no-audit
...
Modify ports
Bot
Search for
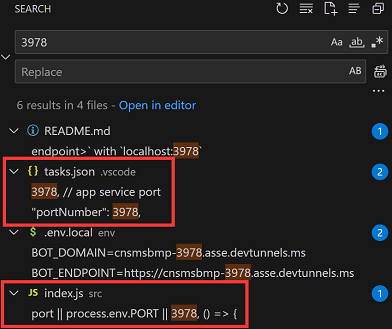
"3978"across your project and look for appearances intasks.jsonandindex.js.Replace it with your port.
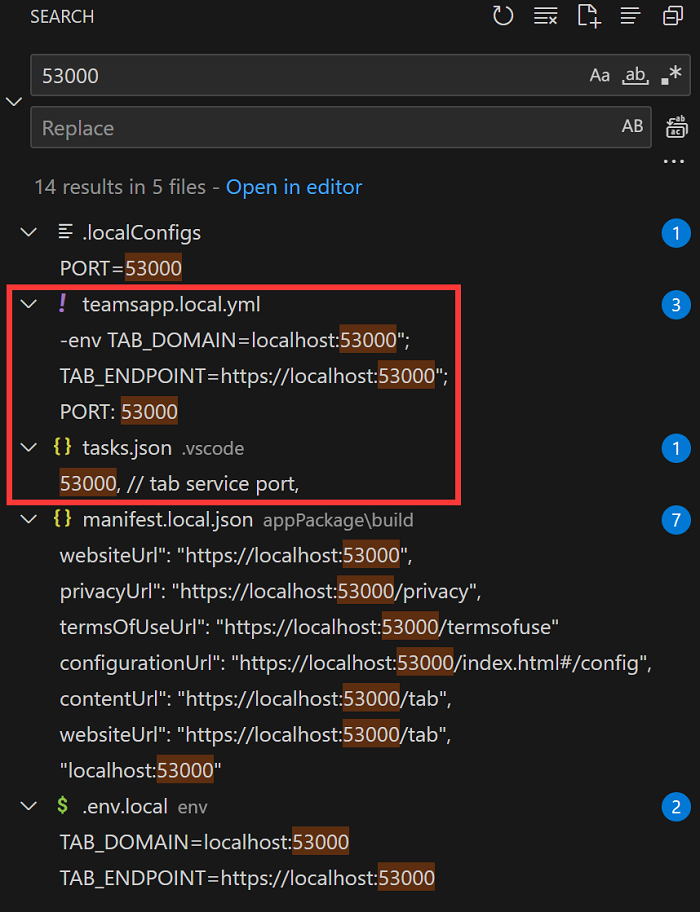
Tab
Search for
"53000"across your project and look for appearances inteamsapp.local.ymlandtasks.json.Replace it with your port.
Use your own app package
Teams Toolkit by default creates a set of teamsApp actions to manage app package. You can update those in teamsapp.local.yml to use your own app package.
# teamsapp.local.yml
...
  - uses: teamsApp/create # Creates a Teams app
    ...
  - uses: teamsApp/validateManifest # Validate using manifest schema
    ...
  - uses: teamsApp/zipAppPackage # Build Teams app package with latest env value
    ...
  - uses: teamsApp/validateAppPackage # Validate app package using validation rules
    ...
  - uses: teamsApp/update # Apply the app manifest (previously called Teams app manifest) to an existing Teams app in Teams Developer Portal.
    ...
...
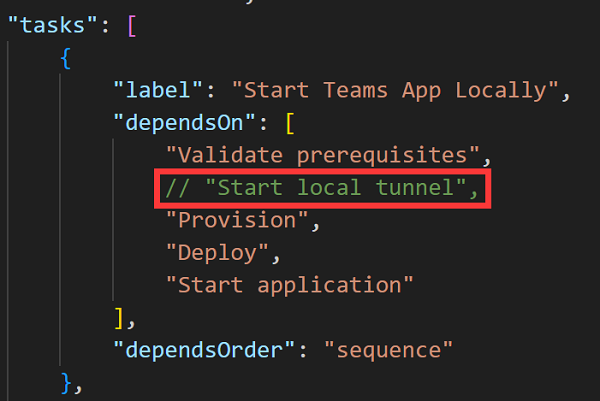
Use your own tunnel
In .vscode/tasks.json under "Start Teams App Locally", you can update "Start Local tunnel".
# env/.env.local

# Built-in environment variables
TEAMSFX_ENV=local
...
BOT_DOMAIN={YOUR_OWN_TUNNEL_DOMAIN}
BOT_ENDPOINT={YOUR_OWN_TUNNEL_URL}
...
# env/.env.local

# Built-in environment variables
TEAMSFX_ENV=local
...
BOT_DOMAIN={YOUR_OWN_TUNNEL_DOMAIN}
BOT_ENDPOINT={YOUR_OWN_TUNNEL_URL}
...
Add environment variables
You can add environment variables to .localConfigs file for tab, bot, message extension, and Azure Functions. Teams Toolkit loads the environment variables you added to start services during local debug.
Note
Ensure to start a new local debug after you add new environment variables, as the environment variables don't support hot reload.
Debug partial component
Teams Toolkit utilizes Visual Studio Code multi-target debugging to debug tab, bot, message extension, and Azure Functions at the same time. You can update .vscode/launch.json and .vscode/tasks.json to debug partial component. If you want to debug tab only in a tab plus bot with Azure Functions project, use the following steps:
Update
"Attach to Bot"and"Attach to Backend"from debug compound in.vscode/launch.json.{ "name": "Debug in Teams (Edge)", "configurations": [ "Attach to Frontend (Edge)", // "Attach to Bot", // "Attach to Backend" ], "preLaunchTask": "Start Teams App Locally", "presentation": { "group": "all", "order": 1 }, "stopAll": true }Update
"Start Backend"and"Start Bot"from Start All task in .vscode/tasks.json.{ "label": "Start application", "dependsOn": [ "Start Frontend", // "Start Backend", // "Start Bot" ] }
Update the expired client secret ID for the existing apps
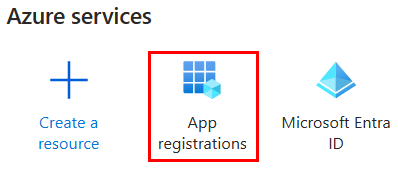
Go to Azure portal.
Select App registrations.
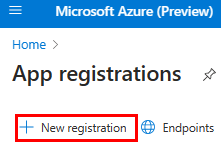
Select + New registration.
Enter the name of your app.
Select Accounts in any organizational directory (Any Microsoft Entra ID tenant - Multitenant).
Select Register.
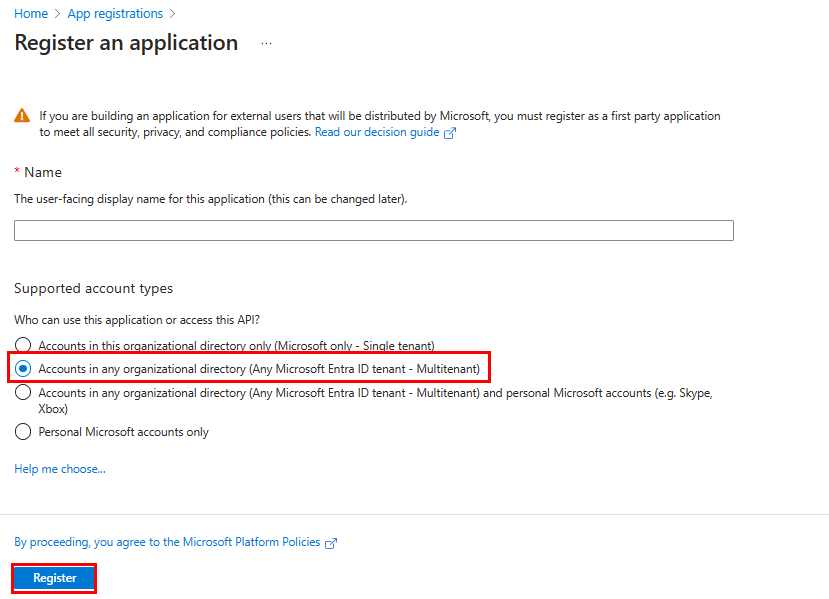
Your app is registered in Microsoft Entra ID. The app overview page appears.

In the left panel, select Certificates & secrets to create a client secret for your application.
- Under Client secrets, select ➕ New client secret.
- Add a description to identify this secret from others you might need to create for this app, such as Bot identity app in Teams.
- Set Expires to your selection.
- Select Add.
Update the
.envfile with the bot secret.Provision or deploy the app as required.
If your app is already deployed, ensure you update the app service configuration in Azure resource with the newly created bot secret.
Next
See also
Platform Docs
