Отображение сведений о компоненте
Примечание.
Прекращение использования пакета SDK для Android для Azure Maps
Пакет SDK для машинного кода Azure Maps для Android теперь не рекомендуется и будет снят с 3.31.25. Чтобы избежать сбоев в работе служб, перейдите в веб-пакет SDK Azure Maps на 3/31/25. Дополнительные сведения см . в руководстве по миграции пакета SDK для Android для Azure Maps.
Для представления пространственных данных часто используются точки, линии и многоугольники. С этими данными часто связаны метаданные. Например, точка может представлять расположение ресторана, а метаданные этого ресторана могут быть его именем, адресом и типом предоставляемого питания. Эти метаданные можно добавить как свойства GeoJSON Feature. Следующий код создает простую функцию точки со свойством title, имеющим значение "Hello World!".
//Create a data source and add it to the map.
DataSource source = new DataSource();
map.sources.add(source);

//Create a point feature.
Feature feature = Feature.fromGeometry(Point.fromLngLat(-122.33, 47.64));

//Add a property to the feature.
feature.addStringProperty("title", "Hello World!");

//Create a point feature, pass in the metadata properties, and add it to the data source.
source.add(feature);
//Create a data source and add it to the map.
val source = DataSource()
map.sources.add(source)

//Create a point feature.
val feature = Feature.fromGeometry(Point.fromLngLat(-122.33, 47.64))

//Add a property to the feature.
feature.addStringProperty("title", "Hello World!")

//Create a point feature, pass in the metadata properties, and add it to the data source.
source.add(feature)
Дополнительные сведения о создании и добавлении данных в карту см. в разделе "Создание источника данных".
Когда пользователь взаимодействует с компонентом на карте, для реагирования на эти действия могут использоваться события. Распространенным сценарием является вывод на экран сообщения, созданного на основе свойств метаданных компонента, с которым взаимодействует пользователь. Событие OnFeatureClick является основным событием, используемым для определения касания пользователем компонента карты. Существует также событие OnLongFeatureClick. OnFeatureClick При добавлении события на карту его можно ограничить одним слоем, передав идентификатор слоя, чтобы ограничить его. Если идентификатор слоя не передается, то касание любого компонента на карте, независимо от того, в каком слое он находится, будет инициировать это событие. Следующий код создает слой символов для визуализации точек на карте, затем добавляет событие OnFeatureClick и ограничивает его этим уровнем символов.
//Create a symbol and add it to the map.
SymbolLayer layer = new SymbolLayer(source);
map.layers.add(layer);

//Add a feature click event to the map.
map.events.add((OnFeatureClick) (features) -> {
    //Retrieve the title property of the feature as a string.
    String msg = features.get(0).getStringProperty("title");

    //Do something with the message.

    //Return a boolean indicating if event should be consumed or continue bubble up.
    return false;
}, layer.getId());    //Limit this event to the symbol layer.
//Create a symbol and add it to the map.
val layer = SymbolLayer(source)
map.layers.add(layer)

//Add a feature click event to the map.
map.events.add(OnFeatureClick { features: List<Feature> ->
    //Retrieve the title property of the feature as a string.
    val msg = features[0].getStringProperty("title")

    //Do something with the message.

    //Return a boolean indicating if event should be consumed or continue bubble up.
    return false
}, layer.getId()) //Limit this event to the symbol layer.
Отображение всплывающего сообщения
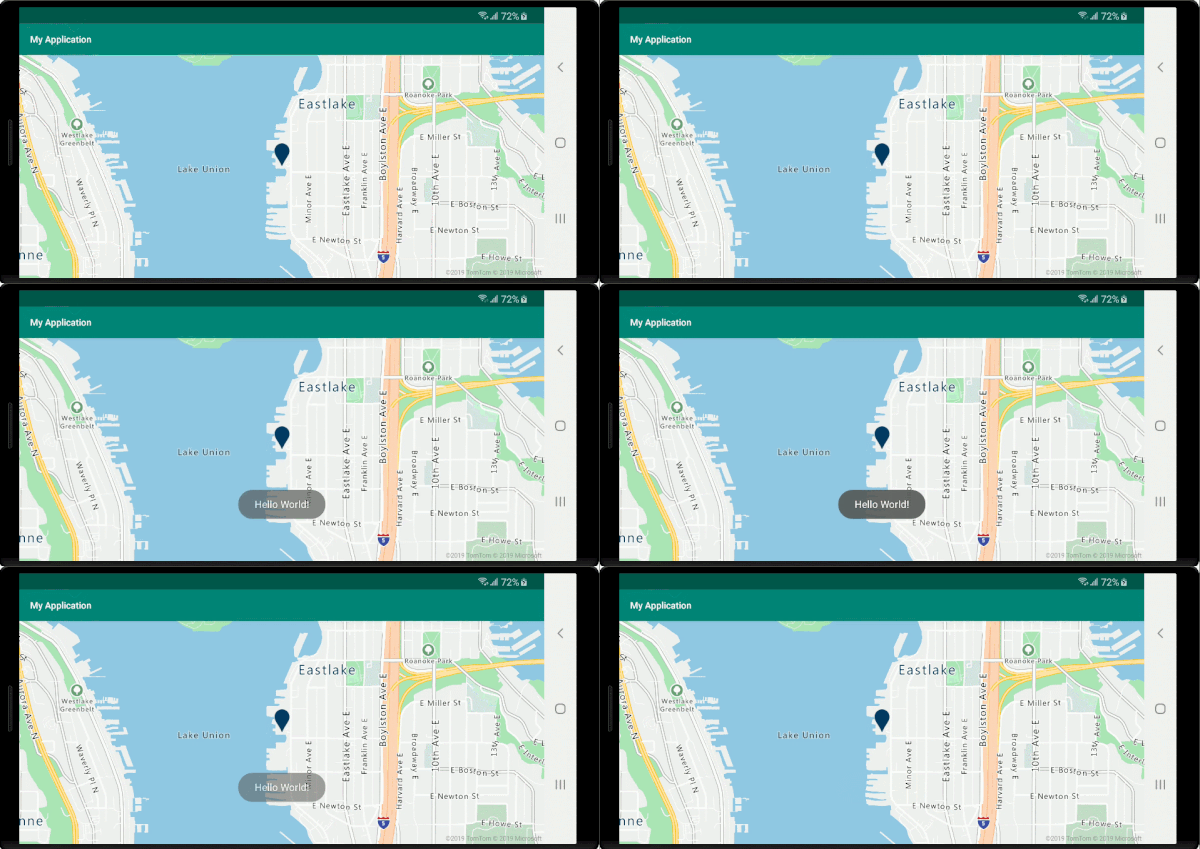
Всплывающее сообщение — это один из самых простых способов отобразить данные для пользователя, доступный во всех версиях Android. Оно не поддерживает никаких типов пользовательского ввода и появляется только на короткий промежуток времени. Это может быть хорошим вариантом, если нужно быстро сообщить пользователю, чего он касается. Следующий код показывает, как можно использовать всплывающее сообщение с событием OnFeatureClick.
//Add a feature click event to the map.
map.events.add((OnFeatureClick) (features) -> {
    //Retrieve the title property of the feature as a string.
    String msg = features.get(0).getStringProperty("title");

    //Display a toast message with the title information.
    Toast.makeText(this, msg, Toast.LENGTH_SHORT).show();

    //Return a boolean indicating if event should be consumed or continue bubble up.
    return false;
}, layer.getId());    //Limit this event to the symbol layer.
//Add a feature click event to the map.
map.events.add(OnFeatureClick { features: List<Feature> ->
    //Retrieve the title property of the feature as a string.
    val msg = features[0].getStringProperty("title")

    //Display a toast message with the title information.
    Toast.makeText(this, msg, Toast.LENGTH_SHORT).show()

    //Return a boolean indicating if event should be consumed or continue bubble up.
    return false
}, layer.getId()) //Limit this event to the symbol layer.

Помимо всплывающих сообщений существует много других способов показать свойства метаданных компонента, например:
- Мини-приложение закусочной -
Snackbarsобеспечивает простую обратную связь с операцией. Оно выводит короткое сообщение внизу экрана на мобильных устройствах и в нижнем левом углу на устройствах с экраном большего размера.Snackbarsпоявляется над всеми другими элементами на экране, и одновременно может отображаться только одно такое сообщение. - Диалоговые окна — это небольшие окна, предлагающие пользователю принять решение или ввести дополнительные данные. Диалоговое окно не заполняет экран и обычно используется для модальных событий, требующих от пользователя выполнить действие, прежде чем он сможет продолжить работу.
- Добавьте фрагмент к текущему действию.
- Перейдите к другому действию или представлению.
Отображение всплывающего окна
Пакет SDK для Android в Azure Maps предоставляет класс Popup, упрощающий создание элементов аннотации пользовательского интерфейса, привязанных к месту на карте. При выводе всплывающих окон необходимо в представлении передать относительный макет в параметр content всплывающего окна. Ниже приведен простой пример макета, в котором отображается темный текст поверх фона.
<?xml version="1.0" encoding="utf-8"?>
<RelativeLayout xmlns:android="http://schemas.android.com/apk/res/android"
    android:layout_width="match_parent"
    android:orientation="vertical"
    android:background="#ffffff"
    android:layout_margin="8dp"
    android:padding="10dp"

    android:layout_height="match_parent">

    <TextView
        android:id="@+id/message"
        android:layout_width="wrap_content"
        android:text=""
        android:textSize="18dp"
        android:textColor="#222"
        android:layout_height="wrap_content"
        android:width="200dp"/>

</RelativeLayout>
Если приведенный выше макет хранится в файле popup_text.xml в res -> layout папке приложения, следующий код создает всплывающее окно и добавляет его на карту. При щелчке этого компонента свойство title отображается, используя макет popup_text.xml, снизу по центру макета, привязанного к заданной точке на карте.
//Create a popup and add it to the map.
Popup popup = new Popup();
map.popups.add(popup);

map.events.add((OnFeatureClick)(feature) -> {
    //Get the first feature and it's properties.
    Feature f = feature.get(0);
    JsonObject props = f.properties();

    //Retrieve the custom layout for the popup.
    View customView = LayoutInflater.from(this).inflate(R.layout.popup_text, null);

    //Access the text view within the custom view and set the text to the title property of the feature.
    TextView tv = customView.findViewById(R.id.message);
    tv.setText(props.get("title").getAsString());

    //Get the position of the clicked feature.
    Position pos = MapMath.getPosition((Point)cluster.geometry());

    //Set the options on the popup.
    popup.setOptions(
        //Set the popups position.
        position(pos),

        //Set the anchor point of the popup content.
        anchor(AnchorType.BOTTOM),

        //Set the content of the popup.
        content(customView)

        //Optionally, hide the close button of the popup.
        //, closeButton(false)

        //Optionally offset the popup by a specified number of pixels.
        //pixelOffset(new Pixel(10, 10))
    );

    //Open the popup.
    popup.open();

    //Return a boolean indicating if event should be consumed or continue bubble up.
    return false;
});
//Create a popup and add it to the map.
val popup = Popup()
map.popups.add(popup)

map.events.add(OnFeatureClick { feature: List<Feature> ->
    //Get the first feature and it's properties.
    val f = feature[0]
    val props = f.properties()

    //Retrieve the custom layout for the popup.
    val customView: View = LayoutInflater.from(this).inflate(R.layout.popup_text, null)

    //Access the text view within the custom view and set the text to the title property of the feature.
    val tv: TextView = customView.findViewById(R.id.message)
    tv.text = props!!["title"].asString

    //Get the position of the clicked feature.
    val pos = MapMath.getPosition(f.geometry() as Point?);

    //Set the options on the popup.
    popup.setOptions(
        //Set the popups position.
        position(pos),

        //Set the anchor point of the popup content.
        anchor(AnchorType.BOTTOM),

        //Set the content of the popup.
        content(customView)

        //Optionally, hide the close button of the popup.
        //, closeButton(false)

        //Optionally offset the popup by a specified number of pixels.
        //pixelOffset(Pixel(10, 10))
    )

    //Open the popup.
    popup.open()

    //Return a boolean indicating if event should be consumed or continue bubble up.
    false
})
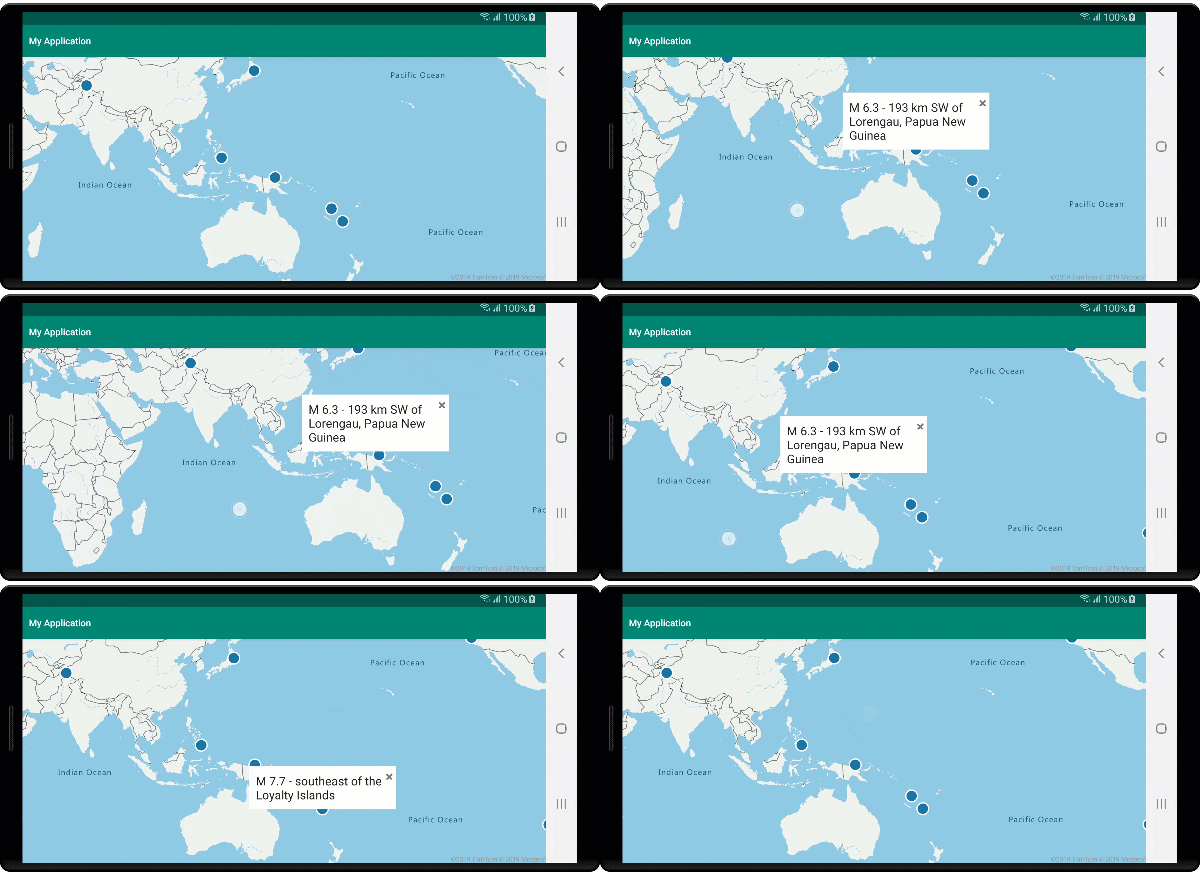
На следующем снимке экрана показаны всплывающие окна, появляющиеся при щелчке компонентов и остающиеся привязанными к соответствующему заданному положению на карте при их перемещении.

Следующие шаги
Чтобы добавить дополнительные данные на карту, выполните следующие действия.