SharePoint Integration with Clarity
SharePoint is a web-based platform for collaboration that seamlessly integrates with Microsoft Office. The SharePoint App Store is a marketplace that offers apps for Microsoft 365, Dynamics 365, and Power Platform. Users of the site can access the browse for and add third-party apps directly from the App Store. The apps offer unlimited possibilities for customizing your sites in ways that are specific to your organization. Now you can add Clarity through App Store.
Note
An organization owner must add the app to the organization catalog or approve the add app request from site owners. Once the app is available in the market, site owners can add and customize it. Check how to manage apps using the Apps site for more details.
Add Clarity to all SharePoint sites
Step 1
Note
You would need a Clarity Project ID to activate the app for SharePoint. If you don't have a project on Clarity, check how to create a new project.
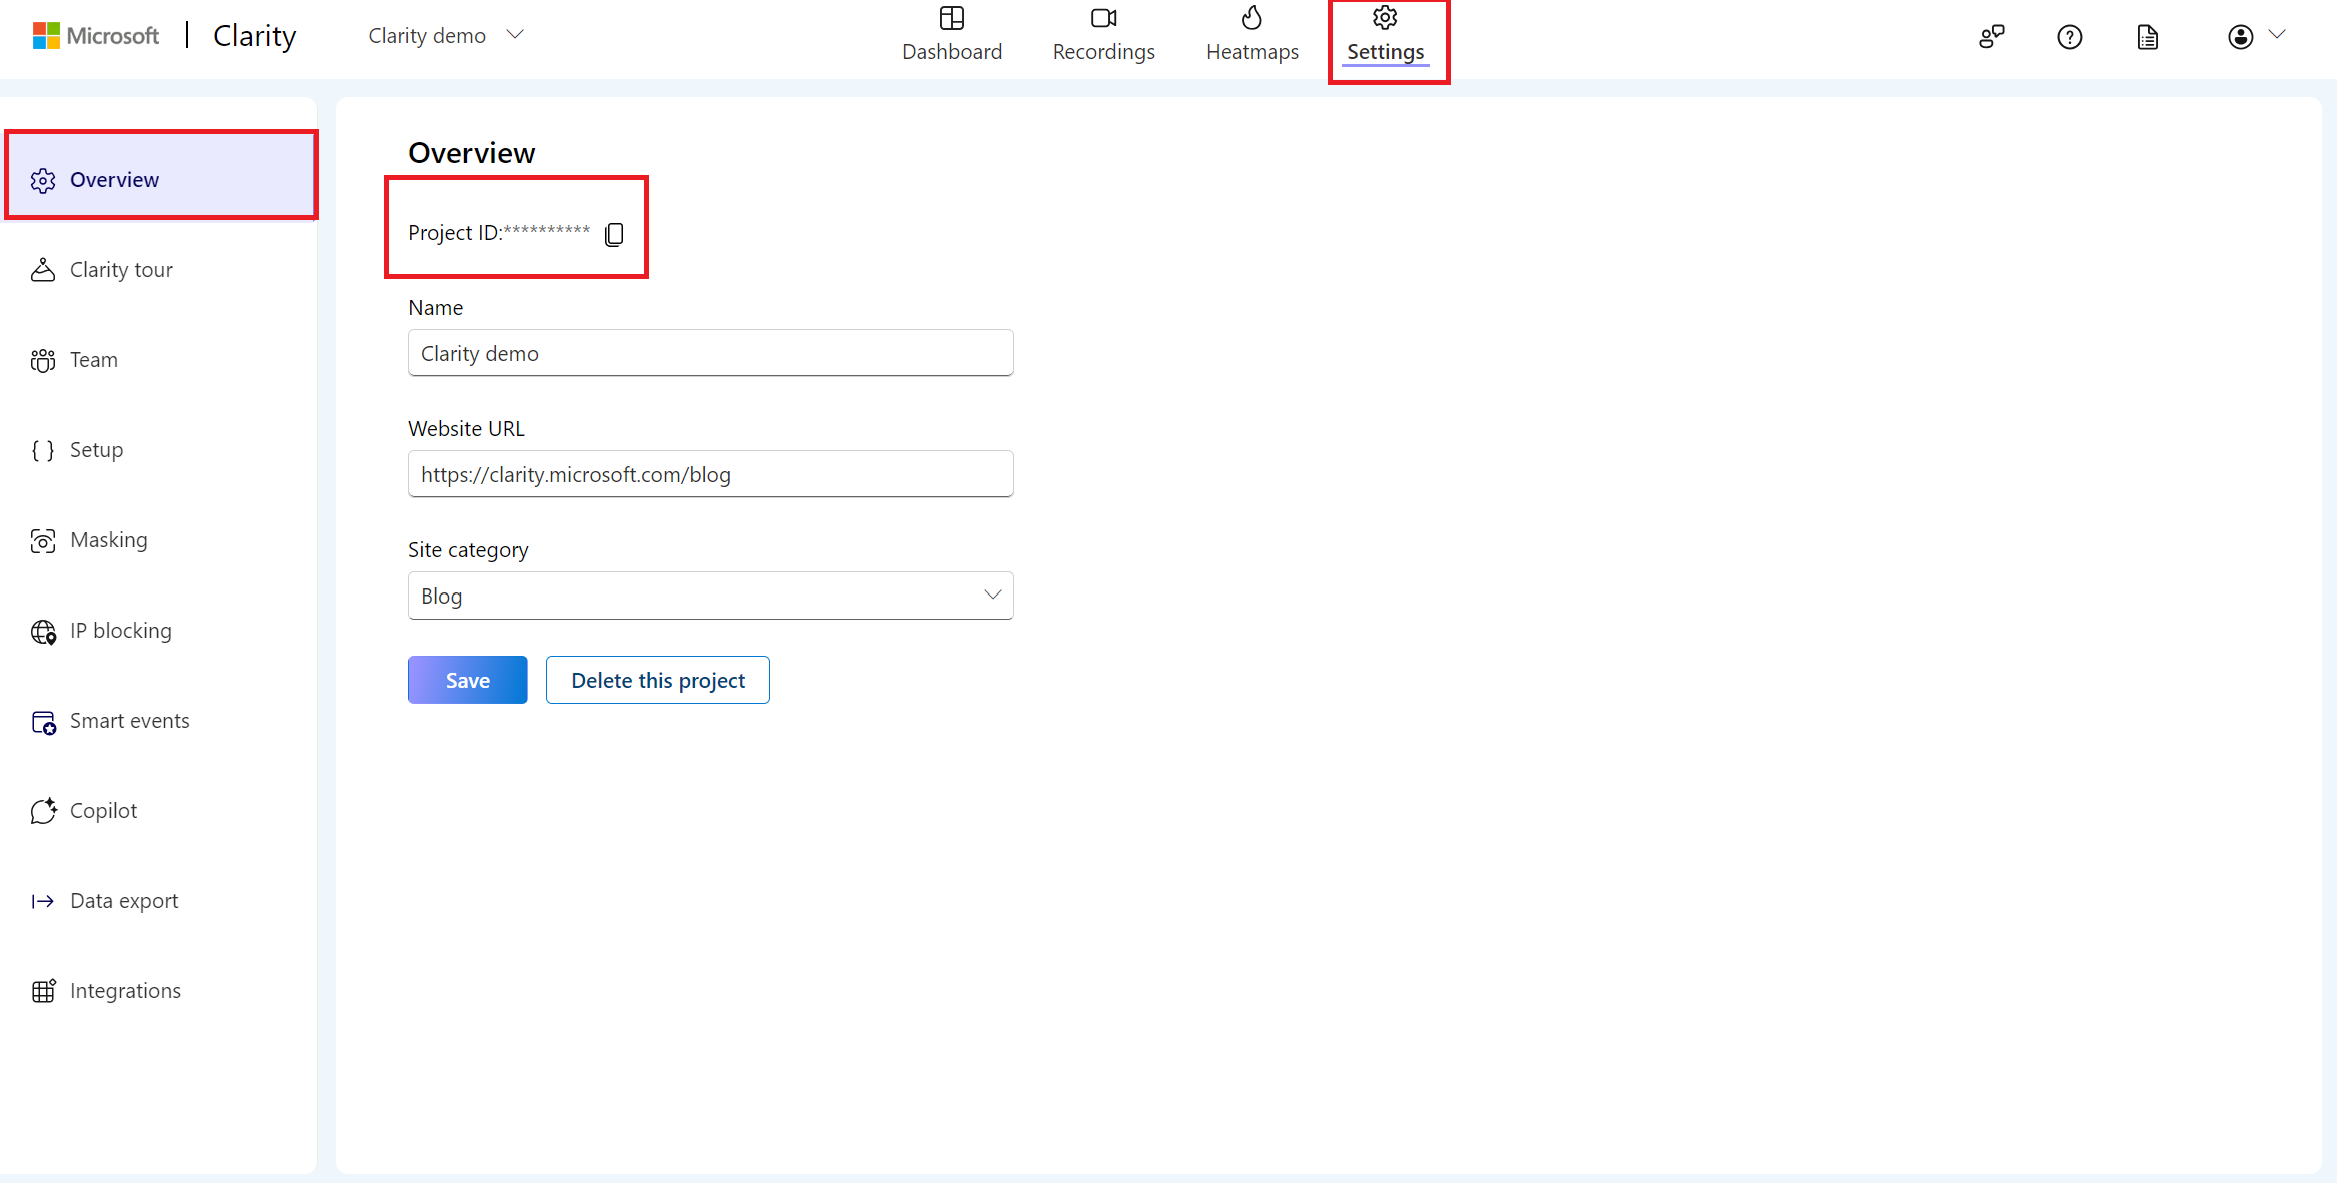
Locate your Clarity Project ID and copy it by following the below instructions:
- From the Clarity dashboard, go to Settings.
- Select Overview from the left panel.
- Copy the Project ID (for example, 55u86t0118).
Step 2
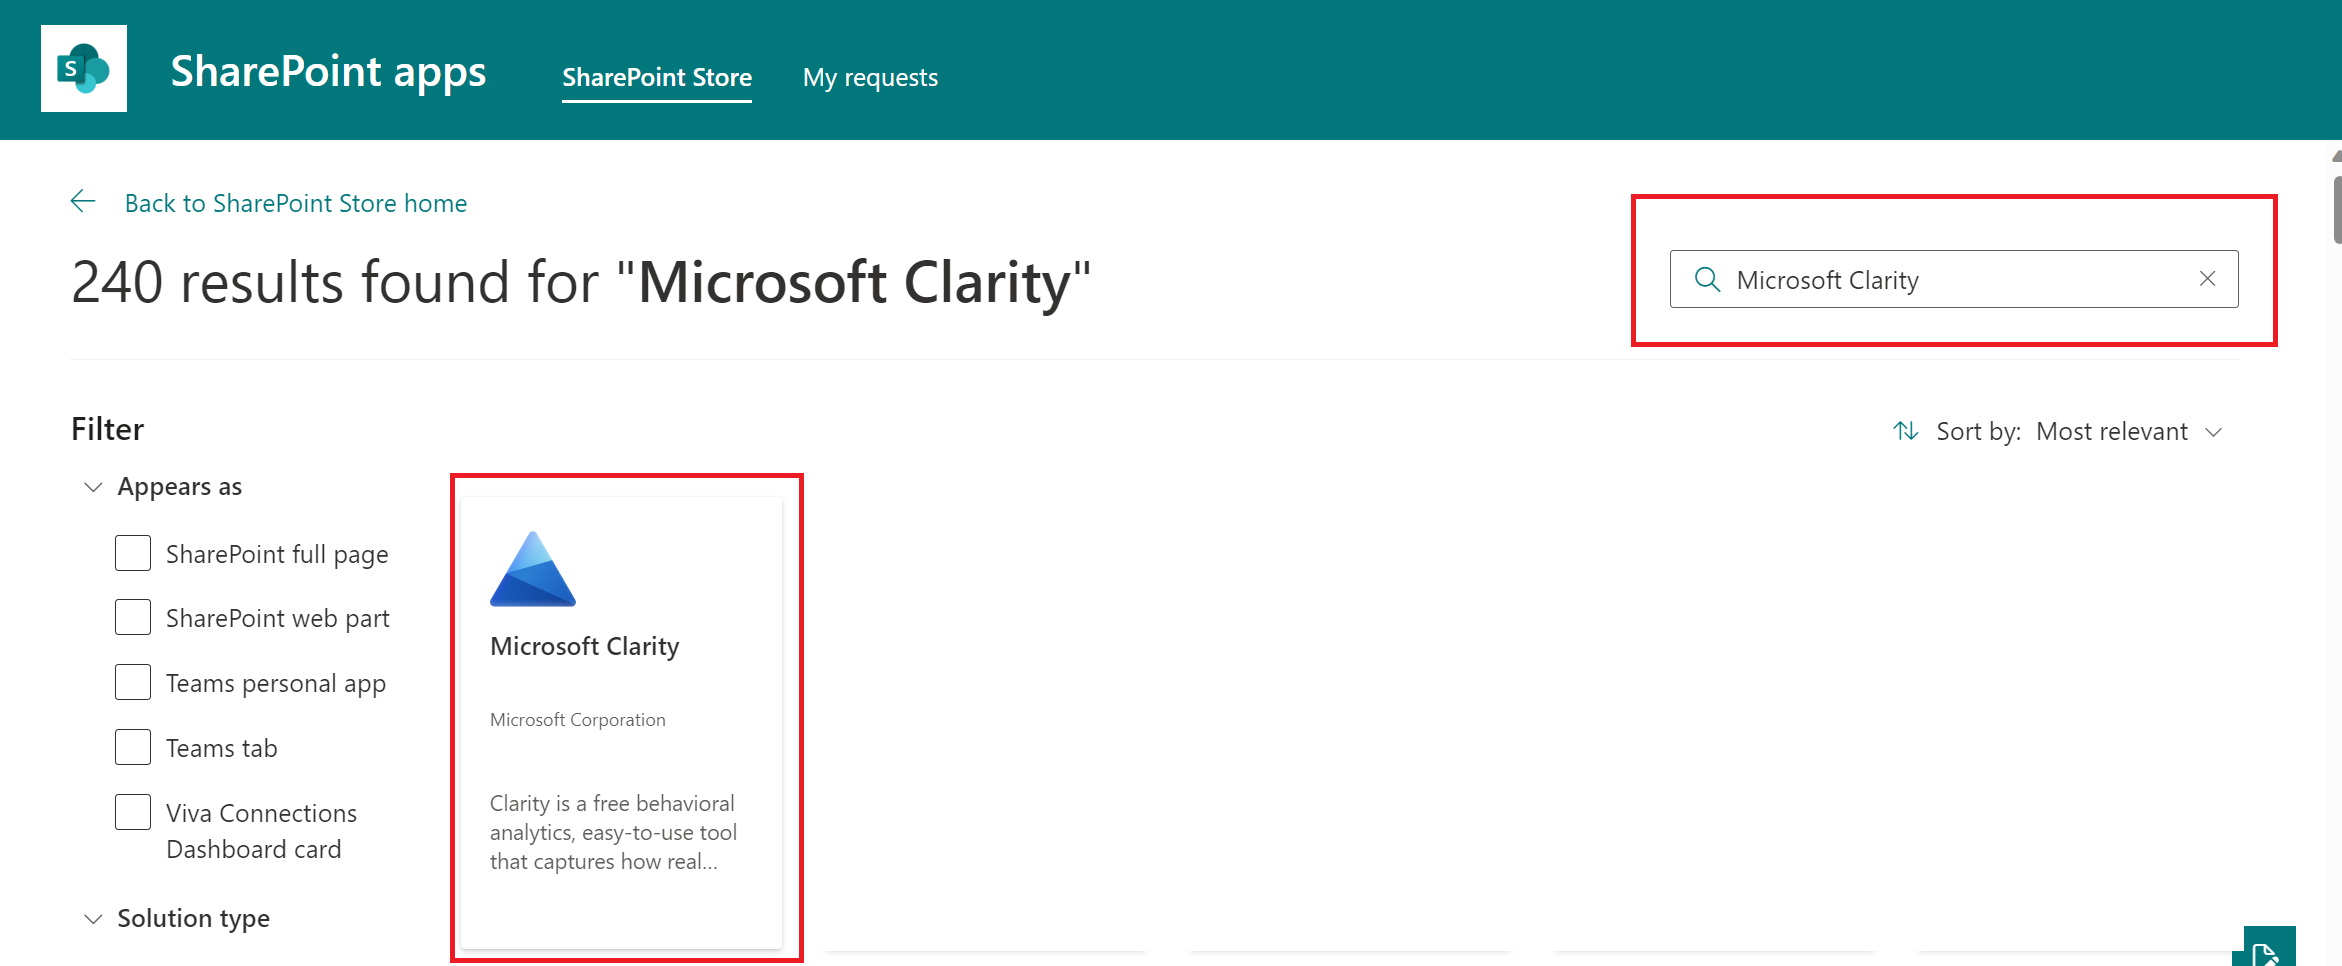
Go to the SharePoint app store and search for Clarity.
Step 3
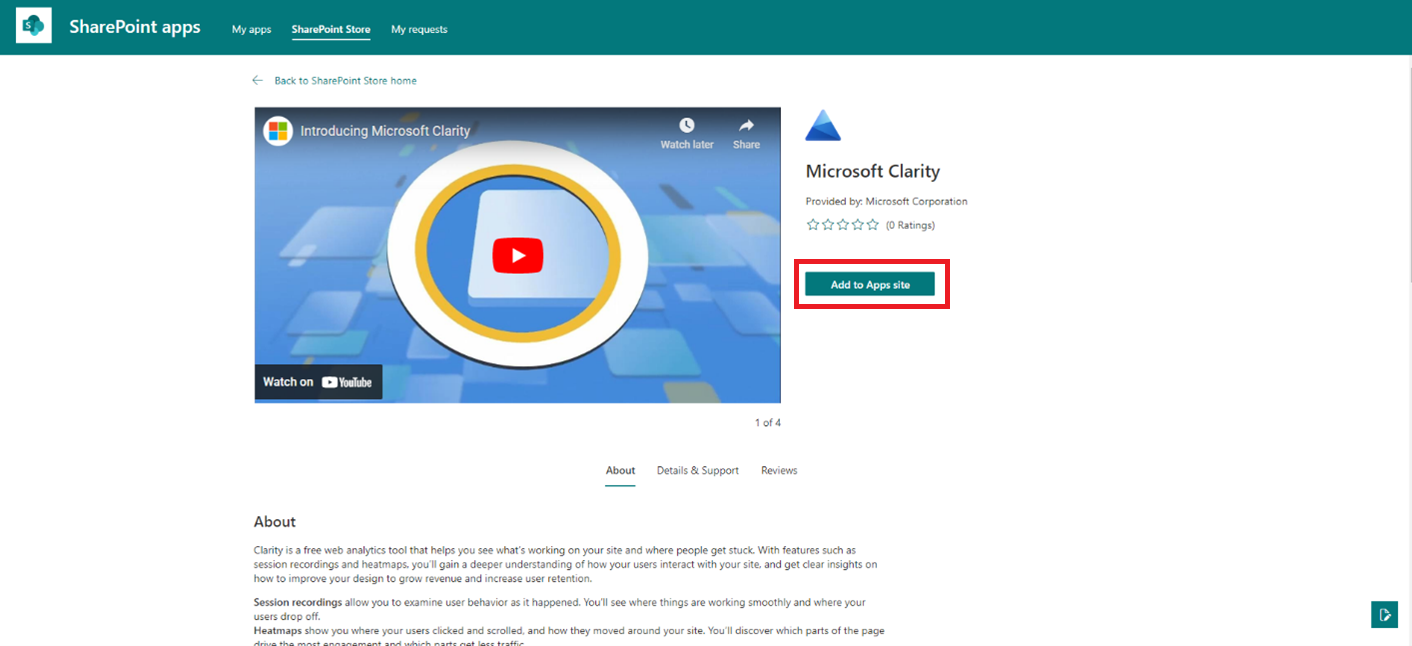
Select the Microsoft Clarity app and Add to Apps site.
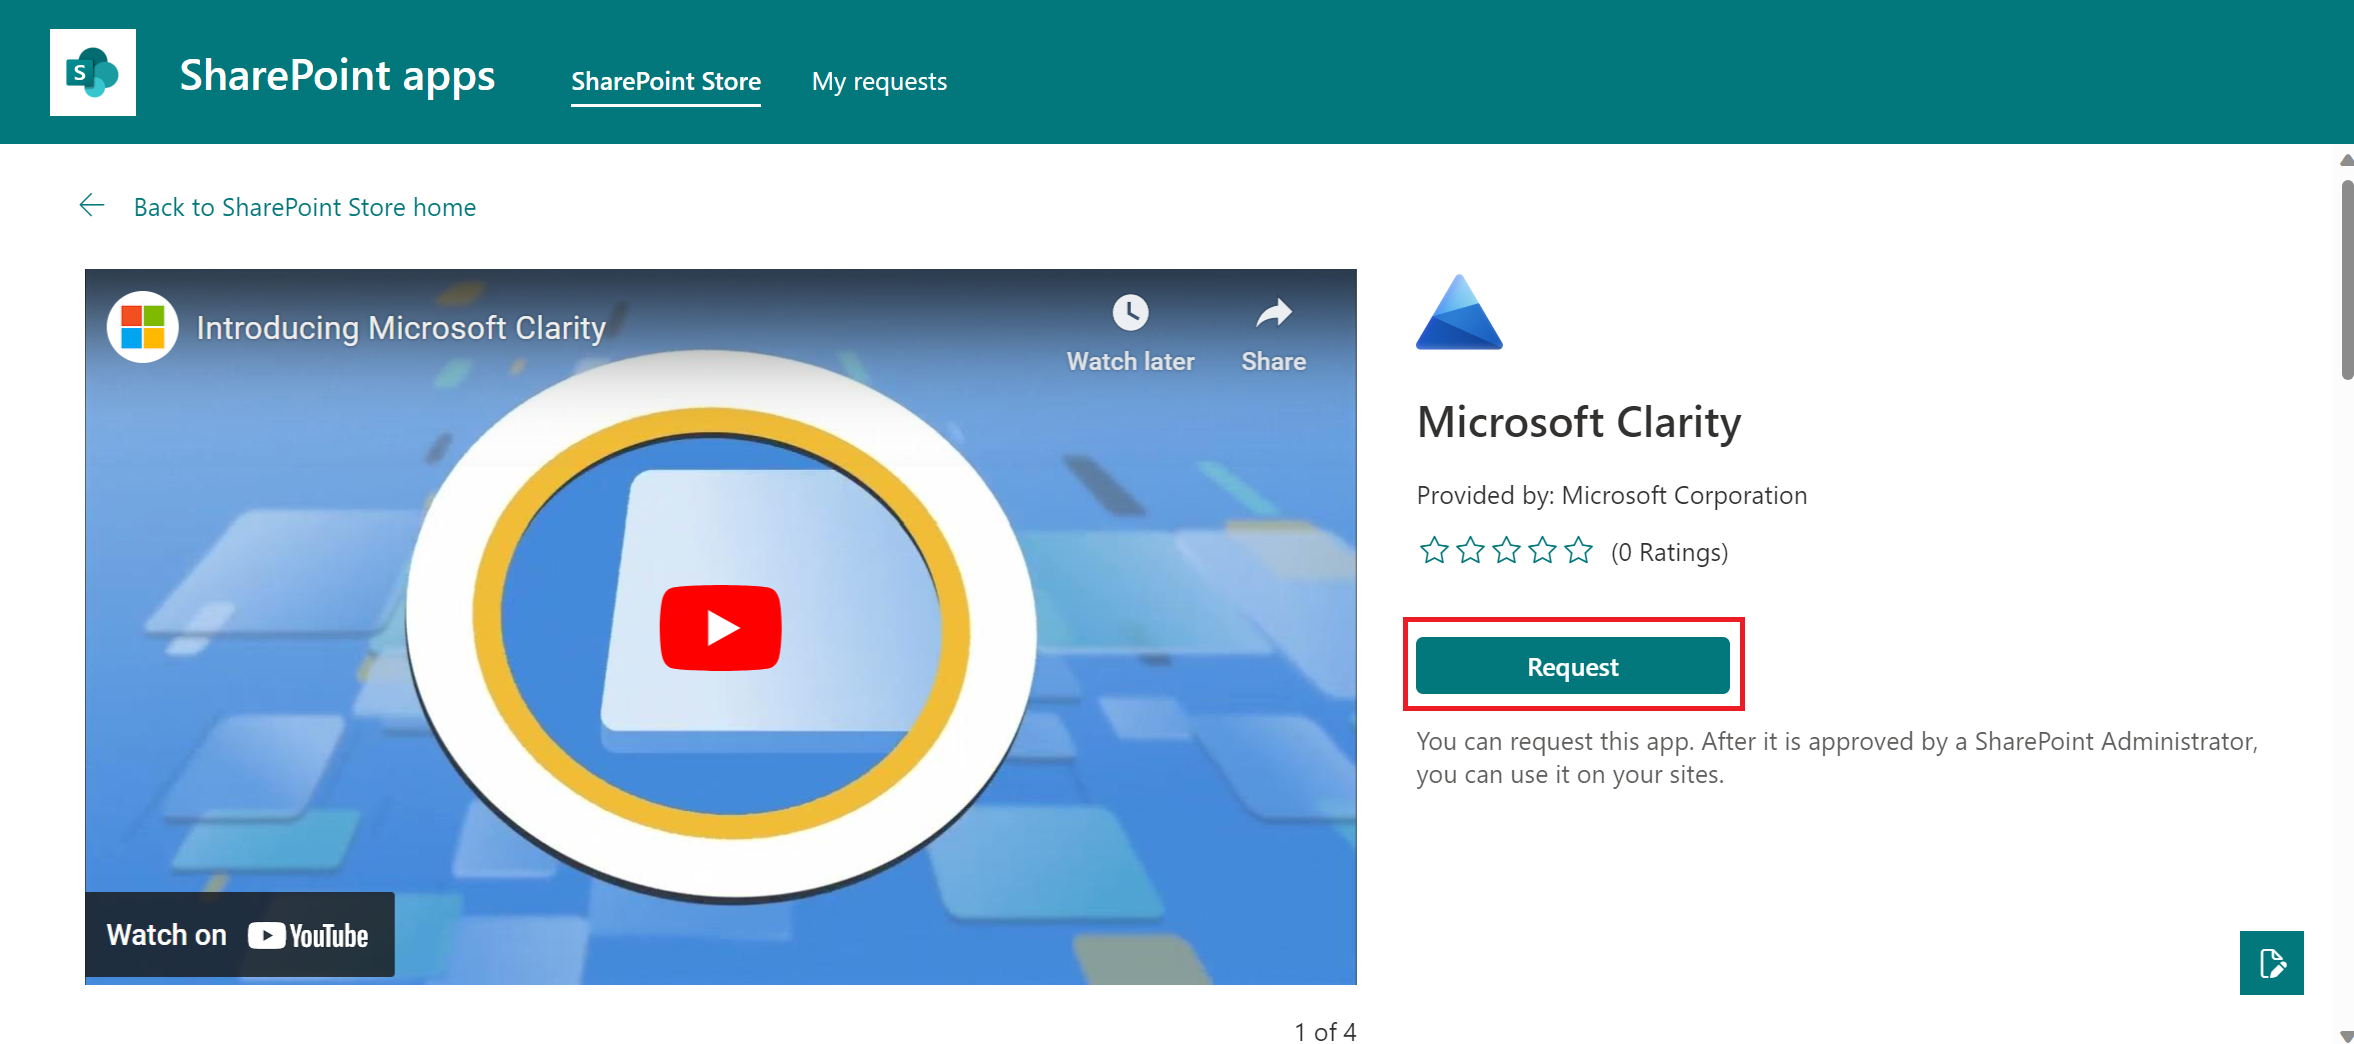
If you notice Request, select it to get it approved by a SharePoint Admin.
Step 4
On the pop-up window, select Enable this app and add it to all sites and Add to add Clarity to all SharePoint sites.
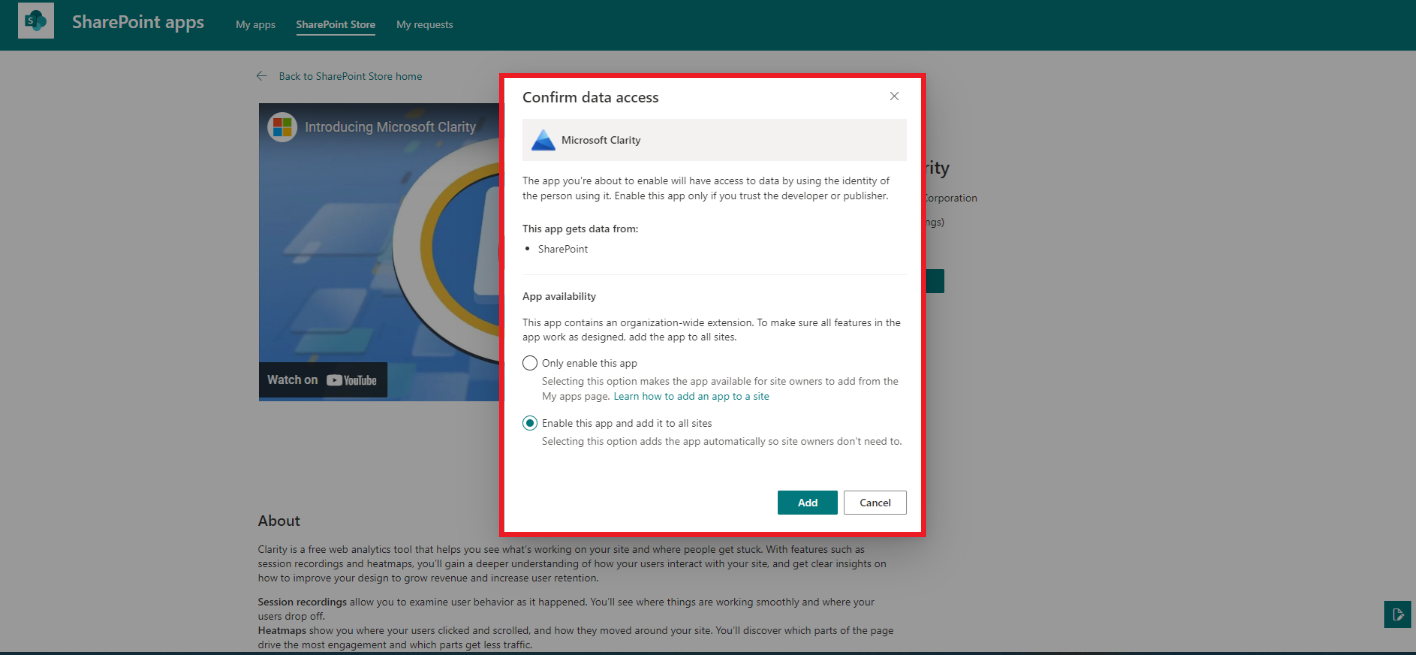
Step 5
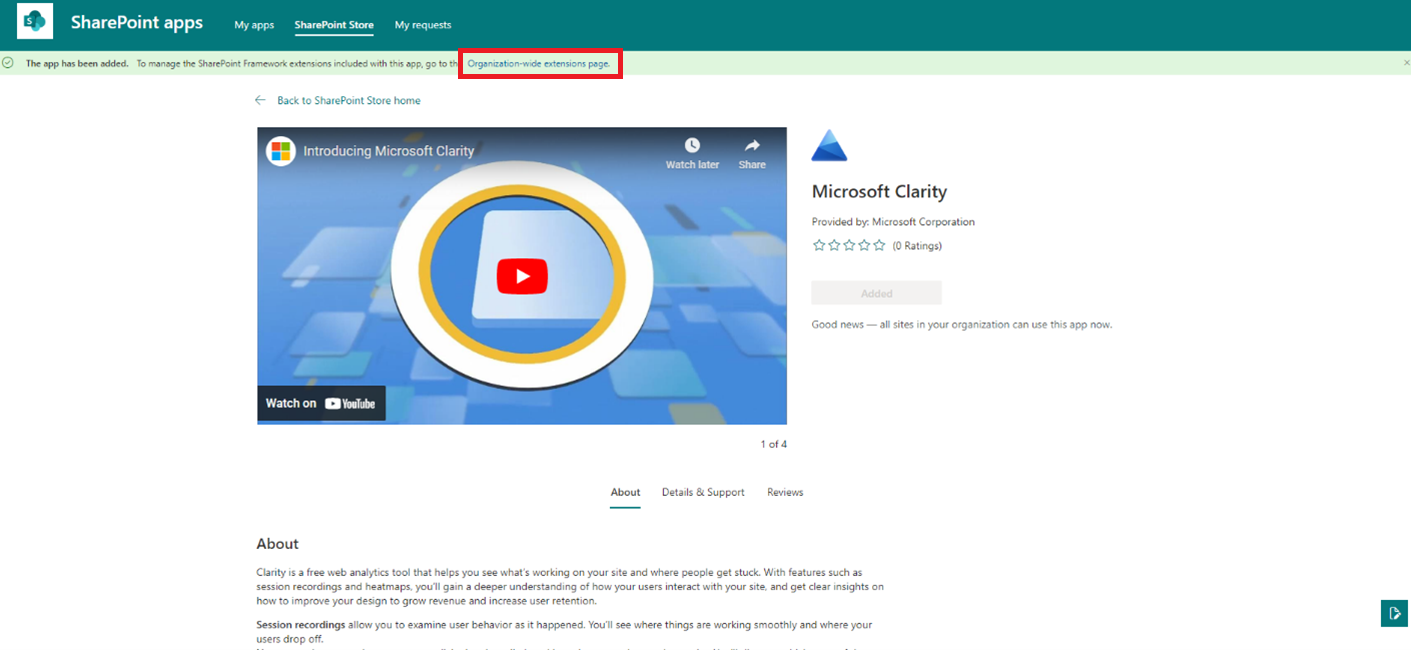
Go to the Organization-wide extension page on the top of the screen highlighted in green.
Or navigate to the App catalog page -> Site contents tab -> Tenant wide extensions.
Step 6
In the Tenant wide extensions, select the record with the title Microsoft Clarity -> Edit. Paste your Clarity Project ID in the Component Properties.
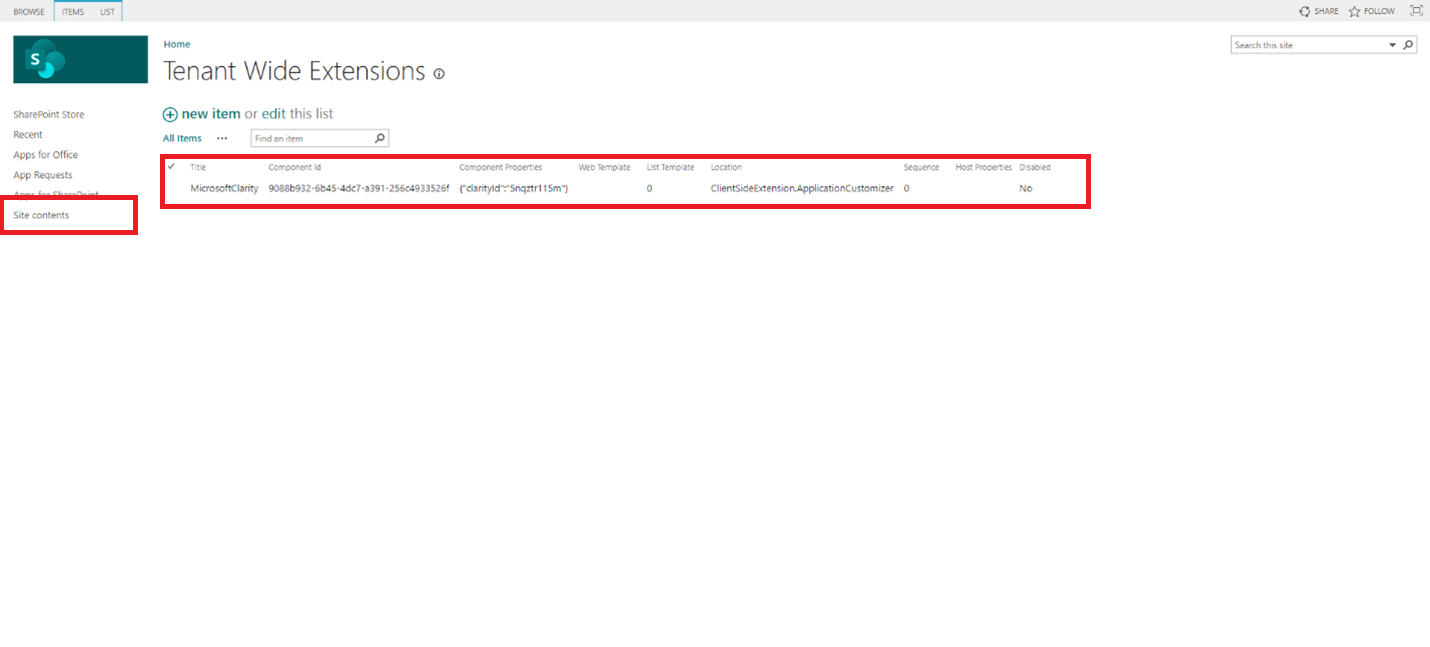
The SharePoint Integration is now successful.
Add Clarity to a specific SharePoint site
Use the following steps to deploy the SharePoint app to a single site using the management shell and browser:
Note
If already added Clarity for all sites, go to your main app site and remove the Clarity record from the Apps for SharePoint tab.
Step 1
Once your organization's Admin adds the app to your organization market, go to SharePoint Store and follow these steps:
Search for Clarity.
Add Clarity and select Only enable this app.
Go to your site -> Settings -> Add an app.
Select Add on Clarity. Go to site contents to view the Clarity record.
Step 2
On your SharePoint online management shell, enter the following commands by replacing the respective inputs:
Connect-SPOServiceand type{Your main site URL}Add-SPOSiteCollectionAppCatalog-Site {site URL}Connect-PnPOnline-URL {site URL}-InteractiveAdd-PnPApplicationCustomizer-ClientSideComponentId: "9088b932-6b45-4dc7-a391-256c4933526f"-ClientSideComponentProperties: '{"clarityId": "clarity project id"}'-Scope site.
Repeat the steps to add Clarity to other sites.
Validate the installation
Validate each site's installation using these steps:
Step 1
Check POST requests for the fastest validation. Make sure there aren't any duplicate tag calls. Multiple tags indicate multiple script additions. Check Step 2 on how to fix it.
Step 2
Check the site's configurations
Verify that each site has only one record, and also check the Clarity project ID using the command:
Get-PnPApplicationCustomizer -ClientSideComponentId: "9088b932-6b45-4dc7-a391-256c4933526f"
Recommendation: Remove duplicate records
Use the following to remove duplicate records:
Remove-PnPApplicationCustomizer -ClientSideComponentId: "9088b932-6b45-4dc7-a391-256c4933526f"
- Enter
Yfor the ones you want to keep, and for all the others, enterN. - Compare these with the
Scope IDsobtained from thegetcommand.
FAQ
For more answers, refer to the Setup FAQ.