Analyzify
See how to implement Microsoft Clarity through your GTM container with Analyzify.
Implement Clarity Pixel/Web Tracking via GTM with Analyzify
Note
To start using Analyzify, install Analyzify on Shopify app store, set up data layers and the GTM container on your Shopify store or ensure you are using the Analyzify v2.3 or above.
Shopify sellers who integrate Clarity with Analyzify, can view visitor screen recordings, heatmaps, and determine how to enhance their websites to increase conversion rates.
Step 1
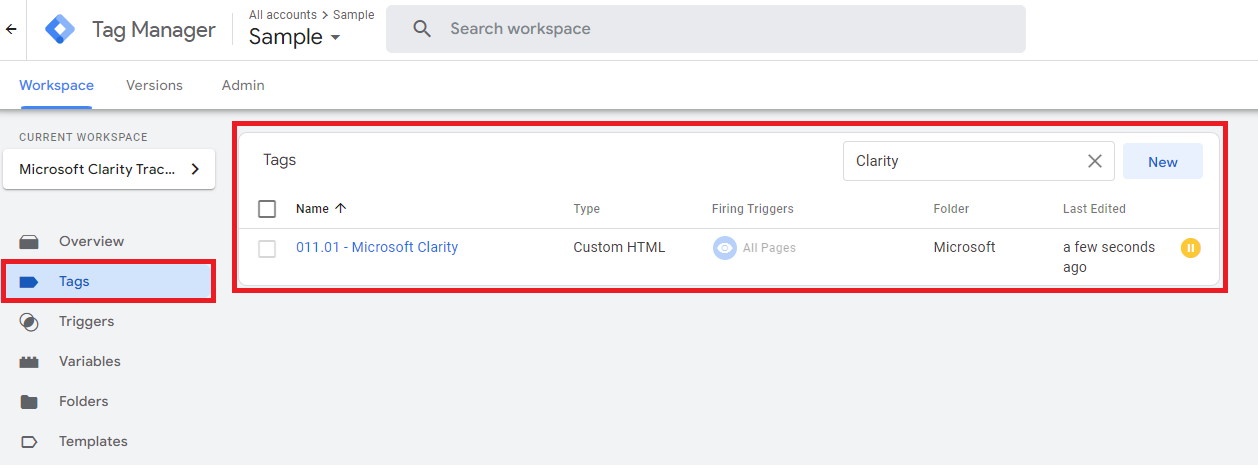
To make sure you're using Analyzify v2.3, verify your version using the following steps:
Go to Google Tag Manager container and search for Clarity. Select 011.01 - Microsoft Clarity tag. If the tag is available, move to the next step. Else, upgrade your Analyzify version.

Step 2
Note
You would need a Clarity Project ID to activate Clarity on Analyzify. If you don't have a project on Clarity, check how to create a new project.
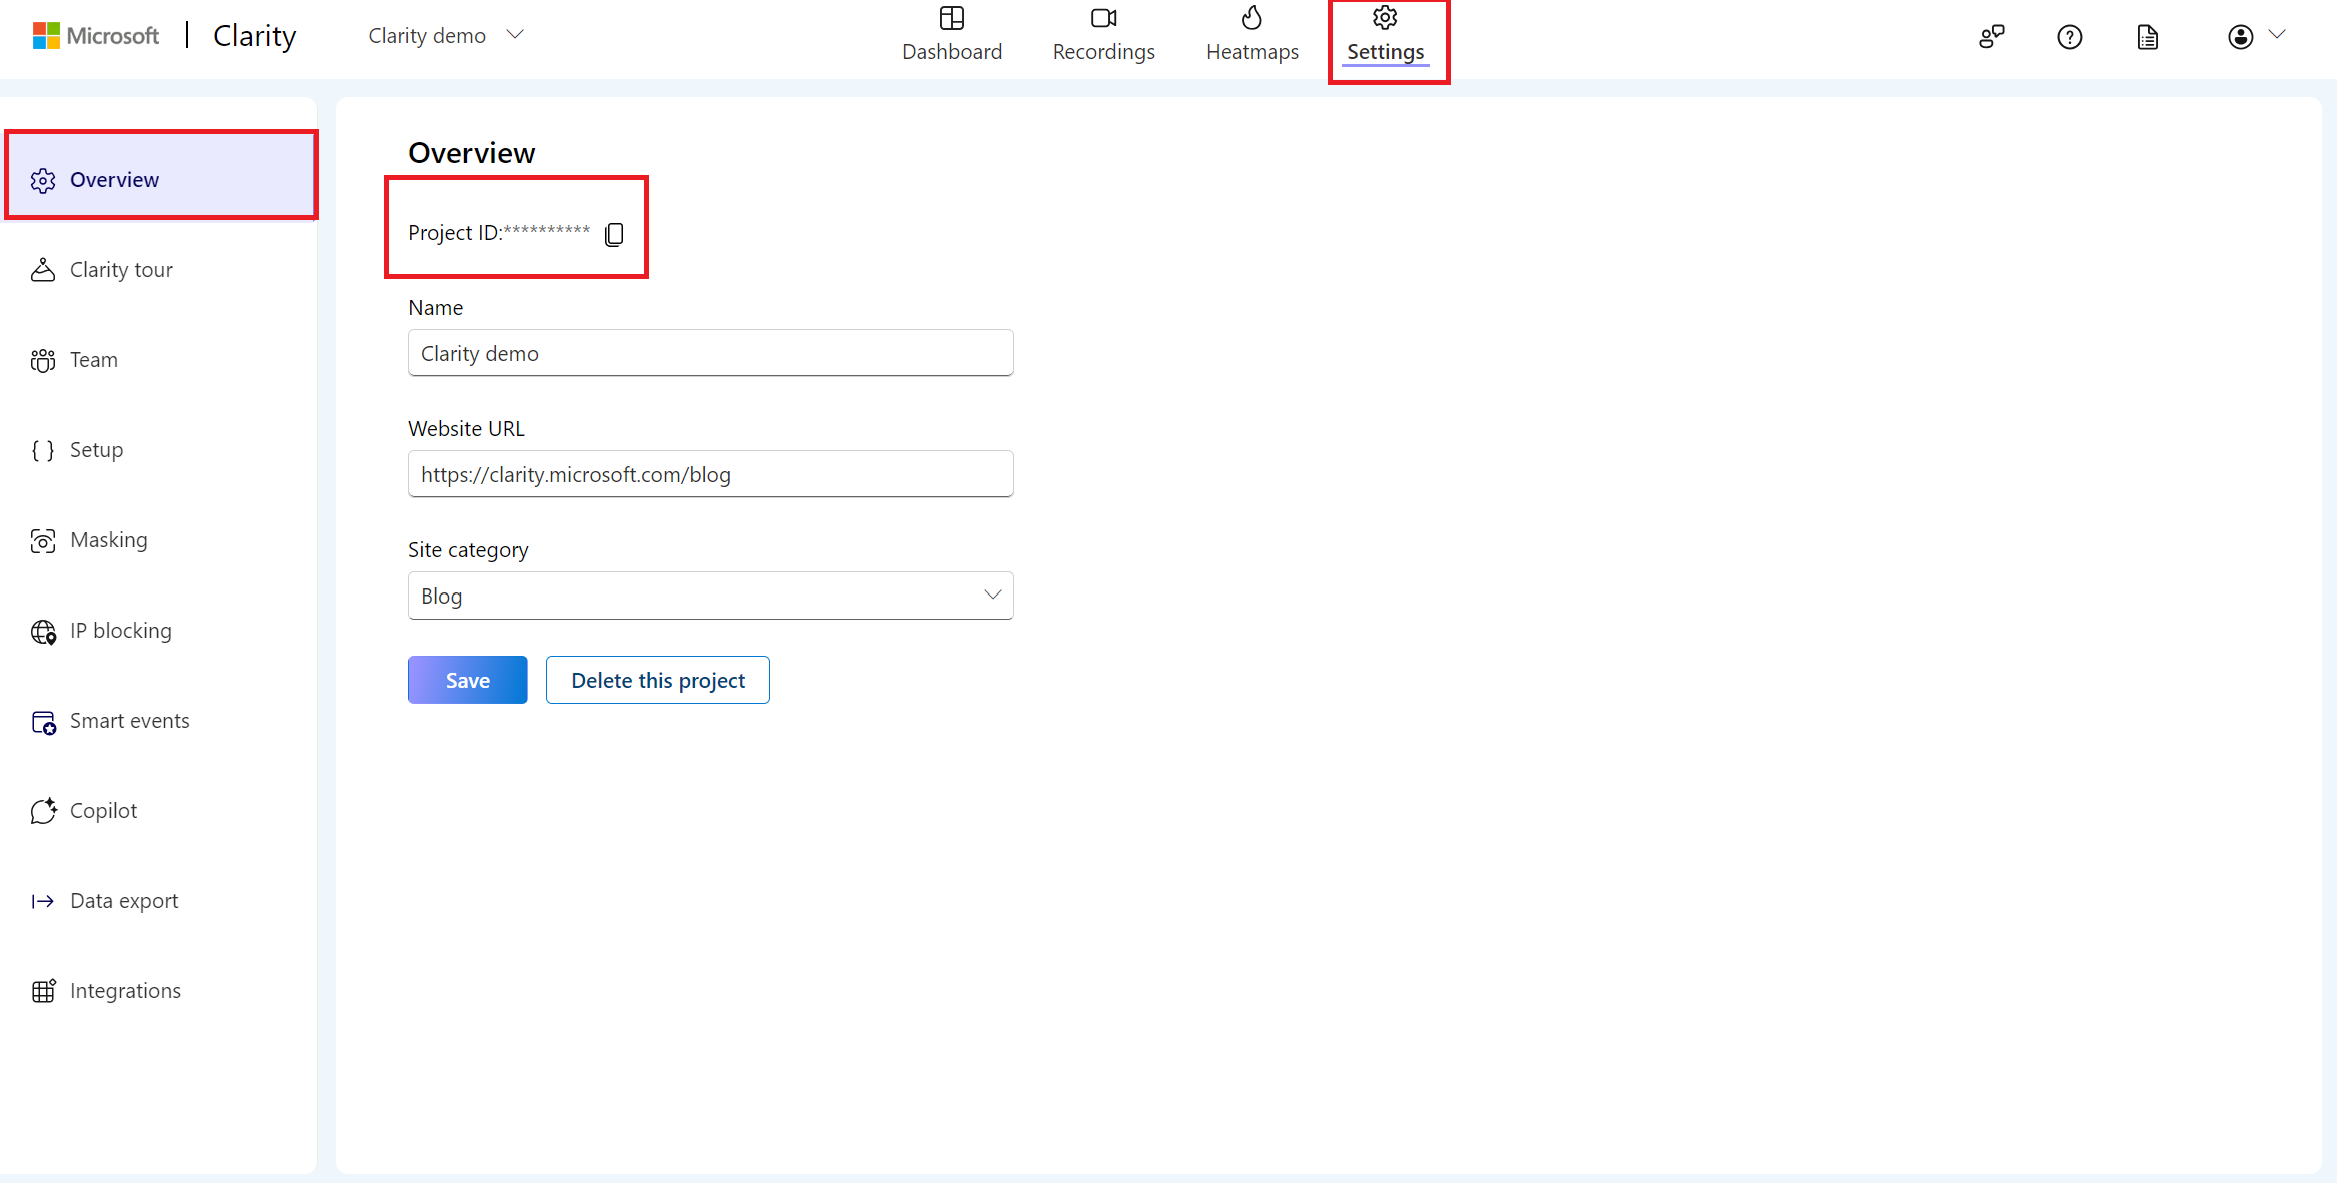
Locate your Clarity Project ID and copy it by following the below instructions:
- From the Clarity dashboard, go to Settings.
- Select Overview from the left panel.
- Copy the Project ID (for example, 55u86t0118).

Step 3
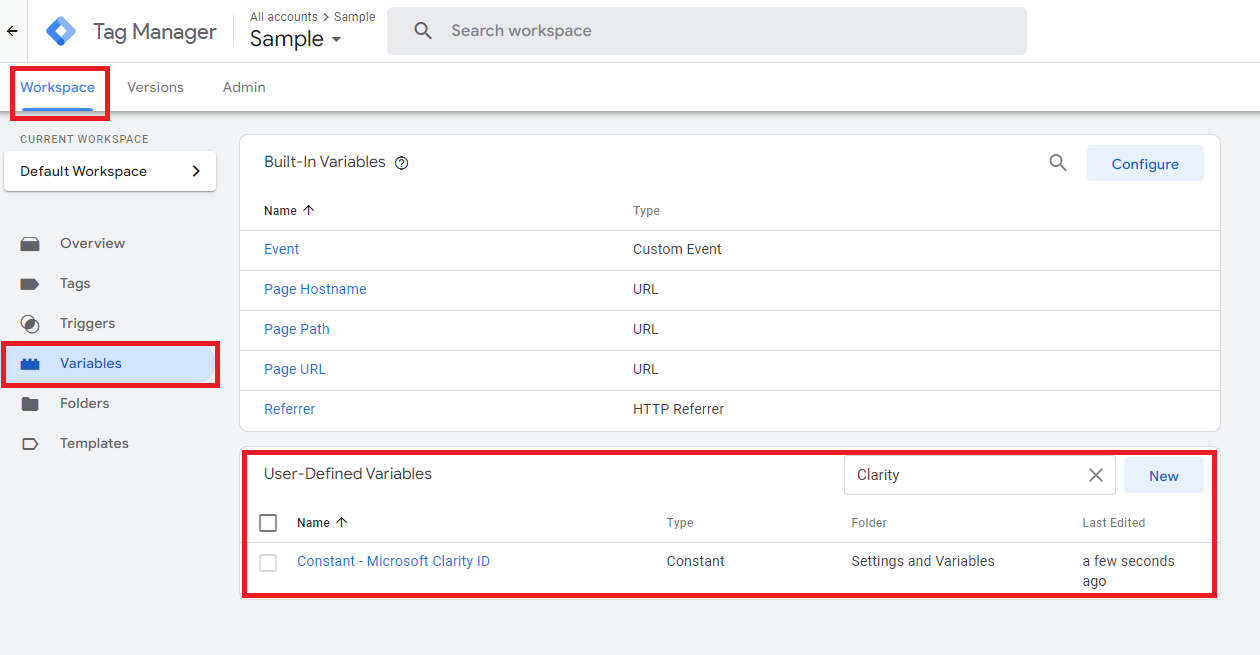
Go to GTM Workspace -> Variables -> User-Defined Variables. Search for Clarity.

Select the constant and paste the project ID and select Save.

Step 4
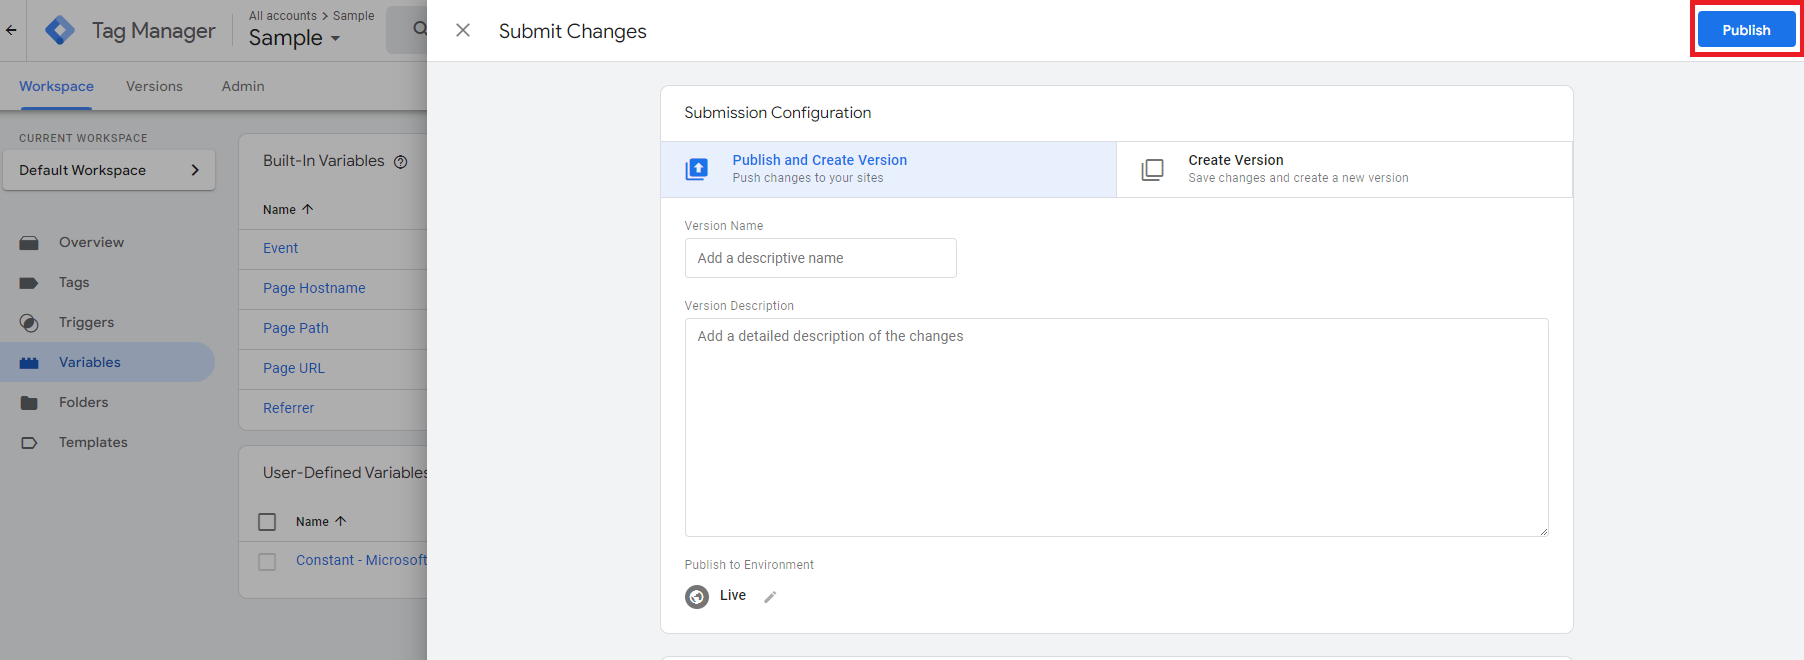
Select Submit and Publish your container to make the changes live.

FAQ
For more answers, refer to Setup FAQ.