Construct 2 Trivia App Part 1(Layout and Reading From File)
This is the first part in a 3 part series on how to build a Trivia App using Construct 2, a free drag and drop type tool for creating cross platform games. This tutorial will cover some of the basics of Construct 2, including editing layout and text boxes as well as reading text from a file. The intent is for this to start simple enough so that people without any experience can follow along as well. However, if you get confused or have questions please comment below! So, let’s go ahead and get started!
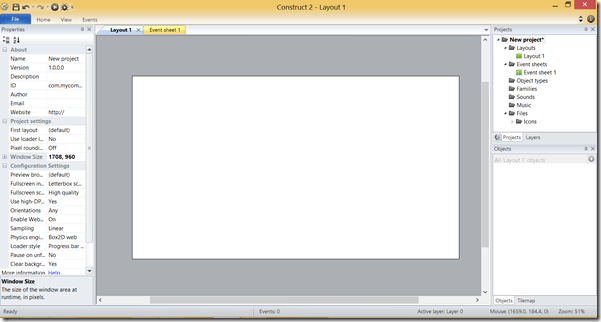
First, when you open up construct 2, go ahead and click File->New from the top left corner, and select empty project. You should now see a screen like this.
A couple of things to note here. I’ve got two files open above, one is “Layout 1”, and the other is “Event Sheet 1”. Our layout pages are pretty self explanatory, but they basically just show how objects, characters, etc. are arranged in our game. The event sheets, on the other hand, are where we define all of the logic for our game, for instance how to read from a text file. Additionally, on the left hand side you have a properties pane, which will show the properties for anything that you select, for instance an object, a layout, etc. As you can see the properties for my Layout are currently being displayed now. On the right hand side, you have a project pane and an objects pane. The project pane, shows all of the files in our project, and the object pane shows all of the objects that we have added to our current layout (we will add some shortly).
Alright, so that’s a brief introduction, but it gives us enough to get started. The first thing we want to do is select our project folder, “New Project” on the right, and then change it’s windows size property to match the layout size that is shown above (1708,960). This way the size of the individual layouts will match the Windows size, which is what the user will be able to see. Notice also that I have centered my layout and zoomed out so I can see the whole thing! Should now look like this with the project window size being 1708,960.
We are about to start adding objects to our game, but let’s take a second to think through the layout of a trivia game. Typically, you have a question and four answer choices to choose from. Let’s go ahead and start with the 5 text boxes, one for the question and one for the four answer choices.
In general, to add an object to your game, you can just double click somewhere inside of your layout. Once you do, you can choose which kind of object you want to add from the menu below.
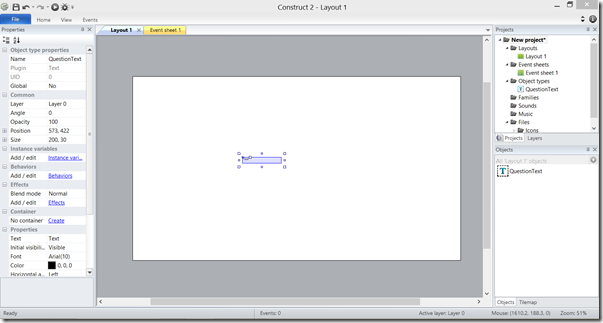
Right now we are looking for the “Text” object. You can see it on the immediate screen that shows up, but one thing to keep in mind is that there is a search box in the top right. It may not seem like much but it proves to be very useful when you want to find something that you might otherwise have to scroll for. So, go ahead and select the “Text” object, and then give it a name, “QuestionText”, and click insert. Now, you will see a crosshair mouse. Go ahead and click anywhere on your layout, and your text object will be added there. You will also see the properties window on the left for the object that we just created.
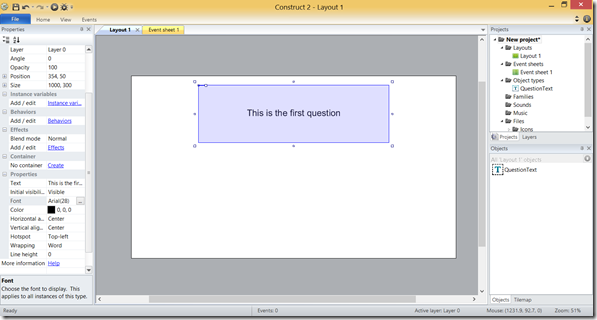
Since this is our questions text box, let’s go ahead and move it to the top center of the screen by clicking and dragging. We can also change the size of our object by dragging one of the corners. Alternatively, you can change the size and position by editing the properties on the left. I am going to choose a size of 1000,300 and then a position of 354,50, which should center the object horizontally and put it 50 pixels down from the top of the layout. After you do that, you will notice that you have a very big text box with very small text. Therefore, let’s change the size and give it something to say other than just “text”. In the properties windows near the bottom, you should see “text” and “font”. Go ahead change the “text” to something like “This is the first question”, and then bump up the size to 28 under the font property. If you scroll down just a tad more, you will see Horizontal Alignment and Vertical Alignment. Go ahead choose to center those. You should see something like this now.
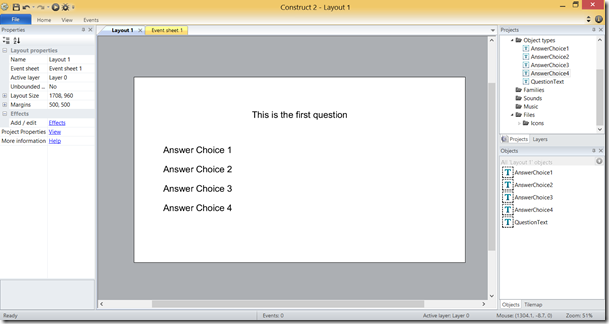
Now that we have question text box arranged, we need to add our answer choice boxes. This process will be very similar to what we just did. We will add text objects and call them “AnswerChoice1”, “AnswerChoice2”… ”AnswerChoice4”. Each one will have a size of 1000,100, and then the corresponding positions will be; (150,350), (150,450), (150,550), (150,650). You can change the font size for each to 28, and the text to be “Answer Choice X”. If you don't remember how to do each of these things you can refer above to how we added the question text object. After you have done all of this, it should look something like this.
We don't have any real questions included yet, but we do have a very simple trivia template. So the next step logically would be to add real questions, right? Right! But we do need to figure out how we are going to get our questions and answer choices. We could just change the “text” properties of the text objects that we have created so far, but that alone would limit us to only one question in our game, which we obviously don't want. We need to be able to store a list of different questions and answers so that we can cycle through them as the user tries to answer them.
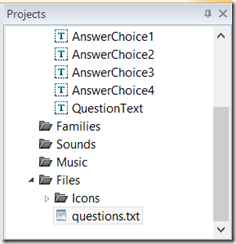
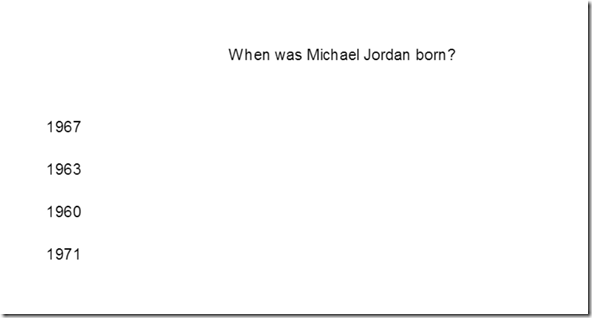
The way we are going to accomplish this is to read the questions from a text file. Sounds simple enough, but it takes a couple of steps. So, first things first, let’s create a text file with a simple question. You can open up any simple text editor like Wordpad. Since I am a basketball fan, I am going to keep this example basketball related. So, go ahead and type in the following, “When was Michael Jordan born?”, and then save the file as “questions.txt”. Now, we need to include that file in our Construct 2 project, so go to the project pane on the right, right click on files, and then click import files to browse to your questions file. Your file should show up like below.
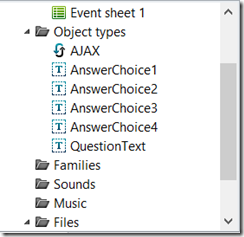
We have created our file and added it to our project, but we need to now read from it. For that, we are going to use the AJAX object, which is used to make requests such as reading files. To add the AJAX object, double click in our your layout again, and then choose to add the AJAX object. You wont need to give it a name, but it should then pop up on the right in your project pane under “object types”.
We now need to move over to our Event Sheet 1, where will add the logic to read our file using the AJAX object. Once you open up your event sheet, you will see a grayed out button in the top left that says “Add Event”. Before we start, let me take a second to explain how the logic in Construct 2 works. Very simply, your logic is two-fold, using events and actions. When an event occurs you will then execute a number of actions. For instance, here we want to add the “ on start of layout” event, and then a corresponding action to read our file. This means that when our layout is started (when the game starts) we want to then read the text file. Make sense?
Let’s try to do this. First click “add event”. You will then be able to choose from either “system” or all of the other objects that we have created. Each different object has its own corresponding events. However, here we just want to use “System”. Then we will have a list of events to choose from, but again, I use the search box to start typing “on start” , and then the event that we are looking for will show up for us as shown below.
Press done and then our event is added, and will look like this.
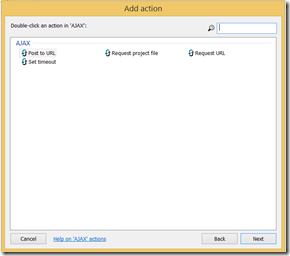
Notice now that we have an “Add Action” button next to the event that we just created. Go ahead and click “Add Action”, but instead of selecting system again, go ahead and choose the AJAX object, then select “Request Project File”. You will then be prompted for a tag and to choose a file. The file part is easy, as we want to choose our questions.txt, but what is the tag? Go ahead and fill it in as “Reading questions”, and I’ll explain in a second.
Press “done”, and you should have the event and action as below.
Now, back to the tag, but first, you might be wondering where the data from the file that we are trying to read is stored. We made the request but then how do we get the response? Well, the AJAX object will actually trigger an event when it is finished making the request. So, we need to add that event, and then add corresponding actions to do something with the data, which is stored in “AJAX.LastData” ( we will see this in a second). So, click add event, then choose the AJAX object, then choose “on completed”. It will then ask you for a tag, and we want to use the same tag we used earlier, “Reading questions”.
Now, let’s consider if we had made multiple requests with the AJAX object, how would we know which data comes from which request? This is why we use the tag here to say that I am looking for the response from the request that matches the tag, “Reading questions”.
Lastly, we need to add an action to handle the data that we get back when that “on completed” event is triggered. What we will do is set the text property for our question text object to that data. Click “add event”, then select your QuestionText object, and then “Set Text”. It will ask you what text to use, and use AJAX.LastData (no quotes), then click done. The AJAX.LastData represents the data that we retrieved from the questions file. When you finish your action, your event sheet should look like this.
Now, let’s go ahead and run our game by clicking either F5 or the play button at the top. It should open up a browser (Construct 2 creates games with HTML/JavaScript), and show this.
We now have read our question in from the text file, but what about the answer choices? Well, first go ahead and open your questions.txt file by double clicking it in the project pane, and edit it so that it looks like this.
Now we have four answer choices, 1967,1963,1960,1971, that we need to read in as well. You might also notice that each line ends with a semicolon. Why is that? I am using the semicolon here to separate the questions and answer choices from each other. This basically allows us to read in this data as 5 different parts separated by semicolons, the first part is the question, the second is the second answer choice, etc. Let’s take a look at this in action.
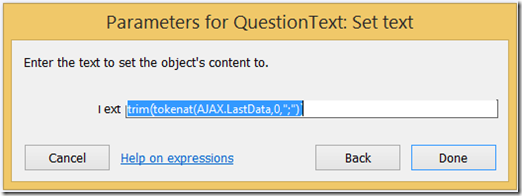
Now that we have our answer choices included in our questions file, instead of assigning the entire data string returned from the AJAX object to our question text object, we only want to use the first part as explained above. To accomplish this, we are going to use the tokenat method. To use this method, we need to tell it which data string to look at, which index of the string we want, and what the separator is. In this case, we are using AJAX.LastData as our data string, 0 for the index (The first part is the 0th index the second is the 1st index, etc.), and the separator is the semicolon that I mentioned above. We also need to do one other thing here, and that is to trim all of the whitespace (spaces, tabs, etc.) out of the response by using the trim function. So the final thing that we will be using as the text for our question text object will look like this
trim(tokenat(AJAX.LastData,0,";"))
Make sure that you have copied this exactly. Now, we need to do a very similar thing for each of different answer choice text objects. The first answer choice will get the second part of the data string (index 1), the second answer choices gets the third part, and so on. Therefore, we will add an action for each of the four different choices in which we set their text to the corresponding part of the data string. Once you have all four answer choices added, it should look like this.
Now, if you run your game again, you should see the question and answer choices from your text file displayed like below!
Lastly, here is a link to the project file for this template in case you missed a step or got lost. You can find it here
Part 1 > Part 2 > Part 3 > Part 4
Comments
Anonymous
July 24, 2014
The comment has been removedAnonymous
July 29, 2014
Hola Kelo, mucho gusto! Si, tambien hablo espanol, pero no tengo mucha experiencia en hablar de conceptos tecnicos. Ahora, estoy en Seattle por una conferencia, sii tienes preguntas, mandame un email, jaquick@microsoft.com. Gracias!!Anonymous
August 31, 2014
Yo me pregunto si sería posible hacer lo mismo con un xml. gracias por el tutorialAnonymous
August 31, 2014
Lauranc, tu puedes usar qualquier formato que desees, pero tenga en cuenta, hay que analizar el archivo manualmente. Mi recomendaccion es que uses el formato que a ti te gusta mas.Anonymous
May 22, 2015
Can I use html tag like Bold or Italic on xml text?

