Tutorial: Entrar e sair de um SPA React
Este tutorial é a parte final de uma série que demonstra a criação de um aplicativo de página única (SPA) React e prepará-lo para autenticação usando a plataforma de identidade da Microsoft. Na parte 2 desta série, você adicionou componentes funcionais a um SPA React e criou uma interface do usuário responsiva. Esta etapa final mostra como testar a funcionalidade de entrada e saída em seu aplicativo.
Neste tutorial, você;
- Adicionar código ao arquivo claimUtils.js para criar a tabela de declarações
- Entrar e sair do aplicativo
- Exibir as declarações retornadas do token de ID
Pré-requisitos
- Conclusão dos pré-requisitos e etapas em Tutorial: Criar componentes para iniciar sessão e terminar sessão numa aplicação de página única do React.
Adicionar código ao arquivo claimUtils.js (opcional)
Para adicionar o recurso de uma tabela que pode exibir declarações vindas do ID token, pode-se adicionar código ao arquivo claimUtils.js. Esse trecho de código preencherá a tabela de declarações com a descrição apropriada e o valor correspondente.
- Abra utils/claimUtils.js e adicione o seguinte trecho de código:
export const createClaimsTable = (claims) => {
    let claimsObj = {};
    let index = 0;

    Object.keys(claims).forEach((key) => {
        if (typeof claims[key] !== 'string' && typeof claims[key] !== 'number') return;
        switch (key) {
            case 'aud':
                populateClaim(
                    key,
                    claims[key],
                    "Identifies the intended recipient of the token. In ID tokens, the audience is your app's Application ID, assigned to your app in the Microsoft Entra admin center.",
                    index,
                    claimsObj
                );
                index++;
                break;
            case 'iss':
                populateClaim(
                    key,
                    claims[key],
                    'Identifies the issuer, or authorization server that constructs and returns the token. It also identifies the external tenant for which the user was authenticated. If the token was issued by the v2.0 endpoint, the URI will end in /v2.0. The GUID that indicates that the user is a consumer user from a Microsoft account is 9188040d-6c67-4c5b-b112-36a304b66dad.',
                    index,
                    claimsObj
                );
                index++;
                break;
            case 'iat':
                populateClaim(
                    key,
                    changeDateFormat(claims[key]),
                    'Issued At indicates when the authentication for this token occurred.',
                    index,
                    claimsObj
                );
                index++;
                break;
            case 'nbf':
                populateClaim(
                    key,
                    changeDateFormat(claims[key]),
                    'The nbf (not before) claim identifies the time (as UNIX timestamp) before which the JWT must not be accepted for processing.',
                    index,
                    claimsObj
                );
                index++;
                break;
            case 'exp':
                populateClaim(
                    key,
                    changeDateFormat(claims[key]),
                    "The exp (expiration time) claim identifies the expiration time (as UNIX timestamp) on or after which the JWT must not be accepted for processing. It's important to note that in certain circumstances, a resource may reject the token before this time. For example, if a change in authentication is required or a token revocation has been detected.",
                    index,
                    claimsObj
                );
                index++;
                break;
            case 'name':
                populateClaim(
                    key,
                    claims[key],
                    "The name claim provides a human-readable value that identifies the subject of the token. The value isn't guaranteed to be unique, it can be changed, and it's designed to be used only for display purposes. The profile scope is required to receive this claim.",
                    index,
                    claimsObj
                );
                index++;
                break;
            case 'preferred_username':
                populateClaim(
                    key,
                    claims[key],
                    'The primary username that represents the user. It could be an email address, phone number, or a generic username without a specified format. Its value is mutable and might change over time. Since it is mutable, this value must not be used to make authorization decisions. It can be used for username hints, however, and in human-readable UI as a username. The profile scope is required in order to receive this claim.',
                    index,
                    claimsObj
                );
                index++;
                break;
            case 'nonce':
                populateClaim(
                    key,
                    claims[key],
                    'The nonce matches the parameter included in the original /authorize request to the IDP. If it does not match, your application should reject the token.',
                    index,
                    claimsObj
                );
                index++;
                break;
            case 'oid':
                populateClaim(
                    key,
                    claims[key],
                    'The oid (user’s object id) is the only claim that should be used to uniquely identify a user in an external tenant. The token might have one or more of the following claim, that might seem like a unique identifier, but is not and should not be used as such.',
                    index,
                    claimsObj
                );
                index++;
                break;
            case 'tid':
                populateClaim(
                    key,
                    claims[key],
                    'The tenant ID. You will use this claim to ensure that only users from the current external tenant can access this app.',
                    index,
                    claimsObj
                );
                index++;
                break;
            case 'upn':
                populateClaim(
                    key,
                    claims[key],
                    '(user principal name) – might be unique amongst the active set of users in a tenant but tend to get reassigned to new employees as employees leave the organization and others take their place or might change to reflect a personal change like marriage.',
                    index,
                    claimsObj
                );
                index++;
                break;
            case 'email':
                populateClaim(
                    key,
                    claims[key],
                    'Email might be unique amongst the active set of users in a tenant but tend to get reassigned to new employees as employees leave the organization and others take their place.',
                    index,
                    claimsObj
                );
                index++;
                break;
            case 'acct':
                populateClaim(
                    key,
                    claims[key],
                    'Available as an optional claim, it lets you know what the type of user (homed, guest) is. For example, for an individual’s access to their data you might not care for this claim, but you would use this along with tenant id (tid) to control access to say a company-wide dashboard to just employees (homed users) and not contractors (guest users).',
                    index,
                    claimsObj
                );
                index++;
                break;
            case 'sid':
                populateClaim(key, claims[key], 'Session ID, used for per-session user sign-out.', index, claimsObj);
                index++;
                break;
            case 'sub':
                populateClaim(
                    key,
                    claims[key],
                    'The sub claim is a pairwise identifier - it is unique to a particular application ID. If a single user signs into two different apps using two different client IDs, those apps will receive two different values for the subject claim.',
                    index,
                    claimsObj
                );
                index++;
                break;
            case 'ver':
                populateClaim(
                    key,
                    claims[key],
                    'Version of the token issued by the Microsoft identity platform',
                    index,
                    claimsObj
                );
                index++;
                break;
            case 'uti':
            case 'rh':
                index++;
                break;
            case '_claim_names':
            case '_claim_sources':
            default:
                populateClaim(key, claims[key], '', index, claimsObj);
                index++;
        }
    });

    return claimsObj;
};

/**
 * Populates claim, description, and value into an claimsObject
 * @param {String} claim
 * @param {String} value
 * @param {String} description
 * @param {Number} index
 * @param {Object} claimsObject
 */
const populateClaim = (claim, value, description, index, claimsObject) => {
    let claimsArray = [];
    claimsArray[0] = claim;
    claimsArray[1] = value;
    claimsArray[2] = description;
    claimsObject[index] = claimsArray;
};

/**
 * Transforms Unix timestamp to date and returns a string value of that date
 * @param {String} date Unix timestamp
 * @returns
 */
const changeDateFormat = (date) => {
    let dateObj = new Date(date * 1000);
    return `${date} - [${dateObj.toString()}]`;
};
Execute o seu projeto e inicie sessão
Agora que todos os trechos de código necessários foram adicionados, o aplicativo pode ser chamado e testado em um navegador da web.
Abra um novo terminal e execute o seguinte comando para iniciar o servidor web expresso.
npm startCopie o URL
httpque aparece no terminal, por exemplo,http://localhost:3000e cole-o em um navegador. Recomendamos o uso de uma sessão privada ou anônima do navegador.Inicie sessão com uma conta registada no locatário.
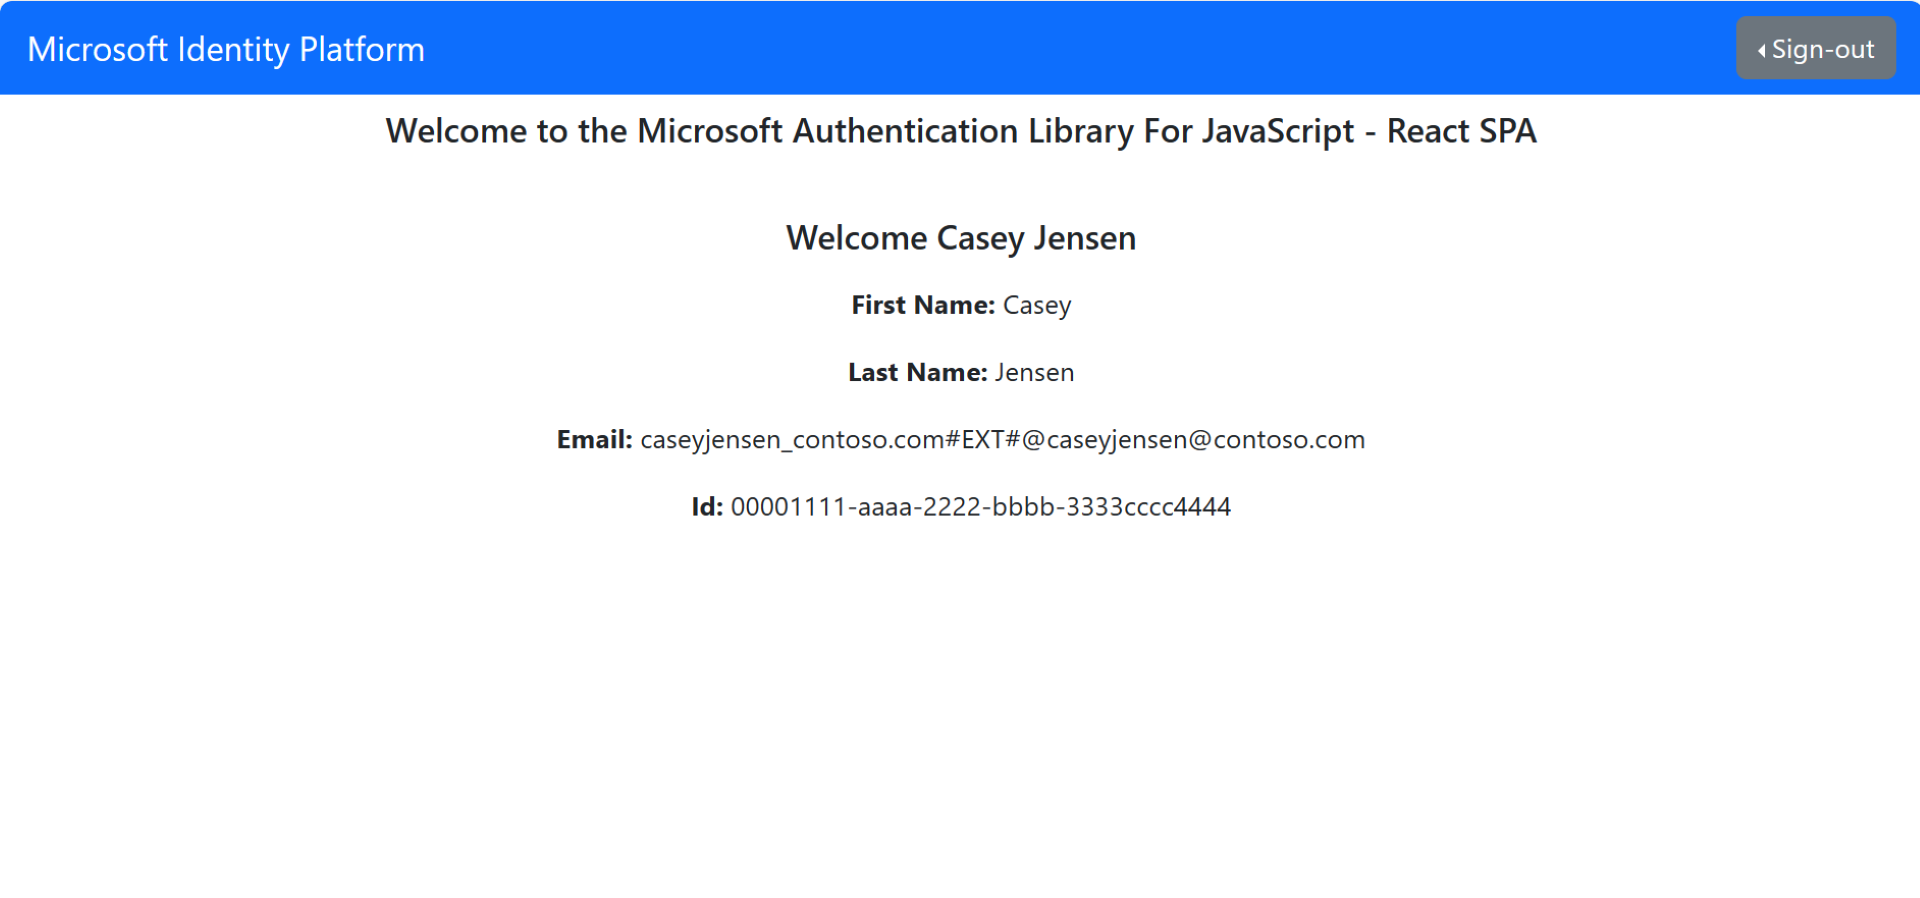
Uma interface semelhante à captura de tela a seguir é exibida, indicando que você entrou no aplicativo. Se você tiver adicionado a tabela de declarações, poderá exibir as declarações retornadas do token de ID.

Sair do aplicativo
- Encontre o botão Sair na página e selecione-o.
- Você será solicitado a escolher uma conta da qual sair. Selecione a conta que utilizou para iniciar sessão.
É apresentada uma mensagem a indicar que terminou sessão. Agora você pode fechar a janela do navegador.
Conteúdo relacionado
- Guia de início rápido: proteja uma API Web ASP.NET Core com a plataforma de identidade da Microsoft.
- Saiba mais criando um SPA React para que os utilizadores iniciem sessão na seguinte série de tutoriais dividida em várias partes.
- Ativar redefinição de senha.
- Personalize a marca padrão.
- Configurar o início de sessão com o Google.