Exibir informações do recurso
Observação
Desativação do SDK do Android do Azure Mapas
O SDK Nativo do Azure Mapas para Android já foi preterido e será desativado em 31/03/25. Para evitar interrupções de serviço, migre para o SDK da Web do Azure Mapas até 31/3/25. Para obter mais informações, confira O guia de migração do SDK do Android do Azure Mapas.
Os dados espaciais costumam ser representados usando pontos, linhas e polígonos. Esses dados geralmente têm informações de metadados a eles associadas. Por exemplo, um ponto pode representar a localização de um restaurante, e os metadados sobre esse restaurante podem ser nome, endereço e tipo de comida servida. Esses metadados podem ser adicionados como propriedades de um Feature (recurso) GeoJSON. O código a seguir cria um recurso de ponto simples com uma propriedade title que tem um valor de "Olá, Mundo!"
//Create a data source and add it to the map.
DataSource source = new DataSource();
map.sources.add(source);

//Create a point feature.
Feature feature = Feature.fromGeometry(Point.fromLngLat(-122.33, 47.64));

//Add a property to the feature.
feature.addStringProperty("title", "Hello World!");

//Create a point feature, pass in the metadata properties, and add it to the data source.
source.add(feature);
//Create a data source and add it to the map.
val source = DataSource()
map.sources.add(source)

//Create a point feature.
val feature = Feature.fromGeometry(Point.fromLngLat(-122.33, 47.64))

//Add a property to the feature.
feature.addStringProperty("title", "Hello World!")

//Create a point feature, pass in the metadata properties, and add it to the data source.
source.add(feature)
Para obter mais informações sobre como criar e adicionar dados ao mapa, confira Criar uma fonte de dados.
Quando um usuário interage com um recurso no mapa, os eventos podem ser usados para reagir a essas ações. Um cenário comum é exibir uma mensagem formada pelas propriedades de metadados de um recurso com o qual o usuário interagiu. O evento OnFeatureClick é o principal evento usado para detectar que o usuário tocou em um recurso no mapa. Há, também, um evento OnLongFeatureClick. Quando o evento OnFeatureClick for adicionado ao mapa, ele poderá ser limitado a uma única camada passando a ID de uma camada para limitá-la. Se nenhuma ID de camada for passada, tocar em qualquer recurso no mapa acionará esse evento, seja qual for a camada em que ele estiver. O código a seguir cria uma camada de símbolo para renderizar dados de ponto no mapa e, em seguida, adiciona um eventoOnFeatureClick e o limita a essa camada de símbolo.
//Create a symbol and add it to the map.
SymbolLayer layer = new SymbolLayer(source);
map.layers.add(layer);

//Add a feature click event to the map.
map.events.add((OnFeatureClick) (features) -> {
    //Retrieve the title property of the feature as a string.
    String msg = features.get(0).getStringProperty("title");

    //Do something with the message.

    //Return a boolean indicating if event should be consumed or continue bubble up.
    return false;
}, layer.getId());    //Limit this event to the symbol layer.
//Create a symbol and add it to the map.
val layer = SymbolLayer(source)
map.layers.add(layer)

//Add a feature click event to the map.
map.events.add(OnFeatureClick { features: List<Feature> ->
    //Retrieve the title property of the feature as a string.
    val msg = features[0].getStringProperty("title")

    //Do something with the message.

    //Return a boolean indicating if event should be consumed or continue bubble up.
    return false
}, layer.getId()) //Limit this event to the symbol layer.
Exibir uma mensagem do sistema
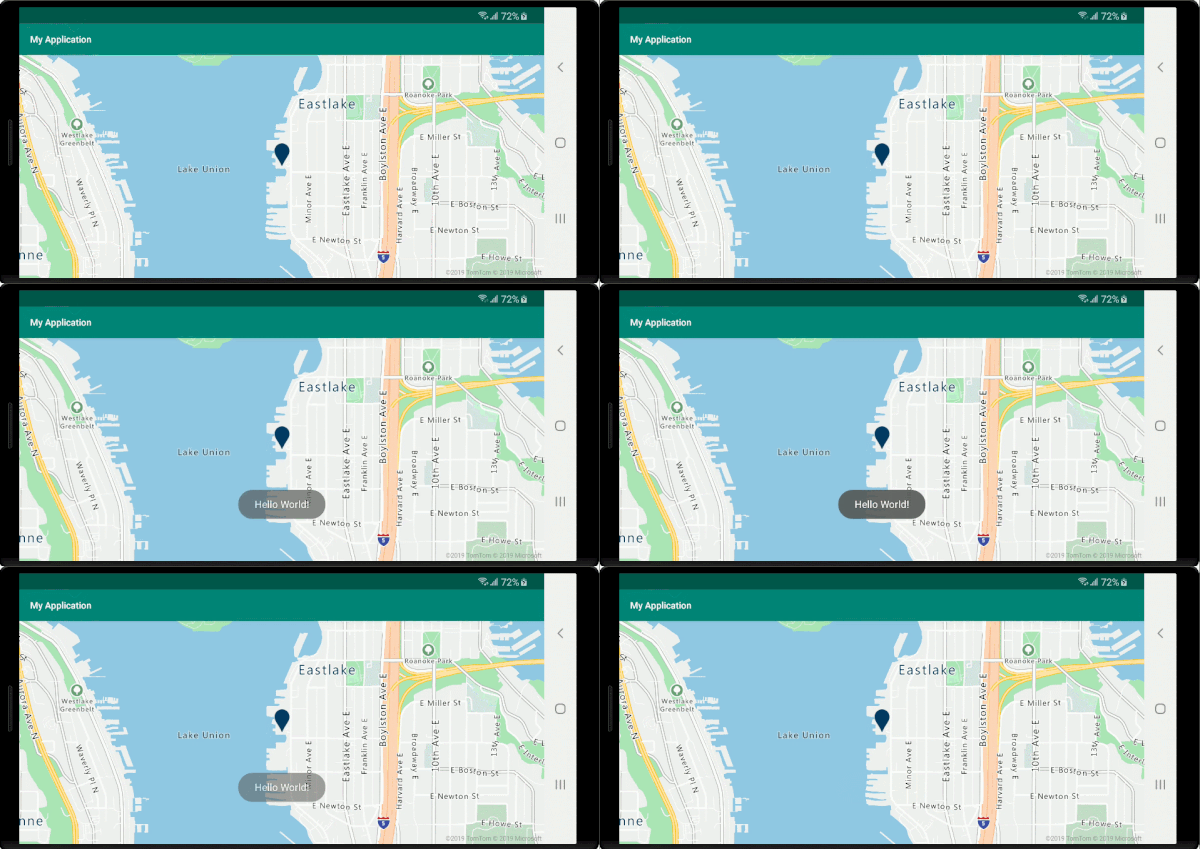
Uma mensagem do sistema é uma das maneiras mais fáceis de exibir informações para o usuário e está disponível em todas as versões do Android. Ela não dá suporte a nenhum tipo de entrada do usuário, e é exibida apenas por um curto período de tempo. Se quiser que o usuário saiba rapidamente algo sobre o que ele tocou, uma mensagem do sistema poderá ser uma boa opção. O código a seguir mostra como uma mensagem do sistema pode ser usada com o evento OnFeatureClick.
//Add a feature click event to the map.
map.events.add((OnFeatureClick) (features) -> {
    //Retrieve the title property of the feature as a string.
    String msg = features.get(0).getStringProperty("title");

    //Display a toast message with the title information.
    Toast.makeText(this, msg, Toast.LENGTH_SHORT).show();

    //Return a boolean indicating if event should be consumed or continue bubble up.
    return false;
}, layer.getId());    //Limit this event to the symbol layer.
//Add a feature click event to the map.
map.events.add(OnFeatureClick { features: List<Feature> ->
    //Retrieve the title property of the feature as a string.
    val msg = features[0].getStringProperty("title")

    //Display a toast message with the title information.
    Toast.makeText(this, msg, Toast.LENGTH_SHORT).show()

    //Return a boolean indicating if event should be consumed or continue bubble up.
    return false
}, layer.getId()) //Limit this event to the symbol layer.

Além das mensagens do sistema, há muitas outras maneiras de apresentar as propriedades de metadados de um recurso, tais como:
- O widget Snackbar -
Snackbarsfornece comentários leves sobre uma operação. Ele exibe uma breve mensagem na parte inferior da tela no celular e na parte inferior esquerda em dispositivos maiores. AsSnackbarsaparecem acima de todos os outros elementos na tela. Somente uma pode ser exibida por vez. - Caixas de diálogo - uma caixa de diálogo é uma pequena janela que solicita que o usuário tome uma decisão ou insira informações adicionais. Caixas de diálogo não preenchem toda a tela, e costumam ser usadas em eventos modais que requerem uma ação do usuário antes de continuarem.
- Adicione um Fragmento à atividade atual.
- Navegue até outra atividade ou exibição.
Exibir um pop-up
O SDK do Android do Azure Mapas fornece uma classe dePopup que facilita a criação de elementos de anotação da interface do usuário que estão ancorados a uma posição no mapa. No caso dos pop-ups, você precisa passar uma exibição com um layout relativo para a opção content do pop-up. Aqui está um exemplo simples de layout que exibe texto escuro sobre um plano de fundo branco.
<?xml version="1.0" encoding="utf-8"?>
<RelativeLayout xmlns:android="http://schemas.android.com/apk/res/android"
    android:layout_width="match_parent"
    android:orientation="vertical"
    android:background="#ffffff"
    android:layout_margin="8dp"
    android:padding="10dp"

    android:layout_height="match_parent">

    <TextView
        android:id="@+id/message"
        android:layout_width="wrap_content"
        android:text=""
        android:textSize="18dp"
        android:textColor="#222"
        android:layout_height="wrap_content"
        android:width="200dp"/>

</RelativeLayout>
Considerando que o layout acima esteja armazenado em um arquivo chamado popup_text.xml na pasta res -> layout de um aplicativo, o código a seguir cria um pop-up e o adiciona ao mapa. Quando um recurso é clicado, a propriedade title é exibida usando o layout popup_text.xml, com o centro inferior do layout ancorado à posição especificada no mapa.
//Create a popup and add it to the map.
Popup popup = new Popup();
map.popups.add(popup);

map.events.add((OnFeatureClick)(feature) -> {
    //Get the first feature and it's properties.
    Feature f = feature.get(0);
    JsonObject props = f.properties();

    //Retrieve the custom layout for the popup.
    View customView = LayoutInflater.from(this).inflate(R.layout.popup_text, null);

    //Access the text view within the custom view and set the text to the title property of the feature.
    TextView tv = customView.findViewById(R.id.message);
    tv.setText(props.get("title").getAsString());

    //Get the position of the clicked feature.
    Position pos = MapMath.getPosition((Point)cluster.geometry());

    //Set the options on the popup.
    popup.setOptions(
        //Set the popups position.
        position(pos),

        //Set the anchor point of the popup content.
        anchor(AnchorType.BOTTOM),

        //Set the content of the popup.
        content(customView)

        //Optionally, hide the close button of the popup.
        //, closeButton(false)

        //Optionally offset the popup by a specified number of pixels.
        //pixelOffset(new Pixel(10, 10))
    );

    //Open the popup.
    popup.open();

    //Return a boolean indicating if event should be consumed or continue bubble up.
    return false;
});
//Create a popup and add it to the map.
val popup = Popup()
map.popups.add(popup)

map.events.add(OnFeatureClick { feature: List<Feature> ->
    //Get the first feature and it's properties.
    val f = feature[0]
    val props = f.properties()

    //Retrieve the custom layout for the popup.
    val customView: View = LayoutInflater.from(this).inflate(R.layout.popup_text, null)

    //Access the text view within the custom view and set the text to the title property of the feature.
    val tv: TextView = customView.findViewById(R.id.message)
    tv.text = props!!["title"].asString

    //Get the position of the clicked feature.
    val pos = MapMath.getPosition(f.geometry() as Point?);

    //Set the options on the popup.
    popup.setOptions(
        //Set the popups position.
        position(pos),

        //Set the anchor point of the popup content.
        anchor(AnchorType.BOTTOM),

        //Set the content of the popup.
        content(customView)

        //Optionally, hide the close button of the popup.
        //, closeButton(false)

        //Optionally offset the popup by a specified number of pixels.
        //pixelOffset(Pixel(10, 10))
    )

    //Open the popup.
    popup.open()

    //Return a boolean indicating if event should be consumed or continue bubble up.
    false
})
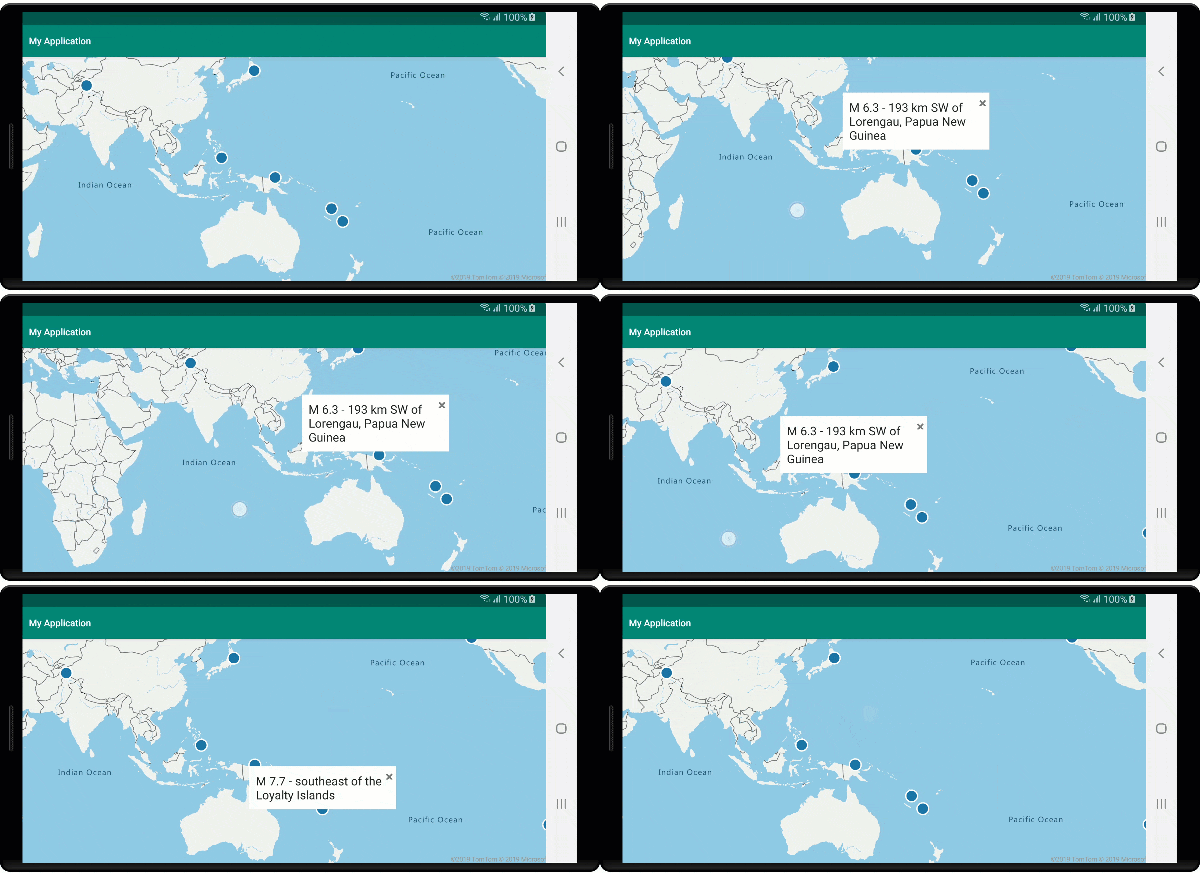
A captura de tela a seguir mostra pop-ups que aparecem quando os recursos são clicados e que ficam ancorados no local já especificado no mapa conforme este se movimenta.

Próximas etapas
Para adicionar mais dados ao seu mapa: