Customize speech models with fine-tuning
With custom speech, you can enhance speech recognition accuracy for your applications by using a custom model for real-time speech to text, speech translation, and batch transcription.
You create a custom speech model by fine-tuning an Azure AI Speech base model with your own data. You can upload your data, test and train a custom model, compare accuracy between models, and deploy a model to a custom endpoint.
This article shows you how to use fine-tuning to create a custom speech model. For more information about custom speech, see the custom speech overview documentation.
Tip
You can bring your custom speech models from Speech Studio to the Azure AI Foundry portal. In Azure AI Foundry, you can pick up where you left off by connecting to your existing Speech resource. For more information about connecting to an existing Speech resource, see Connect to an existing Speech resource.
Start fine-tuning
Custom speech fine-tuning includes models, training and testing datasets, and deployment endpoints. Each project is specific to a locale. For example, you might fine-tune for English in the United States.
In the Azure AI Foundry portal, you can fine-tune some Azure AI services models. For example, you can fine-tune a model for custom speech. Each custom model is specific to a locale. For example, you might fine-tune a model for English in the United States.
Go to your project in the Azure AI Foundry portal. If you need to create a project, see Create an Azure AI Foundry project.
Select Fine-tuning from the left pane.
Select AI Service fine-tuning > + Fine-tune.
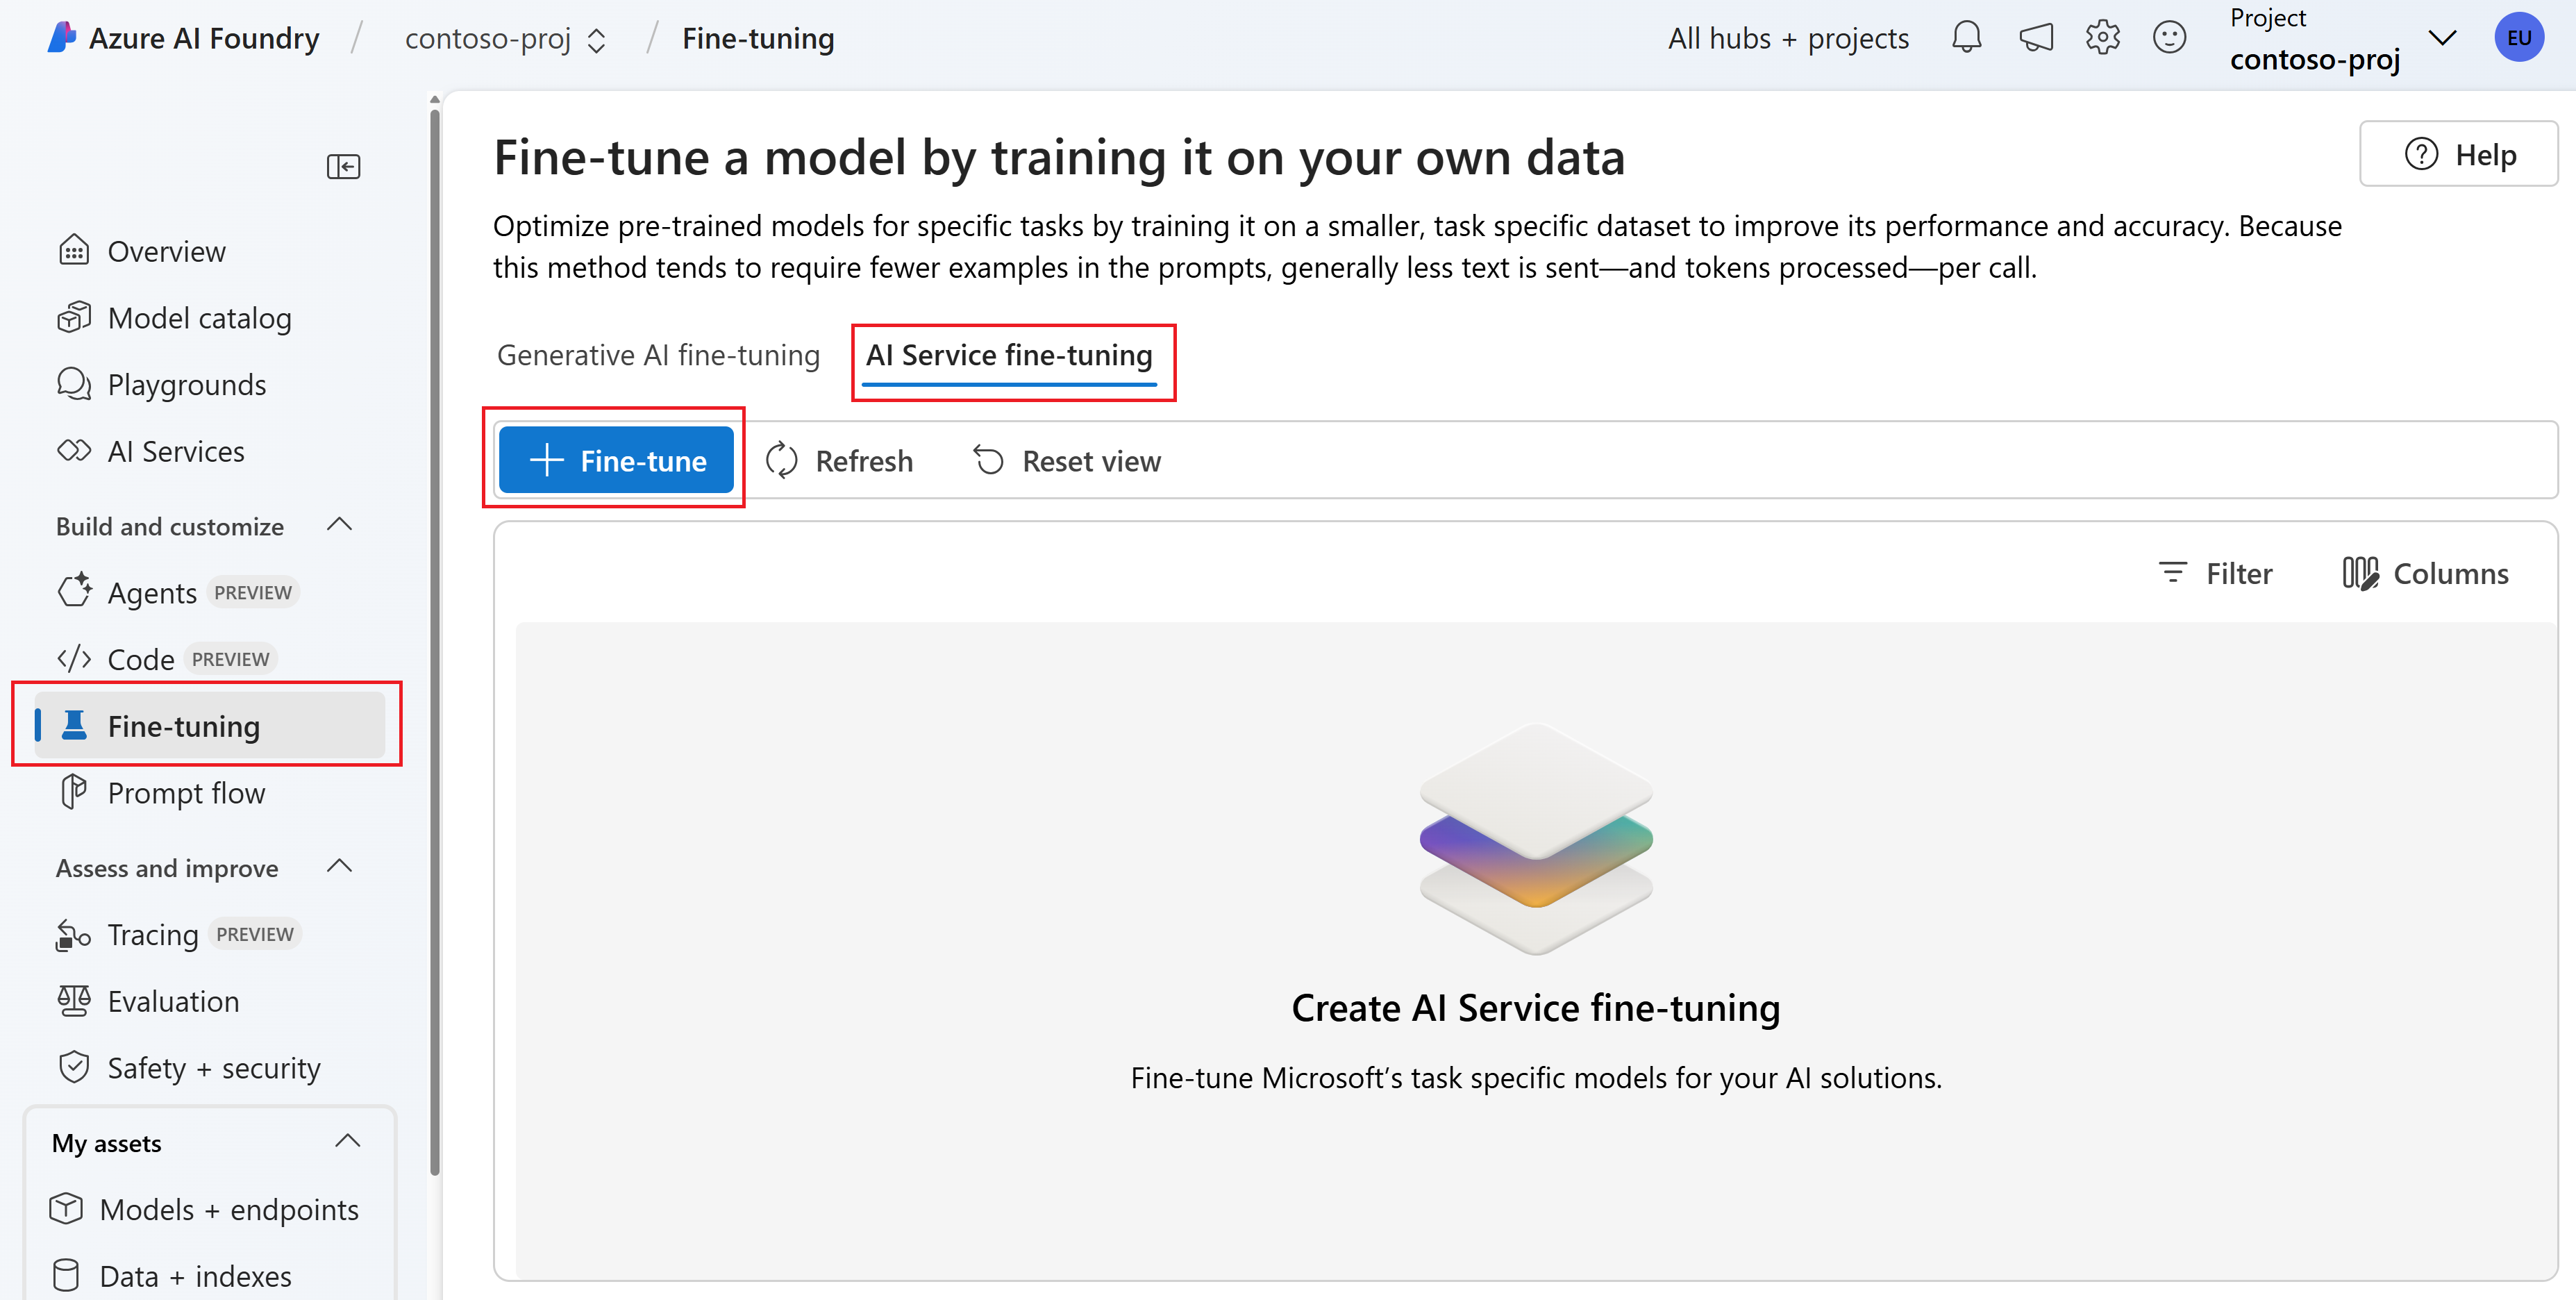
In the wizard, select Speech to text (speech recognition) for custom speech. Then select Next.
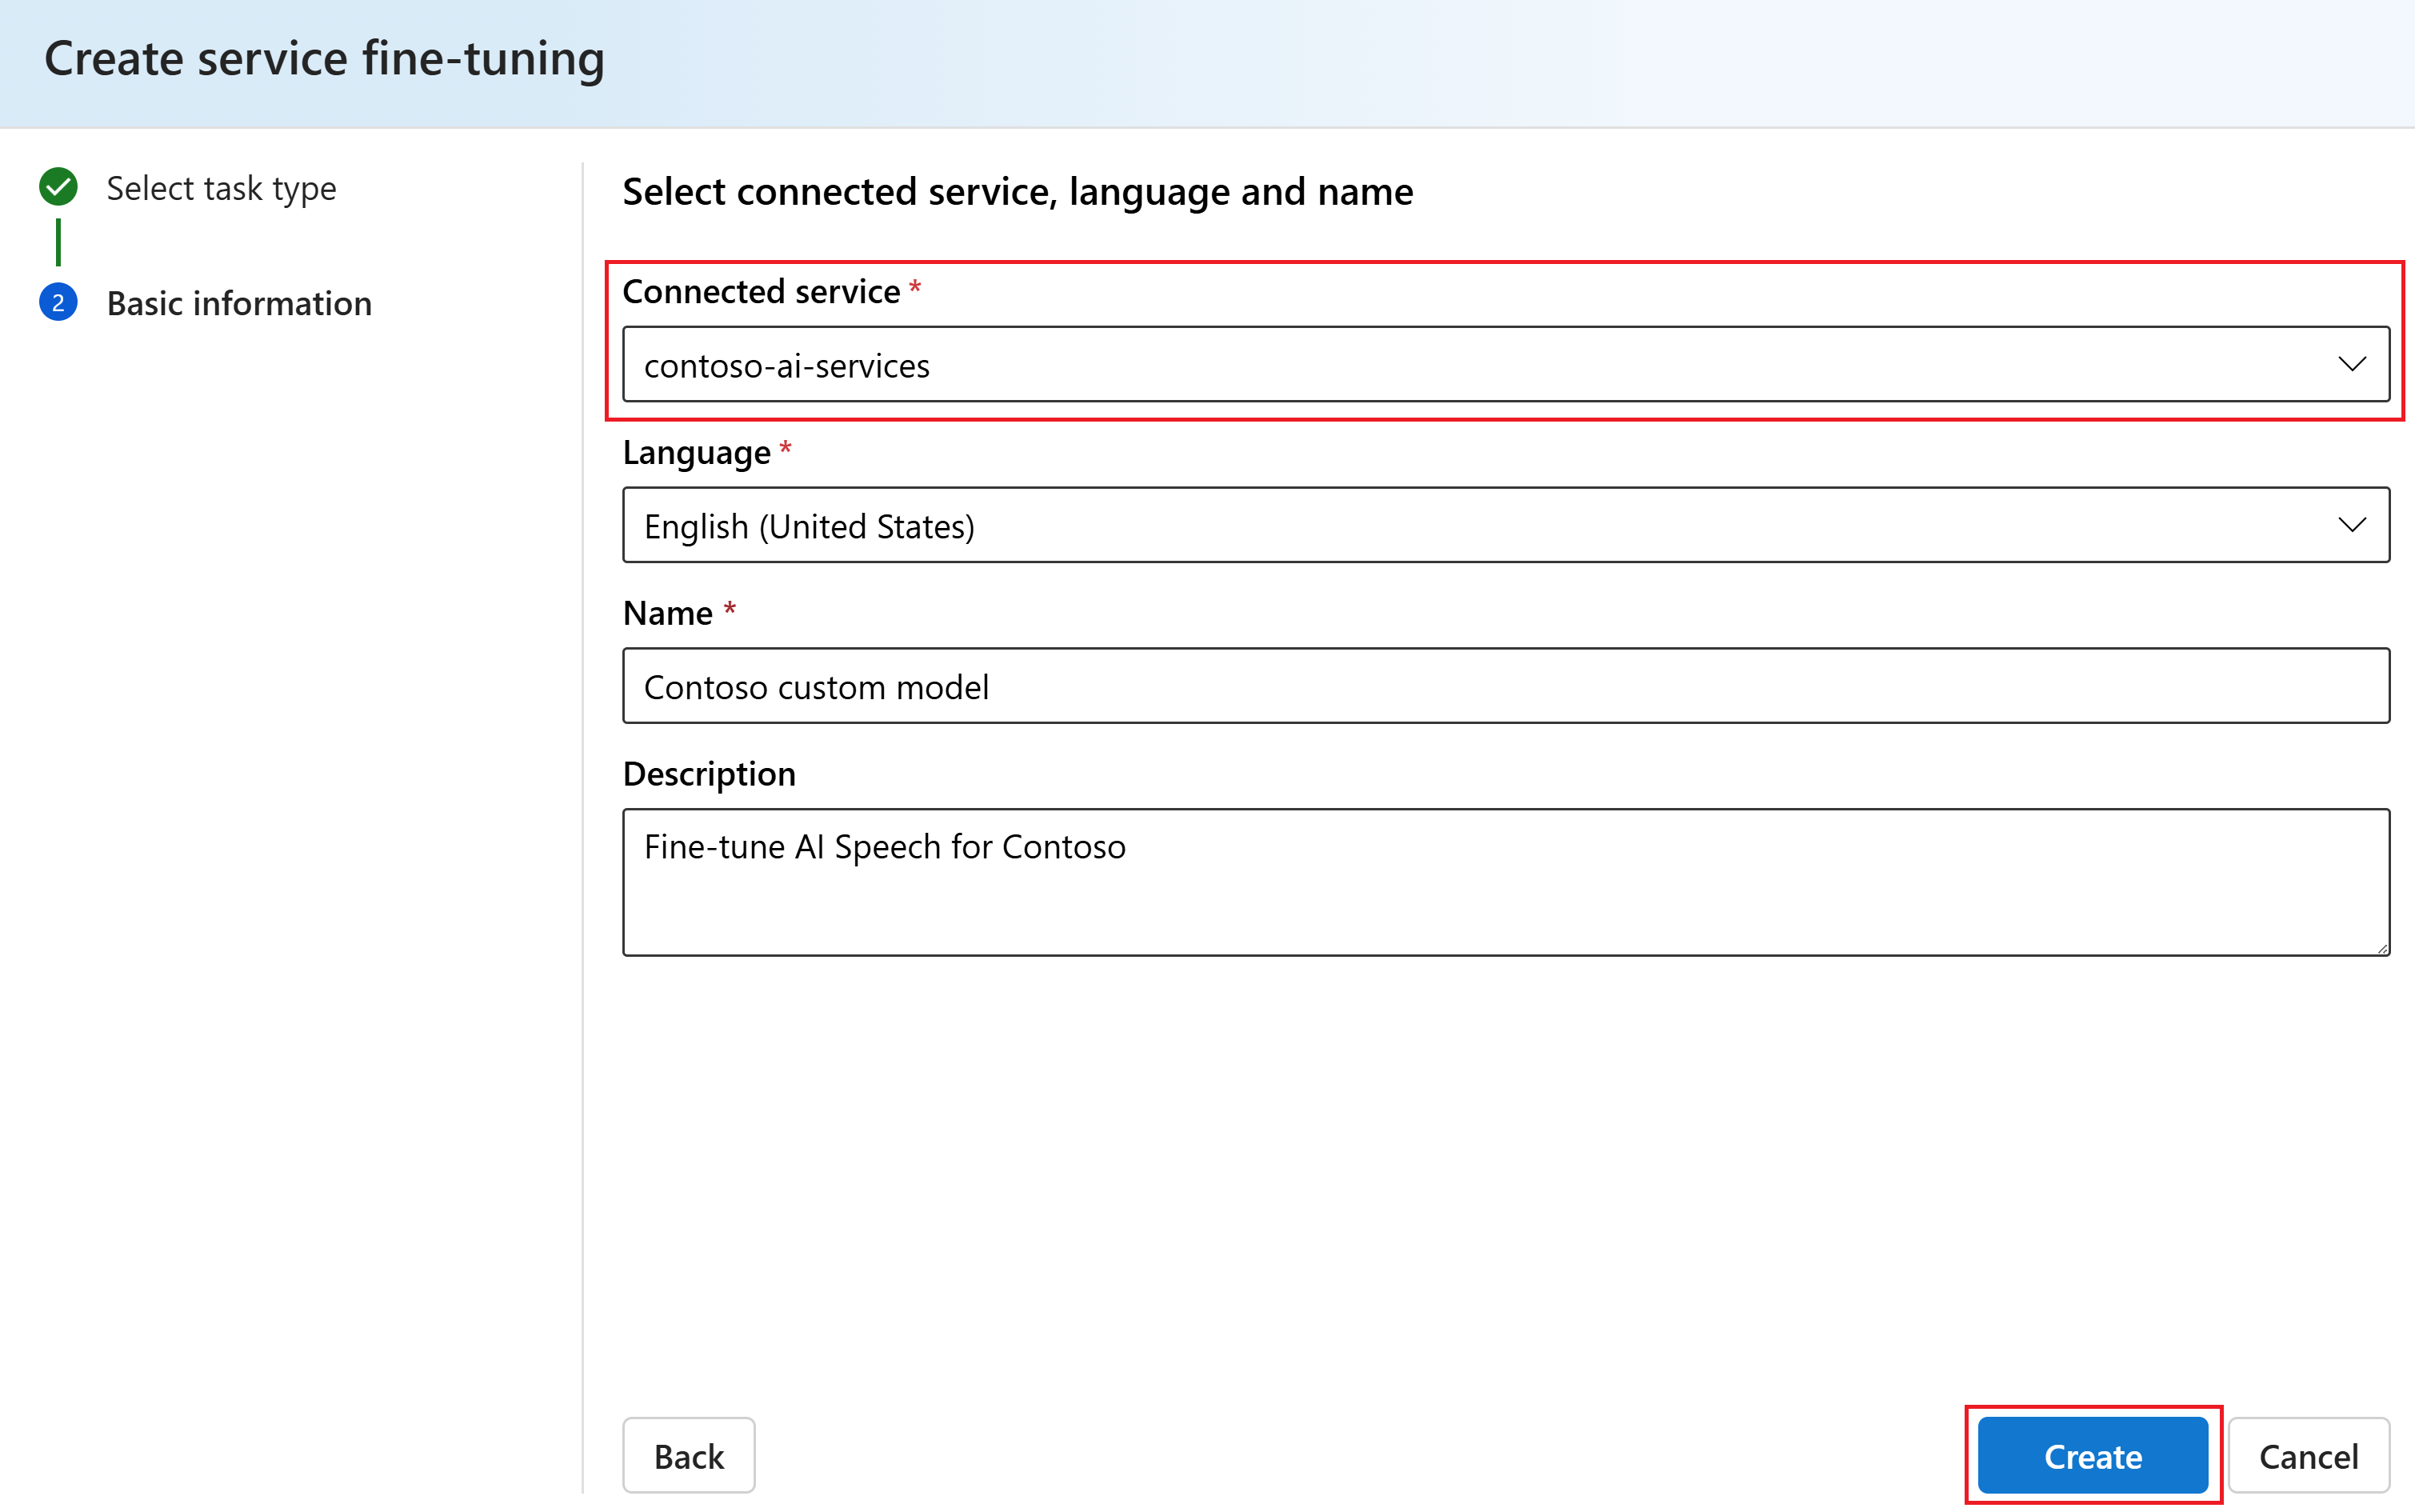
Select the connected service resource that you want to use for fine-tuning.
Important
If you train a custom model with audio data, select a service resource in a region with dedicated hardware for training audio data. See footnotes in the regions table for more information.
You can choose from the following connected resource types:
- AI Service: The Azure AI Services multi-service resource that came with the Azure AI Foundry project.
- Speech Service: An Azure AI Speech resource that was connected after the project was created.
Enter the language, name, and description for the fine-tuning job. Then select Create.


Continue fine-tuning
Go to the Azure AI Speech documentation to learn how to continue fine-tuning your custom speech model:
- Upload training and testing datasets
- Train a model
- Test model quantitatively and test model qualitatively
- Deploy a model
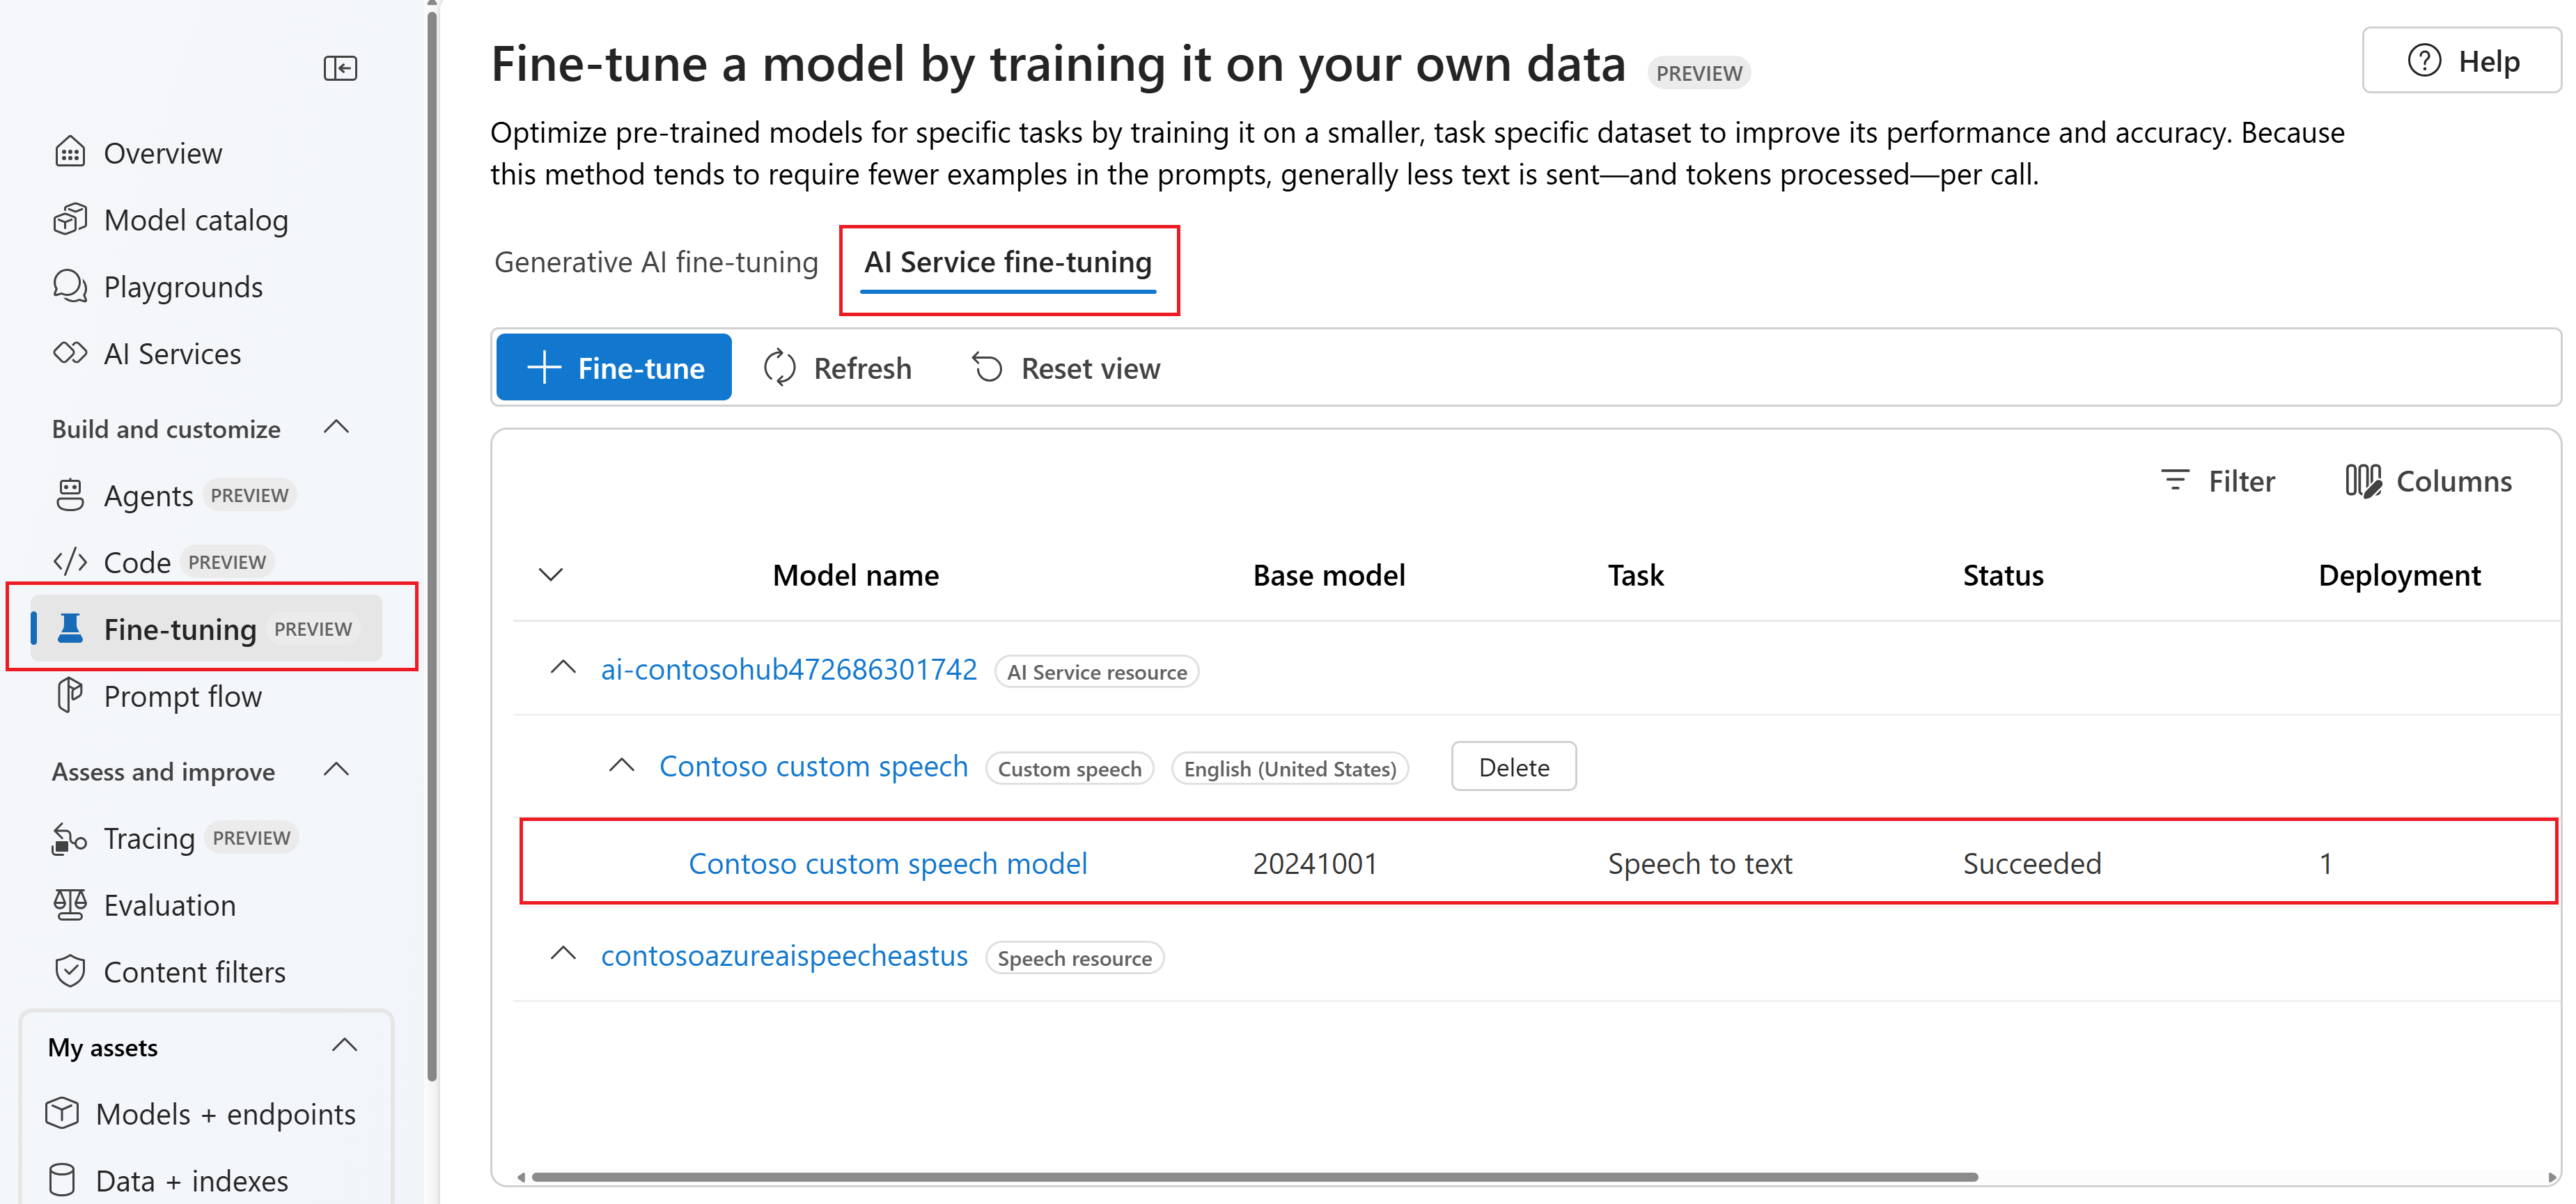
View fine-tuned models
After fine-tuning, you can access your custom speech models and deployments from the Fine-tuning page.
Sign in to the Azure AI Foundry portal.
Select Fine-tuning from the left pane.
Select AI Service fine-tuning.

To create a custom speech project in Speech Studio, follow these steps:
Sign in to the Speech Studio.
Select the subscription and Speech resource to work with.
Important
If you train a custom model with audio data, select a service resource in a region with dedicated hardware for training audio data. See footnotes in the regions table for more information.
Select Custom speech > Create a new project.
Follow the instructions provided by the wizard to create your project.
Select the new project by name or select Go to project. Then you should see these menu items in the left panel: Speech datasets, Train custom models, Test models, and Deploy models.