Create device limit restrictions in Intune
Applies to
- Android
- iOS
- macOS
- Windows 10
- Windows 11
Create a device limit enrollment restriction policy to limit the number of devices a user can enroll in Microsoft Intune. Device limit restrictions work on devices that meet the following criteria:
- Microsoft Intune-managed
- Established contact with Intune within last 90 days
- Not in a registration-pending state for more than 24 hours
- Hasn't failed Apple enrollment
- Hasn't been deleted from Microsoft Intune
- Enrollment type is not in shared mode (check DeviceCountsForDeviceCap for detail)
You can create a new device limit-enrollment restriction policy in the Microsoft Intune admin center or use the default policy that's already available. You can have up to 25 device limit restriction policies.
This article describes how to create and configure a device limit-enrollment restriction policy in the admin center.
Default policy
Microsoft Intune provides one default policy for device limit restrictions that you can edit and customize as needed. Intune applies the default policy to all user and userless enrollments until you assign a higher-priority policy.
Create a device limit restriction
- Sign in to the Microsoft Intune admin center.
- Go to Devices > Enrollment.
- Select the Windows, Apple, or Android tab.
- Select Device limit restriction.
- Choose Create restriction.
- On the Basics page, give the restriction a Name and optional Description.
- Choose Next to go to the Device limit page.
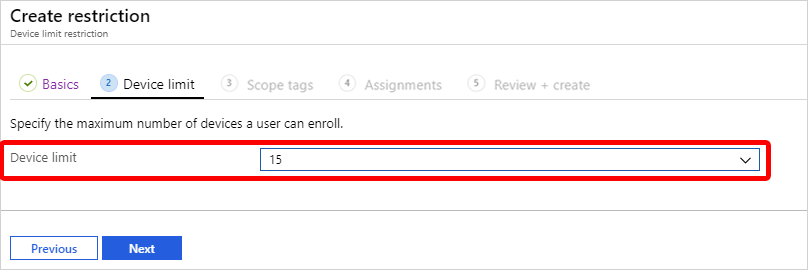
- For Device limit, select the maximum number of devices that a user can enroll.

- Choose Next to go to the Scope tags page.
- On the Scope tags page, optionally add the scope tags you want to apply to this restriction. For more information about scope tags, see Use role-based access control and scope tags for distributed IT.
- Choose Next to go to the Assignments page.
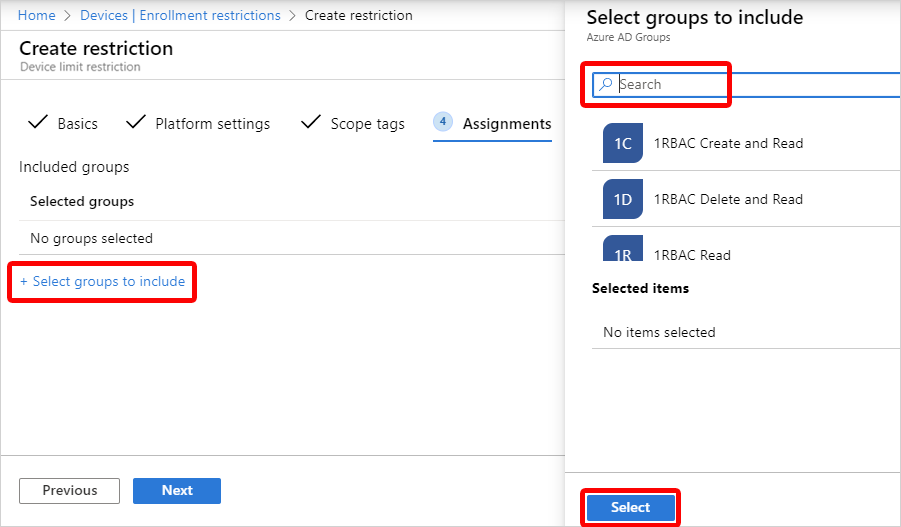
- Choose Select groups to include and then use the search box to find groups that you want to include in this restriction. The restriction applies only to groups to which it's assigned. If you don't assign a restriction to at least one group, it won't have any effect. Then choose Select.

- Select Next to go to the Review + create page.
- Select Create to create the restriction. The new restriction appears in your list of restrictions and is given a higher priority than the default policy. For information about changing the priority level, see Change restriction priority (in this article).
Edit enrollment restrictions
Edits are applied to new enrollments and don't affect devices that are already enrolled.
- Go to Device limit restrictions to see the list of your restrictions.
- Select the name of the restriction you want to change.
- Select Properties.
- Select Edit.
- Make your changes and select Review + save.
- Review your changes and select Save.
Change restriction priority
When a group is assigned multiple restrictions, the priority level determines which policy gets applied. The restriction with highest priority (1 being the highest priority position) is applied and the other restrictions are disregarded. For example:
- Joe belongs to two user groups in Intune: Group A and Group B.
- Group A is assigned a restriction policy. Its priority level is 5.
- Group B is assigned a restriction policy. The priority level is 2.
- Joe is subject only to the priority 2 restrictions.
When you create a restriction, it's added to the list just above the default. You can change the priority of non-default restrictions.
- Go to Device limit restrictions.
- Select Device limit restrictions to bring up the list of your policies.
- Hover over the policy in the Priority column,and then select and drag the priority to the desired position in the list.
Device user experience
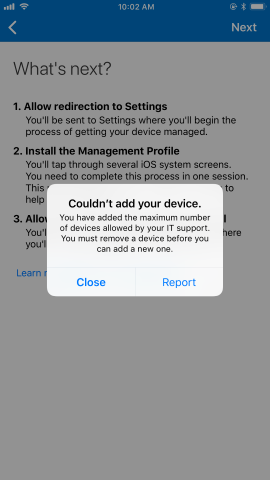
BYOD users who reach their device limit receive a message during enrollment explaining the restriction. To continue enrolling, the device user must unenroll an existing device. Alternatively, as the admin you can increase the device limit in the admin center. For more information about troubleshooting enrollment errors such as this one, see Troubleshoot device enrollment.
