자습서: 채팅 앱에서 파일 첨부 지원 사용
채팅 SDK는 모임 중에 Microsoft Teams와 원활하게 작동합니다. Teams 사용자만 Azure Communication Services 사용자에게 첨부 파일을 보낼 수 있습니다. Azure Communication Services 사용자는 Teams 사용자에게 첨부 파일을 보낼 수 없습니다. 현재 기능은 Teams Interop 채팅을 참조하세요.
파일 첨부 지원 추가
채팅 SDK는 각 첨부 파일에 대해 previewUrl 속성을 제공합니다. 특히 previewUrl은 사용자가 파일 내용을 보고, 파일을 편집하고, 권한이 허용되는 경우 파일을 다운로드할 수 있는 SharePoint의 웹 페이지로 연결합니다.
이 기능과 관련된 일부 제약 조건은 다음과 같습니다.
보낸 사람 테넌트의 Teams 관리자는 이 기능을 완전히 제한하거나 사용하지 않도록 설정하는 정책을 적용할 수 있습니다. 예를 들어 Teams 관리자는 파일 첨부 URL(
previewUrl)에 액세스할 수 없게 만들 수 있는 특정 권한(예:Anyone)을 사용하지 않도록 설정할 수 있습니다.현재는 두 가지 파일 권한만 지원합니다.
Anyone-
People you choose(이메일 주소 포함)
다른 모든 권한(예:
People in your organization)은 지원되지 않음을 Teams 사용자에게 알립니다. Teams 사용자는 Teams 클라이언트에 파일을 업로드한 후 기본 권한이 지원되는지 다시 확인해야 합니다.직접 다운로드 URL(
url)은 지원되지 않습니다.
일반 파일(file 중 AttachmentType 포함) 외에도 채팅 SDK는 image의 AttachmentType 속성도 제공합니다. Azure Communication Services 사용자는 Microsoft Teams 클라이언트가 UI 계층에서 이미지 첨부를 인라인 이미지로 변환하는 동작을 미러링하는 방식으로 이미지를 첨부할 수 있습니다. 자세한 내용은 이미지 첨부 파일 처리를 참조하세요.
Azure Communication Services 사용자는 이 디바이스에서 업로드를 통해 이미지를 추가할 수 있습니다. 그러면 Teams 쪽에서 렌더링되고 Chat SDK는 image과(와) 같은 첨부 파일을 반환합니다.
클라우드 파일 첨부를 통해 업로드된 이미지의 경우 채팅 SDK가 file과 같은 첨부 파일을 반환하도록 이미지는 Teams 쪽에서 일반 파일로 처리됩니다.
또한 Azure Communication Services 사용자는 끌어서 놓기를 사용하거나 첨부 메뉴 명령인 이 디바이스에서 업로드 및 클라우드 파일 첨부를 통해서만 파일을 업로드할 수 있습니다. 포함된 미디어가 있는 특정 유형의 메시지(예: 비디오 클립, 오디오 메시지 및 날씨 카드)는 현재 지원되지 않습니다.
이 자습서는 JavaScript용 Azure Communication Services 채팅 SDK를 사용하여 파일 첨부 지원을 사용하도록 설정하는 방법을 설명합니다.
샘플 코드
GitHub에서 이 자습서의 최종 코드를 찾습니다.
필수 조건
- 빠른 시작 Teams 모임에 채팅 앱 참여를 검토합니다.
- Azure Communication Services 리소스를 만듭니다. 자세한 내용은 Azure Communication Services 리소스 만들기를 참조하세요. 이 자습서에서는 연결 문자열을 기록해야 합니다.
- 비즈니스 계정을 사용하여 Teams 모임을 설정하고 모임 URL을 준비합니다.
- JavaScript용 채팅 SDK(@azure/communication-chat) 1.5.0 이상을 사용합니다. 자세한 내용은 JavaScript용 Azure Communication 채팅 클라이언트 라이브러리를 참조하세요.
목표
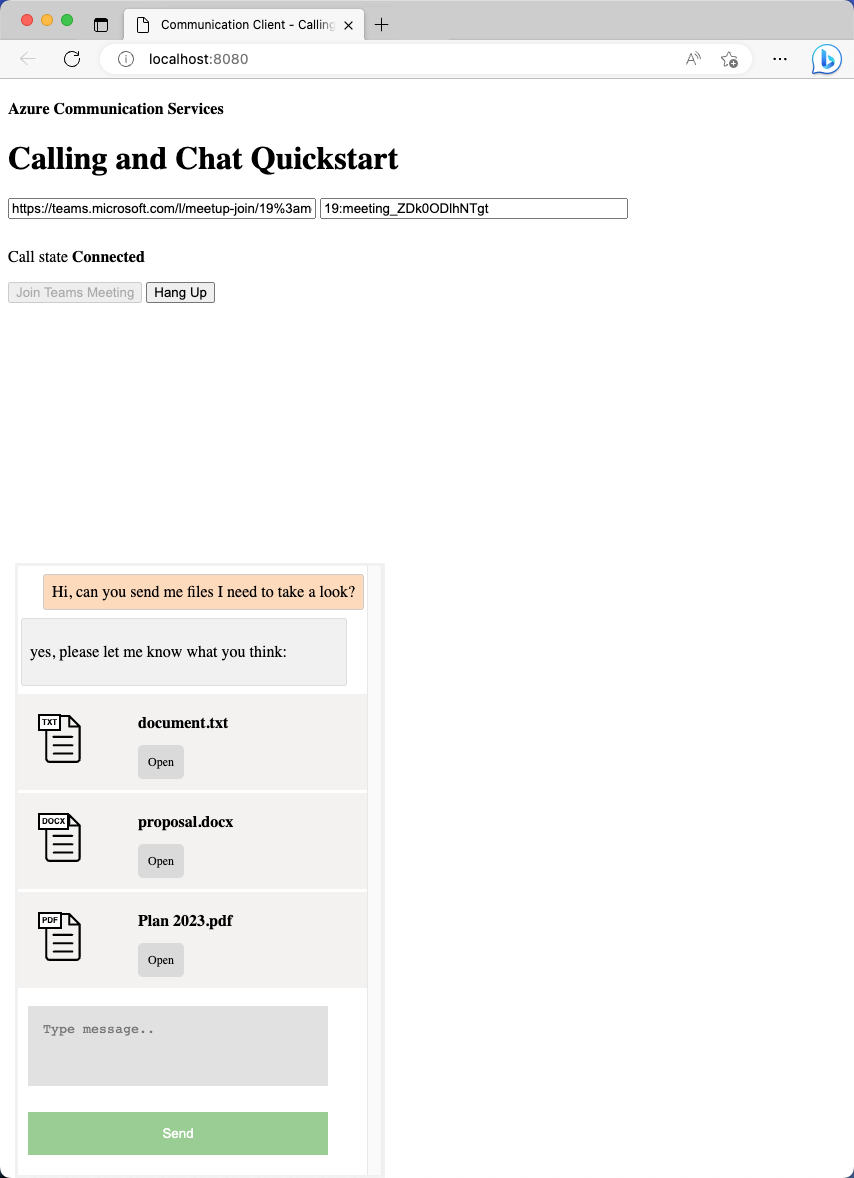
- 메시지 스레드에서 파일 첨부를 렌더링합니다. 각 파일 첨부 카드에는 열기 단추가 있습니다.
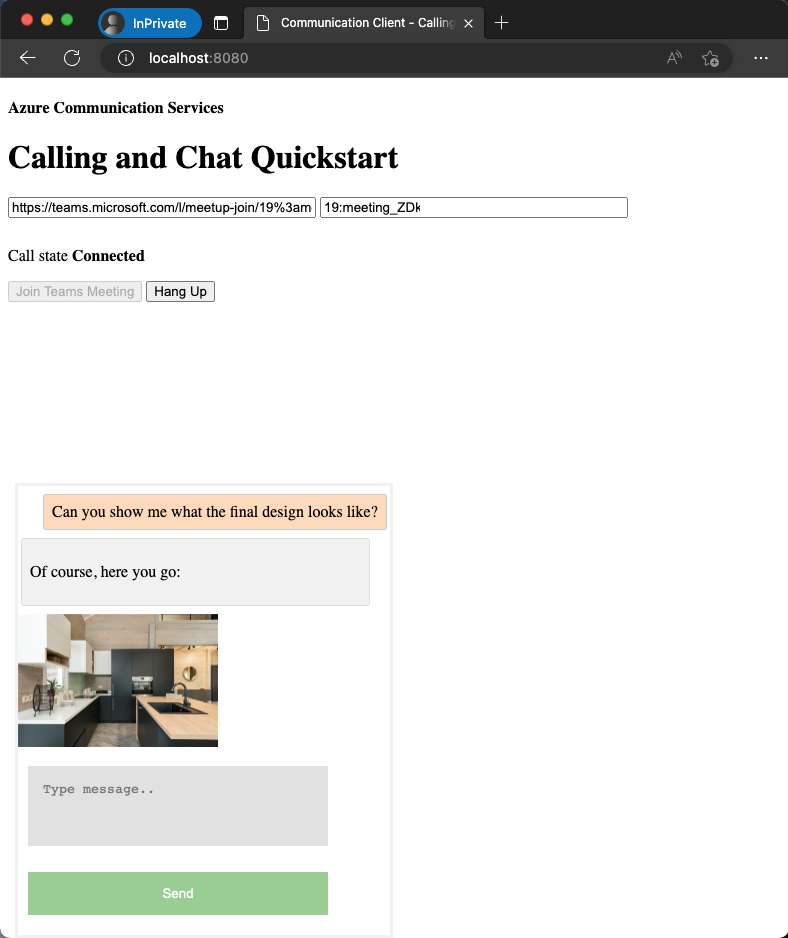
- 이미지 첨부 파일을 인라인 이미지로 렌더링합니다.
첨부 파일 처리
JavaScript용 채팅 SDK는 일반 파일 첨부의 경우 file의 ChatAttachmentType 속성을 반환하고 메시지 삽입 이미지의 경우 image 속성을 반환합니다.
export interface ChatMessageReceivedEvent extends BaseChatMessageEvent {
  /**
   * Content of the message.
   */
  message: string;

  /**
   * Chat message attachment.
   */
  attachments?: ChatAttachment[];

  ...
}

export interface ChatAttachment {
  /** Id of the attachment */
  id: string;
  /** The type of attachment. */
  attachmentType: AttachmentType;
  /** The name of the attachment content. */
  name?: string;
  /** The URL that is used to provide the original size of the inline images */
  url?: string;
  /** The URL that provides the preview of the attachment */
  previewUrl?: string;
}

/** Type of supported attachments. */
export type ChatAttachmentType = "image" | "file" | "unknown";
예를 들어 다음 JSON은 이미지 첨부 파일과 첨부 파일에 대해 ChatAttachment이(가) 어떻게 보이는지 보여줍니다.
"attachments": [
    {
        "id": "08a182fe-0b29-443e-8d7f-8896bc1908a2",
        "attachmentType": "file",
        "name": "business report.pdf",
        "previewUrl": "https://contoso.sharepoint.com/:u:/g/user/h8jTwB0Zl1AY"
    },
    {
        "id": "9d89acb2-c4e4-4cab-b94a-7c12a61afe30",
        "attachmentType": "image",
        "name": "Screenshot.png",
        "url": "https://contoso.communication.azure.com/chat/threads/19:9d89acb29d89acb2@thread.v2/messages/123/images/9d89acb2-c4e4-4cab-b94a-7c12a61afe30/views/original?api-version=2023-11-15-preview",
        "previewUrl": "https://contoso.communication.azure.com/chat/threads/19:9d89acb29d89acb2@thread.v2/messages/123/images/9d89acb2-c4e4-4cab-b94a-7c12a61afe30/views/small?api-version=2023-11-15-preview"
      }
]
이제 빠른 시작: Teams 모임에 채팅 앱 참여에서 만든 이벤트 처리기로 돌아가서 file의 attachmentType 속성을 사용하여 첨부 파일을 처리하는 몇 가지 추가 논리를 추가해 보겠습니다.
chatClient.on("chatMessageReceived", (e) => {
  console.log("Notification chatMessageReceived!");
  // Check whether the notification is intended for the current thread
  if (threadIdInput.value != e.threadId) {
     return;
  }

  if (e.sender.communicationUserId != userId) {
    renderReceivedMessage(e);
  } else {
    renderSentMessage(e.message);
  }
});

async function renderReceivedMessage(event) {
    messages += `<div class="container lighter"> ${event.message} </div>`;
    messagesContainer.innerHTML = messages;

    // Get the list of attachments and calls renderFileAttachments to construct a file attachment card
    var attachmentHtml = event.attachments
        .filter(attachment => attachment.attachmentType === "file")
        .map(attachment => renderFileAttachments(attachment))
        .join('');
    messagesContainer.innerHTML += attachmentHtml;
}

function renderFileAttachments(attachment) {
    var re = /(?:\.([^.]+))?$/;
    var fileExtension = re.exec(attachment.name)[1];
    return '<div class="attachment-container">' +
        '<img class="attachment-icon" alt="attachment file icon" />' +
        '<div>' +
        '<p class="attachment-type">' + fileExtension + '</p>' +
        '<p>' + attachment.name + '</p>' +
        '<a href=' + attachment.previewUrl + ' target="_blank" rel="noreferrer">Open</a>' +
        '</div>' +
        '</div>';
}
첨부 카드용 CSS를 추가했는지 확인합니다.
  /* Let's make the chat popup scrollable */
  .chat-popup {

     ...

     max-height: 650px;
     overflow-y: scroll;
}

 .attachment-container {
     overflow: hidden;
     background: #f3f2f1;
     padding: 20px;
     margin: 0;
     border-radius: 10px;
}
 .attachment-container img {
     width: 50px;
     height: 50px;
     float: left;
     margin: 0;
}
 .attachment-container p {
     font-weight: 700;
     margin: 0 5px 20px 0;
}
 .attachment-container {
     display: grid;
     grid-template-columns: 100px 1fr;
     margin-top: 5px;
}
 .attachment-icon {
     content: url("data:image/svg+xml;base64, ...");
}
 .attachment-container a {
     background-color: #dadada;
     color: black;
     font-size: 12px;
     padding: 10px;
     border: none;
     cursor: pointer;
     border-radius: 5px;
     text-align: center;
     margin-right: 10px;
     text-decoration: none;
     margin-top: 10px;
}
 .attachment-container a:hover {
     background-color: black;
     color: white;
}
 .attachment-type {
     position: absolute;
     color: black;
     border: 2px solid black;
     background-color: white;
     margin-top: 50px;
     font-family: sans-serif;
     font-weight: 400;
     padding: 2px;
     text-transform: uppercase;
     font-size: 8px;
}
이것이 첨부 파일을 처리하는 데 필요한 전부입니다. 다음으로 코드를 실행해 보겠습니다.
코드 실행
webpack의 webpack-dev-server 경우 이 속성을 사용하여 앱을 빌드하고 실행할 수 있습니다. 다음 명령을 실행하여 로컬 웹 서버에서 애플리케이션 호스트를 번들로 묶습니다.
npx webpack-dev-server --entry ./client.js --output bundle.js --debug --devtool inline-source-map
또는
npm start
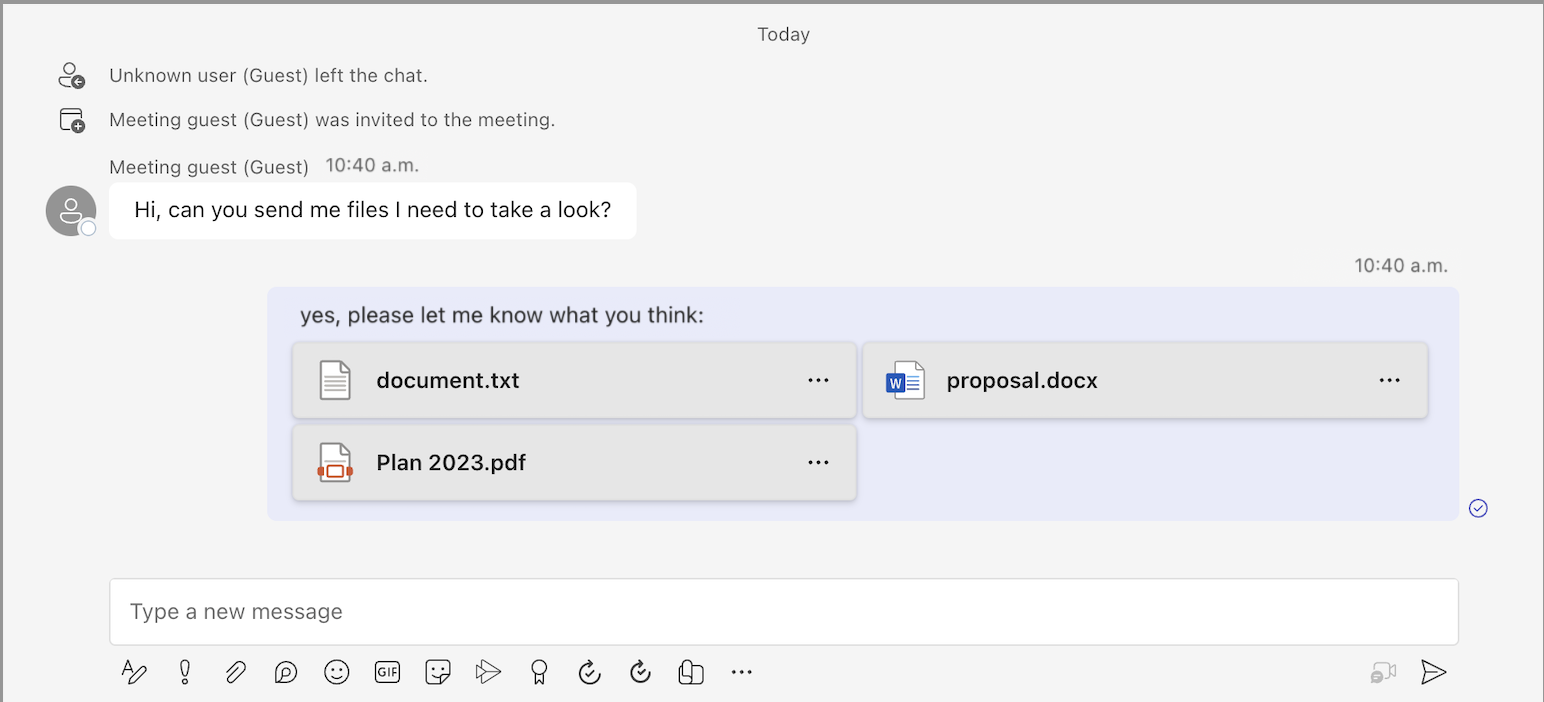
파일 첨부 데모
브라우저를 열고
http://localhost:8080/으로 이동하십시오. 모임 URL 및 스레드 ID를 입력합니다.Teams 클라이언트에서 일부 파일 첨부를 보냅니다.

첨부 파일과 함께 렌더링되는 새 메시지가 표시됩니다.

이미지 첨부 파일을 처리합니다.
이미지 첨부 파일은 표준 file 첨부 파일과 다르게 처리해야 합니다. 이미지 첨부 파일에는 미리 보기 또는 전체 크기 이미지를 검색하려면 통신 토큰이 필요한 image의 attachmentType 속성이 있습니다.
계속하기 전에 채팅 앱에서 인라인 이미지 지원을 사용하도록 설정하는 방법을 보여 주는 자습서를 완료합니다. 이 자습서에서는 요청 헤더에서 통신 토큰이 필요한 이미지를 가져오는 방법을 설명합니다. 이미지 Blob을 받은 후에는 이 Blob을 가리키는 ObjectUrl 속성을 만들어야 합니다. 그런 다음 이 URL을 각 인라인 이미지의 src 특성에 삽입합니다.
이제 인라인 이미지 작동 방식에 익숙해졌으므로 일반 인라인 이미지처럼 이미지 첨부 파일을 렌더링할 수 있습니다.
먼저 이미지 첨부 파일이 있을 때마다 메시지 콘텐츠에 image 태그를 삽입합니다.
async function renderReceivedMessage(event) {
    messages += `<div class="container lighter"> ${event.message} </div>`;
    messagesContainer.innerHTML = messages;
    console.log(event);
    // Filter out inline images from attachments
    const imageAttachments = event.attachments?.filter(
        (attachment) =>
        attachment.attachmentType === "image" && !messages.includes(attachment.id)
    );
    // Inject image tag for all image attachments
    var imageAttachmentHtml =
        imageAttachments
        .map((attachment) => renderImageAttachments(attachment))
        .join("") ?? "";
    messagesContainer.innerHTML += imageAttachmentHtml;

    // Get list of attachments and calls renderFileAttachments to construct a file attachment card
    var attachmentHtml =
        event.attachments
        ?.filter((attachment) => attachment.attachmentType === "file")
        .map((attachment) => renderFileAttachments(attachment))
        .join("") ?? "";
    messagesContainer.innerHTML += attachmentHtml;

    // Fetch and render preview images
    fetchPreviewImages(imageAttachments);
}

function renderImageAttachments(attachment) {
    return `<img alt="image" src="" itemscope="png" id="${attachment.id}" style="max-width: 100px">`
}
이제 자습서: 인라인 이미지 지원 사용에서 fetchPreviewImages()을(를) 빌려와 아무런 변경 없이 그대로 사용하겠습니다.
function fetchPreviewImages(attachments) {
    if (!attachments.length > 0) {
        return;
    }
    Promise.all(
        attachments.map(async (attachment) => {
            const response = await fetch(attachment.previewUrl, {
                method: 'GET',
                headers: {
                    'Authorization': 'Bearer ' + tokenString,
                },
            });
            return {
                id: attachment.id,
                content: await response.blob(),
            };
        }),
    ).then((result) => {
        result.forEach((imageRef) => {
            const urlCreator = window.URL || window.webkitURL;
            const url = urlCreator.createObjectURL(imageRef.content);
            document.getElementById(imageRef.id).src = url;
        });
    }).catch((e) => {
        console.log('error fetching preview images');
    });
}
이 함수에는 tokenString 속성이 필요하므로 다음 코드 조각에 표시된 대로 init()에서 초기화된 전역 복사본이 필요합니다.
var tokenString = '';

async function init() {
    ...
    const {
        token,
        expiresOn
    } = tokenResponse;

    tokenString = token;
    ...
}
이제 이미지 첨부가 지원됩니다. 계속해서 코드를 실행하여 실제로 작동하는 모습을 확인하세요.
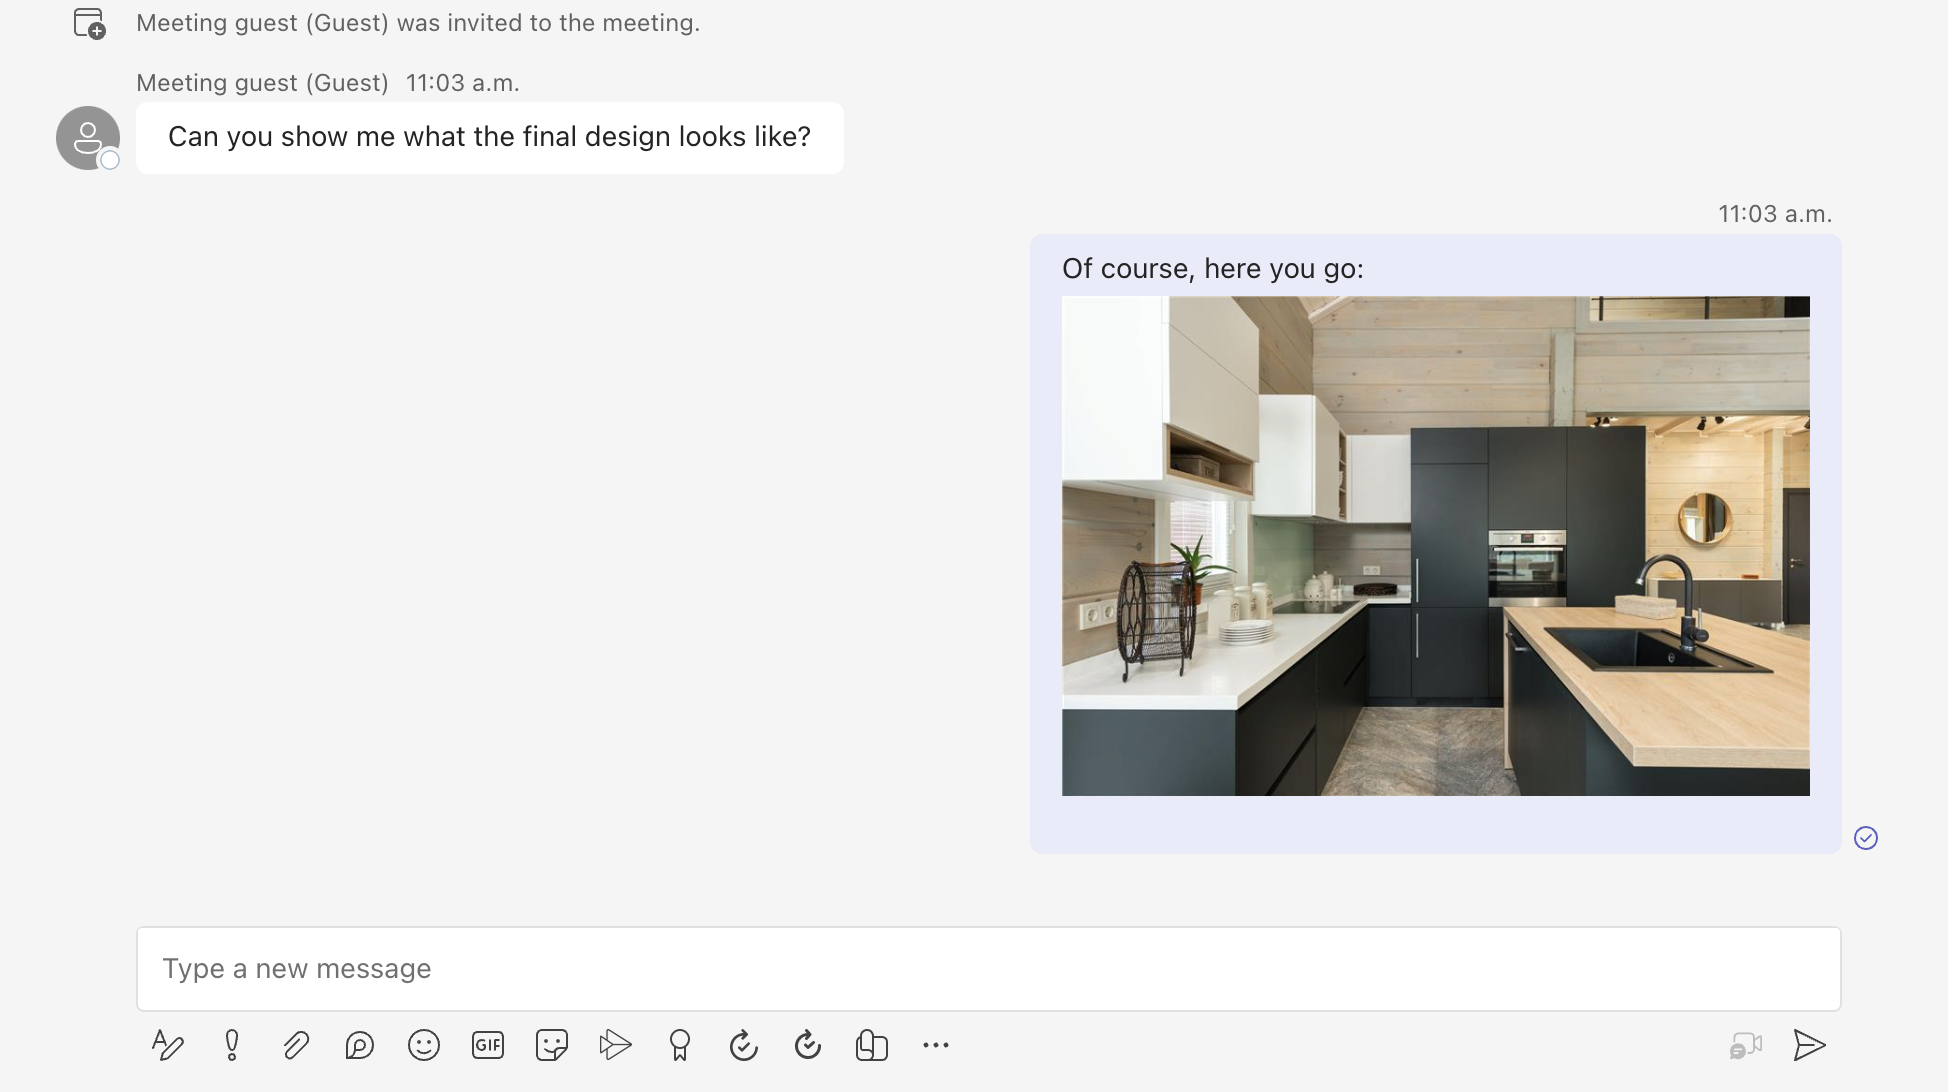
이미지 첨부 파일 데모
Teams 클라이언트에서 일부 이미지 첨부 파일을 보냅니다.

이미지 첨부 파일을 보낸 후에는 Teams 클라이언트 쪽에서 인라인 이미지가 됩니다.

샘플 앱으로 돌아가서 동일한 이미지가 렌더링되는지 확인합니다.

이 자습서는 C#용 Azure Communication Services 채팅 SDK를 사용하여 파일 첨부 지원을 사용하도록 설정하는 방법을 설명합니다.
이 자습서에서는 다음을 하는 방법을 알아볼 수 있습니다.
- 첨부 파일을 처리합니다.
- 이미지 첨부 파일을 처리합니다.
필수 조건
- 빠른 시작 Teams 모임에 채팅 앱 참여를 검토합니다.
- Azure Communication Services 리소스 만들기에 설명된 대로 Azure Communication Services 리소스를 만듭니다. 이 자습서에서는 연결 문자열을 기록해야 합니다.
- 비즈니스 계정을 사용하여 Teams 모임을 설정하고 모임 URL을 준비합니다.
- C#용 채팅 SDK(@azure/communication-chat) 1.3.0 이상을 다운로드합니다. 자세한 내용은 Azure Communication 채팅 클라이언트 라이브러리를 참조하세요.
샘플 코드
GitHub에서 이 자습서의 최종 코드를 찾습니다.
첨부 파일 처리
C#용 채팅 SDK는 일반 파일 첨부의 경우 file, 인라인 이미지의 경우 image의 ChatAttachmentType 속성을 반환합니다.
public readonly partial struct ChatAttachmentType : IEquatable<ChatAttachmentType>
{
        private const string ImageValue = "image";
        private const string FileValue = "file";
        /// <summary> image. </summary>
        public static ChatAttachmentType Image { get; } = new ChatAttachmentType(ImageValue);
        /// <summary> file. </summary>
        public static ChatAttachmentType File { get; } = new ChatAttachmentType(FileValue);
}
예를 들어, 다음 JSON은 서버 쪽에서 요청을 받을 때 이미지 첨부 파일 및 파일 첨부에 대해 ChatAttachment이(가) 어떻게 보이는지 보여줍니다.
"attachments": [
    {
        "id": "08a182fe-0b29-443e-8d7f-8896bc1908a2",
        "attachmentType": "file",
        "name": "business report.pdf",
        "previewUrl": "https://contoso.sharepoint.com/:u:/g/user/h8jTwB0Zl1AY"
    },
    {
        "id": "9d89acb2-c4e4-4cab-b94a-7c12a61afe30",
        "attachmentType": "image",
        "name": "Screenshot.png",
        "url": "https://contoso.communication.azure.com/chat/threads/19:9d89acb29d89acb2@thread.v2/messages/123/images/9d89acb2-c4e4-4cab-b94a-7c12a61afe30/views/original?api-version=2023-11-15-preview",
        "previewUrl": "https://contoso.communication.azure.com/chat/threads/19:9d89acb29d89acb2@thread.v2/messages/123/images/9d89acb2-c4e4-4cab-b94a-7c12a61afe30/views/small?api-version=2023-11-15-preview"
      }
]
이제 이전 빠른 시작에서 만든 이벤트 처리기로 돌아가서 file의 ChatAttachmentType 속성을 사용하여 첨부 파일을 처리하는 추가 논리를 추가합니다.
await foreach (ChatMessage message in allMessages)
{
    // Get message attachments that are of type 'file'
    IEnumerable<ChatAttachment> fileAttachments = message.Content.Attachments.Where(x => x.AttachmentType == ChatAttachmentType.File);
    var chatAttachmentFileUris = new List<Uri>();
    foreach (var file in fileAttachments)
    {
        chatAttachmentFileUris.Add(file.PreviewUri);
    }

    // Build message list
    if (message.Type == ChatMessageType.Html || message.Type == ChatMessageType.Text)
    {
        textMessages++;
        var userPrefix = message.Sender.Equals(currentUser) ? "[you]:" : "";
        var strippedMessage = StripHtml(message.Content.Message);


        var chatAttachments = fileAttachments.Count() > 0 ? "[Attachments]:\n" + string.Join(",\n", chatAttachmentFileUris) : "";
        messageList.Add(long.Parse(message.SequenceId), $"{userPrefix}{strippedMessage}\n{chatAttachments}");
    }
}
특히 각 첨부 파일에 대해 previewUrl 속성을 가져오고 for loop에 URL 목록을 구성합니다. 그런 다음 채팅 메시지 콘텐츠와 함께 문자열을 포함합니다.
이미지 첨부 파일을 처리합니다.
이미지 첨부 파일을 표준 file 첨부 파일과 다르게 처리해야 합니다. 이미지 첨부 파일에는 미리 보기 또는 전체 크기 이미지를 검색하려면 통신 토큰이 필요한 image의 ChatAttachmentType 속성이 있습니다.
계속하기 전에 인라인 이미지 지원 사용 자습서를 완료합니다. 이미지 첨부 파일을 식별하려면 메시지 콘텐츠에 첨부 파일과 동일한 이미지 ID가 포함되어 있는지 확인해야 합니다.
bool isImageAttachment = message.Content.Message.Contains(x.Id);
이 플래그가 true이면 인라인 이미지 논리를 적용하여 렌더링합니다.
IEnumerable<ChatAttachment> imageAttachments = message.Content.Attachments.Where(x => x.AttachmentType == ChatAttachmentType.Image);
// Fetch image and render
var chatAttachmentImageUris = new List<Uri>();
foreach (ChatAttachment imageAttachment in imageAttachments)
{
    client.DefaultRequestHeaders.Authorization = new System.Net.Http.Headers.AuthenticationHeaderValue("Bearer", communicationTokenCredential.GetToken().Token);
    var response = await client.GetAsync(imageAttachment.PreviewUri);
    var randomAccessStream = await response.Content.ReadAsStreamAsync();
    await Dispatcher.RunAsync(CoreDispatcherPriority.Normal, async () =>
    {
        var bitmapImage = new BitmapImage();
        await bitmapImage.SetSourceAsync(randomAccessStream.AsRandomAccessStream());
        InlineImage.Source = bitmapImage;
    });
    chatAttachmentImageUris.Add(imageAttachment.PreviewUri);
}
이제 앱에서 이미지 첨부 파일을 지원합니다.
다음 단계
- 인라인 이미지 지원을 사용하도록 설정하는 방법에 대해 자세히 알아봅니다.
- 기타 지원되는 상호 운용성 기능에 대해 자세히 알아봅니다.
- 채팅 영웅 샘플을 체크 아웃합니다.
- 채팅 작동 방식에 대해 자세히 알아봅니다.