Fabric でハイパーパラメーター調整を実行する (プレビュー)
ハイパーパラメーター調整は、パフォーマンスに影響を与える機械学習モデルのパラメーターに最適な値を見つけるプロセスです。 複雑なモデルや大規模なデータセットを扱う場合は特に、困難で時間がかかる場合があります。 この記事では、Fabric でハイパーパラメーター調整を実行する方法について説明します。
このチュートリアルでは、カリフォルニア州のさまざまな国勢調査ブロックの住宅の中央値とその他の特徴に関する情報を含むカリフォルニア州の住宅データセットを使用します。 データが準備されたら、SynapseML LightGBM モデルをトレーニングして、特徴に基づいて家の値を予測します。 次に、高速で軽量な AutoML ライブラリである FLAML を使用して、LightGBM モデルに最適なハイパーパラメーターを見つけます。 最後に、チューニングされたモデルの結果と、既定のパラメーターを使用するベースライン モデルを比較します。
前提 条件
Microsoft Fabric サブスクリプションを取得します。 それとも、無料で Microsoft Fabric 試用版 にサインアップします。
Microsoft Fabric にサインインします。
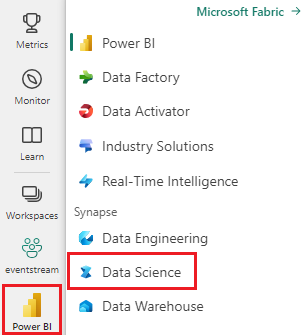
ホーム ページの左下にあるエクスペリエンス スイッチャーを使用して、Fabric に切り替えます。

- 新しい Fabric 環境を作成するか、ファブリック ランタイム 1.2 (Spark 3.4 以降) と Delta 2.4 で実行していることを確認します
- 新しいノートブックを作成します。
- ノートブックをレイクハウスにアタッチします。 ノートブックの左側にある [ の追加] を選択して、既存のレイクハウスを追加するか、新しいレイクハウスを作成します。
トレーニング データセットとテスト データセットを準備する
このセクションでは、LightGBM モデルのトレーニング データセットとテスト データセットを準備します。 Sklearn のカリフォルニア住宅データセットを使用します。 データから Spark データフレームを作成し、VectorAssembler を使用して特徴を 1 つのベクター列に結合します。
from sklearn.datasets import fetch_california_housing
from pyspark.sql import SparkSession

# Load the Scikit-learn California Housing dataset
sklearn_dataset = fetch_california_housing()

# Convert the Scikit-learn dataset to a Pandas DataFrame
import pandas as pd
pandas_df = pd.DataFrame(sklearn_dataset.data, columns=sklearn_dataset.feature_names)
pandas_df['target'] = sklearn_dataset.target

# Create a Spark DataFrame from the Pandas DataFrame
spark_df = spark.createDataFrame(pandas_df)

# Display the data
display(spark_df)
次に、データをそれぞれ 85%、12.75%、2.25% でトレーニング、検証、テストの 3 つのサブセットにランダムに分割します。 ハイパーパラメーターのチューニングにはトレーニングセットと検証セットを使用し、モデル評価にはテストセットを使用します。
from pyspark.ml.feature import VectorAssembler

# Combine features into a single vector column
featurizer = VectorAssembler(inputCols=sklearn_dataset.feature_names, outputCol="features")
data = featurizer.transform(spark_df)["target", "features"]

# Split the data into training, validation, and test sets
train_data, test_data = data.randomSplit([0.85, 0.15], seed=41)
train_data_sub, val_data_sub = train_data.randomSplit([0.85, 0.15], seed=41)
ML 実験を設定する
MLflow の構成
ハイパーパラメーターのチューニングを実行する前に、ハイパーパラメーターのさまざまな値を取得し、トレーニング データで LightGBM モデルをトレーニングできるトレーニング関数を定義する必要があります。 また、R2 スコアを使用して検証データのモデル のパフォーマンスを評価する必要があります。このスコアは、モデルがデータにどの程度適合しているかを測定します。
これを行うには、まず必要なモジュールをインポートし、MLflow 実験を設定します。 MLflow は、エンドツーエンドの機械学習ライフサイクルを管理するためのオープン ソース プラットフォームです。 これは、さまざまなモデルとハイパーパラメーターの結果を追跡して比較するのに役立ちます。
# Import MLflow and set up the experiment name
import mlflow

mlflow.set_experiment("flaml_tune_sample")

# Enable automatic logging of parameters, metrics, and models
mlflow.autolog(exclusive=False)
ログ 記録レベルを設定する
ここでは、ログ レベルを構成して、Synapse.ml ライブラリからの不要な出力を抑制し、ログをよりクリーンに保ちます。
import logging

logging.getLogger('synapse.ml').setLevel(logging.ERROR)
ベースラインモデルのトレーニング
次に、α、learningRate、numLeaves、numIterations の 4 つのハイパーパラメーターを入力として受け取るトレーニング関数を定義します。 これらは、後で FLAML を使用して調整するハイパーパラメーターです。
また、train 関数は、2 つのデータフレームを入力として受け取ります。train_dataとval_dataは、それぞれトレーニング データセットと検証データセットです。 train 関数は、トレーニング済みのモデルと検証データの R2 スコアという 2 つの出力を返します。
# Import LightGBM and RegressionEvaluator
from synapse.ml.lightgbm import LightGBMRegressor
from pyspark.ml.evaluation import RegressionEvaluator

def train(alpha, learningRate, numLeaves, numIterations, train_data=train_data_sub, val_data=val_data_sub):
    """
    This train() function:
     - takes hyperparameters as inputs (for tuning later)
     - returns the R2 score on the validation dataset

    Wrapping code as a function makes it easier to reuse the code later for tuning.
    """
    with mlflow.start_run() as run:

        # Capture run_id for prediction later
        run_details = run.info.run_id

        # Create a LightGBM regressor with the given hyperparameters and target column
        lgr = LightGBMRegressor(
            objective="quantile",
            alpha=alpha,
            learningRate=learningRate,
            numLeaves=numLeaves,
            labelCol="target",
            numIterations=numIterations,
            dataTransferMode="bulk"
        )

        # Train the model on the training data
        model = lgr.fit(train_data)

        # Make predictions on the validation data
        predictions = model.transform(val_data)
        # Define an evaluator with R2 metric and target column
        evaluator = RegressionEvaluator(predictionCol="prediction", labelCol="target", metricName="r2")
        # Compute the R2 score on the validation data
        eval_metric = evaluator.evaluate(predictions)

        mlflow.log_metric("r2_score", eval_metric)

    # Return the model and the R2 score
    return model, eval_metric, run_details
最後に、トレーニング関数を使用して、ハイパーパラメーターの既定値を使用してベースライン モデルをトレーニングします。 また、テスト データのベースライン モデルを評価し、R2 スコアを出力します。
# Train the baseline model with the default hyperparameters
init_model, init_eval_metric, init_run_id = train(alpha=0.2, learningRate=0.3, numLeaves=31, numIterations=100, train_data=train_data, val_data=test_data)
# Print the R2 score of the baseline model on the test data
print("R2 of initial model on test dataset is: ", init_eval_metric)
FLAML を使用してハイパーパラメーター調整を実行する
FLAML は、特定のモデルとデータセットに最適なハイパーパラメーターを自動的に検索できる高速で軽量の AutoML ライブラリです。 評価メトリックからのフィードバックに適応する低コストの検索戦略を使用します。 このセクションでは、FLAML を使用して、前のセクションで定義した LightGBM モデルのハイパーパラメーターを調整します。
チューニング関数を定義する
FLAML を使用するには、構成ディクショナリを入力として受け取り、評価メトリックをキーとして、メトリック値を値としてディクショナリを返すチューニング関数を定義する必要があります。
構成ディクショナリには、チューニングするハイパーパラメーターとその値が含まれています。 tune 関数では、先ほど定義したトレーニング関数を使用して、指定された構成でモデルをトレーニングおよび評価します。
# Import FLAML
import flaml

# Define the tune function
def flaml_tune(config):
    # Train and evaluate the model with the given config
    _, metric, run_id = train(**config)
    # Return the evaluation metric and its value
    return {"r2": metric}
検索スペースを定義する
次に、調整するハイパーパラメーターの検索空間を定義する必要があります。 検索空間は、ハイパーパラメーター名を探索する値の範囲にマップするディクショナリです。 FLAML には、uniform、loguniform、randint など、さまざまな種類の範囲を定義するための便利な関数がいくつか用意されています。
この場合、アルファ、learningRate、numLeaves、numIterations の 4 つのハイパーパラメーターを調整します。
# Define the search space
params = {
    # Alpha is a continuous value between 0 and 1
    "alpha": flaml.tune.uniform(0, 1),
    # Learning rate is a continuous value between 0.001 and 1
    "learningRate": flaml.tune.uniform(0.001, 1),
    # Number of leaves is an integer value between 30 and 100
    "numLeaves": flaml.tune.randint(30, 100),
    # Number of iterations is an integer value between 100 and 300
    "numIterations": flaml.tune.randint(100, 300),
}
ハイパーパラメーター試用版を定義する
最後に、FLAML を使用してハイパーパラメーターを最適化するハイパーパラメーター試用版を定義する必要があります。 tune 関数、検索スペース、時間予算、サンプル数、メトリック名、モード、および詳細レベルを flaml.tune.run 関数に渡す必要があります。 また、評価版の結果を追跡するために、入れ子になった MLflow 実行を開始する必要があります。
flaml.tune.run function は、最適な構成と最適なメトリック値を含む分析オブジェクトを返します。
# Start a nested MLflow run
with mlflow.start_run(nested=True, run_name="Child Run: "):
    # Run the hyperparameter trial with FLAML
    analysis = flaml.tune.run(
        # Pass the tune function
        flaml_tune,
        # Pass the search space
        params,
        # Set the time budget to 120 seconds
        time_budget_s=120,
        # Set the number of samples to 100
        num_samples=100,
        # Set the metric name to r2
        metric="r2",
        # Set the mode to max (we want to maximize the r2 score)
        mode="max",
        # Set the verbosity level to 5
        verbose=5,
        )
試用が完了すると、分析オブジェクトから最適な構成と最適なメトリック値を表示できます。
# Get the best config from the analysis object
flaml_config = analysis.best_config
# Print the best config
print("Best config: ", flaml_config)
print("Best score on validation data: ", analysis.best_result["r2"])
結果を比較する
FLAML で最適なハイパーパラメーターを見つけたら、モデルのパフォーマンスをどれだけ向上させるかを評価する必要があります。 これを行うには、トレーニング関数を使用して、完全なトレーニング データセットに最適なハイパーパラメーターを持つ新しいモデルを作成します。 次に、テスト データセットを使用して、新しいモデルとベースライン モデルの両方の R2 スコアを計算します。
# Train a new model with the best hyperparameters
flaml_model, flaml_metric, flaml_run_id = train(train_data=train_data, val_data=test_data, **flaml_config)

# Print the R2 score of the baseline model on the test dataset
print("On the test dataset, the initial (untuned) model achieved R^2: ", init_eval_metric)
# Print the R2 score of the new model on the test dataset
print("On the test dataset, the final flaml (tuned) model achieved R^2: ", flaml_metric)
最終的なモデルを保存する
ハイパーパラメーターの試用が完了したら、最終的なチューニングされたモデルを ML モデルとして Fabric に保存できるようになりました。
# Specify the model name and the path where you want to save it in the registry
model_name = "housing_model"  # Replace with your desired model name
model_path = f"runs:/{flaml_run_id}/model"

# Register the model to the MLflow registry
registered_model = mlflow.register_model(model_uri=model_path, name=model_name)

# Print the registered model's name and version
print(f"Model '{registered_model.name}' version {registered_model.version} registered successfully.")