モジュール 3: Data Factory を使用して通知を自動化して送信する
このモジュールは 10 分で完了し、パイプライン内のすべてのジョブが完了したときに通知する電子メールを送信し、それがスケジュールに基づいて実行されるように構成します。
このモジュールでは、次の方法を学習します。
- Office 365 Outlook アクティビティを追加して、Copy アクティビティの出力を電子メールで送信します。
- パイプラインを実行するスケジュールを追加します。
- (省略可能) データフロー アクティビティを同じパイプラインに追加します。
Office 365 Outlook アクティビティをパイプラインに追加する
「モジュール 1: Data Factory でパイプラインを作成する」で作成したパイプラインを使用します。
パイプライン エディターで [Activities](アクティビティ) タブを選択し、Office Outlook アクティビティを見つけます。

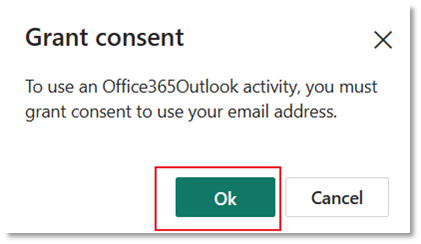
[OK] を選択して、メール アドレスの使用に同意します。
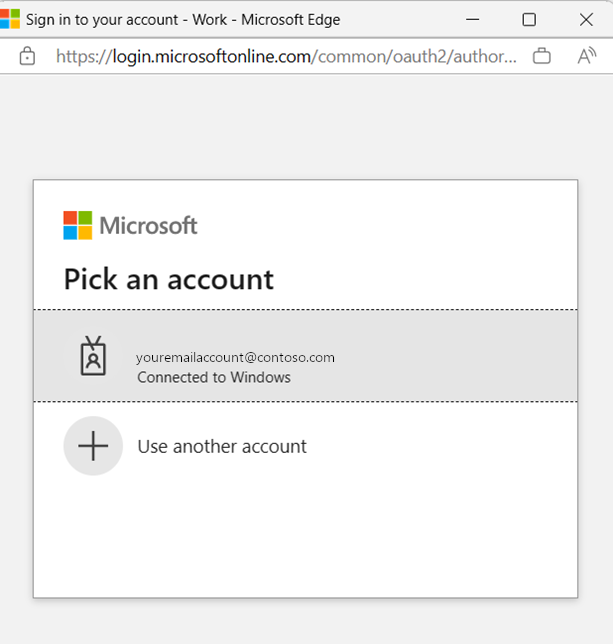
使用するメール アドレスを選択します。
Note
このサービスでは現在、個人用のメール アドレスはサポートされていません。 企業メール アドレスを使用する必要があります。
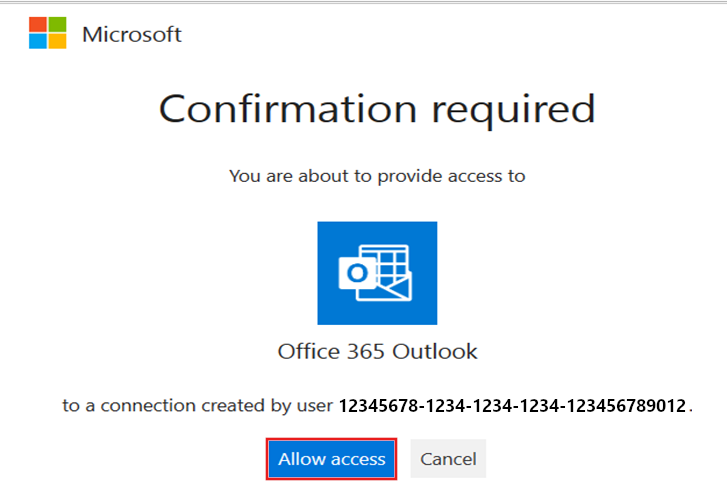
[Allow access](アクセスを許可) を選択して確認します。
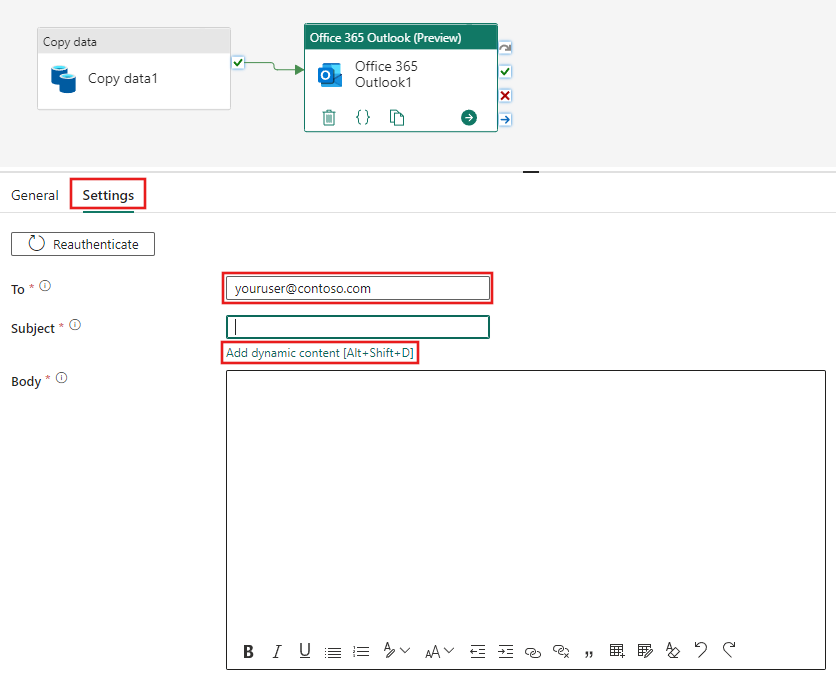
[成功時] パス (パイプライン キャンバスのアクティビティの右上にある緑色のチェックボックス) を選択して、Copy アクティビティから新しいOffice 365 Outlook アクティビティにドラッグします。

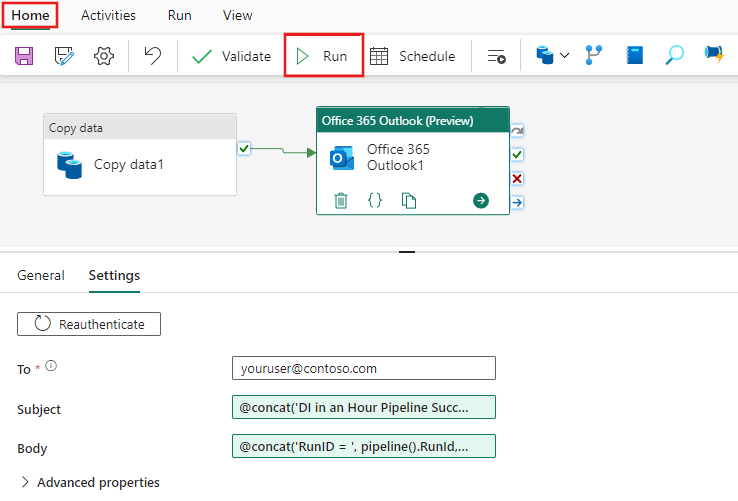
パイプライン キャンバスから Office 365 Outlook アクティビティを選択し、キャンバスの下にあるプロパティ領域の [設定] タブを選択して、メール アドレスを設定します。
- [宛先] セクションにメール アドレスを入力します。 複数のアドレスを使用する場合は、; 使用して区切ります。
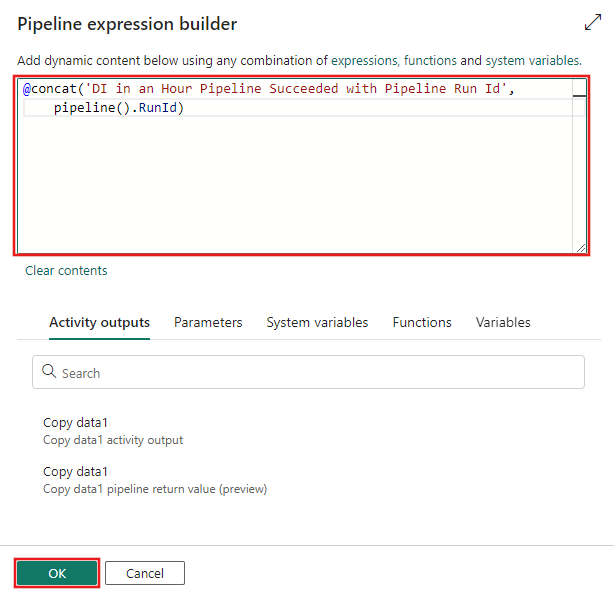
- [件名] で、フィールドを選択して [Add dynamic content](動的なコンテンツの追加) オプションが表示されるようにし、それを選択してパイプライン式ビルダー キャンバスを表示します。
[Pipeline expression builder](パイプライン式ビルダー) ダイアログが表示されます。 次の式を入力し、[OK] を選択します。
@concat('DI in an Hour Pipeline Succeeded with Pipeline Run Id', pipeline().RunId)
[本文] で、フィールドをもう一度選択し、テキスト領域の下に表示された [Add dynamic content](動的なコンテンツの追加) オプションを選択します。 表示される [Pipeline expression builder](パイプライン式ビルダー) ダイアログで次の式をもう一度追加し、[OK] を選択します。
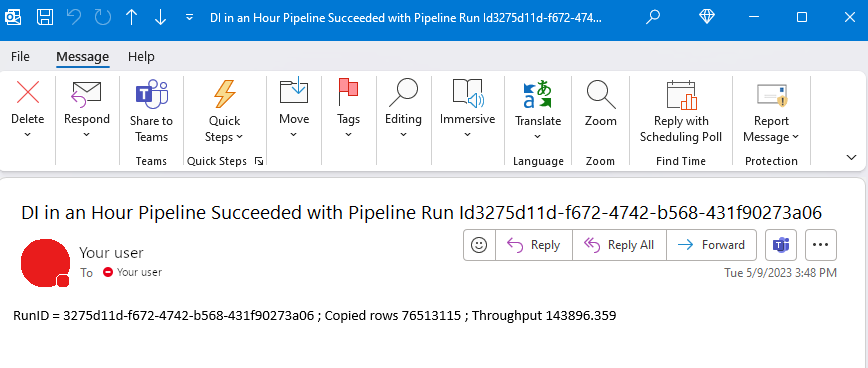
@concat('RunID = ', pipeline().RunId, ' ; ', 'Copied rows ', activity('Copy data1').output.rowsCopied, ' ; ','Throughput ', activity('Copy data1').output.throughput)
Note
Copy data1 は、自分のパイプライン コピー アクティビティの名前に置き換えてください。
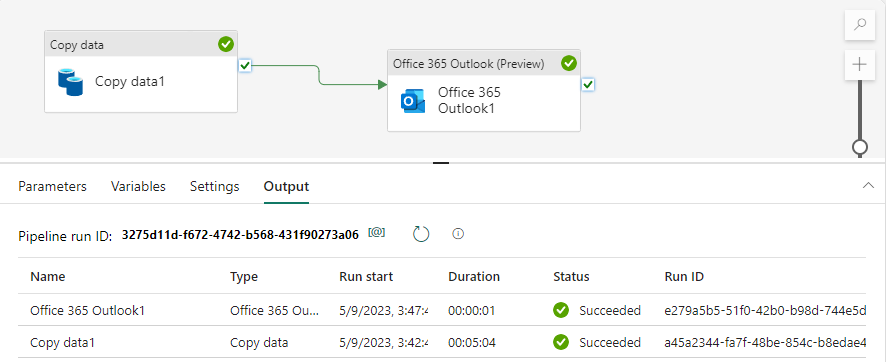
最後に、パイプライン エディターの上部にある [ホーム] タブを選択し、[実行] を選択します。 次に、確認ダイアログでもう一度 [Save and run](保存および実行) を選択して、これらのアクティビティを実行します。
パイプラインが正常に実行されたら、電子メールを調べて、パイプラインから送信された確認メールを見つけます。
パイプラインの実行をスケジュールする
パイプラインの作成とテストが完了したら、自動的に実行されるようにスケジュールできます。
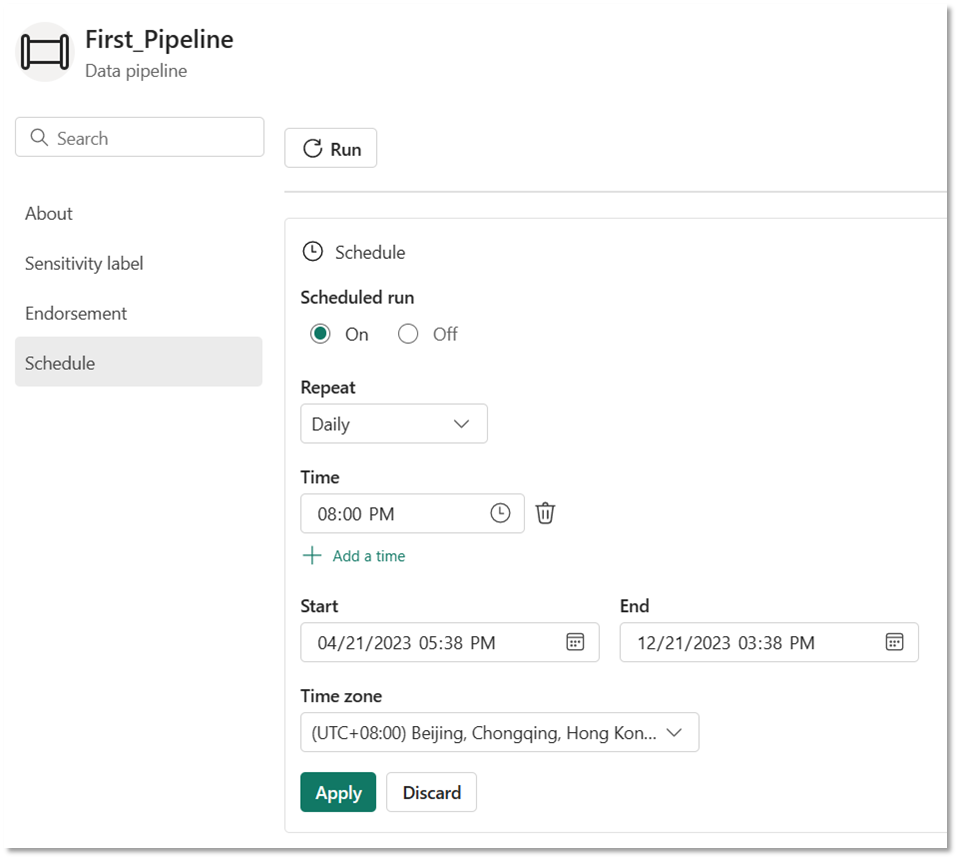
パイプライン エディター ウィンドウの [ホーム] タブで、[スケジュール] を選択します。

必要に応じてスケジュールを設定します。 この例では、年の終わりまで毎日午後 8 時に実行されるようにパイプラインをスケジュールします。
(省略可能) パイプラインにデータフロー アクティビティを追加する
「モジュール 2: Data Factory でデータフローを作成する」で作成したデータフローをパイプラインに追加することもできます。
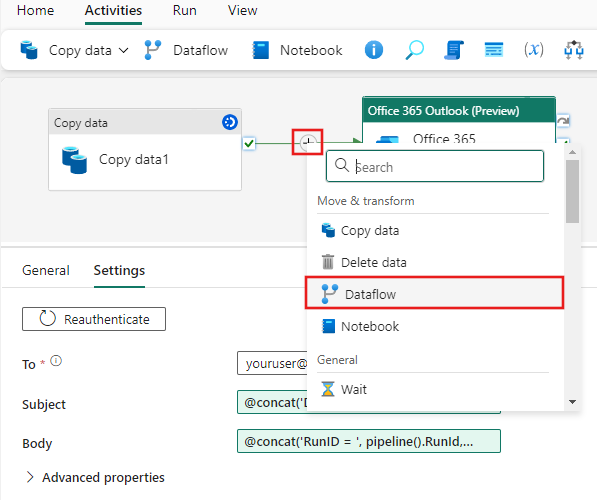
パイプライン キャンバス上で Copy アクティビティ と Office 365 Outlook アクティビティを接続している緑色の線にカーソルを合わせ、+ ボタンを選択して新しいアクティビティを挿入します。

表示されるメニューから [Dataflow](データフロー) を選択します。
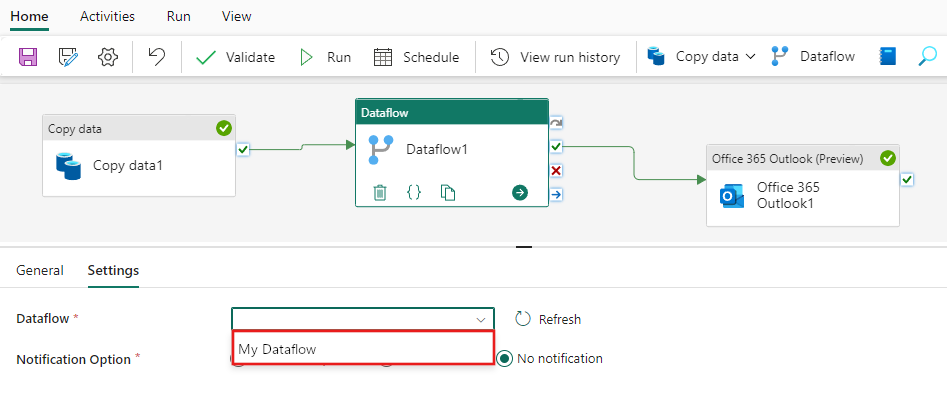
新たに作成されたデータフロー アクティビティは、Copy アクティビティと Office 365 Outlook アクティビティの間に挿入され、自動的に選択され、キャンバスの下の領域にそのプロパティが表示されます。 プロパティ領域の [設定] タブを選択し、「モジュール 2: Data Factory でデータフローを作成する」で作成したデータフローを選択します。
関連するコンテンツ
Microsoft Fabric の Data Factory を使用した最初のデータ統合に関するエンドツーエンドのチュートリアルのこの 3 つ目のモジュールでは、次の方法を学習しました。
- Copy アクティビティを使用して、ソース ストアからデータ レイクハウスのテーブルに生データを取り込む。
- データフロー アクティビティを使用してデータを処理し、それをレイクハウスの新しいテーブルに移動する。
- Office 365 Outlook アクティビティを使用して、すべてのジョブの完了時に通知する電子メールを送信する。
- スケジュールに基づいて実行するようにパイプラインを設定する。
- (省略可能) 既存のパイプライン フローにデータフロー アクティビティを挿入する。
このチュートリアルは完了したので、パイプラインの実行を監視する方法の詳細を学習しましょう。