Configure invoice layout for Bahrain (BH-00003)
This article explains how to configure printable invoice layouts to ensure compliance with Bahraini legal requirements. Bahrain-specific invoice layouts are implemented by using the concept of configurable business documents. For more information about configurable business documents, see the Business document management overview.
Prerequisites
The primary address of the legal entity must be in Bahrain.
Turn on features
In the Feature management workspace, turn on the following features:
- (Bahrain) Credit invoicing layout for sales and project invoice reports
- Convert Electronic reporting outbound documents from Microsoft Office formats to PDF
For more information about how to turn on features, see Feature management overview.
Import Electronic reporting configurations
In the Electronic reporting workspace, import the following Electronic reporting (ER) formats from the repository:
- Sales invoice (Excel) (BH)
- Free text invoice (Excel) (BH)
- Project invoice (Excel) (BH)
- Project contract line items (Excel) (BH)
- Project manage invoice (Excel) (BH)
Note
These formats are derived from related standard formats, based on the invoice model, and they use the invoice model mapping. All required additional configurations will be automatically imported.
For more information about how to import ER configurations, see Download Electronic reporting configurations from Lifecycle Services.
Configure conversion to PDF
By default, invoices are generated as Microsoft Excel files. To enable their conversion to PDF format, follow these steps.
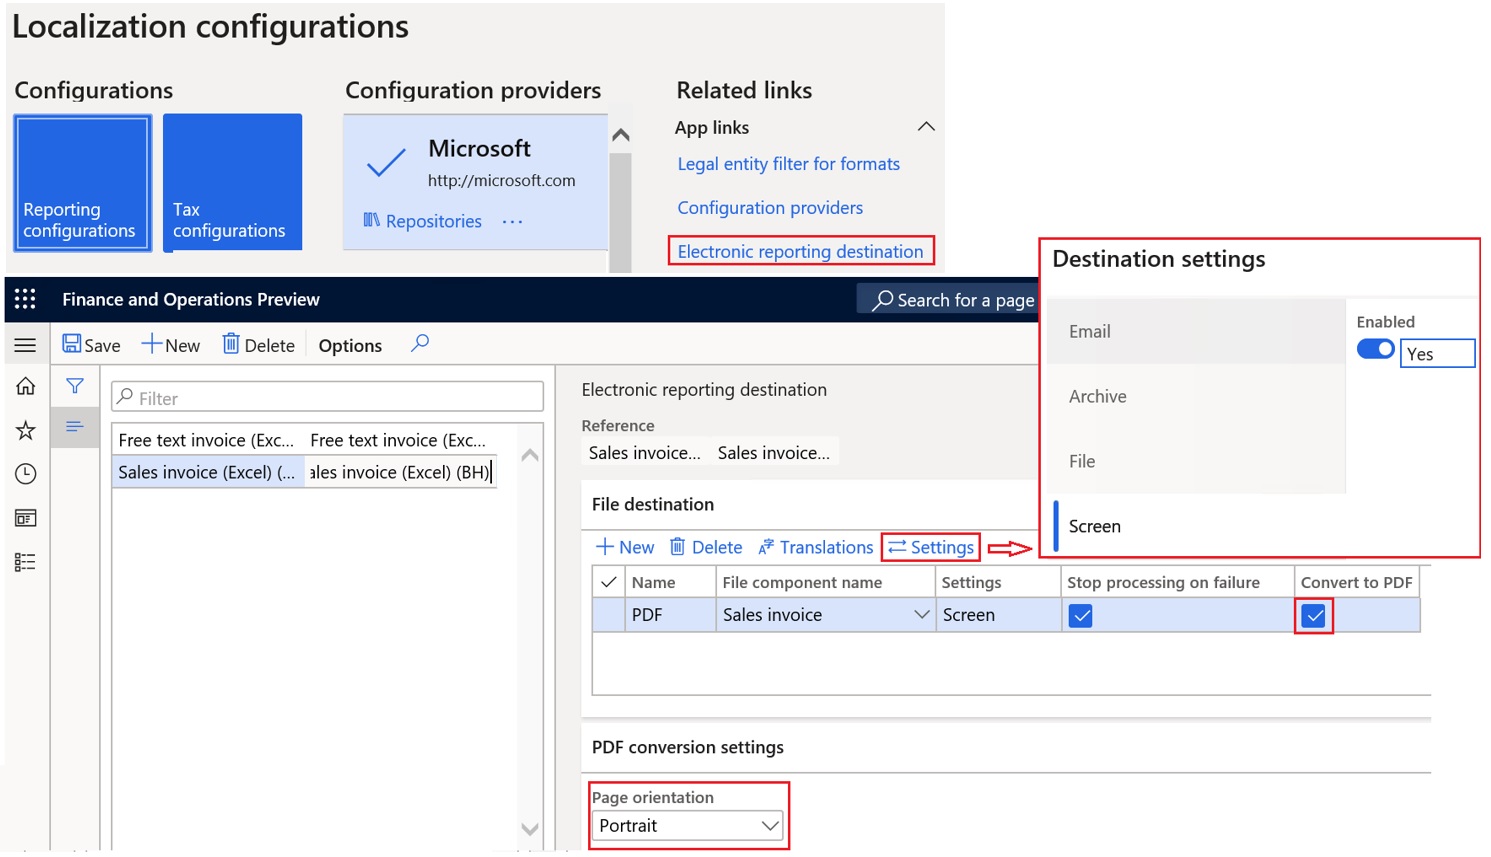
In the Electronic reporting workspace, in the Related links section, select Electronic reporting destination.
On the Electronic reporting destination page, create destinations for the following related formats:
- Sales invoice (Excel) (BH)
- Free text invoice (Excel) (BH)
- Project invoice (Excel) (BH)
- Project contract line items (Excel) (BH)
- Project manage invoice (Excel) (BH)
For each format, follow these steps:
- Select the Convert to PDF check box.
- In the Page orientation field, select Portrait.
- Select Settings, and then, on the Destination settings page, on the Screen tab, set the Enabled option to Yes to enable printing to the screen.

Configure default model mapping for project invoices
In the Electronic reporting workspace, select the Project invoice model mapping (RDP) configuration. Turn on Default model mapping parameter for the selected configuration.

Configure parameters
Configure Print management
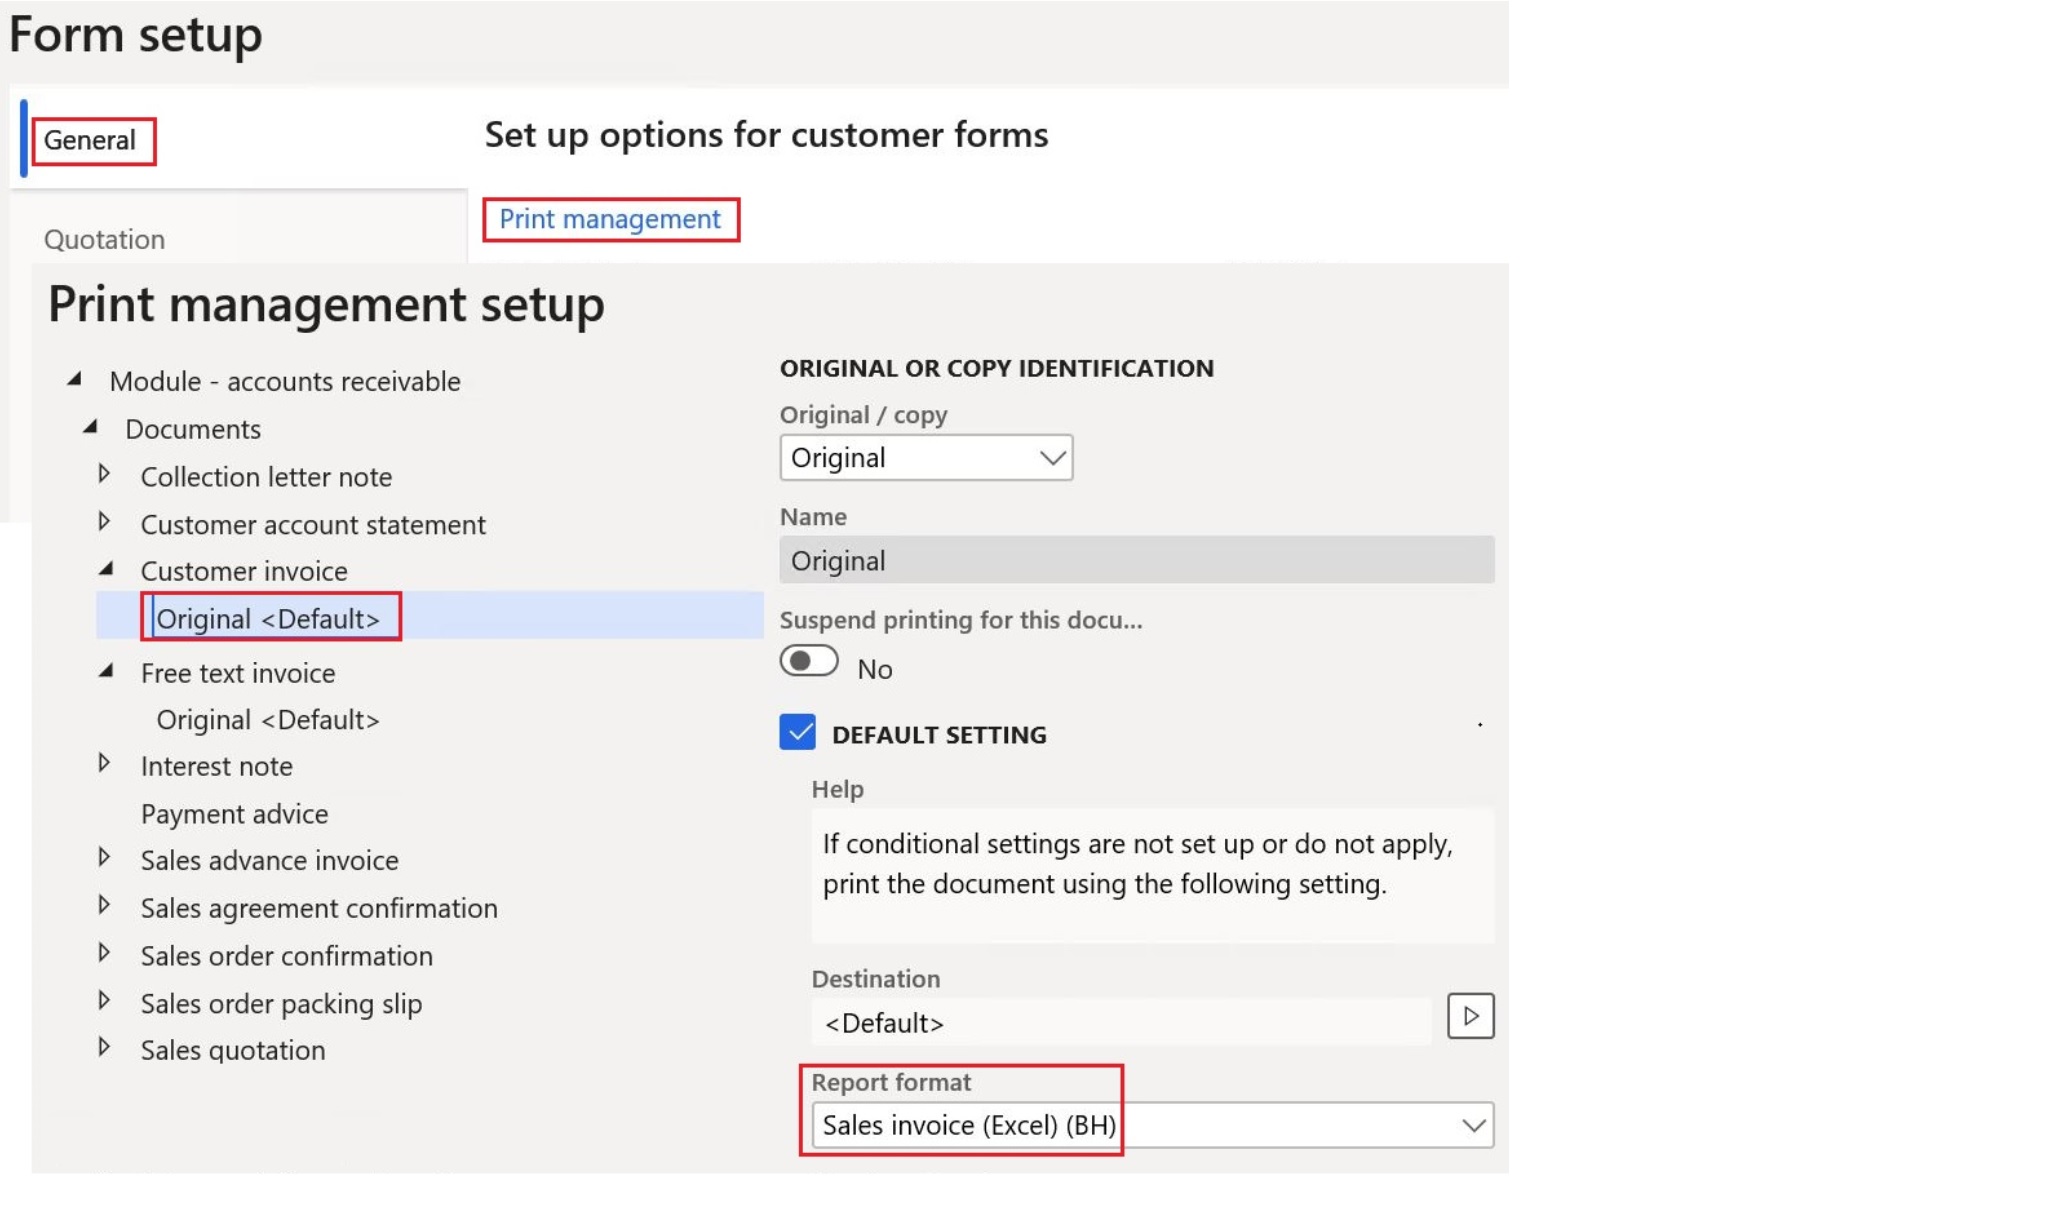
Go to Accounts receivable > Setup > Forms > Forms setup.
On the Form setup page, on the General tab, select Print management.
On the Print management setup page, define the references to the imported formats for the following documents:
- Customer invoice: In the Report format field, select Sales invoice (Excel) (BH).
- Free text invoice: In the Report format field, select Free text invoice (Excel) (BH).

Go to Project management and accounting > Setup > Forms > Forms setup.
On the Form setup page, on the General tab, select Print management.
On the Print management page, define the references to the imported formats for the following documents:
- Project invoice without billing rules: In the Report format field, select Project invoice (Excel) (BH).
- Project invoice with billing rules: In the Report format field, select Project contract line items (Excel) (BH).
- User defined project invoice: In the Report format field, select Project manage invoice (Excel) (BH).
Configure sales tax specification
Go to Accounts receivable > Setup > Forms > Forms setup.
On the Form setup page, on the General tab, in the Sales tax specification field, select Registration and company currency.

Go to Project management and accounting > Setup > Forms > Forms setup.
On the Form setup page, on the General tab, in the Sales tax specification field, select Registration and company currency.
Configure packing slip specification
Go to Accounts receivable > Setup > Forms > Forms setup.
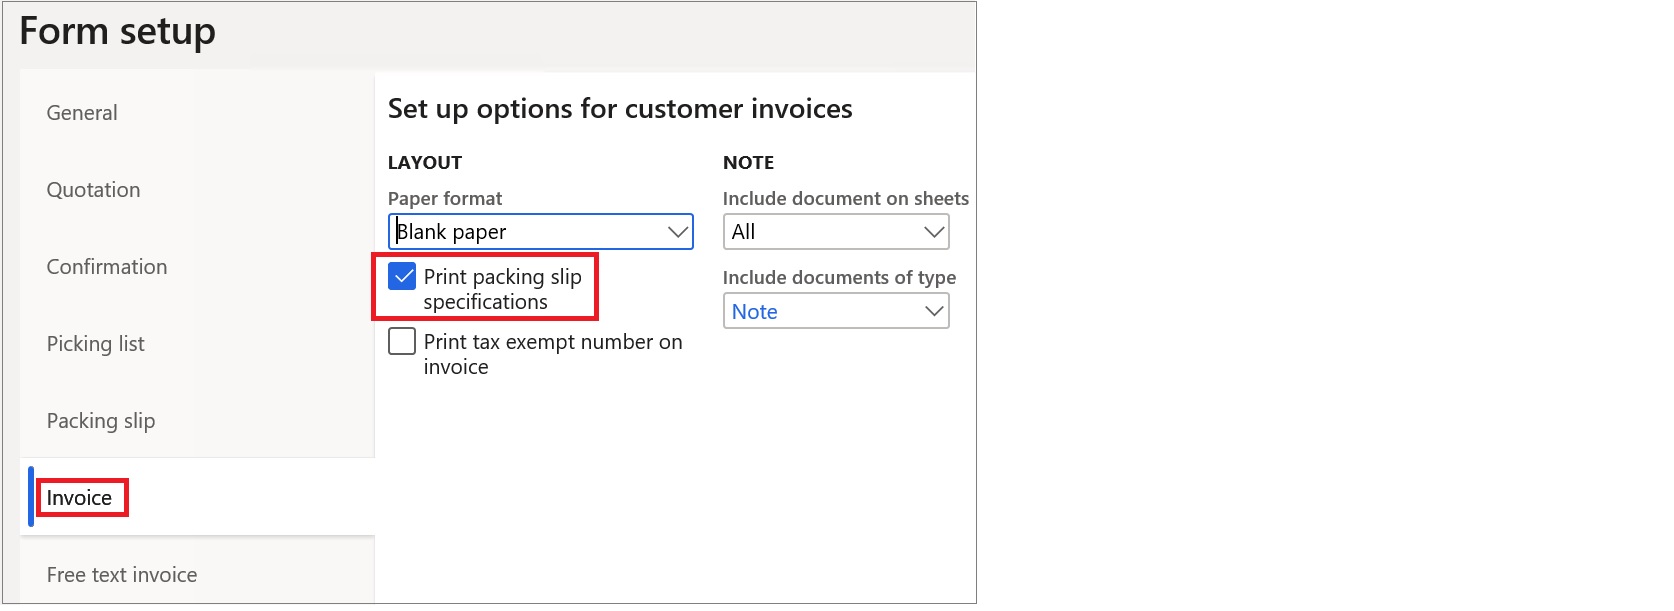
On the Form setup page, on the Invoice tab, select the Print packing slip specifications check box.

Go to Project management and accounting > Setup > Forms > Forms setup.
On the Form setup page, on the Invoice tab, select the Print packing slip specifications check box.
Activate credit invoicing
- Go to Accounts receivable > Setup > Accounts receivable parameters.
- On the Accounts receivable parameters page, on the Updates tab, on the Invoice FastTab, set the Apply the credit invoicing layout into sales and project invoice reports option to Yes.

Generate invoices
After you've completed all the previous procedures in this article, you can print invoices that are based on sales orders and free text invoices, in accordance with Bahraini legal requirements.