Building a Virtualized UC Development Environment: Part 1 – Building the TS Virtual Machine
“I see dead people.” – Cole Sear, The Sixth Sense
“I see progress bars…” – Me, over the last couple of weeks.
In my previous post, I mentioned that it’s possible to use Windows Server 2008 Terminal Services and Remote Desktop Connection to provide a virtualized development environment for OCS 2007 R2, Exchange 2007 and the UC R2 platform SDKs. Over the next few posts, I’ll walk you through how to set up that environment based on the Office Communications Server 2007 R2 VHDs.
This environment has a couple of pros and cons:
Pros:
- Your team can develop without the need to join the development environment domain.
- Developers on your team don’t need to run multiple VMs on their local machine.
- Each developer can log into multiple Remote Desktop sessions from the same machine to see the effects of placing calls between two contacts, changes in presence, call transfers, etc.
Cons:
- Remote Desktop does not support the microphone on the host machine, so you can’t provide audio input to calls or speech recognition. However:
- Playing sound from your Remote Desktop session is supported, so you will hear audio.
- You can still place calls either through OC 2007 R2 or via code, so you can test call scenarios.
- For audio applications, you can do simple testing with DTMF tones.
- You’ll need a physical client machine for testing speech recognition. See the setup document for details on adding physical clients to this environment.
In this post, I’ll provide a step by step process for building the Terminal Services machine. Grab a cup of coffee and let’s get started:
1. Set up the Office Communications Server 2007 R2 VHDs per the instructions included with those virtual machines.
2. Start Hyper-V Manager by selecting Start, All Programs, Administrative Tools and Hyper-V Manager.
- Click Continue on the User Account Control dialog.
3. Start the DC virtual machine by selecting it in the Virtual Machines list, right-click and select Start.
- Wait for the DC virtual machine to completely start. You’ll see the desktop when the machine has completely started.
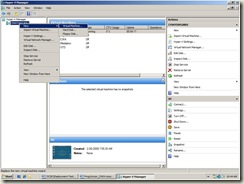
4. Select your host computer in the list of Hyper-V servers on the left of Hyper-V manager and select New, Virtual Machine.
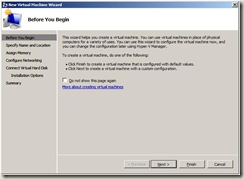
5. On the Before You Begin dialog, select Next.
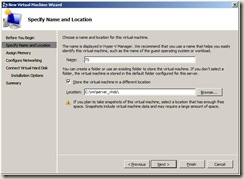
6. On the Specify Name and Location dialog, enter TS for the Name of the machine and C:\vm\server_vhds\ as the Location and click Next.
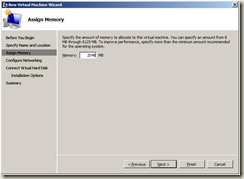
7. On the Assign Memory dialog enter 2048 MB for Memory and click Next.
- Assuming you have a host machine with at least 8 GB of RAM.
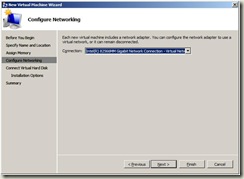
8. On the Configure Networking dialog, select the network adapter you assigned to the other virtual machines during setup in the Connection drop down and click Next.
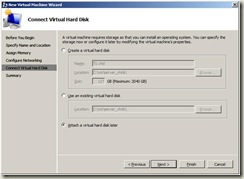
9. On the Connect Virtual Hard Disk dialog, select the Attach a virtual hard disk later option and click Next.
- We’ll do this later using the same differencing disk as the rest of the virtual machines to save disk space and make setup easier.
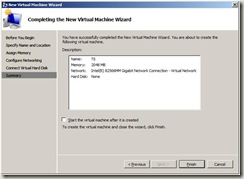
10. On the Completing the New Virtual Machine Wizard dialog, click Finish.
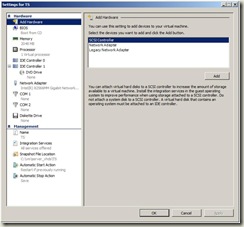
11. Select TS in the Virtual Machines list, right-click and select Settings.
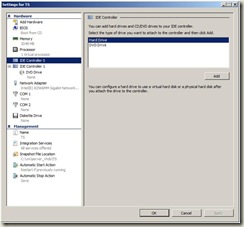
12. Under Hardware, select IDE Controller 0, select Hard Drive and click Add.
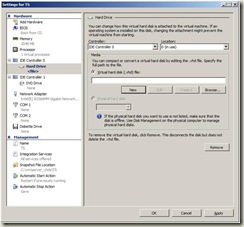
13. Under Media click the New button.
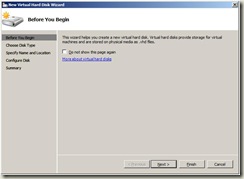
14. In the Before You Begin dialog, click Next.
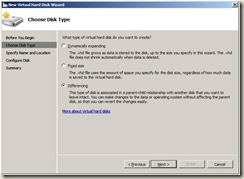
15. On the Chose Disk Type dialog, select Differencing and click Next.
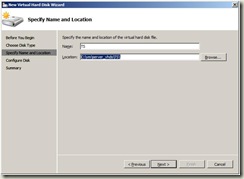
16. On the Specify Name and Location dialog, enter "TS" in the Name text box and " C:\vm\server_vhds\TS\" for the Location and click Next.
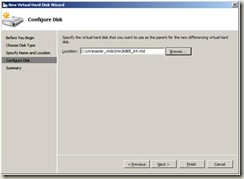
17. On the Configure Disk dialog, enter "C:\vm\master_vhds\Win2k8EE_64.vhd" in the Location text box and click Next.
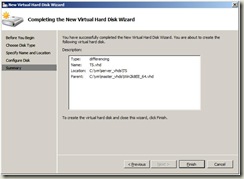
18. On the Completing the New Virtual Hard Disk Wizard dialog, click Finish.
19. On the Settings dialog, click OK to dismiss the dialog.
20. In Hyper-V Manager, select TS in the Virtual Machines list, right-click and select Start.
- The machine will shut down and restart during the first boot. This is expected.
21. When the TS virtual machine has completely started (you see the login screen), right-click on the TS machine and select Connect.
22. When prompted for credentials, enter “fabrikam\administrator” for the account and “pass@word1” for the password.
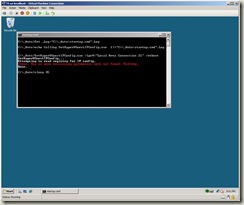
23. When you connect to the TS you will see a script startup.cmd run in a command prompt with errors. This is expected.
24. To prevent the startup.cmd script from running again, select Start, All Programs, Startup, right-click startup.cmd and select Delete.
Now that the TS machine built, you’ll need to join it to the Fabrikam domain, install the Terminal Services role and install the necessary applications. I’ll post those next steps in my next post.
Please respond with comments if you run into any issues.
Special thanks to Jon Rauschenberger from Clarity Consulting for his help on this process.
Thanks,
Chris
Comments
Anonymous
April 10, 2009
PingBack from http://asp-net-hosting.simplynetdev.com/building-a-virtualized-uc-development-environment-part-1-%e2%80%93-building-the-ts-virtual-machine/Anonymous
April 14, 2009
This is Part 2 of a series of blog posts on setting up a virtualized development environment based onAnonymous
April 16, 2009
This is Part 4 of a series of blog posts on setting up a virtualized development environment based onAnonymous
April 16, 2009
T4 Editor Extending your MOSS site with Microsoft ASP.NET AJAX 3.5 SharePoint Guidance V2 Drop 7 BuildingAnonymous
April 17, 2009
This is Part 5 of a series of blog posts on setting up a virtualized development environment based onAnonymous
April 26, 2009
Mijn collega Chris Mayo heeft een reeks blogartikelen geschreven hoe je je eigen UC development omgevingAnonymous
April 29, 2009
Creating you UC development environment is not a simple task to do. Chris Mayo has written a walkthrough
