Service-based authentication for the Warehouse Management mobile app in on-premises deployments
Important
The authentication methods that are described in this topic are now deprecated. We strongly recommend that you authenticate with device code flow instead. For more information about this deprecation, including the deprecation schedule, see Removed or deprecated features in Dynamics 365 Supply Chain Management.
Authentication with Microsoft Active Directory Federation Services (AD FS) provides a secure way of authenticating a mobile device with Dynamics 365 Finance + Operations (on-premises) environments. The Warehouse Management mobile app supports the following types of service-based authentication:
- Certificates
- Client secret
If you'll import connection settings, we recommend that you use a certificate instead of a client secret. Because the client secret must always be stored securely, you can't import it from a connection settings file or a QR code.
Each device should have its own unique certificate or client secret.
Certificates can be used as secrets to prove the application's identity when a token is requested. The public part of the certificate is uploaded to the app registration in the AD FS application, whereas the full certificate must be deployed on each device where the Warehouse Management mobile app is installed. Your organization is responsible for managing the certificate in terms of rotation and so on. You can use self-signed certificates, but you should always use nonexportable certificates.
You must make a certificate locally available on each device where you run the Warehouse Management mobile app. For information about how to manage certificates for Intune-controlled devices (if you're using Intune), see Mass deploy the mobile app for service-based authentication.
Create an application entry in AD FS
For a successful authentication exchange between AD FS and Finance + Operations (on-premises), an application entry must be registered in AD FS under an AD FS application group. To create this application entry, run the following Windows PowerShell commands on a machine where the AD FS is installed. The user account must have enough permissions to administer AD FS.
In the Windows PowerShell console window, run the following command to create the application entry.
Add-AdfsClient -Name 'Dynamics 365 Finance - Warehousing' -ClientId ([guid]::NewGuid()) -ClientType Confidential -GenerateClientSecret -RedirectUri '\<Resource URL\>'Replace <Resource URL> with, for example,
https://ax.d365ffo.onprem.contoso.com(the URL that's used to access Finance + Operations (on-premises)).Save the values that you received.
Run the following command to grant permission to the application.
Grant-AdfsApplicationPermission -ClientRoleIdentifier '\<Client ID received in previous steps\>' -ServerRoleIdentifier '\<Resource URL\>' -ScopeNames 'openid'
Set up mobile-device user accounts in Finance + Operations (on-premises)
To enable Finance + Operations (on-premises) to use your AD FS application, follow these steps.
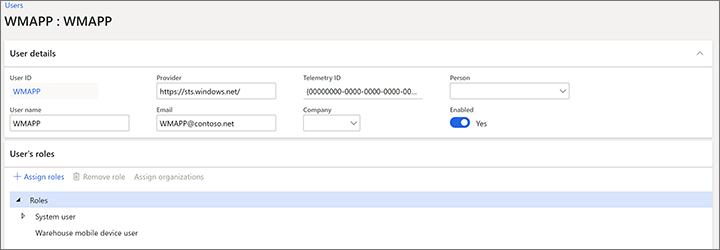
Create a user that corresponds to the user credentials for the Warehouse Management mobile app:
- In Finance + Operations (on-premises), go to System administration > Users > Users.
- Create a user.
- Assign the Warehousing mobile device user role to the user.

Associate your AD FS application with the Warehouse Management mobile app user:
- Go to System administration > Setup > Microsoft Entra ID applications.
- On the Action Pane, select New to add a line.
- In the Client ID field, enter the client ID that you made a note of when you set up the application in AD FS.
- In the Name field, enter a name.
- In the User ID field, select the user ID that you just created.
Tip
One way to use these settings is to create a client in AD FS for each of your physical devices and then add each client ID to the Microsoft Entra ID applications page. Then, if a device is lost, you can easily remove its access to Finance + Operations (on-premises) by removing its client ID from that page. (This approach works because the connection credentials that are saved on each device also specify a client ID, as described later in this article.)
Additionally, the default language, number format, and time zone settings for each client ID are established by the preferences that are set for the User ID value that's mapped here. Therefore, you might use those preferences to establish default settings for each device or collection of devices, based on the client ID. However, these default settings are overridden if they're also defined for the warehouse app user account that a worker uses to sign in on the device. (For more information, see Mobile device user accounts.)
Remove access for a device that authenticates by using a certificate or client secret
If a device is lost or compromised, you must remove its ability to access Finance + Operations (on-premises). The following procedure describes the recommended process for removing access for a device that authenticates by using a certificate or client secret.
Go to System administration > Setup > Microsoft Entra ID applications.
Delete the line that corresponds to the device that you want to remove access for. Make a note of the client ID that's used for the device, because you'll need it later.
If you've registered only one client ID, and multiple devices use it, you must push out new connection settings to those devices. Otherwise, they lose access.
Open your AD FS management tool.
In the left navigation pane, select Application Groups, and then select the application group that corresponds to Finance + Operations (on-premises).
Under the server application group, find and select the client ID that corresponds to the client ID that you made a note of in step 2.
On the bottom right, select Remove.
Select Apply.