Bubble
Bubble lets you create interactive, multi-user apps for desktop and mobile web browsers without coding. It includes all the tools you need to build and also determine what happens as users navigate your application.
How to install Clarity on the Bubble platform
Step 1
Note
You would need a Clarity Project ID to activate Clarity on Bubble. If you don't have a project on Clarity, check how to create a new project.
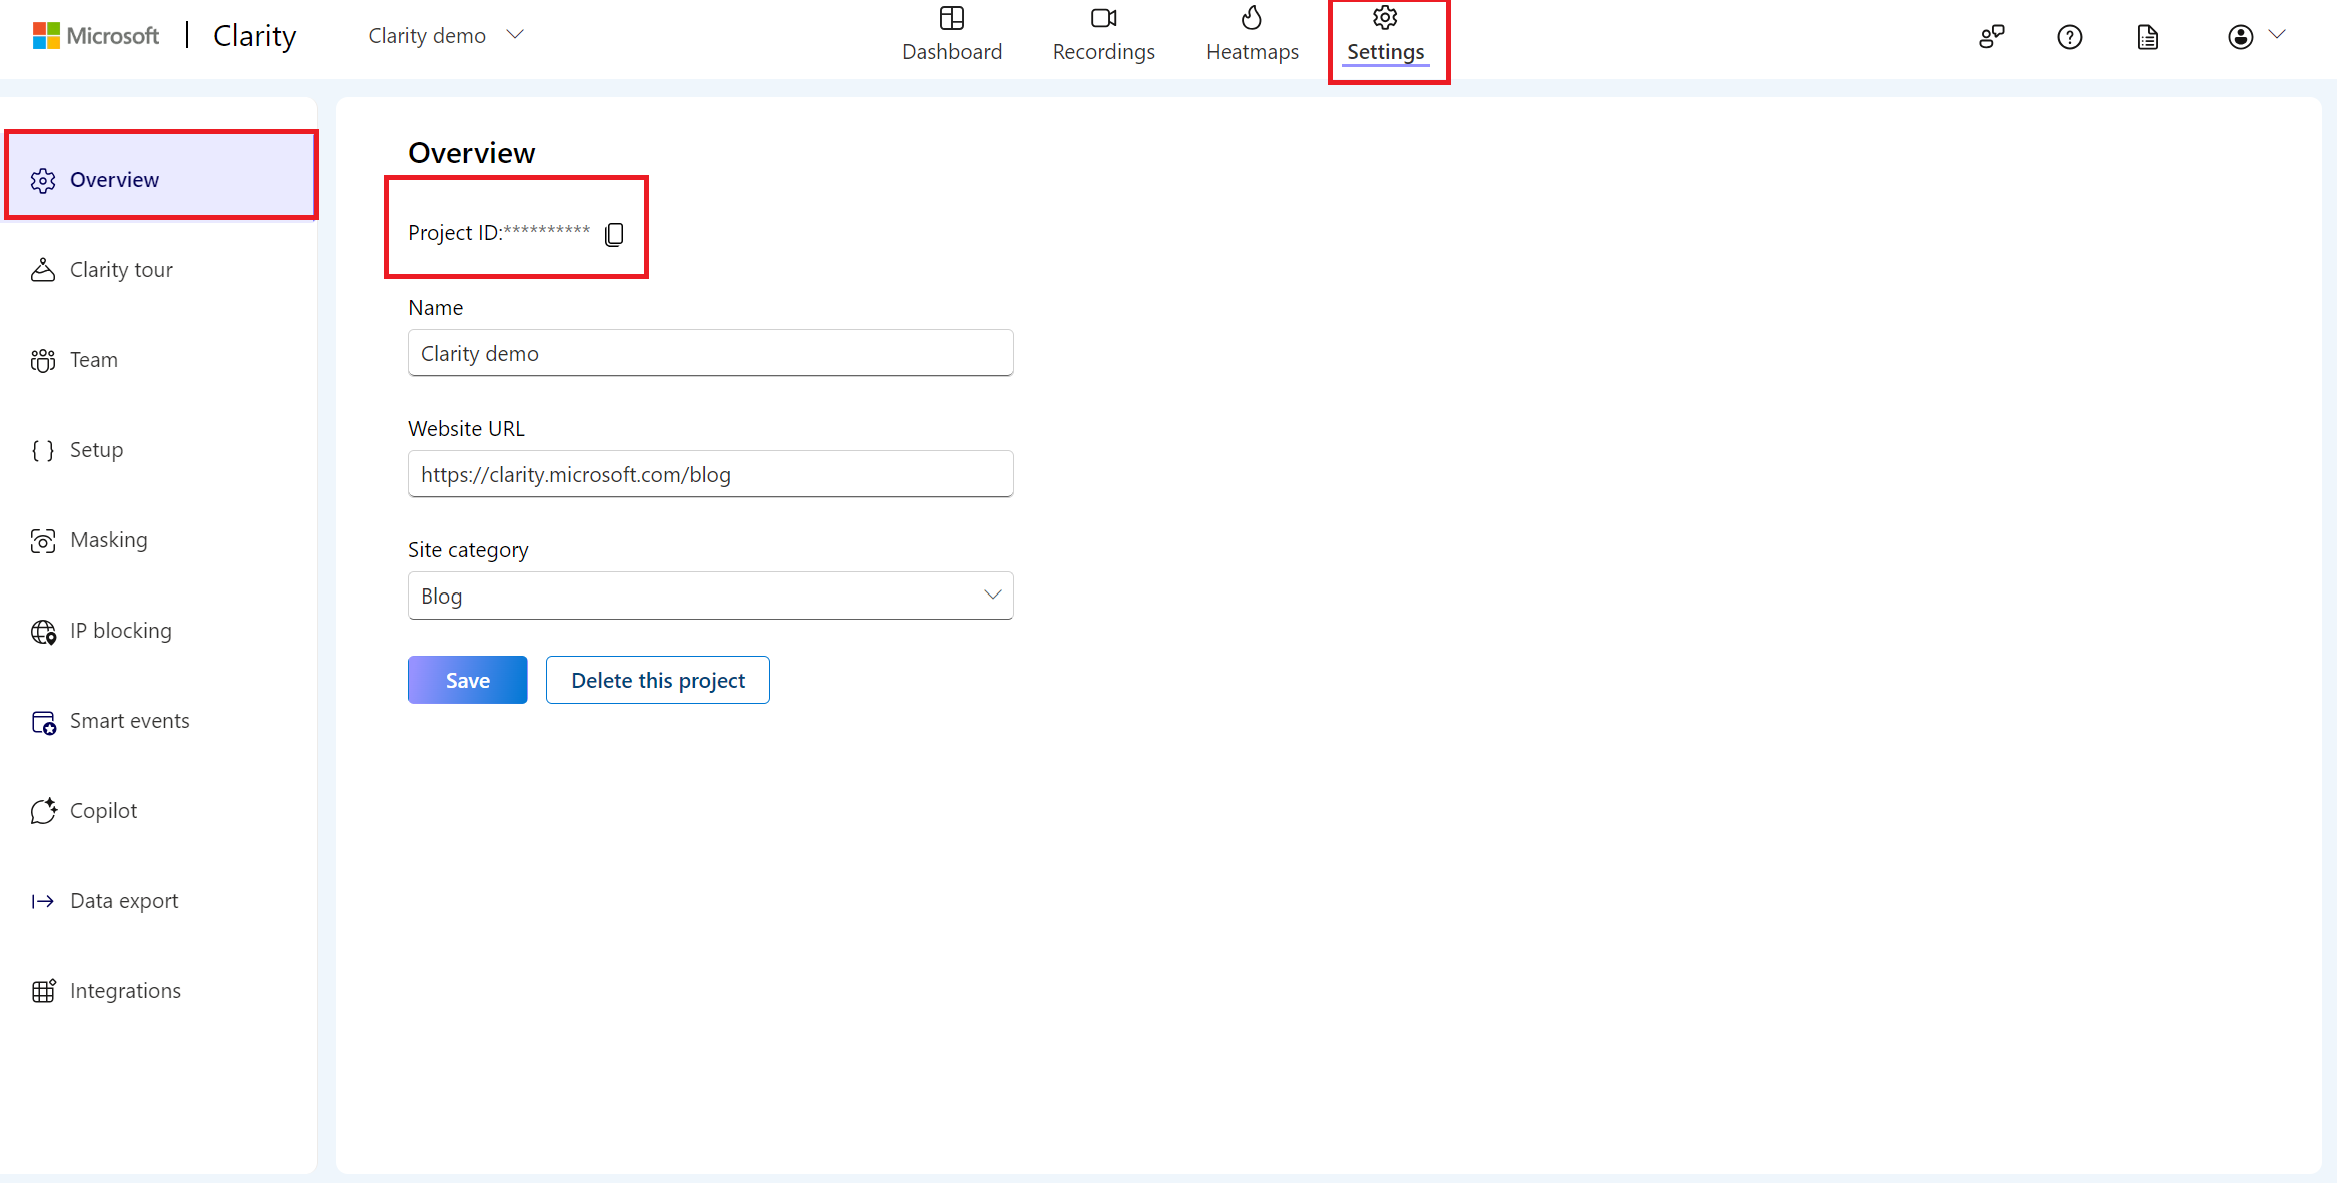
Locate your Clarity Project ID and copy it by following the below instructions:
- From the Clarity dashboard, go to Settings.
- Select Overview from the left panel.
- Copy the Project ID (for example, 55u86t0118).
Step 2
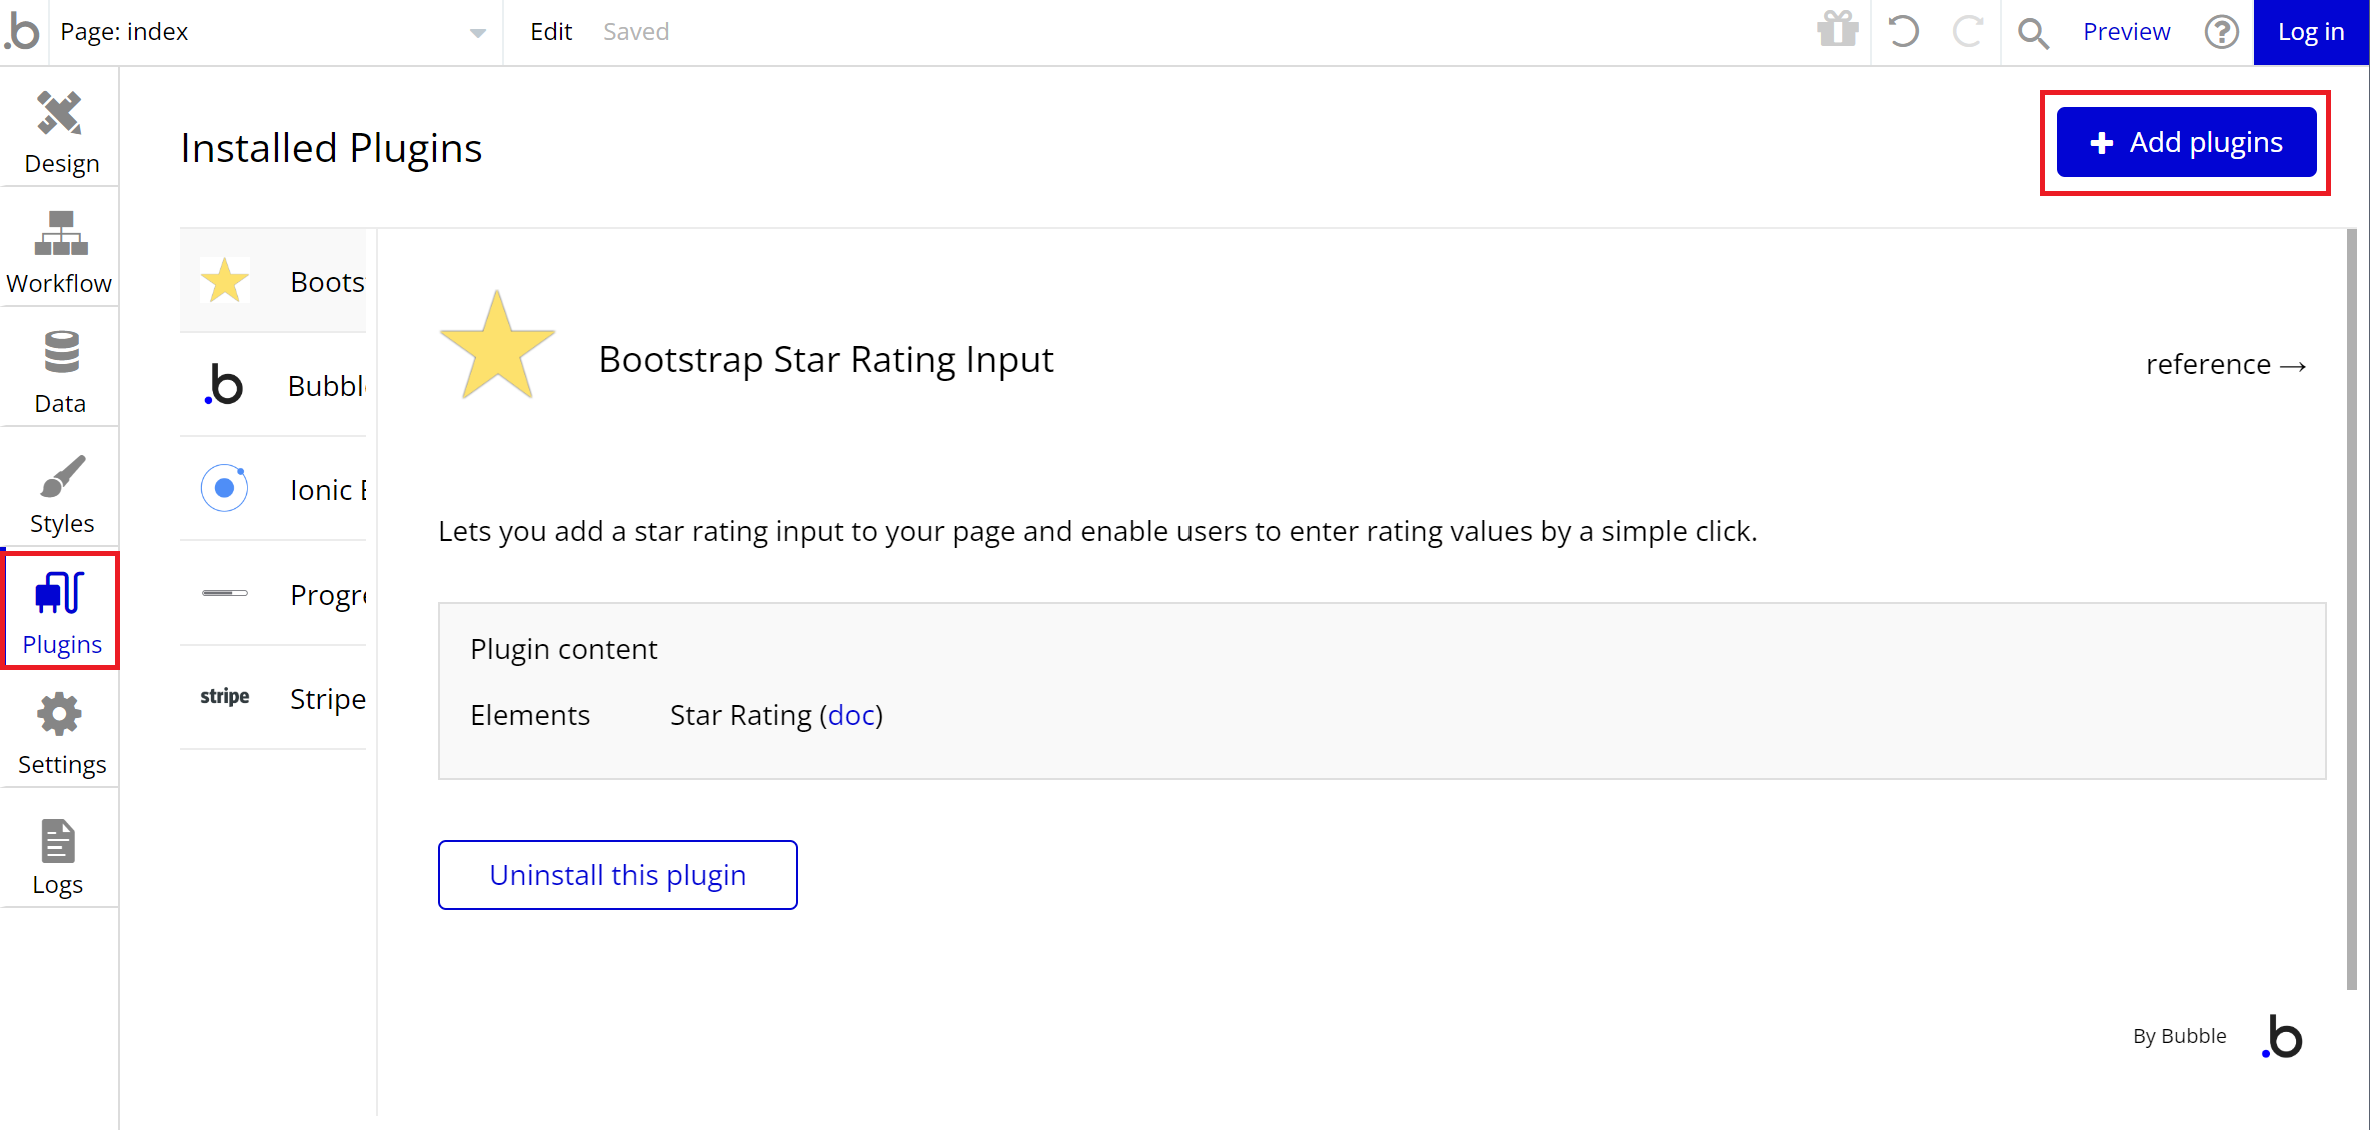
Sign in to Bubble.io. Go to Plugins. Select Add Plugins.
Step 3
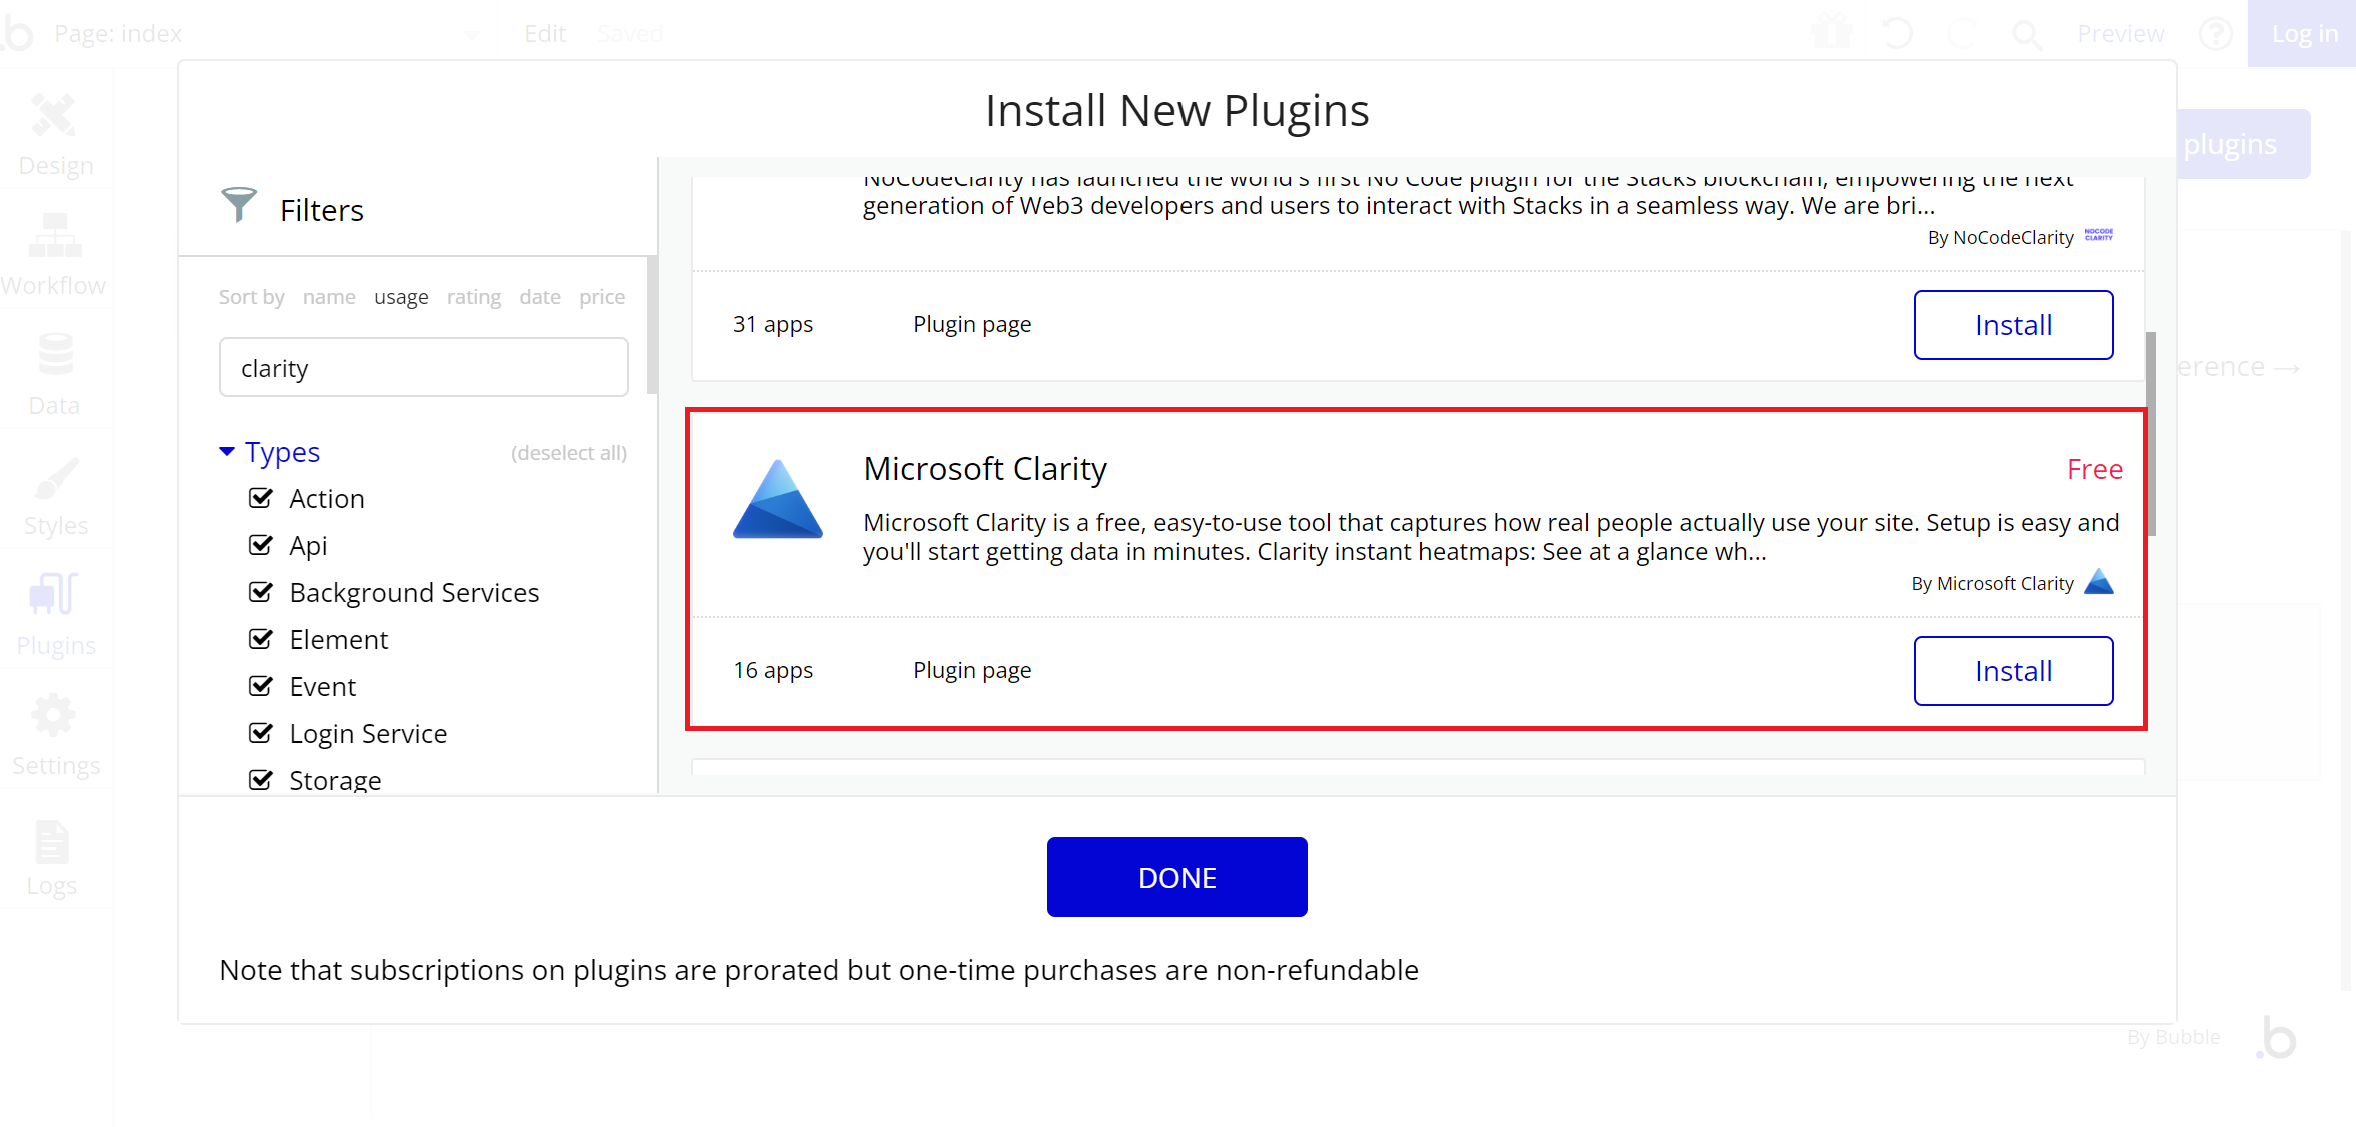
Search and select Microsoft Clarity. Select Install.
Step 4
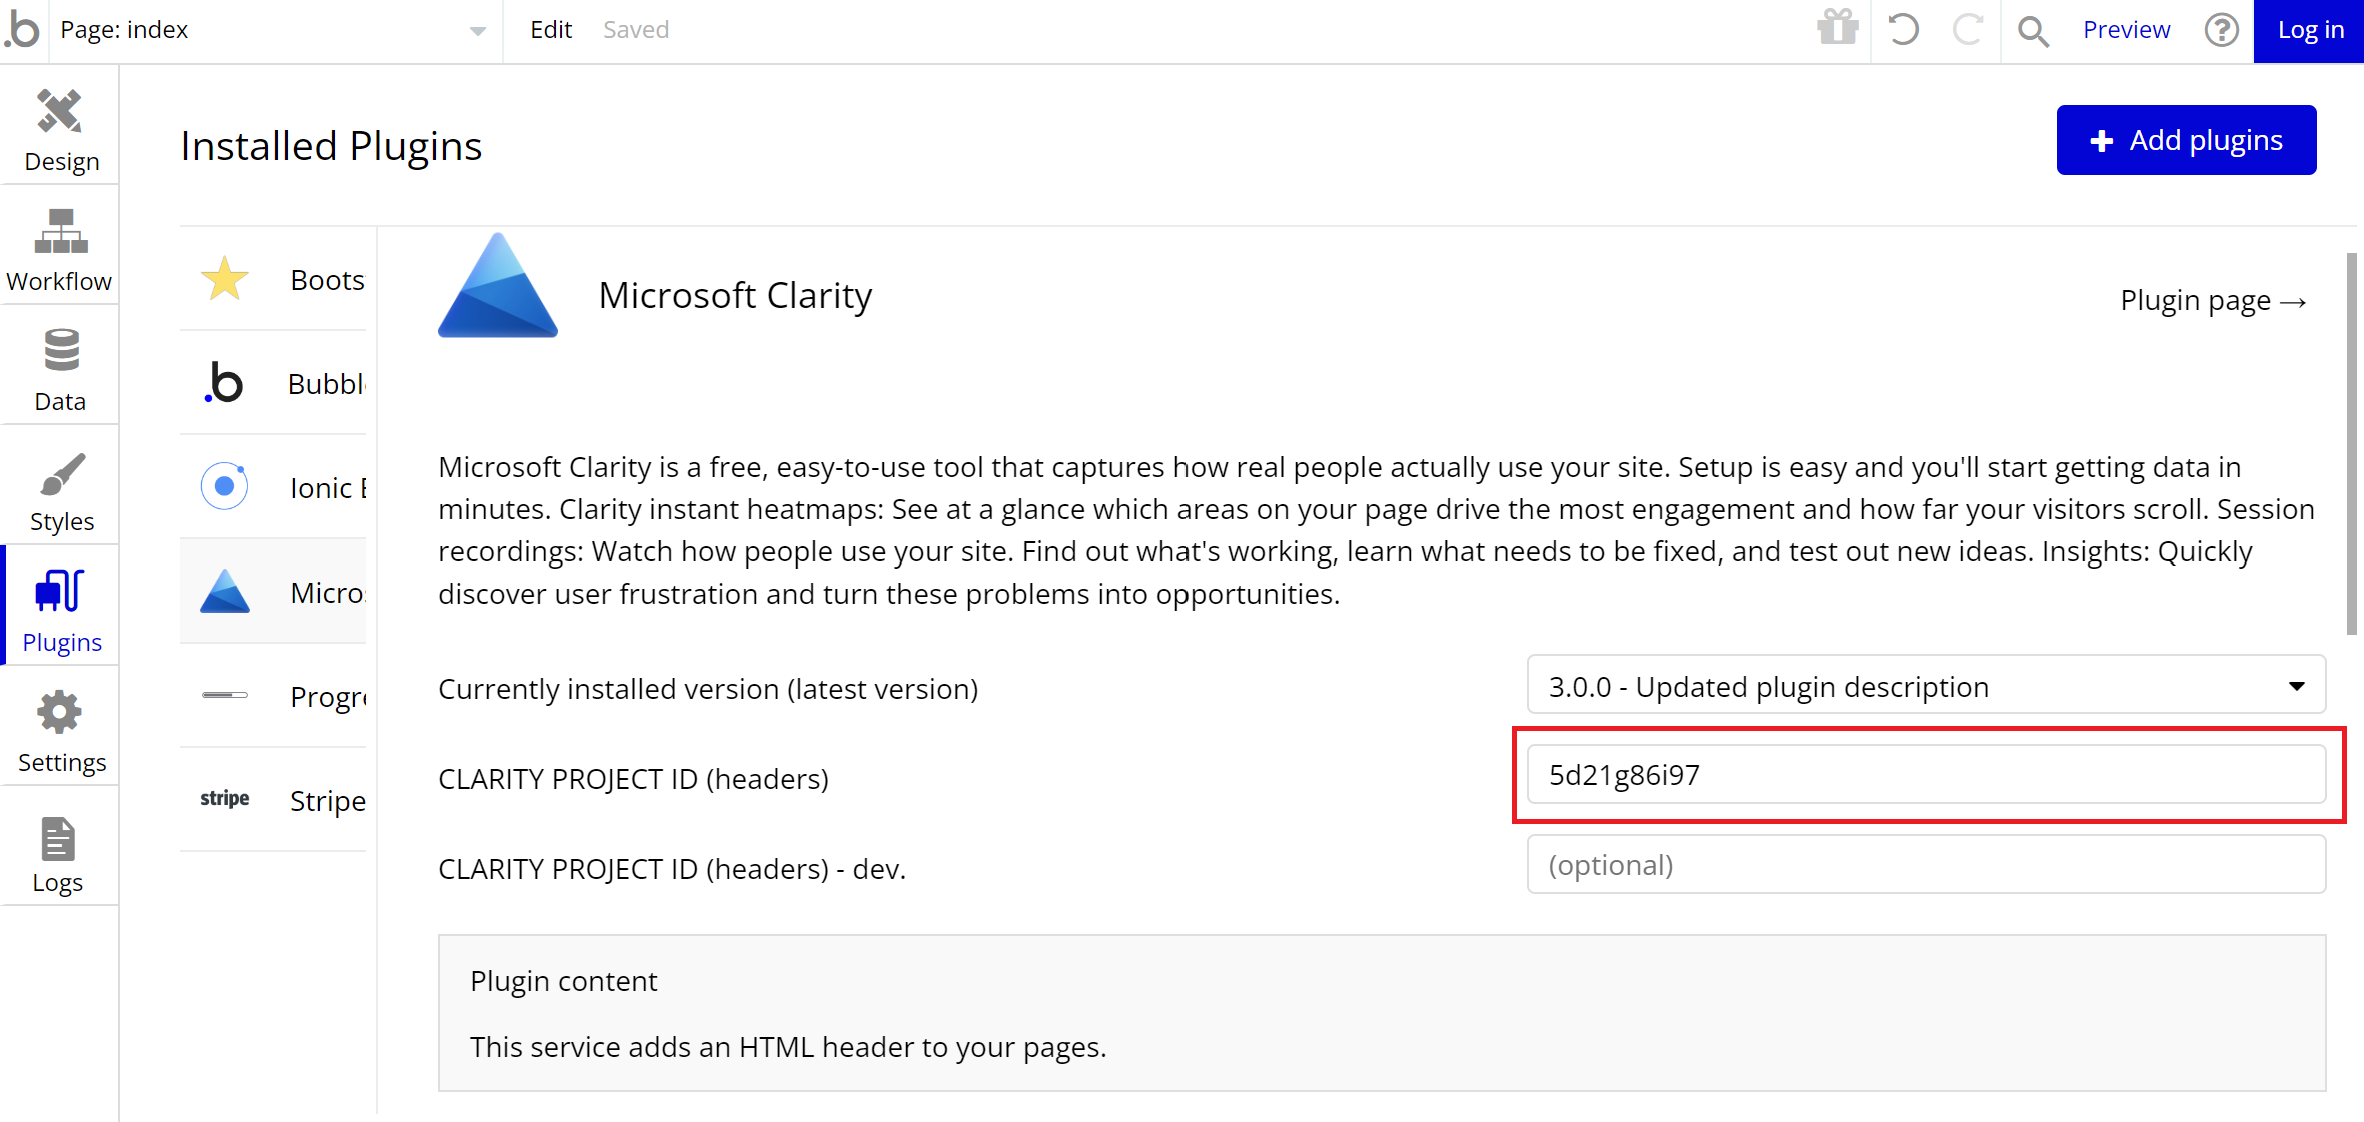
Paste the Project ID to install the plugin.
Send Clarity custom tags from your Bubble app
Step 1
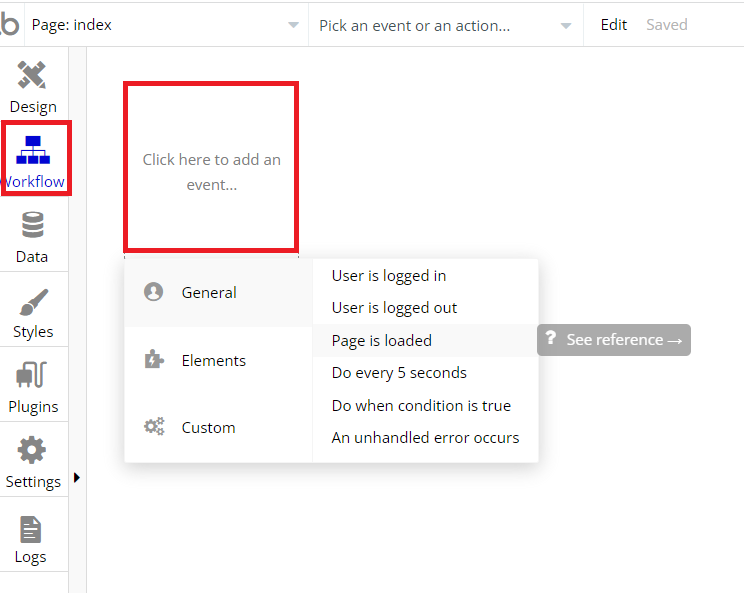
Go to Workflow tab and create new event.
Step 2
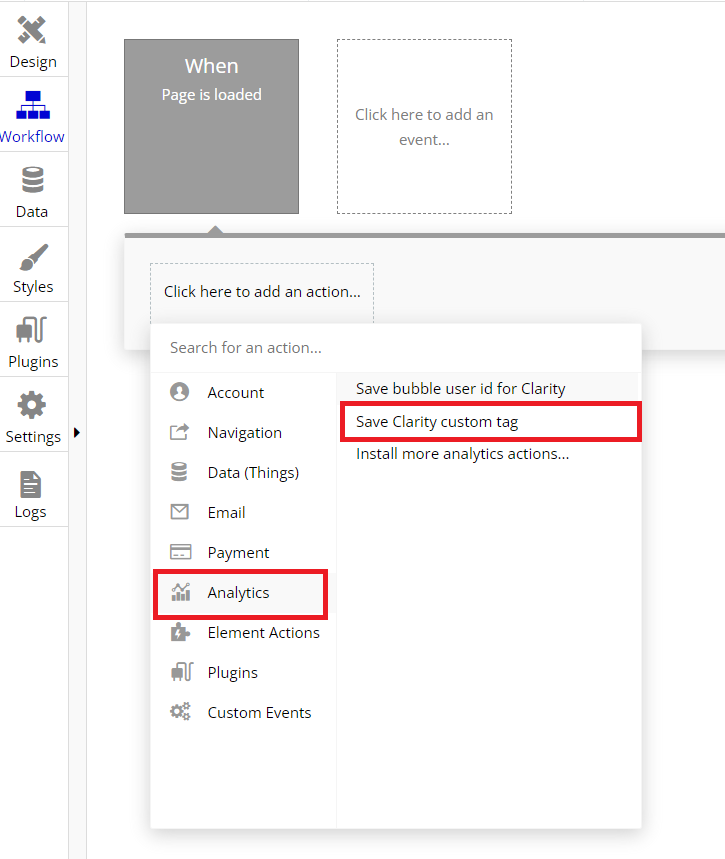
Add an action to the event created. Go to Analytics and select Save Clarity custom tag.
Step 3
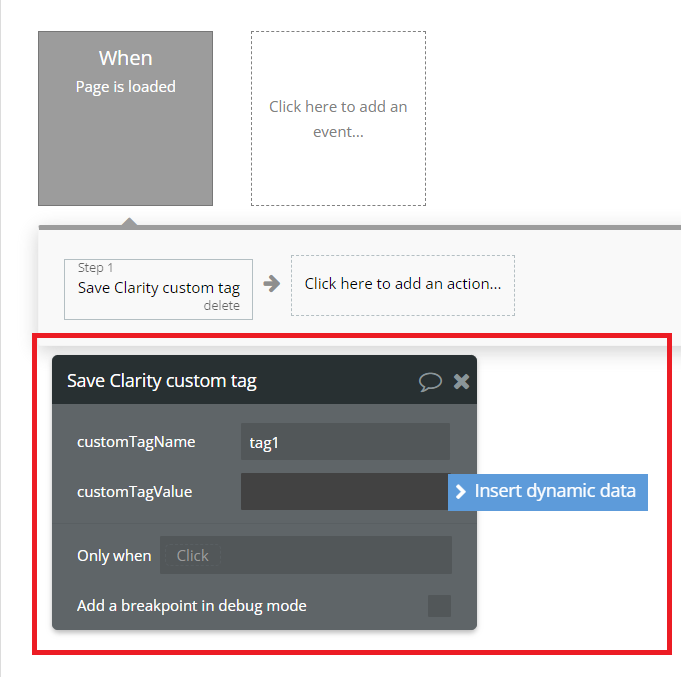
Specify the custom tag name and value. The tag name is a static string. Choose the custom tag value from the list of dynamic data available in your bubble app.
Step 4
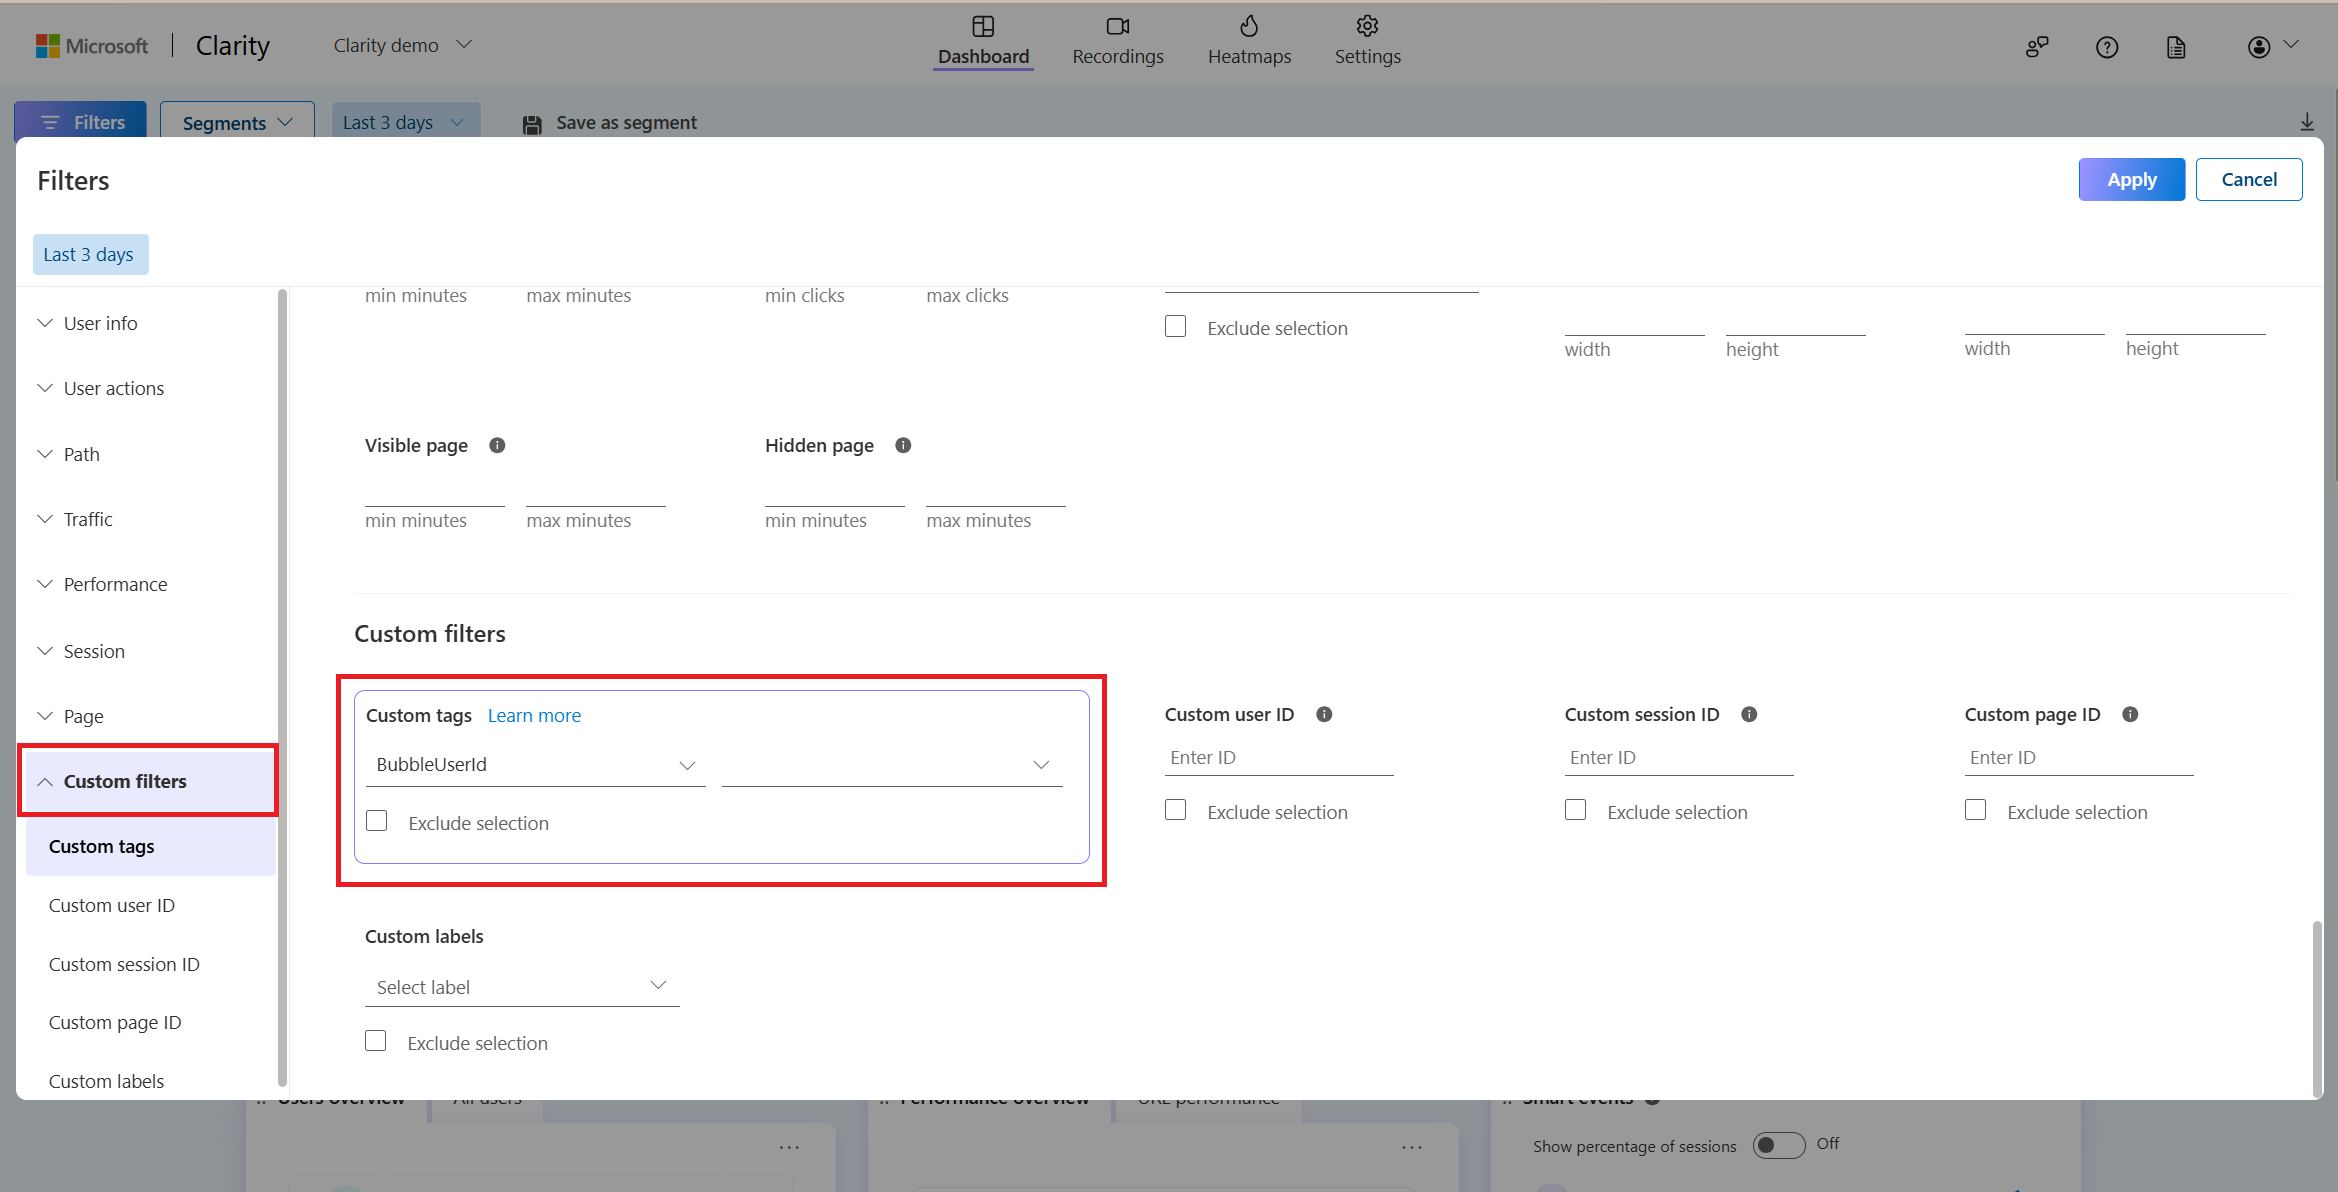
To access the custom tags set in Clarity, go to your Clarity project and select Filters -> Custom filters -> Custom tags. From the drop-down list, choose BubbleUserId and select the relevant user ID.
Send the bubble user ID to clarity
Step 1
Go to Workflow tab and create new event.

Step 2
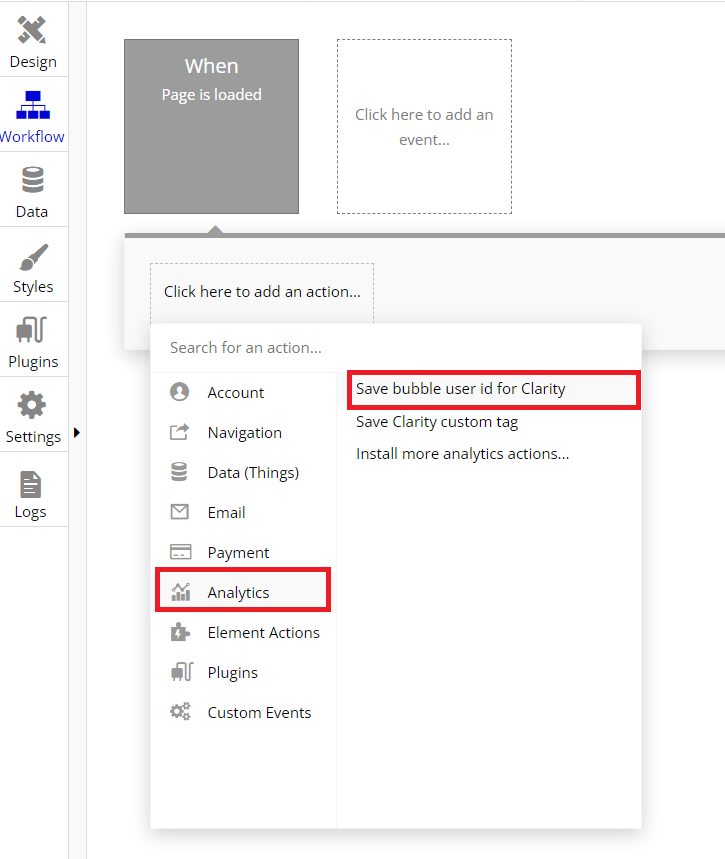
Add an action to the event created. Go to Analytics and select Save bubble user id for Clarity.
Step 3
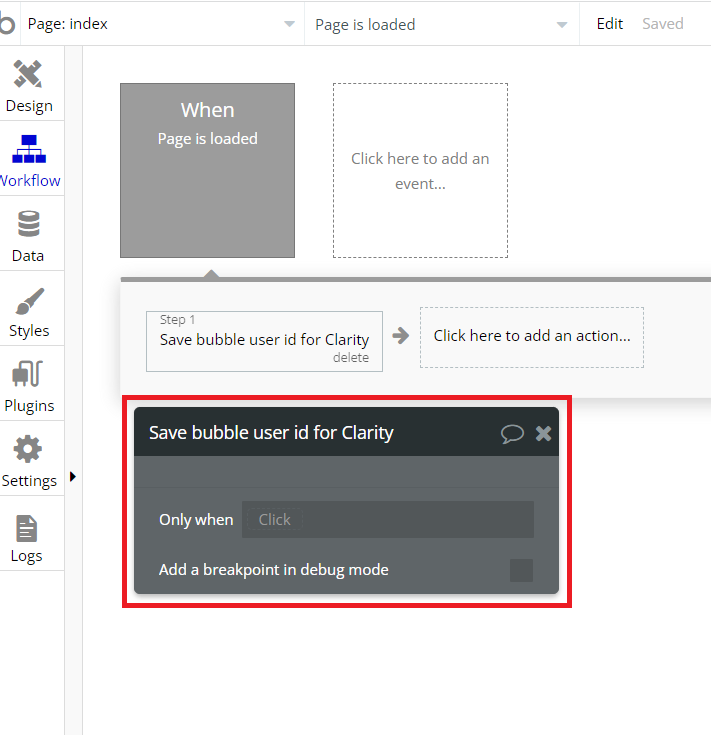
Configure when to save the bubble user ID.
Step 4
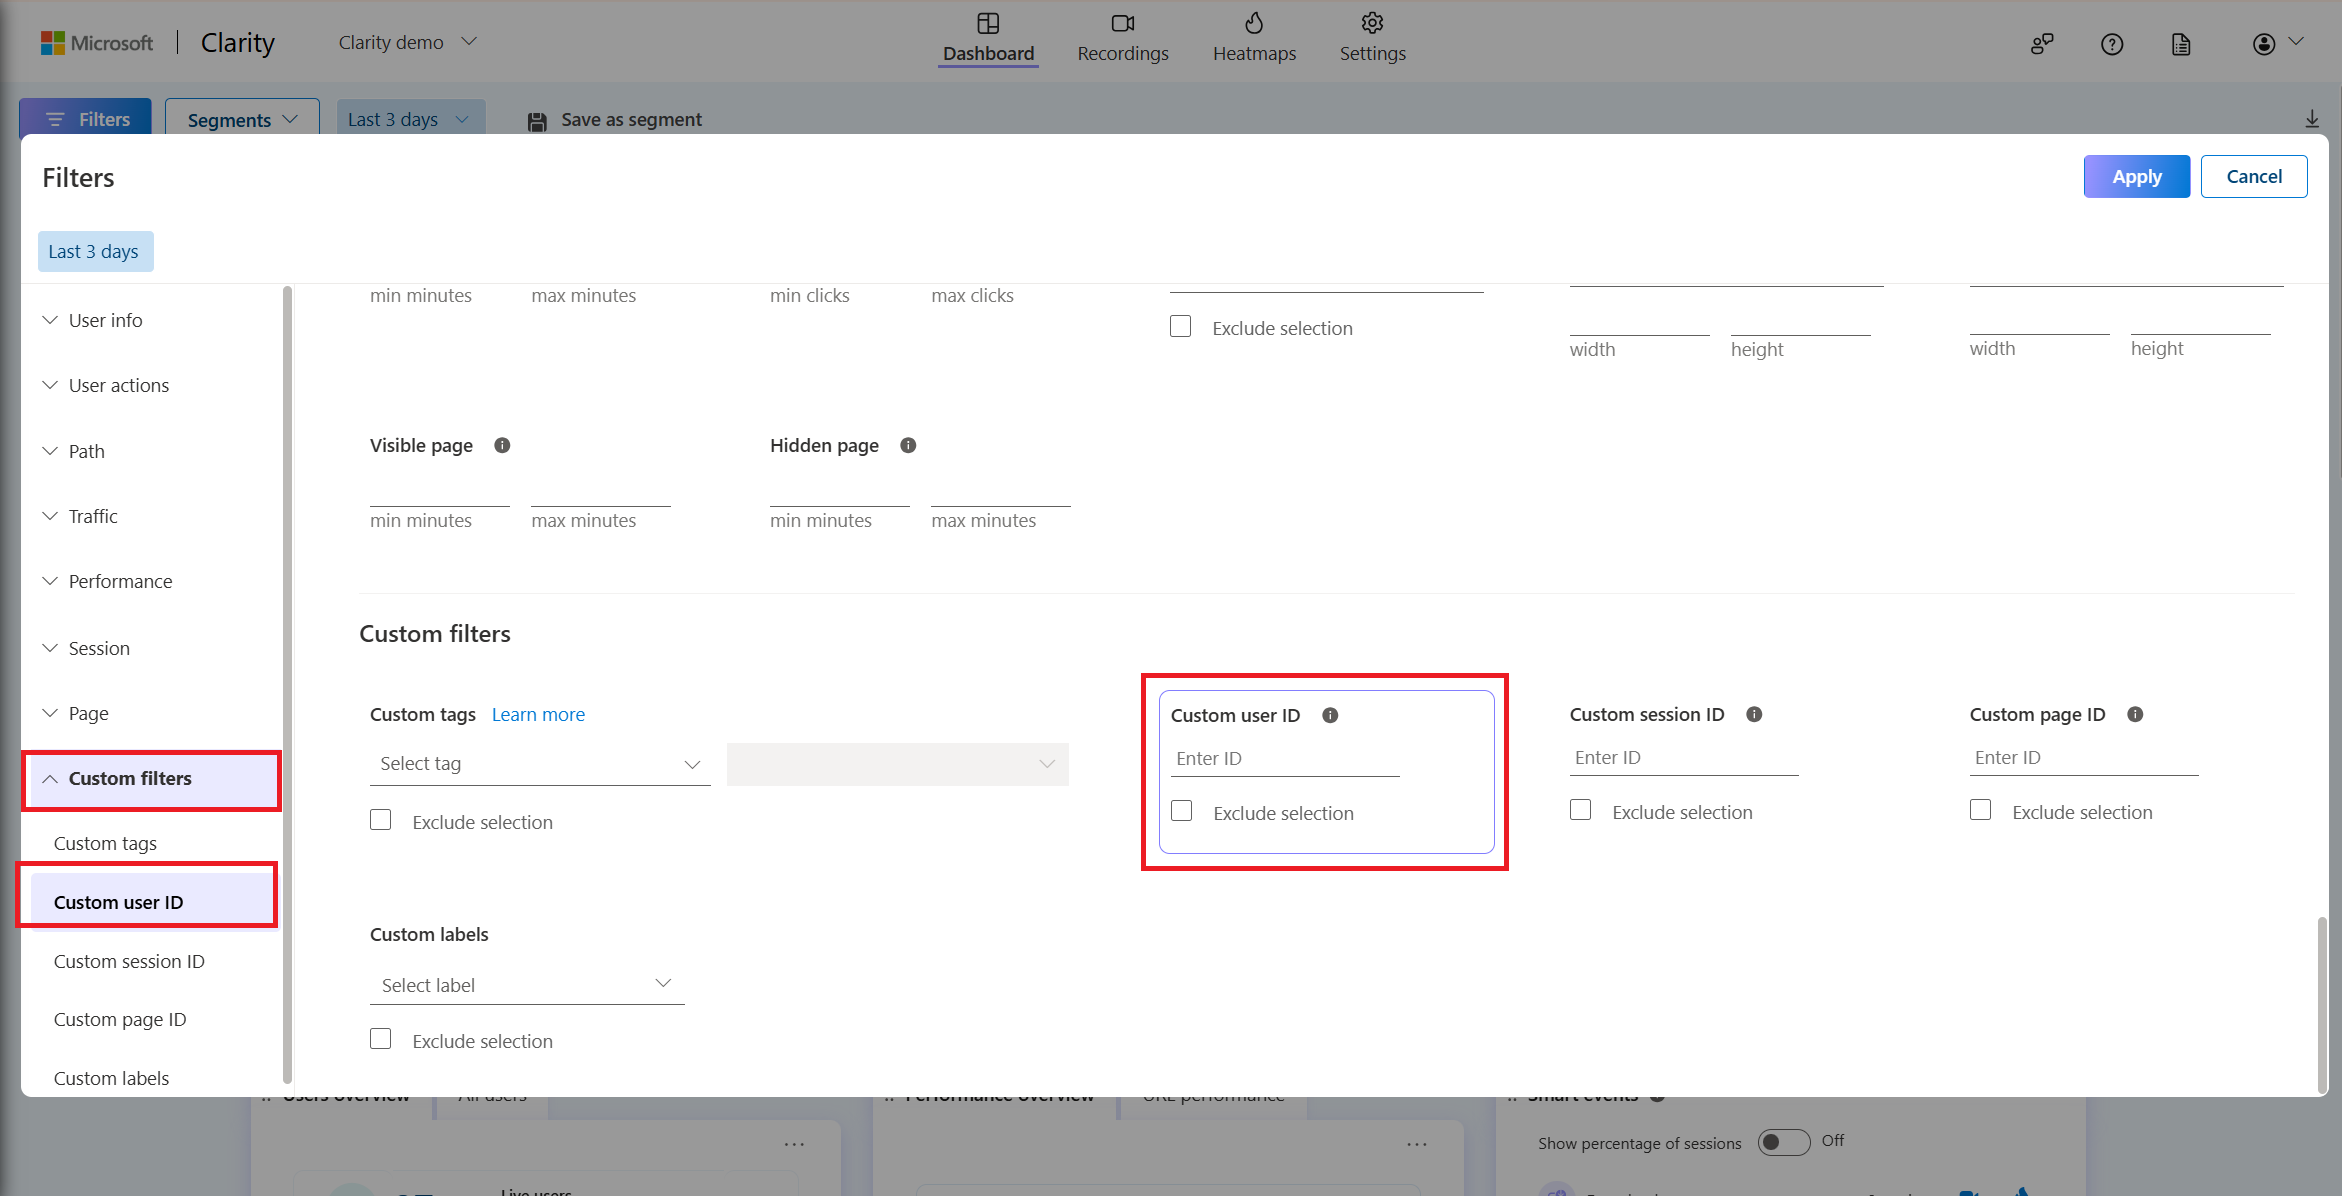
To access the Bubble user ID in Clarity, Go to your Clarity project and select Filters -> Custom filters -> Custom user ID. Enter the ID set in Bubble.
FAQ
For more answers, refer to Setup FAQ.