Creating Amazing User Experiences on the Microsoft Platform - available for download now!
As previously mentioned here I will be posting all my material from the Financial Developers Conference session online.
You can now grab the Powerpoint here.
Grab the Source Code here.
Here is a breakdown of what you will find in the zip file.
AjaxUpdateStatus
- This is the project where I showed how easy it was to add Ajax too an existing ASP.NET Website using VS2008.
- Two pieces of code to to watch for here. First is the UpdateProgress control, this is what enabled us to throw up a message when we simulated server traffic. To simulate server traffic just put the thread to sleep for a few seconds. I did this in the Button click event but you can do it anywhere really.
       <asp:UpdateProgress ID="UpdateProgress1" runat="server">
          <ProgressTemplate>
              Loading, Please Wait...
          </ProgressTemplate>
      </asp:UpdateProgress>
protected void Button1_Click(object sender, EventArgs e) { Thread.Sleep(5000); }
SLDevCon
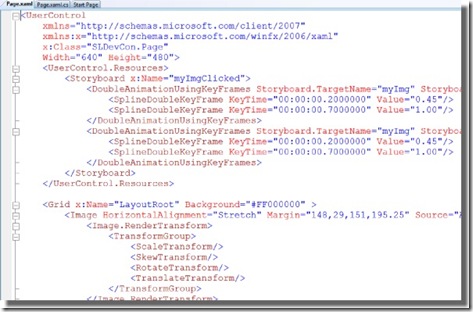
- This project showed a sample of creating a new Silverlight 2.0 application using the templates in VS2008. We covered how to create a mirror shadow on an image (to make it look like glass) a simple storyboard animation and then how to add video as a brush to an element. This is something that is very easy to do in XAML and has some great effects. You'll see in the code we create a MediaElement for the video and then just apply it as a Video Brush on the text foreground. You could do this for any element really, even your buttons or listboxes. =)
     <MediaElement Height="152" HorizontalAlignment="Right" Margin="0,0,25,28"     VerticalAlignment="Bottom" Width="178" x:Name="myVid" Source="Bear.wmv" Visibility="Visible" Opacity="0"/>
    <TextBlock Height="59" HorizontalAlignment="Left" Margin="45,0,0,52" x:Name="myText" VerticalAlignment="Bottom" Width="203"
     Text="USING VIDEO" TextWrapping="Wrap" FontSize="24" >
    <TextBlock.Foreground>
    <VideoBrush SourceName="myVid"/>
    </TextBlock.Foreground>
    </TextBlock>
SLTimers
- This project showed how we can easily use timers now in our code behind in Silvelright 2.0. The old days of using a Storyboard to keep track of time and fire off events are slowing fading. Thanks to Tim Sneath for the idea from his excellent hands on lab. Basically we create a new Dispatch Timer and every time it fires off its Tick event we change the color of the button text.
             timer= new DispatcherTimer();
            timer.Interval = new TimeSpan(0, 0, 2);
            rng = new Random();
            timer.Tick += new EventHandler(timer_Tick);
            timer.Start();
        }

        void timer_Tick(object sender, EventArgs e)
        {
            Byte[] colors=new byte[3];
            rng.NextBytes(colors);

            btnClick.Foreground=new SolidColorBrush(Color.FromArgb(255,colors[0],colors[1],colors[2]));
        }
TestDepth
- This project is the DeepZoom project. I did not include the image output from DeepZoom Composer due to size constraints as well as the Heores mp3 file due to copyright. I will be posting a screencast very shortly that will take you step by step how to build your own. The Deep Zoom image itself is just a MultiScaleImage element declared in the XAML. The mp3 I played was a declared as a MediaElement and then I just added an event handler to capture keyboard input off the control itself. I used W for play, S for pause and X for stop. The actual handling of the mouse to Zoom and Pan was done via the "Nerd Silverlight" code snippets the amazing guys at IdentityMine posted here. Other than that I just formatted the control itself to be a little bit smaller than 1024x768 so when I went into full screen IE mode the illusion all played out nicely so it looked like a Powerpoint.
        <Grid x:Name="LayoutRoot" Background="White">
        <MultiScaleImage x:Name="myZoom" Width="1014" Height="766"
Source="https://localhost:49862/TestDepth_Web/ClientBin/FinServHeroes/info.bin" Cursor="Hand"
MouseLeftButtonDown="myZoom_MouseLeftButtonDown" MouseLeftButtonUp="myZoom_MouseLeftButtonUp" MouseMove="myZoom_MouseMove" />
        <MediaElement x:Name="mp3Heroes" Source="https://localhost:49862/TestDepth_Web/ClientBin/Heroes.mp3"  AutoPlay="False" />
       </Grid>
         public Page()
        {
            this.InitializeComponent();
            this.KeyDown += new KeyEventHandler(Page_KeyDown);
            myZoom.KeyDown += new KeyEventHandler(myZoom_KeyDown);
        }


        void Page_KeyDown(object sender, KeyEventArgs e)
        {
            CheckMusic(e);
        }

        void CheckMusic(KeyEventArgs e)
        {
            switch (e.Key)
            {
                case Key.W:
                    mp3Heroes.Play();
                    break;

                case Key.S:
                    mp3Heroes.Pause();
                    break;

                case Key.X:
                    mp3Heroes.Stop();
                    break;

                default:
                    return;
            }
        }
Web-AJAX
- This was the sample AJAX project we did where we applied a Shadow Extender to the button and some CSS.
Web-SLMediaPlayer
- This is the project where I showed how to add video to an existing ASP.NET Web Application using the new Silverlight AJAX controls. We also went in and modified the XAML for the player skin and added a DevCon logo animation that fired off when the Canvas was loaded. This showed how easy it is to fire off events in XAML directly using Triggers and the ability to create rich animation using Expression Blend. Thanks to Brad Abrams for the original idea and inspiration behind this. Brad also did a really awesome session at Boston Remix on using Video in your Web Applications. Check it out here.
 <Storyboard x:Name="myLogoSpin"/>
  </Canvas.Resources>
    <Canvas.Triggers>
        <EventTrigger RoutedEvent="Canvas.Loaded">
            <BeginStoryboard>
                <Storyboard x:Name="spinMyImg">
                    <DoubleAnimationUsingKeyFrames BeginTime="00:00:00" Storyboard.TargetName="image"
Storyboard.TargetProperty="(UIElement.Opacity)">
                        <SplineDoubleKeyFrame KeyTime="00:00:02" Value="1"/>
                        <SplineDoubleKeyFrame KeyTime="00:00:04" Value="1"/>
                        <SplineDoubleKeyFrame KeyTime="00:00:05" Value="0"/>
                    </DoubleAnimationUsingKeyFrames>
                    <DoubleAnimationUsingKeyFrames BeginTime="00:00:00" Storyboard.TargetName="image"
Storyboard.TargetProperty="(UIElement.RenderTransform).(TransformGroup.Children)[2].(RotateTransform.Angle)">
                        <SplineDoubleKeyFrame KeyTime="00:00:02" Value="0"/>
                        <SplineDoubleKeyFrame KeyTime="00:00:04" Value="361.077"/>
                    </DoubleAnimationUsingKeyFrames>
                </Storyboard>
            </BeginStoryboard>
        </EventTrigger>
    </Canvas.Triggers>
WPFButton
- This project was originally part of Kevin Moore's WPF Bag-O-Tricks. What I did for the session was just create a new Blend Project and import most of the XAML. The great thing about this demo is it shows a really slick animation based on mouse movement without any code behind. It is done entirely in XAML using triggers. Check it out!
Feel free to email me with any questions. I plan to have the Deep Zoom and Video Editing screencasts done shortly and will post the links up here so stay tuned.
Technorati Tags: Creating Amazing User Experiences on the Microsoft Platform,Silverlight code,WPF code
Comments
Anonymous
March 15, 2008
PingBack from http://blogs.msdn.com/davedev/archive/2008/03/15/where-to-get-my-finserv-devcon-content-deepzoom-silverlight-and-other-expression-goodness.aspxAnonymous
March 20, 2008
Tim Heuer revisits SL2 and WS, Jesse Liberty discussing how to get SL assistance, Bill Reiss on the DispatcherTimerAnonymous
March 26, 2008
Blog post and C9 video by Dave Isbitski, with PPT and source code: http://blogs.msdn.com/davedev/archive/2008/03/16/creating-amazing-user-experiences-on-the-microsoft-platform-available-for-download-now.aspx
