Data quality for Fabric Lakehouse data estate
Fabric OneLake is a single, unified, logical data lake for your whole organization. A data lake processes large volumes of data from various sources. Like Microsoft OneDrive, OneLake comes automatically with every Microsoft Fabric tenant and is designed to be the single place for all your analytics data. OneLake brings customers:
- One data lake for the entire organization
- One copy of data for use with multiple analytical engines
OneLake aims to give you the most value possible out of a single copy of data without data movement or duplication. You no longer need to copy data just to use it with another engine or to break down silos so you can analyze the data with data from other sources. You can use Microsoft Purview to catalog fabric data estate and measure data quality to govern and drive improvement action.
You can use shortcut for referencing to data that is stored in other file locations. These file locations can be within the same workspace or across different workspaces, within OneLake or external to OneLake in Azure Data Lake Storage (ADLS), Amazon Web Services (AWS) S3, or Dataverse with more target locations coming soon. Data source location doesn't matter that much, OneLake shortcuts make files and folders look like you have them stored locally. When teams work independently in separate workspaces, shortcuts enable you to combine data across different business groups and domains into a virtual data product to fit a user’s specific needs.
You can use mirroring to bring data from various sources together into Fabric. Mirroring in Fabric is a low-cost and low-latency solution to bring data from various systems together into a single analytics platform. You can continuously replicate your existing data estate directly into Fabric's OneLake, including data from Azure SQL Database, Azure Cosmos DB, and Snowflake. With the most up-to-date data in a queriable format in OneLake, you can now use all the different services in Fabric. For example, running analytics with Spark, executing notebooks, data engineering, visualizing through Power BI Reports, and more. The Delta tables can then be used everywhere Fabric, allowing users to accelerate their journey into Fabric.
Register Fabric OneLake
To configure Data Map scan, you need to first register data source that you want to scan. To scan a Fabric workspace, there are no changes to the existing experience to register a Fabric tenant as a data source. To register a new data source, follow these steps:
- In the Microsoft Purview portal, go to Data Map.
- Select Register.
- On Register sources, select Fabric.
Refer to same tenant and cross tenant setup instructions.
Set up Data Map scan
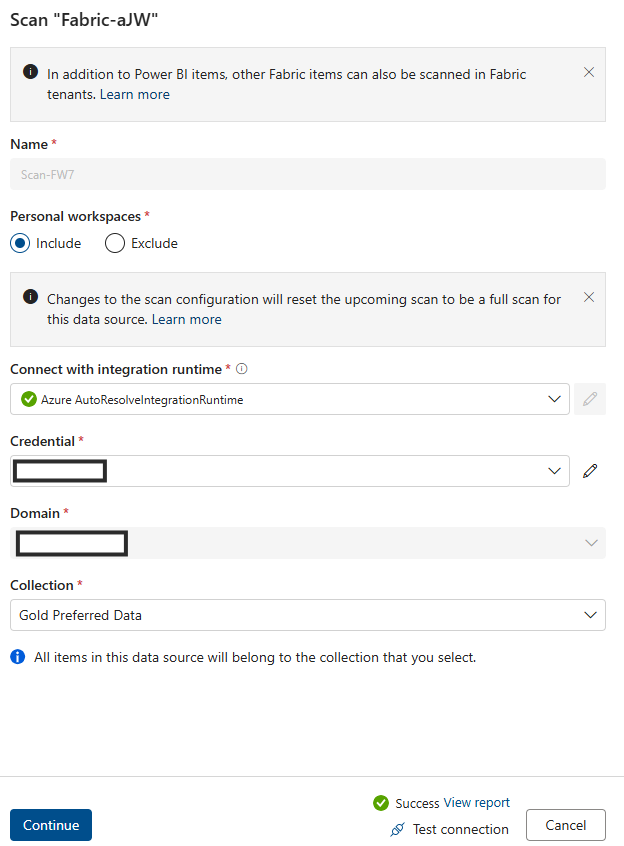
To scan Lakehouse subartifacts, there are no changes to the existing experience in Data Map to set up a scan. There's another step to grant the scan credential with at least Contributor role in the Fabric workspaces to extract the schema information from supported file formats.
Currently only service principal is supported as authentication method. The MSI support is still in backlog.
Refer to same tenant and cross tenant setup instructions.
Set up connection for Fabric Lakehouse scan
After you register Fabric Lakehouse as a source, you can select Fabric from the list of your registered data sources in Data Map and select New scan. Add a Data source ID, then follow the steps below:
Create a security group and a service principal
Make sure to add BOTH this service principal and the Purview Managed Identity to this security group and then provide this security group.
Associate the security group with Fabric tenant
- Log into Fabric admin portal.
- Select the Tenant settings page. You need to be a Fabric Admin to see the tenant settings page.
- Select Admin API settings > Allow service principals to use read-only admin APIs.
- Select Specific security groups.
- Select Admin API settings > Enhance admin APIs responses with detailed metadata and Enhance admin APIs responses with DAX and mashup expressions > Enable the toggle to allow Microsoft Purview Data Map automatically discover the detailed metadata of Fabric datasets as part of its scans. After you update the Admin API settings on your Fabric tenant, wait around 15 minutes before registering a scan and test connection.
Provide Admin API settings read-only API permission to this security group.
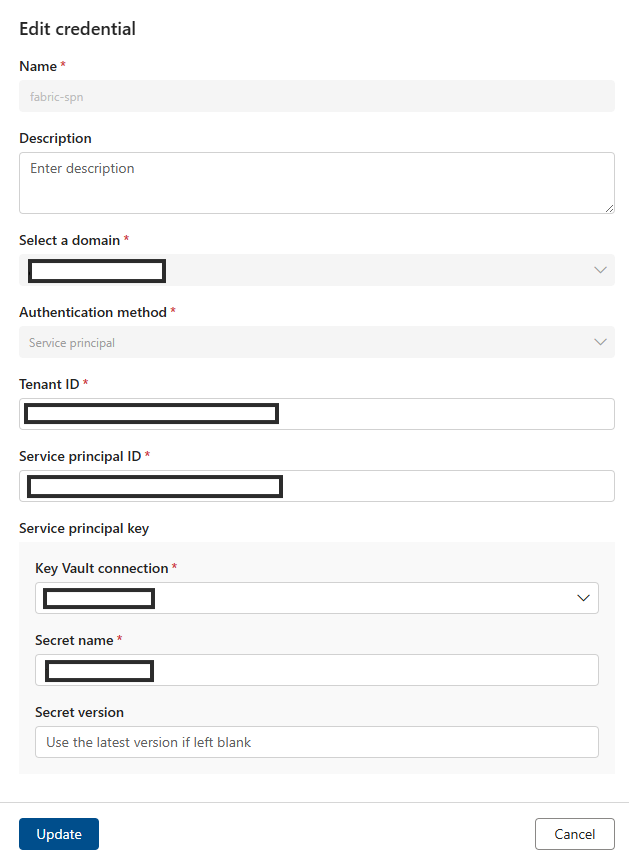
Add SPN into Credential field.
Add Azure resource name.
Add Tenant ID.
Add Service Principle ID.
Add Key Vault connection.
Add Secret name.
After you finish the Data Map scan, locate a Lakehouse instance in Unified Catalog.
- In the Microsoft Purview portal, open Unified Catalog.
- Select Discovery, then Data assets.
- On the Data assets page, select Microsoft Fabric.
- Select Fabric workspaces, then select a workspace from the list.
- On the workspace's page, find the Lakehouse instance under Item name.
To browse Lakehouse tables:
- On a workspace page, select the item name Tables.
- Select a Lakehouse table asset listed under Item name.
- View the asset's details page to find metadata such as schema, lineage, and properties.
Fabric Lakehouse data quality scan prerequisites
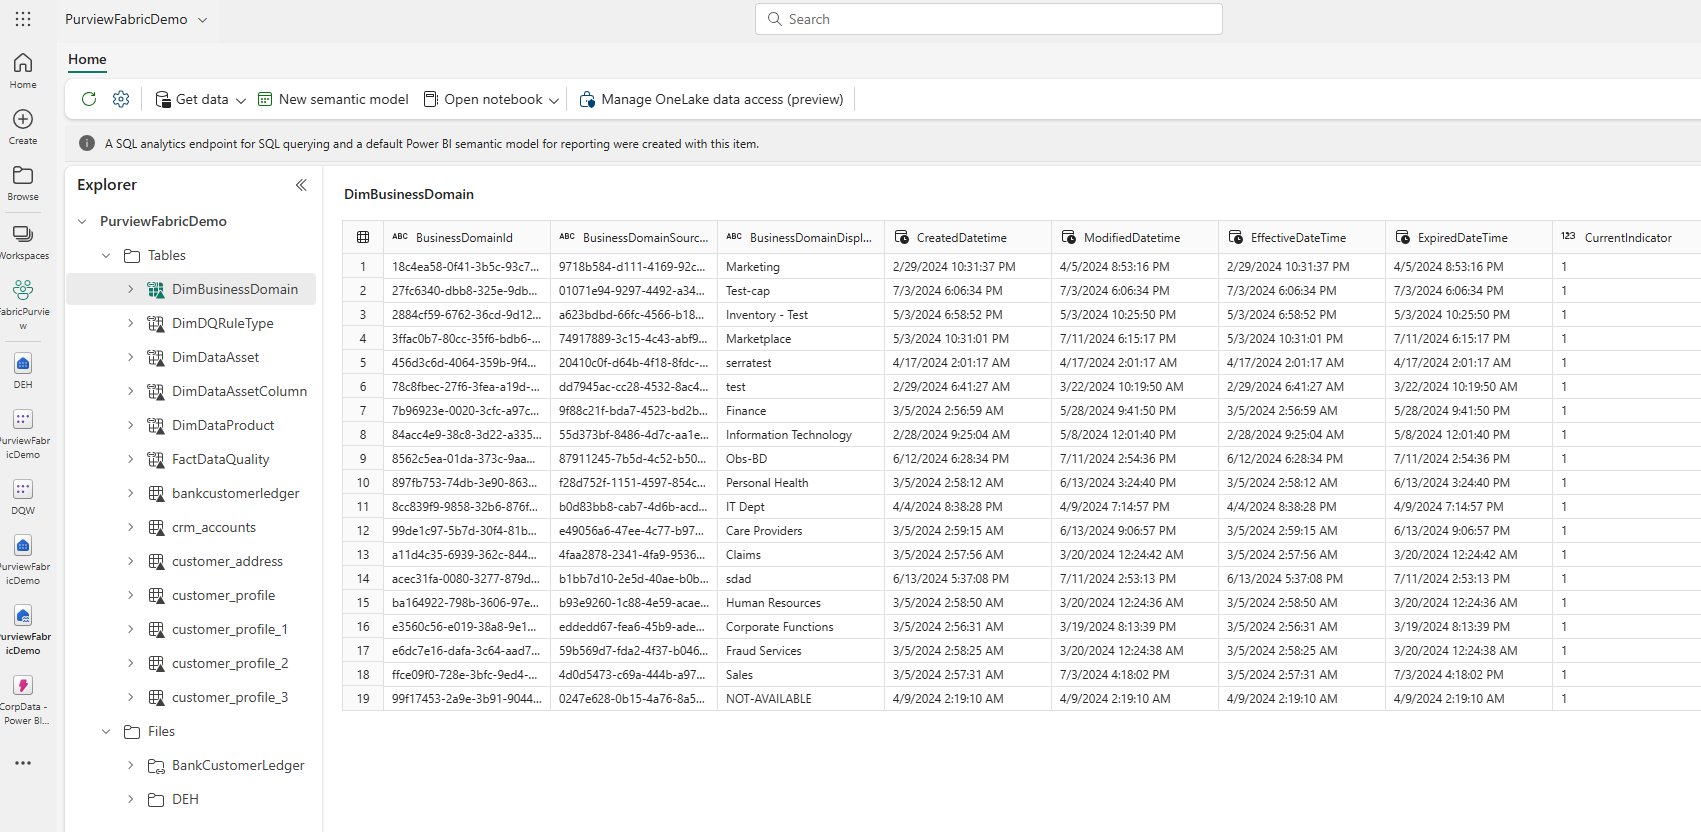
- Shortcut, mirror, or load your data to Fabric Lakehouse in delta format.
Important
If you have added new tables, files or new set of data to Fabric Lakehouse via mirroring or shortcut, then you need to run a Data Map scope scan to catalog those new sets of data before adding those data assets to a data product for data quality assessment.
- Grant Contributor right to your workspace for Purview MSI
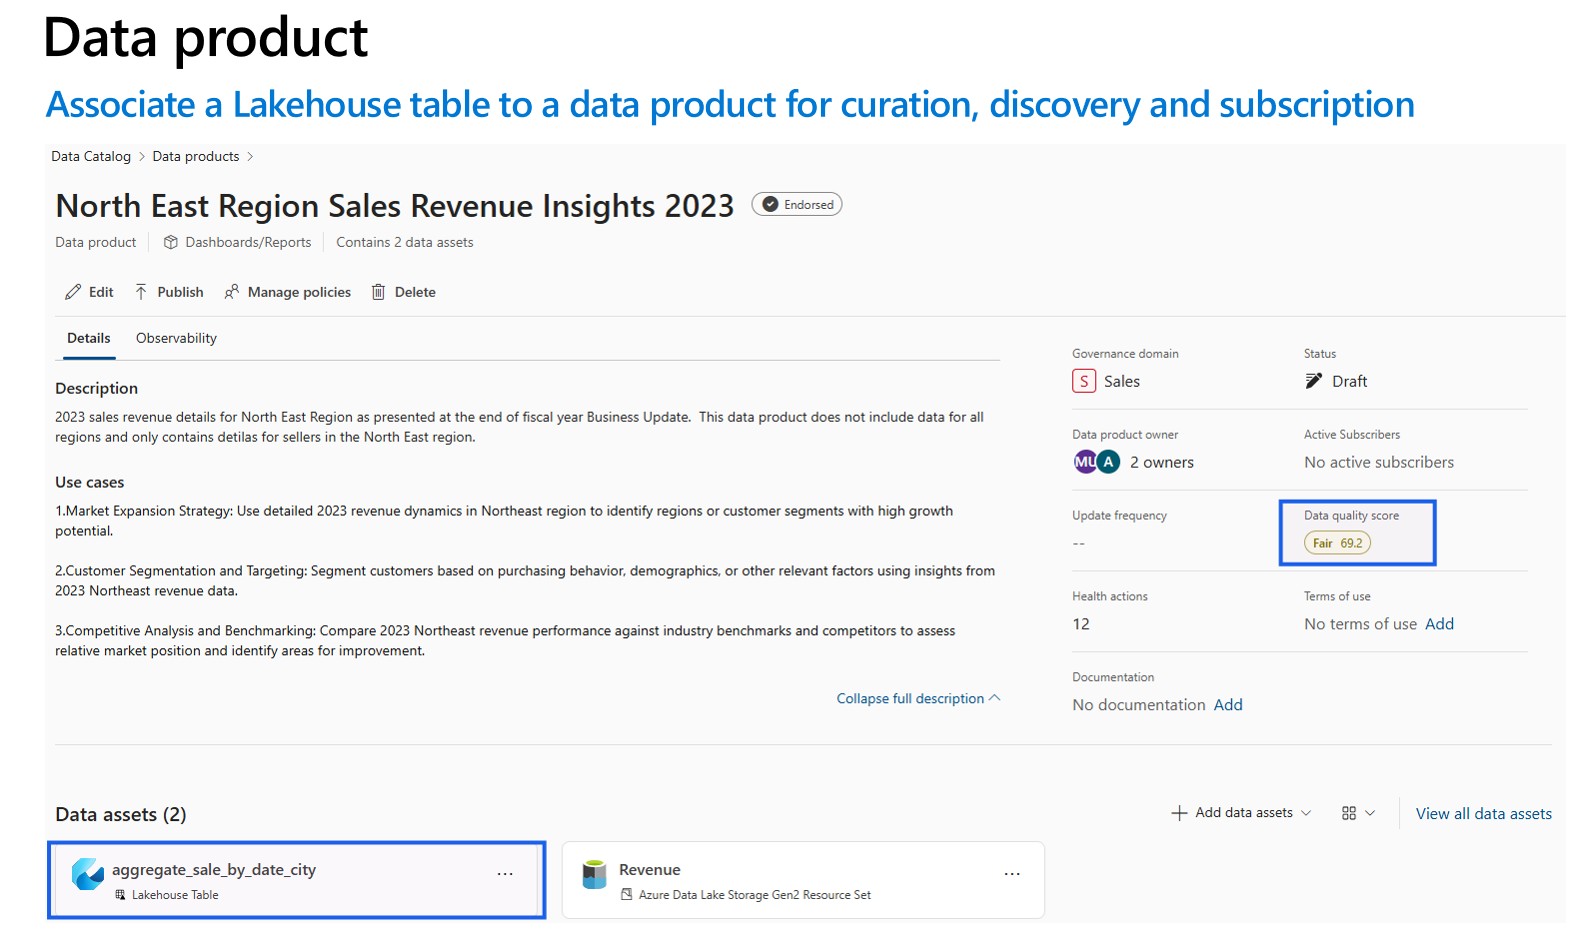
- Add scanned data asset from Lakehouse to the data products of the governance domain. On a data product's page in Unified Catalog, locate the Data assets and select Add data assets. Data profiling and data quality scanning can only be done for the data assets associated with the data products under the governance domain.
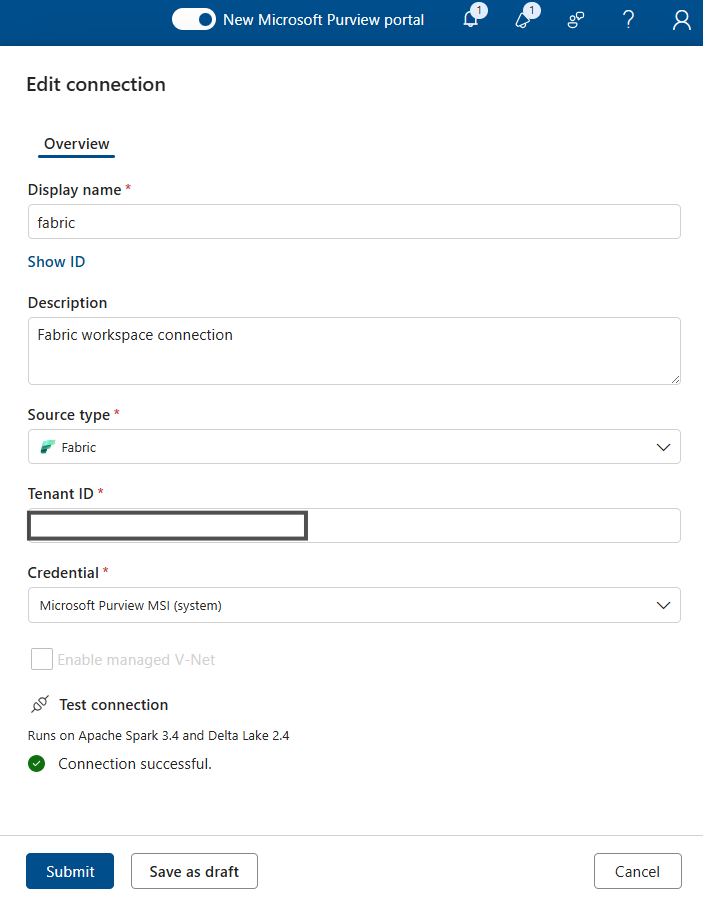
For data profiling and data quality scan, you need to create a data source connection, as different connectors are used to connect the data source and to scan data to capture data quality facts and dimensions. To set up a connection:
In Unified Catalog, select Health management, then select Data quality.
Select a governance domain, and from the Manage dropdown list, select Connections.
Select New to open connection configuration page.
Add connection display name and a description.
Add Source type Fabric.
Add Tenant ID.
Add Workspace ID
Add Lakehouse ID
Add Credential - Microsoft Purview MSI.
Test connection to make sure that the configured connection is successful.
Important
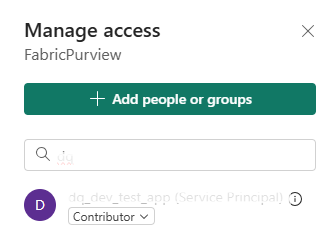
- For a data quality scan, Microsoft Purview MSI must have contributor access to Fabric workspace to connect Fabric workspace. To grant contributor access, open your Fabric workspace, select three dots (...), select Workspace access, then Add people or group, then add Purview MSI as Contributor.
- Fabric tables must be in Delta format or Iceberg format.
Profiling and data quality (DQ) scanning for data in Fabric Lakehouse
After completed connection setup successfully, you can profile, create and apply rules, and run a data quality (DQ) scan of your data in Fabric Lakehouse. Follow the step-by-step guideline described in below:
- Associate a Lakehouse table to a data product for curation, discovery, and subscription. Learn how to create and manage data products.
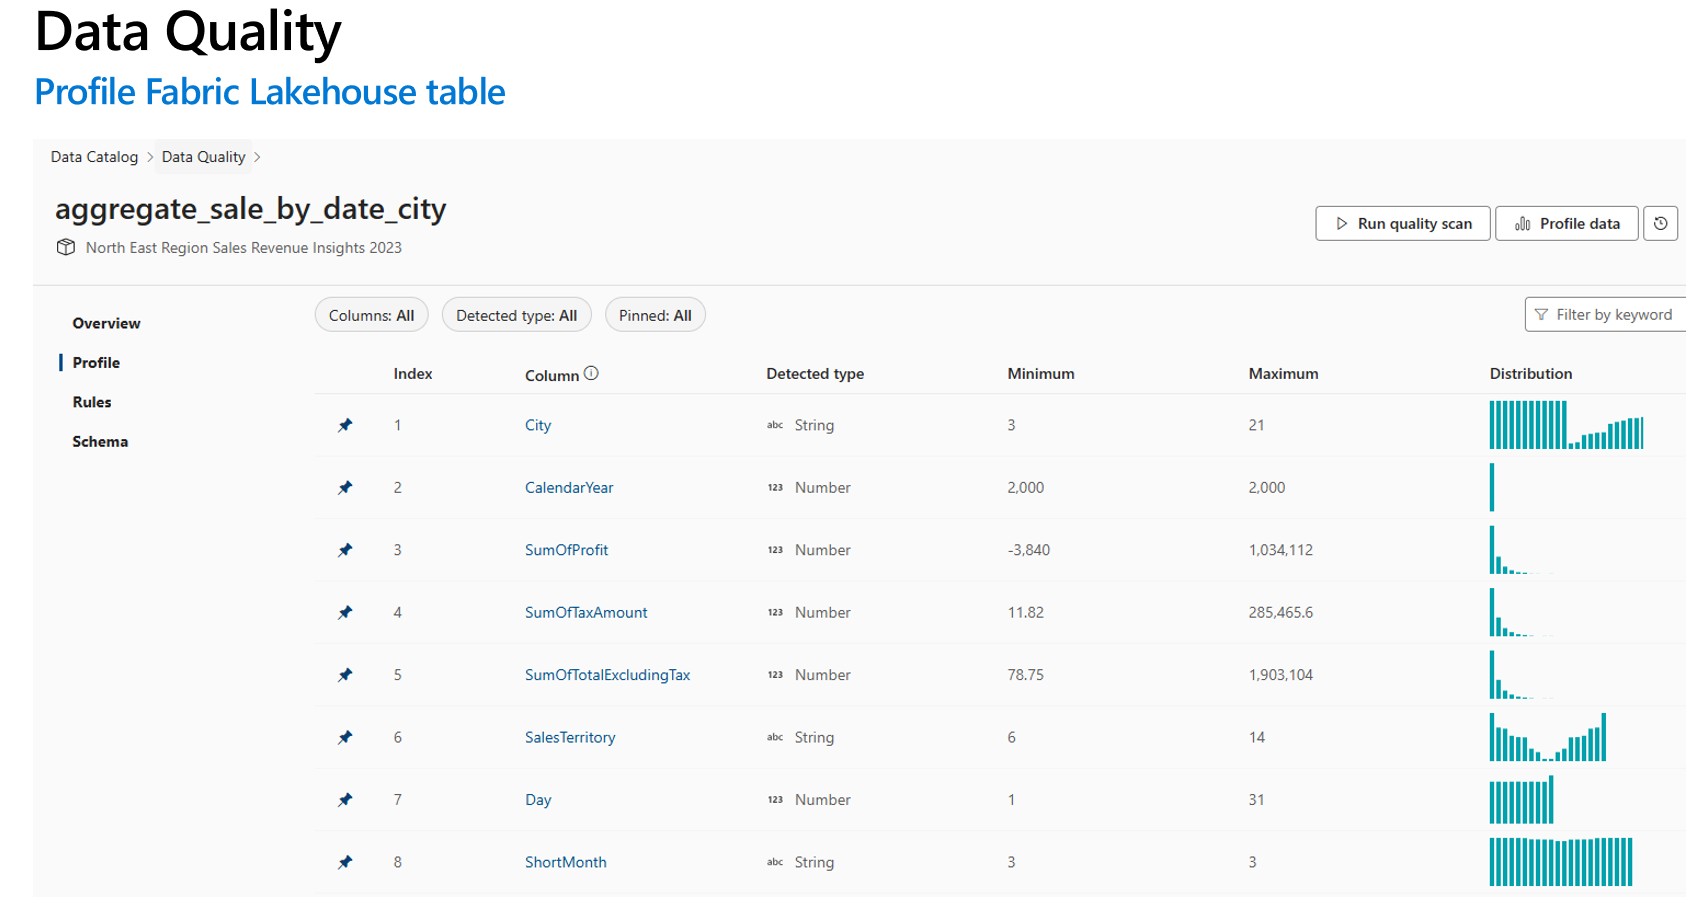
- Profile Fabric Lakehouse table. Learn how to configure and run data profiling for a data asset.
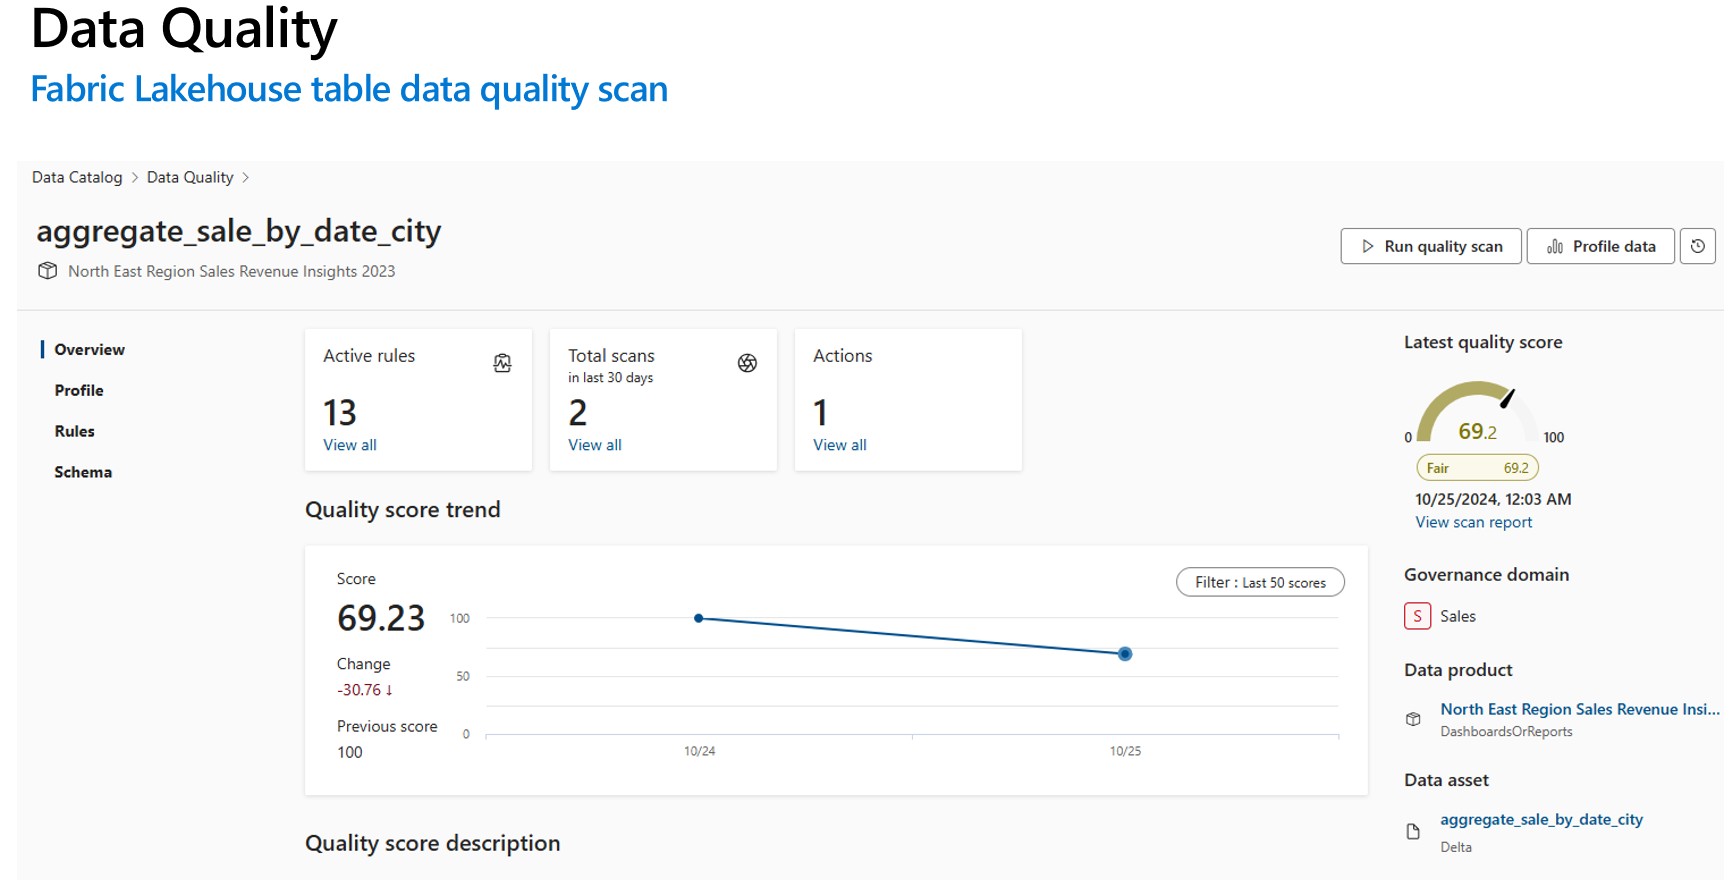
- Configure and run data quality scan to measure data quality of a Fabric Lakehouse table. Learn how to configure and run a data quality scan.
Important
- Make sure that your data are in Delta format or Iceberg format.
- Make sure the Data Map scan ran successfully. If it didn't, then rerun the scan.
Limitations
Data Quality for Parquet file is designed to support:
- A directory with Parquet Part File. For example: ./Sales/{Parquet Part Files}. The Fully Qualified Name must follow
https://(storage account).dfs.core.windows.net/(container)/path/path2/{SparkPartitions}. Make sure there are no {n} patterns in directory/sub-directory structure; it must rather be a direct FQN leading to {SparkPartitions}. - A directory with Partitioned Parquet Files, partitioned by columns within the dataset like sales data partitioned by year and month. For example: ./Sales/{Year=2018}/{Month=Dec}/{Parquet Part Files}.
Both of these essential scenarios which present a consistent parquet dataset schema are supported. Limitation: It isn't designed to or won't support N arbitrary Hierarchies of Directories with Parquet Files. We advise the customer to present data in (1) or (2) constructed structure. So recommending customer to follow the supported parquet standard or migrate their data to ACID compliant delta format.
Tip
For Data Map
- Ensure SPN has workspace permissions.
- Ensure scan connection uses SPN.
- Running a full scan is suggested if you're setting up a Lakehouse scan first time.
- Check that the ingested assets have been updated / refreshed
Unified Catalog
- DQ connection needs to use MSI credentials.
- Ideally create a new data product for first time testing Lakehouse data DQ scan
- Add the ingested data assets, check that the data assets are updated.
- Try run profile, if successful, try running DQ rule. if not successful, try refreshing the asset schema (Schema> Schema management import schema)
- Some users also had to create a new Lakehouse and sample data just to check everything works from scratch. In some cases, working with assets that have been previously ingested in the Data Map the experience isn't consistent.
