Use personal access tokens
TFS 2018
You can use a personal access token (PAT) as an alternate password to authenticate into Azure DevOps. In this article, we show you how to create, use, modify, and revoke PATs for Azure DevOps.
The following video shows you how to create and use a PAT.
About PATs
A personal access token contains your security credentials for Azure DevOps. A PAT identifies you, your accessible organizations, and scopes of access. As such, they're as critical as passwords, so you should treat them the same way.
If you're working within Microsoft tools, then your Microsoft account (MSA) or Microsoft Entra ID is an acceptable and well-supported approach. But, if you're working with third-party tools that don't support Microsoft or Microsoft Entra accounts – or you don't want to provide your primary credentials to the tool – use PATs to limit your risk.
You can create and manage your PATs through one of the following ways:
- the user interface in your user settings, which is described in detail in this article
- through the PAT Lifecycle Management API
To set up PATs for non-Microsoft tools, use Git credential managers or create them manually. We recommend that you review our authentication guidance to help you choose the correct authentication mechanism. For smaller projects that require a less robust solution, PATs are a simple alternative. Unless your users are using a credential manager, they have to enter their credentials each time.
Create a PAT
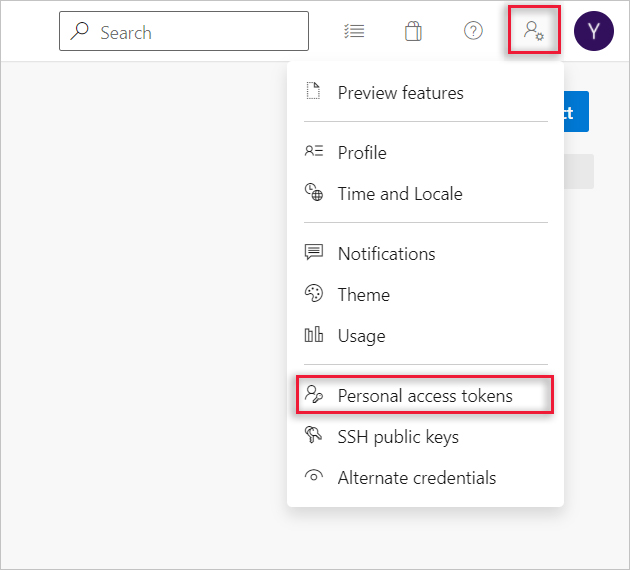
Sign in to your organization (
https://dev.azure.com/{yourorganization}).From your home page, open user settings
 and select Personal access tokens.
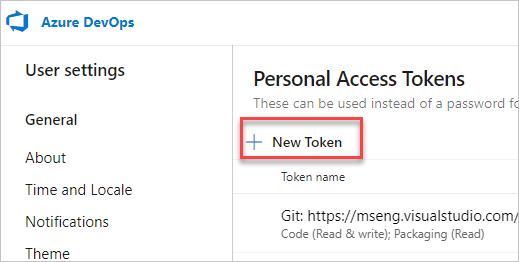
Select + New Token.
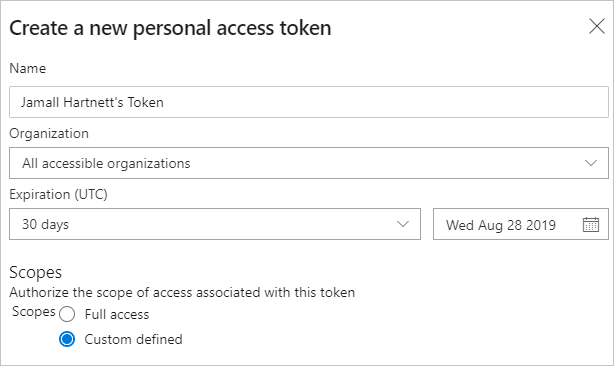
Name your token, select the organization where you want to use the token, and then set your token to automatically expire after a set number of days.
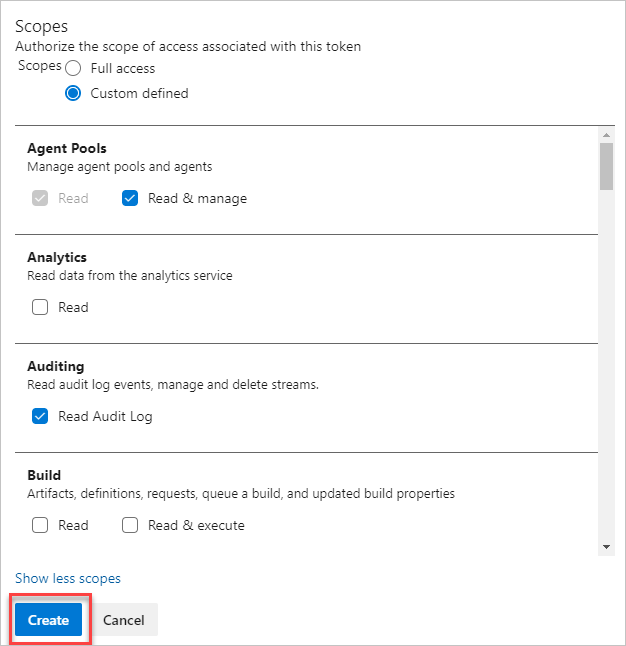
Select the scopes for this token to authorize for your specific tasks.
For example, to create a token to enable a build and release agent to authenticate to Azure DevOps Services, limit your token's scope to Agent Pools (Read & manage). To read audit log events, and manage and delete streams, select Read Audit Log, and then select Create.
Note
You may be restricted from creating full-scoped PATs. If so, your Azure DevOps Administrator in Microsoft Entra ID has enabled a policy which limits you to a specific custom defined set of scopes. For more information, see Manage PATs with policies/Restrict creation of full-scoped PATs. For a custom defined PAT, the required scope for accessing the Component Governance API,
vso.governance, isn't selectable in the UI.When you're done, copy the token and store it in a secure location. For your security, it doesn't display again.
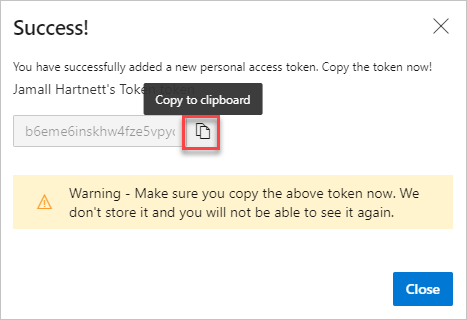
Warning
Treat and use a PAT like your password and keep it a secret.
Sign in to your web portal (
https://{server}:8080/tfs/).From your home page, open your profile. Go to your security details.
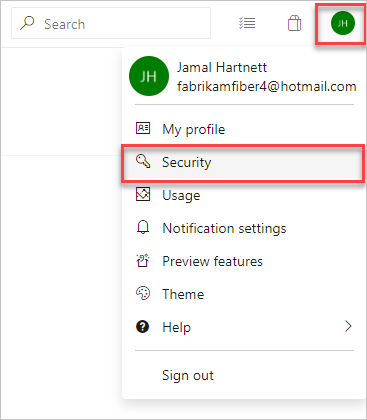
- Create a personal access token.
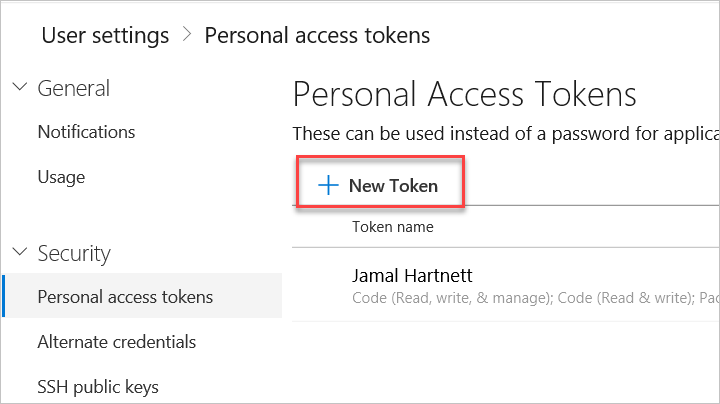
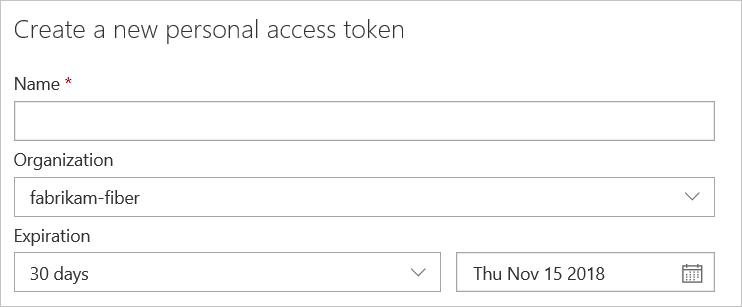
Name your token. Select a lifespan for your token.
If you have more than one organization, you can also select the organization where you want to use the token.
Select the scopes for this token to authorize for your specific tasks.
For example, to create a token to enable a build and release agent to authenticate, limit your token's scope to Agent Pools (read, manage).
When you're done, make sure to copy the token. For your security, it doesn't display again. Use this token as your password. Select Close.
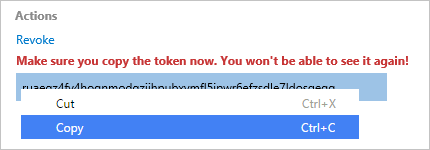
Use your PAT anywhere your user credentials are required for authentication in Azure DevOps.
Important
For organizations backed by Microsoft Entra ID, you have 90 days to sign in with your new PAT, otherwise it's considered inactive. For more information, see User sign-in frequency for Conditional Access.
Notifications
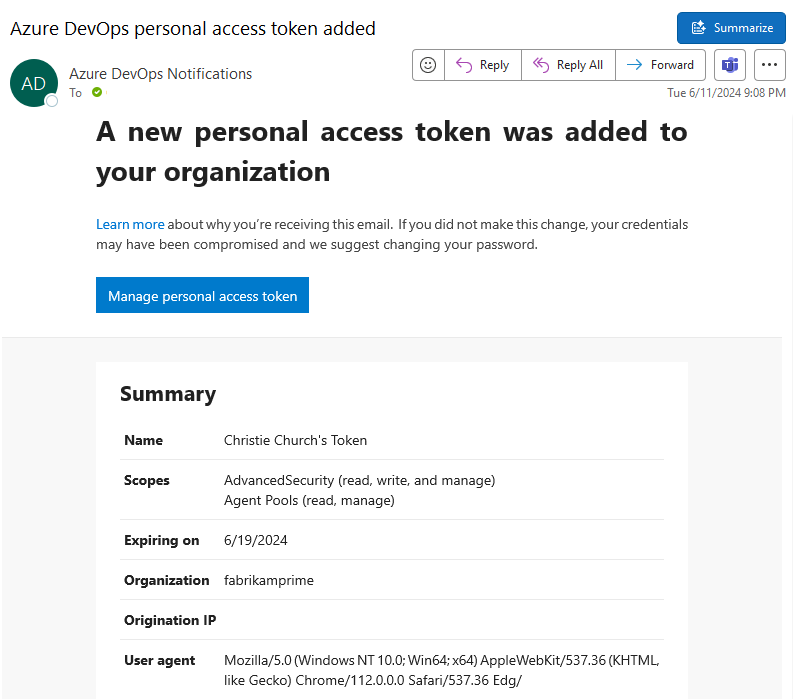
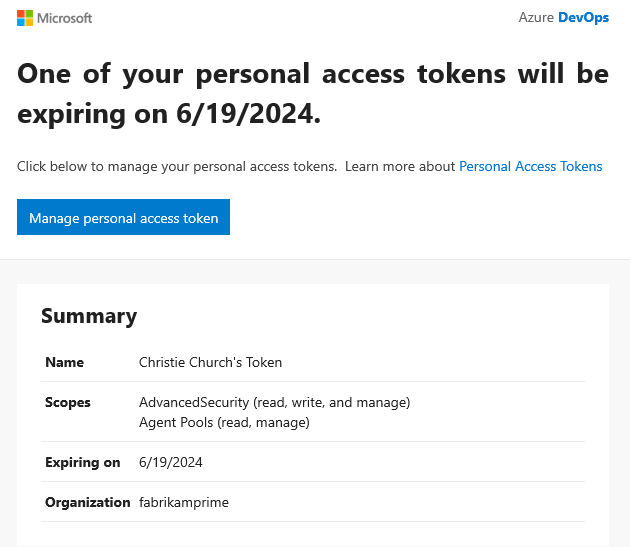
Users receive two notifications during the lifetime of a PAT - one upon creation and the other seven days before the expiration.
After you create a PAT, you receive a notification similar to the following example. This notification confirms that your PAT was added to your organization.
The following image shows an example of the seven-day notification before your PAT expires.
For more information, see Configure an SMTP server and customize email for alerts and feedback requests.
Unexpected notification
If you receive an unexpected PAT notification, an administrator or tool might have created a PAT on your behalf. See the following examples.
- When you connect to an Azure DevOps Git repo through git.exe. it creates a token with a display name like "git:
https://MyOrganization.visualstudio.com/on MyMachine." - When you or an administrator sets up an Azure App Service web app deployment, it creates a token with a display name like "Service Hooks: : Azure App Service: : Deploy web app."
- When you or an administrator sets up web load testing as part of a pipeline, it creates a token with a display name like "WebAppLoadTestCDIntToken."
- When a Microsoft Teams Integration Messaging Extension is set up, it creates a token with a display name like "Microsoft Teams Integration."
Warning
If you believe that a PAT exists in error, we suggest you revoke the PAT. Then, change your password. As a Microsoft Entra user, check with your administrator to see if your organization was used from an unknown source or location. See also the FAQ about accidentally checking in a PAT to a public GitHub repository.
Use a PAT
Your PAT is your identity and represents you when you use it, just like a password.
Git
Git interactions require a username, which can be anything except the empty string.
To use a PAT with HTTP basic authentication, use Base64-encode for and $MyPat, which is included in the following code block.
In PowerShell, enter the following code.
$MyPat = 'yourPAT'

$B64Pat = [Convert]::ToBase64String([System.Text.Encoding]::UTF8.GetBytes("`:$MyPat"))

git -c http.extraHeader="Authorization: Basic $B64Pat" clone https://dev.azure.com/yourOrgName/yourProjectName/_git/yourRepoName
To keep your token more secure, use credential managers so you don't have to enter your credentials every time. We recommend Git Credential Manager. Git for Windows is required.
Existing repos
For existing repositories, if you already added the origin using the username, run the following command first.
git remote remove origin
Otherwise, run the following command.
git remote add origin https://<PAT>@<company_machineName>.visualstudio.com:/<path-to-git-repo> path to git repo = <project name>/_git/<repo_name> git push -u origin --all
Use a PAT in your code
You can use a PAT in your code.
If you wish to provide the PAT through an HTTP header, first convert it to a Base64 string. The following example shows how to convert to Base64 using C#.
Authorization: Basic BASE64_USERNAME_PAT_STRING
The resulting string can then be provided as an HTTP header in the following format.
The following sample uses the HttpClient class in C#.
public static async void GetBuilds()
{
    try
    {
        var personalaccesstoken = "PATFROMWEB";

        using (HttpClient client = new HttpClient())
        {
            client.DefaultRequestHeaders.Accept.Add(
                new System.Net.Http.Headers.MediaTypeWithQualityHeaderValue("application/json"));

            client.DefaultRequestHeaders.Authorization = new AuthenticationHeaderValue("Basic",
                Convert.ToBase64String(
                    System.Text.ASCIIEncoding.ASCII.GetBytes(
                        string.Format("{0}:{1}", "", personalaccesstoken))));

            using (HttpResponseMessage response = client.GetAsync(
                        "https://dev.azure.com/{organization}/{project}/_apis/build/builds?api-version=5.0").Result)
            {
                response.EnsureSuccessStatusCode();
                string responseBody = await response.Content.ReadAsStringAsync();
                Console.WriteLine(responseBody);
            }
        }
    }
    catch (Exception ex)
    {
        Console.WriteLine(ex.ToString());
    }
}
Tip
When you're using variables, add a $ at the beginning of the string, like in the following example.
public static async void GetBuilds()
{
   try
  {
      var personalaccesstoken = "PATFROMWEB";

      using (HttpClient client = new HttpClient())
       {
           client.DefaultRequestHeaders.Accept.Add(
              new System.Net.Http.Headers.MediaTypeWithQualityHeaderValue("application/json"));

           client.DefaultRequestHeaders.Authorization = new AuthenticationHeaderValue("Basic",
               Convert.ToBase64String(
                   System.Text.ASCIIEncoding.ASCII.GetBytes(
                       string.Format("{0}:{1}", "", personalaccesstoken))));

          using (HttpResponseMessage response = client.GetAsync(
                       $"https://dev.azure.com/{organization}/{project}/_apis/build/builds?api-version=5.0").Result)
           {
               response.EnsureSuccessStatusCode();
               string responseBody = await response.Content.ReadAsStringAsync();
               Console.WriteLine(responseBody);
           }
       }
   }
   catch (Exception ex)
   {
       Console.WriteLine(ex.ToString());
   }
}
When your code is working, it's a good time to switch from basic auth to OAuth.
For more information and examples of how to use PATs, see the following articles:
- Git credential managers
- REST APIs
- NuGet on a Mac
- Reporting clients
- Get started with Azure DevOps CLI.
If you enable IIS Basic Authentication, PATs aren't valid. For more information, see Using IIS Basic Authentication on-premises.