Send Proactive Messages
A proactive message is a message sent by a bot in response to simple commands sent in the chat from a user. The message response can be in one of the following formats:
- Welcome messages
- Scheduled messages
- Notifications
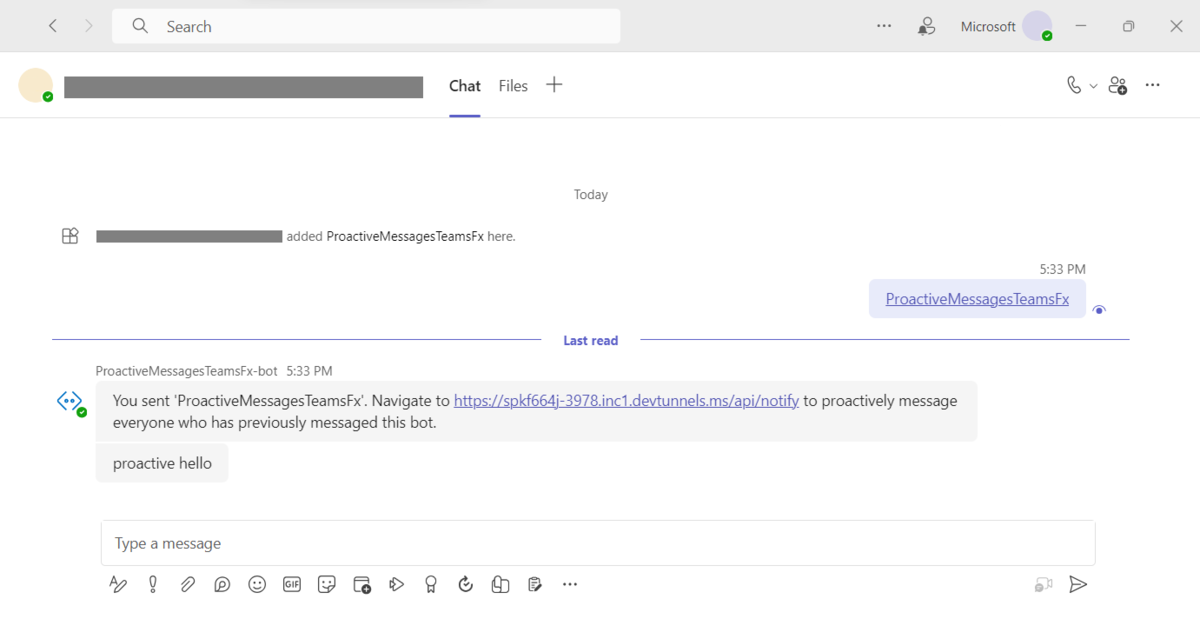
This step-by-step guide helps you to send a proactive message from a bot. You'll see the following output:
Prerequisites
Ensure that you install the following tools for building and deploying your apps.
| Install | For using | |
|---|---|---|
| Microsoft Visual Studio Code | JavaScript or TypeScript, build environments. Use the latest version. | |
| Microsoft Teams Toolkit | Visual Studio Code extension that creates a project scaffolding for your app. Use the latest version. | |
| Node.js | Back-end JavaScript runtime environment. For more information, see Node.js version compatibility table for project type. | |
| Microsoft Teams | Teams to collaborate with everyone you work with through apps for chat, meetings, call and all in one place. | |
| Microsoft Edge (recommended) or Google Chrome | A browser with developer tools. | |
| Microsoft 365 developer account | Access to Teams account with the appropriate permissions to install an app. |
Prepare development environment
After you install the required tools, set up the development environment.
Install Teams Toolkit
Microsoft Teams Toolkit helps simplify the development process with tools to provision and deploy cloud resources for your app and publish to the Teams Store.
You can use Teams Toolkit with Visual Studio Code or a command-line interface called TeamsFx CLI.
Open Visual Studio Code and select Extensions (Ctrl+Shift+X or View > Extensions).
In the search box, enter Teams Toolkit.
Select Install.

The Teams Toolkit
 icon appears in the Visual Studio Code Activity Bar.
You can also install Teams Toolkit from the Visual Studio Code Marketplace.
Set up your Teams development tenant
A tenant is a space or a container for your organization in Teams, where you chat, share files, and run meetings. This space is also where you upload and test your app. Let's verify if you're ready to develop with the tenant.
Check for upload an app option
After creating your custom app, you must upload your app to Teams with the Upload a custom app option. Sign in to your Microsoft 365 account to check if this option is enabled.
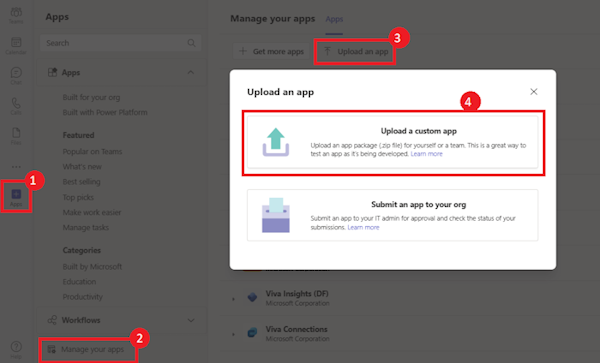
The following steps help you verify if you can upload apps in Teams:
In the Teams client, select the Apps icon.
Select Manage your apps.
Select Upload an app.
Look for the option to Upload a custom app. If the option is visible, you can upload custom apps.
Note
If you don't find the option to upload a custom app, contact your Teams administrator.
Create a free Teams developer tenant (optional)
If you don't have a Teams developer account, join the Microsoft 365 developer program.
Go to the Microsoft 365 developer program.
Select Join Now and follow the onscreen instructions.
In the welcome screen, select Set up E5 subscription.
Set up your administrator account. After you finish, the following screen appears:
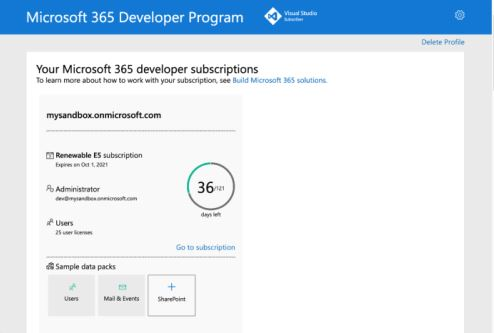
Sign in to Teams using the administrator account you just set up. Verify that you have the Upload a custom app option in Teams.
Build Proactive Message bot
To build proactive message bot using Visual Studio Code, follow these steps:
Open Visual Studio Code.
Select the Teams Toolkit
 icon in the Visual Studio Code Activity Bar.
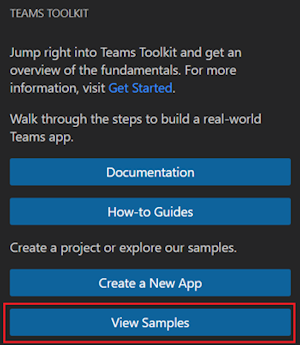
In the left pane, select View Samples.
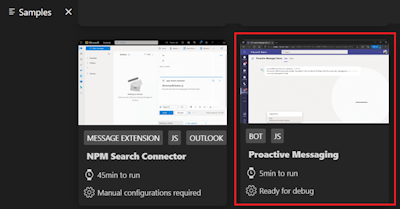
From the list of samples, select Proactive Messaging. A prebuilt sample that's ready for debugging opens.
Select Create.

Select Default folder to store your project root folder in the default location.

If you want to change the default location, perform the following steps:
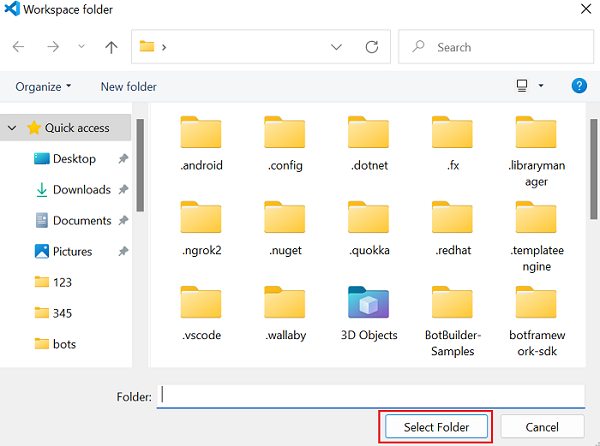
Select Browse.

Select the location for project workspace.
Select Select Folder.
The proactive message bot is created in a few seconds and displays the proactive message bot successful dialog in the lower-right corner with the option to debug:
Select Run and Debug
 icon from the top-left corner.
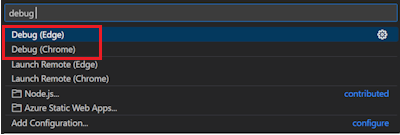
Select Debug (Edge) or Debug (Chrome) from the dropdown list.
When debugging is successful, you'll be prompted to upload the proactive message bot to Teams on your local machine.
Select Add.

Search and select the required scope or select a channel, chat, or meeting from the list, and move through the dialog to select Go.
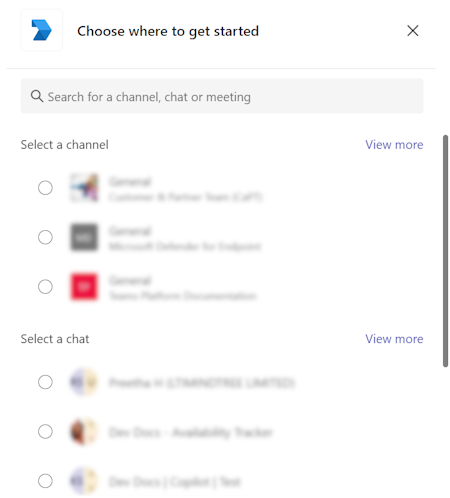
The proactive message bot app is uploaded to Teams client and the following message appears in response to the message sent.
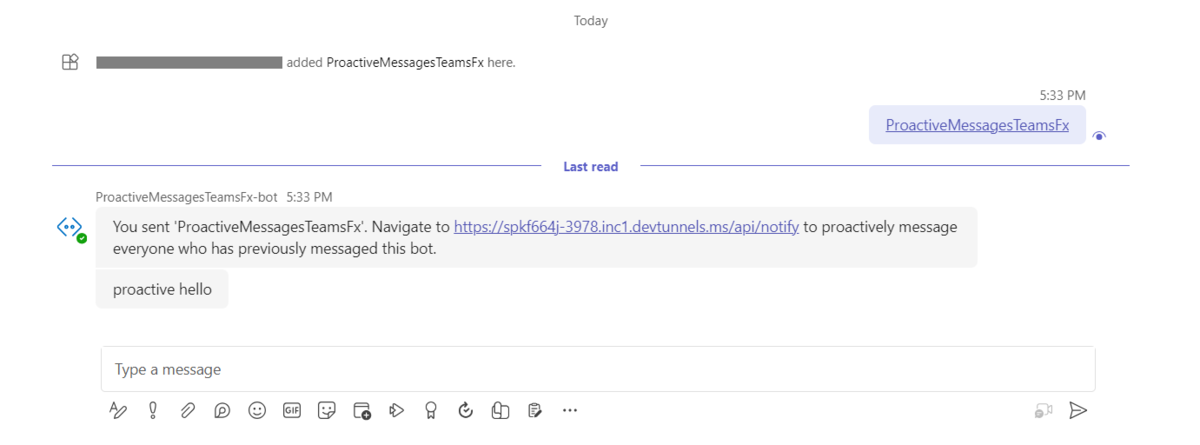
Copy and paste the URL or navigate to the URL in browser. A proactive hello message is triggered and shared in the chat.

Go to Teams. You'll receive a proactive hello message from the bot.

Take a tour of the source code
Teams Toolkit provides components for building an app. After creating the project, you can view the project folders and files in the EXPLORER area of Visual Studio Code.

The new project folder contains the following content:
| Folder / File | Contents |
|---|---|
.vscode/ |
Visual Studio Code files for debugging. |
appManifest/ |
Templates for the app manifest (previously called Teams app manifest). |
env/ |
Name / value pairs are stored in environment files and used by teamsapp.yml to customize the provisioning and deployment rules. |
manifest.json |
App manifest for publishing through the Developer Portal for Teams is stored in Properties/manifest.json. |
teamsapp.yml |
Main project file describes your app configuration and defines the set of actions to run in each lifecycle stage. |
teamsapp.local.yml |
This overrides teamsapp.yml with actions that enable local execution and debugging. |
Deploy your Proactive message bot
You've learnt to build and run Teams app with proactive message bot capability. Let's deploy the first app with proactive message bot capability on Azure using Teams Toolkit.
Sign in to your Azure account
Use your account to access the Microsoft Azure portal and provision new cloud resources to support your app.
Open Visual Studio Code.
Open the project folder where you created the proactive message bot app.
Select the Teams Toolkit
 icon in the Visual Studio Code Activity Bar.
Select Sign in to Azure using your credentials.
Tip
If you have the AZURE ACCOUNT extension installed and are using the same account, you can skip this step.
Your default web browser opens to let you sign in to the account.
Close the browser when prompted and return to Visual Studio Code.
The ACCOUNTS section of the sidebar shows the two accounts separately. It also lists the number of usable Azure subscriptions available to you. Ensure that you have at least one usable Azure subscription available. If not, sign out and use a different account.
Deploy your app to Azure
Deployment consists of two steps. First, necessary cloud resources are created (also known as provisioning). Then, your app's code is copied into the created cloud resources. For this tutorial, you'll deploy the bot app.
What's the difference between Provision and Deploy?
Provision creates resources in Azure and Microsoft 365 for your app, but no code (HTML, CSS, and JavaScript) is copied to the resources. Deploy copies the code for your app to the resources you created during provisioning. It's common to deploy multiple times without provisioning new resources. Since provisioning can take some time to complete, it's separate from deployment.
Select the Teams Toolkit
 icon in the Visual Studio Code Activity Bar.
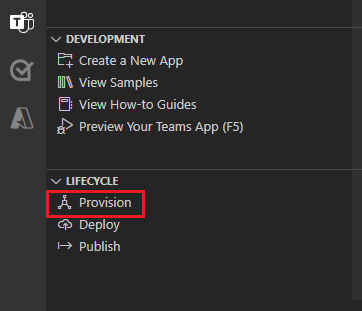
Select Provision under LIFECYCLE.
Select one of the existing subscriptions.
Select an existing resource group or create new resource group. For more information, see create resource group.
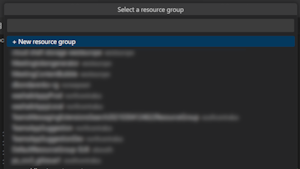
Note
A dialog appears mentioning that costs might be incurred when running resources in Azure.
Select Provision.
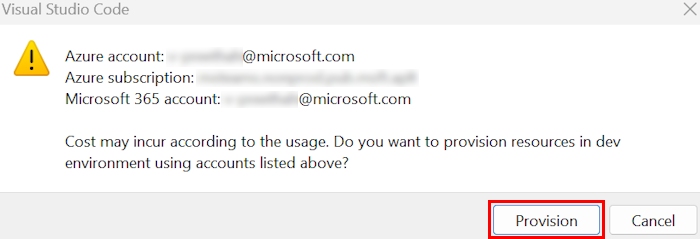
The provisioning process creates resources in the Azure cloud. You can monitor the progress in the dialogs that appear in lower-right corner. After few minutes, the following dialog appears:

Select Deploy under LIFECYCLE.
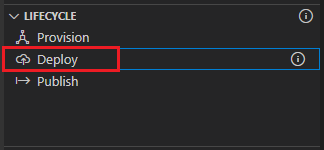
Select Deploy.

Deployment takes some time. You can monitor the progress in the dialogs that appear in lower-right corner. After a few minutes, the following dialog appears.

Open the debug panel (Ctrl+Shift+D / ⌘⇧-D or View > Run) from Visual Studio Code.
Select Launch Remote (Edge) from the launch configuration dropdown list.
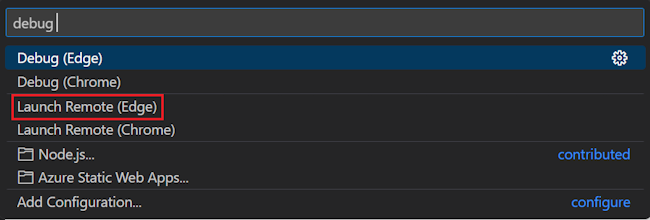
When debugging is successful, you'll be prompted to upload the proactive message bot app to Teams.
Select Add.

Search and select the required scope or select a channel, chat, or meeting from the list, and move through the dialog to select Go.

The proactive message bot app is uploaded to Teams client and the following message appears in response to the message sent.

Copy and paste the URL or navigate to the URL in browser. A proactive hello message is triggered and shared in the chat.

Go to Teams. You'll receive a proactive hello message from the bot.

Complete challenge
Did you come up with something like this?

Congratulations!
You've completed the scenario.
- You can send notifications on a daily basis or request for feedback from users on a periodic basis.
- You can handle throttling limits to avoid multiple notifications.
Have an issue with this section? If so, please give us some feedback so we can improve this section.
Platform Docs
